
 I just completed the first Hillbilly Tansu and I’ve been evaluating all aspects of the project. In truth I’m picking my work apart. Those of us who create or build things tend to be most critical of our own work. We see every flaw, no matter how minor. We see these flaws because we know we made the error. We have to be careful though. This critical evaluation of our own work can drive some folks over the edge. In some cases, stop them from creating anything else at all. I’ve seen it happen. This critical evaluation is most often a good thing though, it leads to continued improvement in design and skill. Luckily, for now at least, I fall into the latter group.
Overall the HB Tansu came together the way I had hoped. There are places that I need to improve my execution here and there. Surface preparation on the birch ply panels is tops on my list. The other two major areas that I want to address are the finishing process and the sliding door pulls. The finish will be an ongoing saga for now but I think I have the solution for the sliding door pulls.
 I knew from the start that I wanted to make my own hardware for this project. By employing my knot tying skills, I was confident that I could create the drawer pulls and the lifting handles. The only real dilemma with those items was settling on a design that complimented the project. I decided to use a (4) strand square knot which I knew would give me a square shape and that would compliment the exposed joinery on the front of the cabinet. The real problem was the sliding door finger pulls. These would need to be flush to the face of the door panel so that the doors can slide past each other. This actually only applies to door at the rear, but the handles should match each other.
 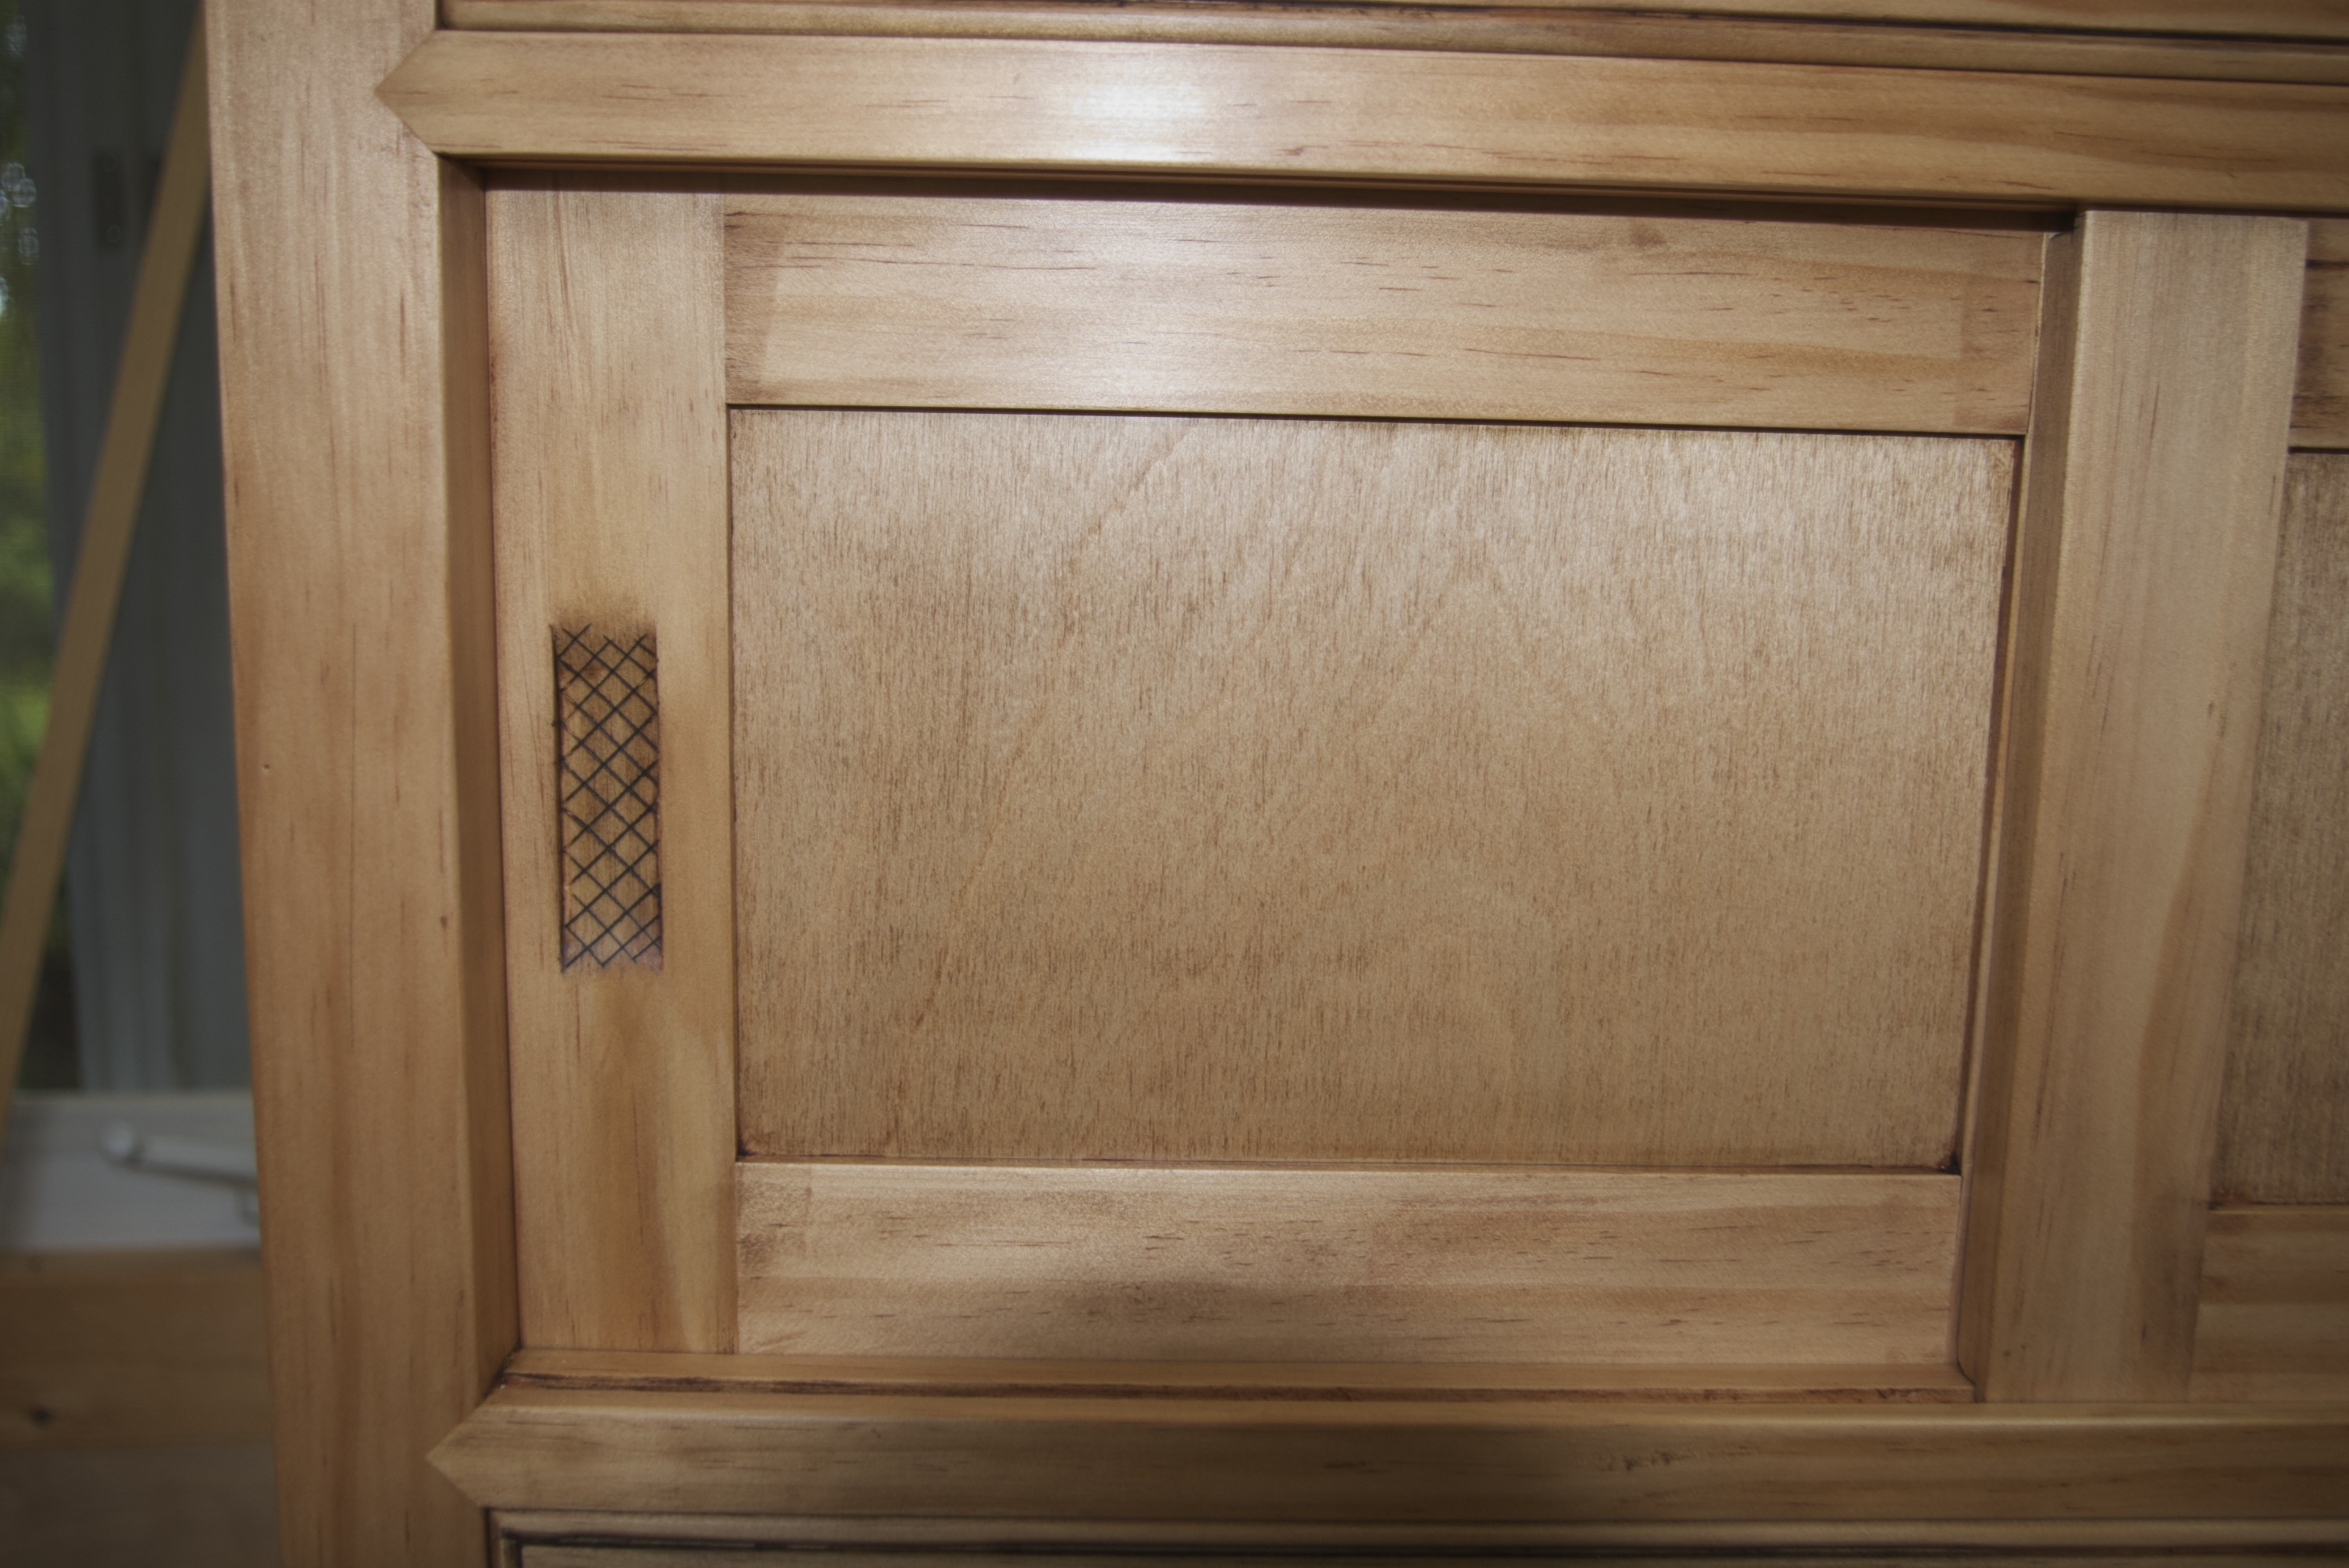 The traditional Japanese method is to inset a purpose made piece, rectangular or round, into the panel itself. I did find a few sources where I could purchase the necessary hardware. Even the big box stores carry pressed metal cups for sliding cabinet doors. But I wanted to do this project without purchasing any hardware. What I settled on was a recess carved into the stile of the door frame. Since the rest of the hardware is black, I knew I needed to add some way of darkening the carved recess. There are several ways to accomplish this but I chose to incise a crosshatching pattern into the recess. I knew the tinted wax would darken the hatched area but I could also have rubbed powdered coffee into the incisions. This technique is called Kolrosing and is a post for another time.
My sliding door pulls turned out pretty well. Their functional, easy to create and look fine. My biggest gripe is that I wanted them to be in-line vertically with the drawer pulls. I also wanted a solution that incorporated the twine that I used in the other hardware. I was stymied for a solution. Then a reader commented on my finished HB Tansu.
Ralph Boumenot, of “Accidental Woodworker” fame, made a comment on my sliding door pulls.
“I thought your drawer (door) pulls were knotted too until I read the write up. I initially thought you had drilled holes in the handles recess and wove your line through them.”
 This immediately jogged the little grey cells, I’ve been watching too much Poirot, and reminded me of appliqué braids. Since I do a lot of knot tying and reading on the subject, one of the natural offshoots is into leather braiding. I dug out my copy of the “Encyclopedia of Rawhide and Leather Braiding” by Bruce Grant. It lives up to its name. In that book there is an appliqué called the “Circle of Hair Braid”. Bingo, winner, winner, chicken dinner! This will work perfectly. So off to the shop I went.
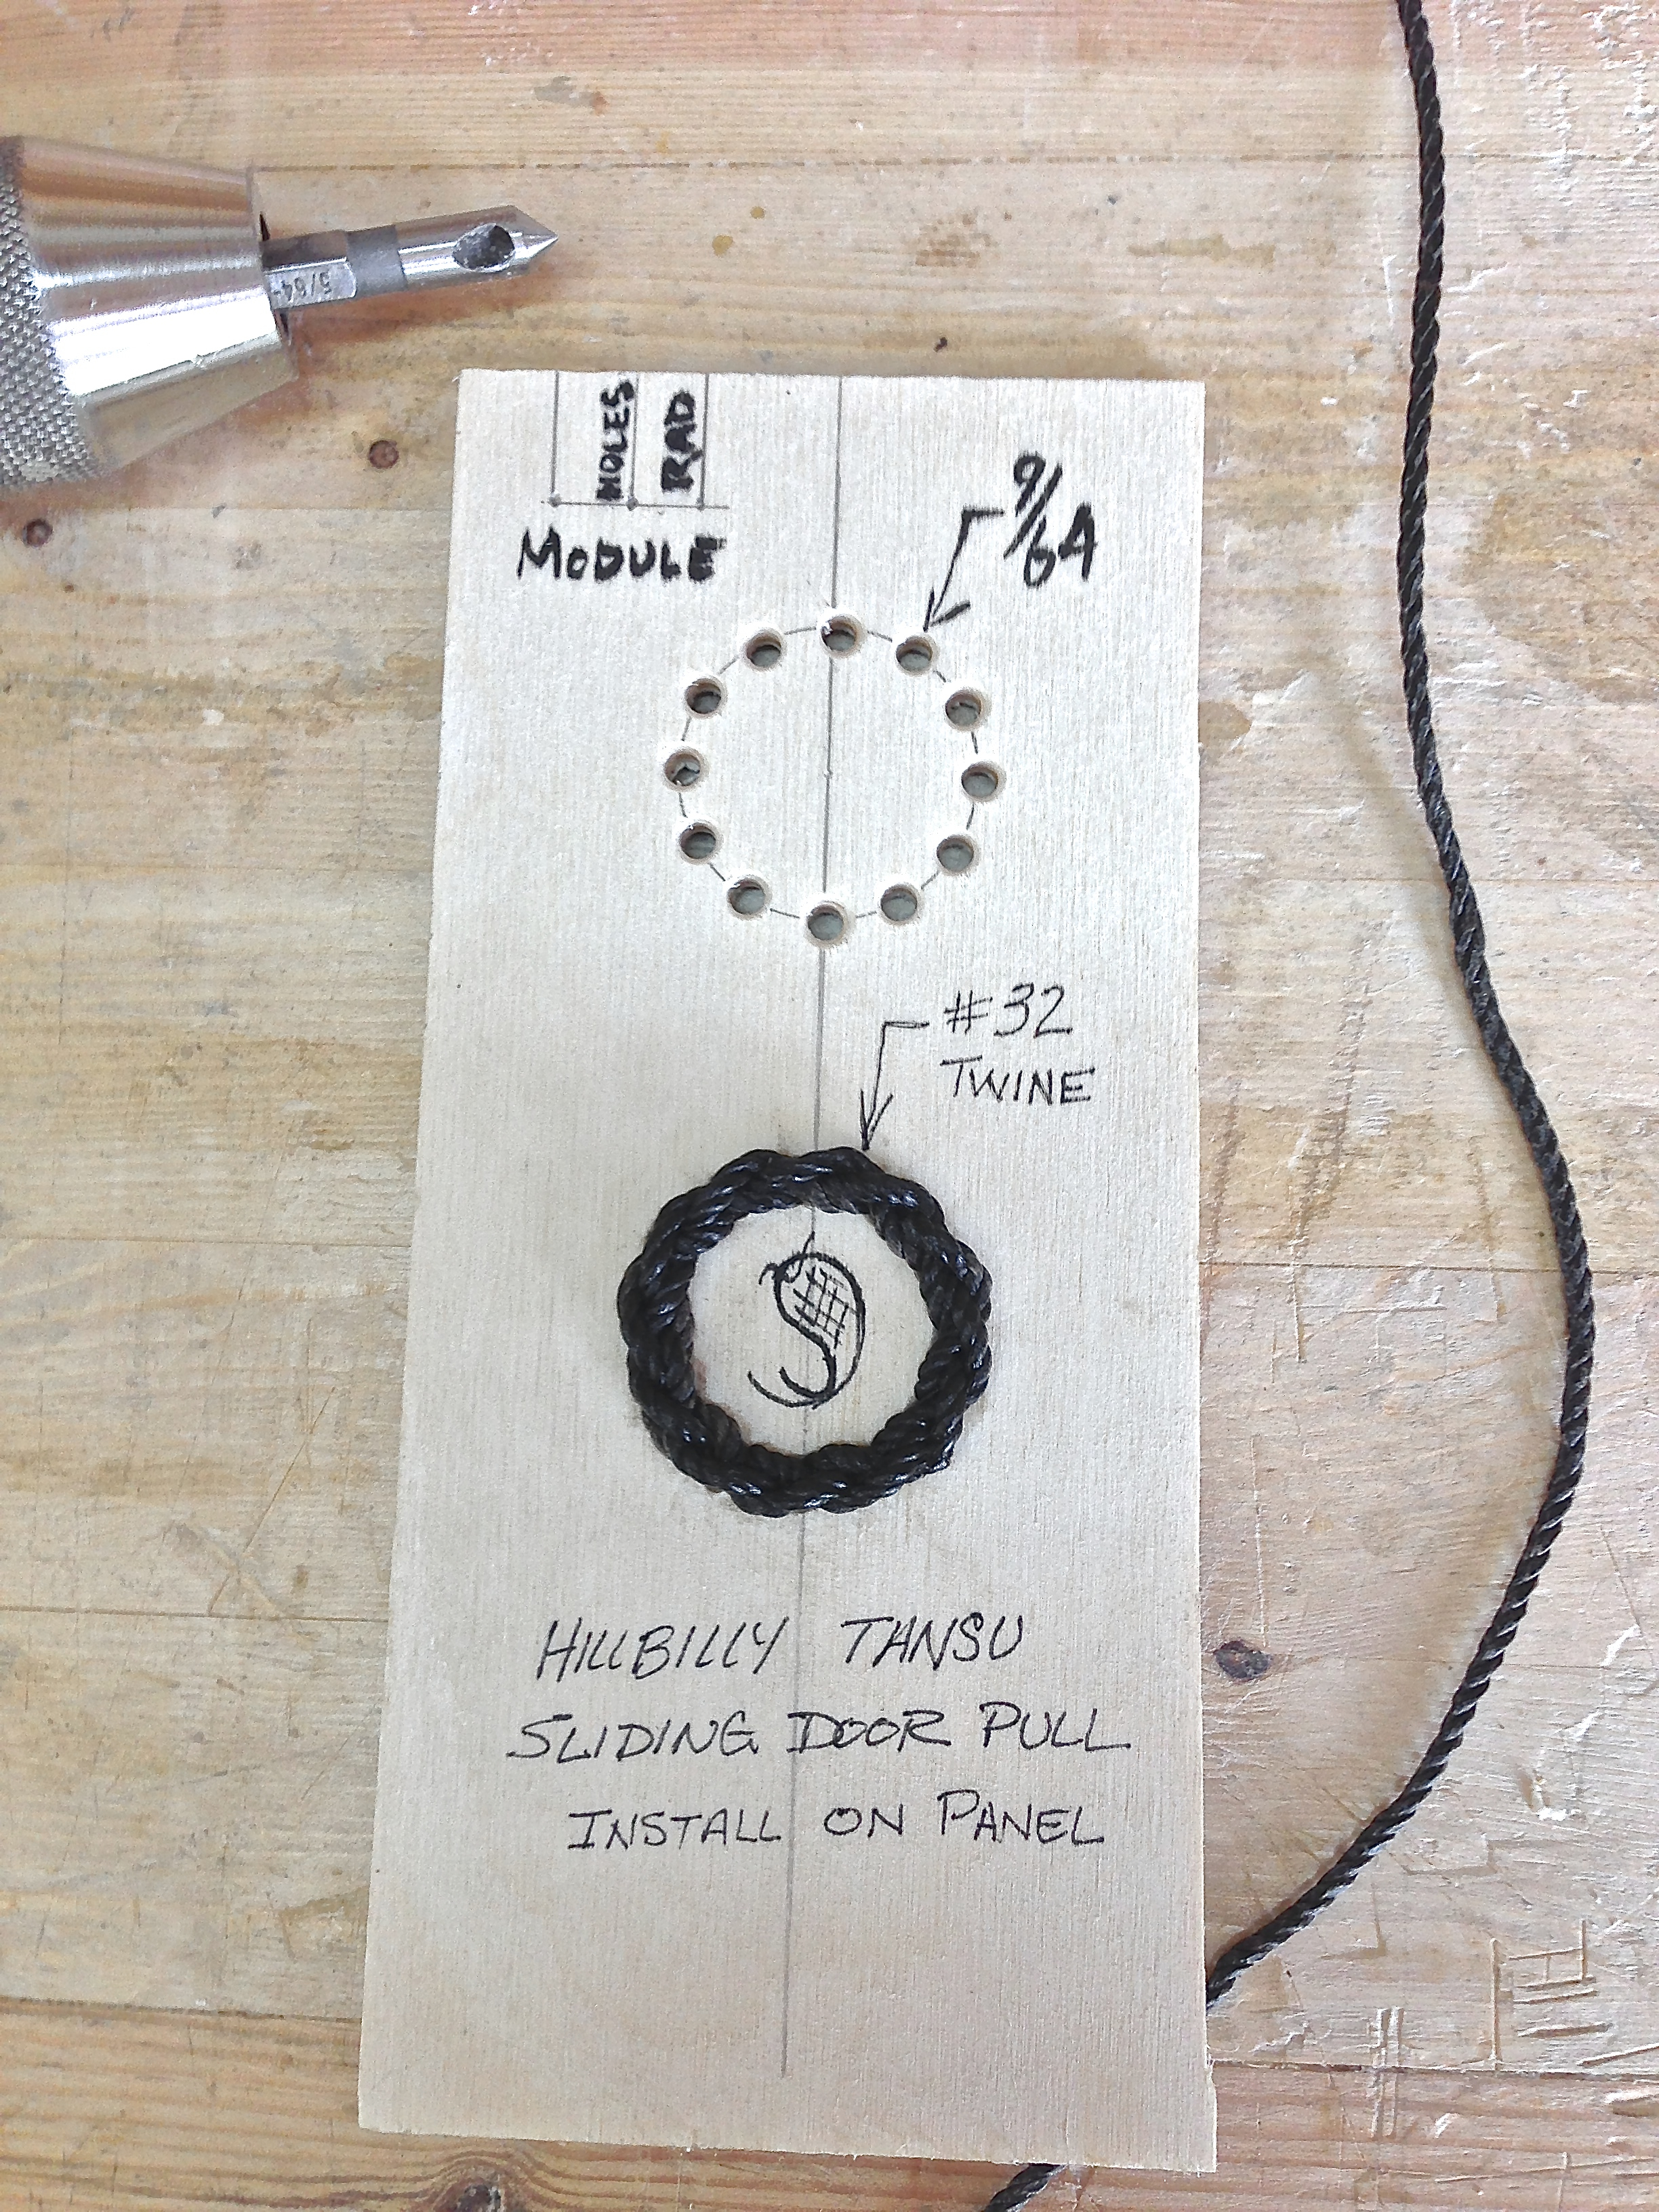
The layout is pretty simple. Draw a circle and step off the perimeter for evenly spaced holes. I drilled the holes 9/64 diameter so that #32 twine would easily pass thru with just enough room for an additional pass of the twine. I then cleaned up the holes on both sides with my smallest countersink. All that was left was to install the appliqué per the instructions. Then I locked it down with CA glue. I like it, I like it a lot and this will be the option used on the next HB Tansu.
Thanks Ralph! I owe you one.
Greg Merritt

Greg – Really enjoyed reading about your project and found this recap especially insightful. The idea of making this sort of thing with homecenter pre-dimensioned stock is great (I hate sizing rough stock). Are you going to develop more projects in the tansu style? This sort of reminds me of campaign style stuff done with frame and panel construction. Perhaps you could continue to develop this style, become an authority, and write a book. Seriously.. One final thought on finish, have you ever heard of staining light woods (maple, beech, etc.) with a solution of ferric nitrate and water which is then heated with a heat gun and finished in linseed oil? Used in building longrifles up in your neck of the woods, it gives a natural looking dark brown finish..
Keep up the good work..
Hi Randy,
I had a lot of fun with this project. Yes, the plan is to develop other configurations. One idea I’ve been working on is a stacking version, ala campaign furniture. Actually two piece tansu are pretty common. My thought is to have a couple of standard base units and then have several top unit configurations that can be mixed and matched. We’ll see how it goes.
I’ll have to do some research on the ferric nitrate method. Sound interesting. My gut feeling is to not try and add any artificial color. Just enhance the natural wood. There will have to several tests done to see what I like the best. One wrinkle is that I really prefer to work with non-toxic finishes. The Briwax was pushing it for me, it contains toluene.
Thanks for following along and I’m glad you have enjoyed my ramblings.
Best,
Greg
I’ll be looking forward to your future work. Here is a link to a piece regarding the finish I mentioned: http://americanlongrifles.org/forum/index.php?topic=17315.0 (Complete with illustrations),