Gaucho Handle Braid

My chair building pace took a toll, I’m just not what I used to be. Once upon a time I could go hard at it with no ill consequences…well, at least no physical consequences, but that is another story. The chair building marathon brought on a bought of tendonitis in my right elbow. After several weeks of taking it easy, I think I’m on the mend.

Even though my shop time has been almost nil, I’ve still been making. There is just no way that I can stop. So I turned my attention to one of my other hobbies, knot tying.

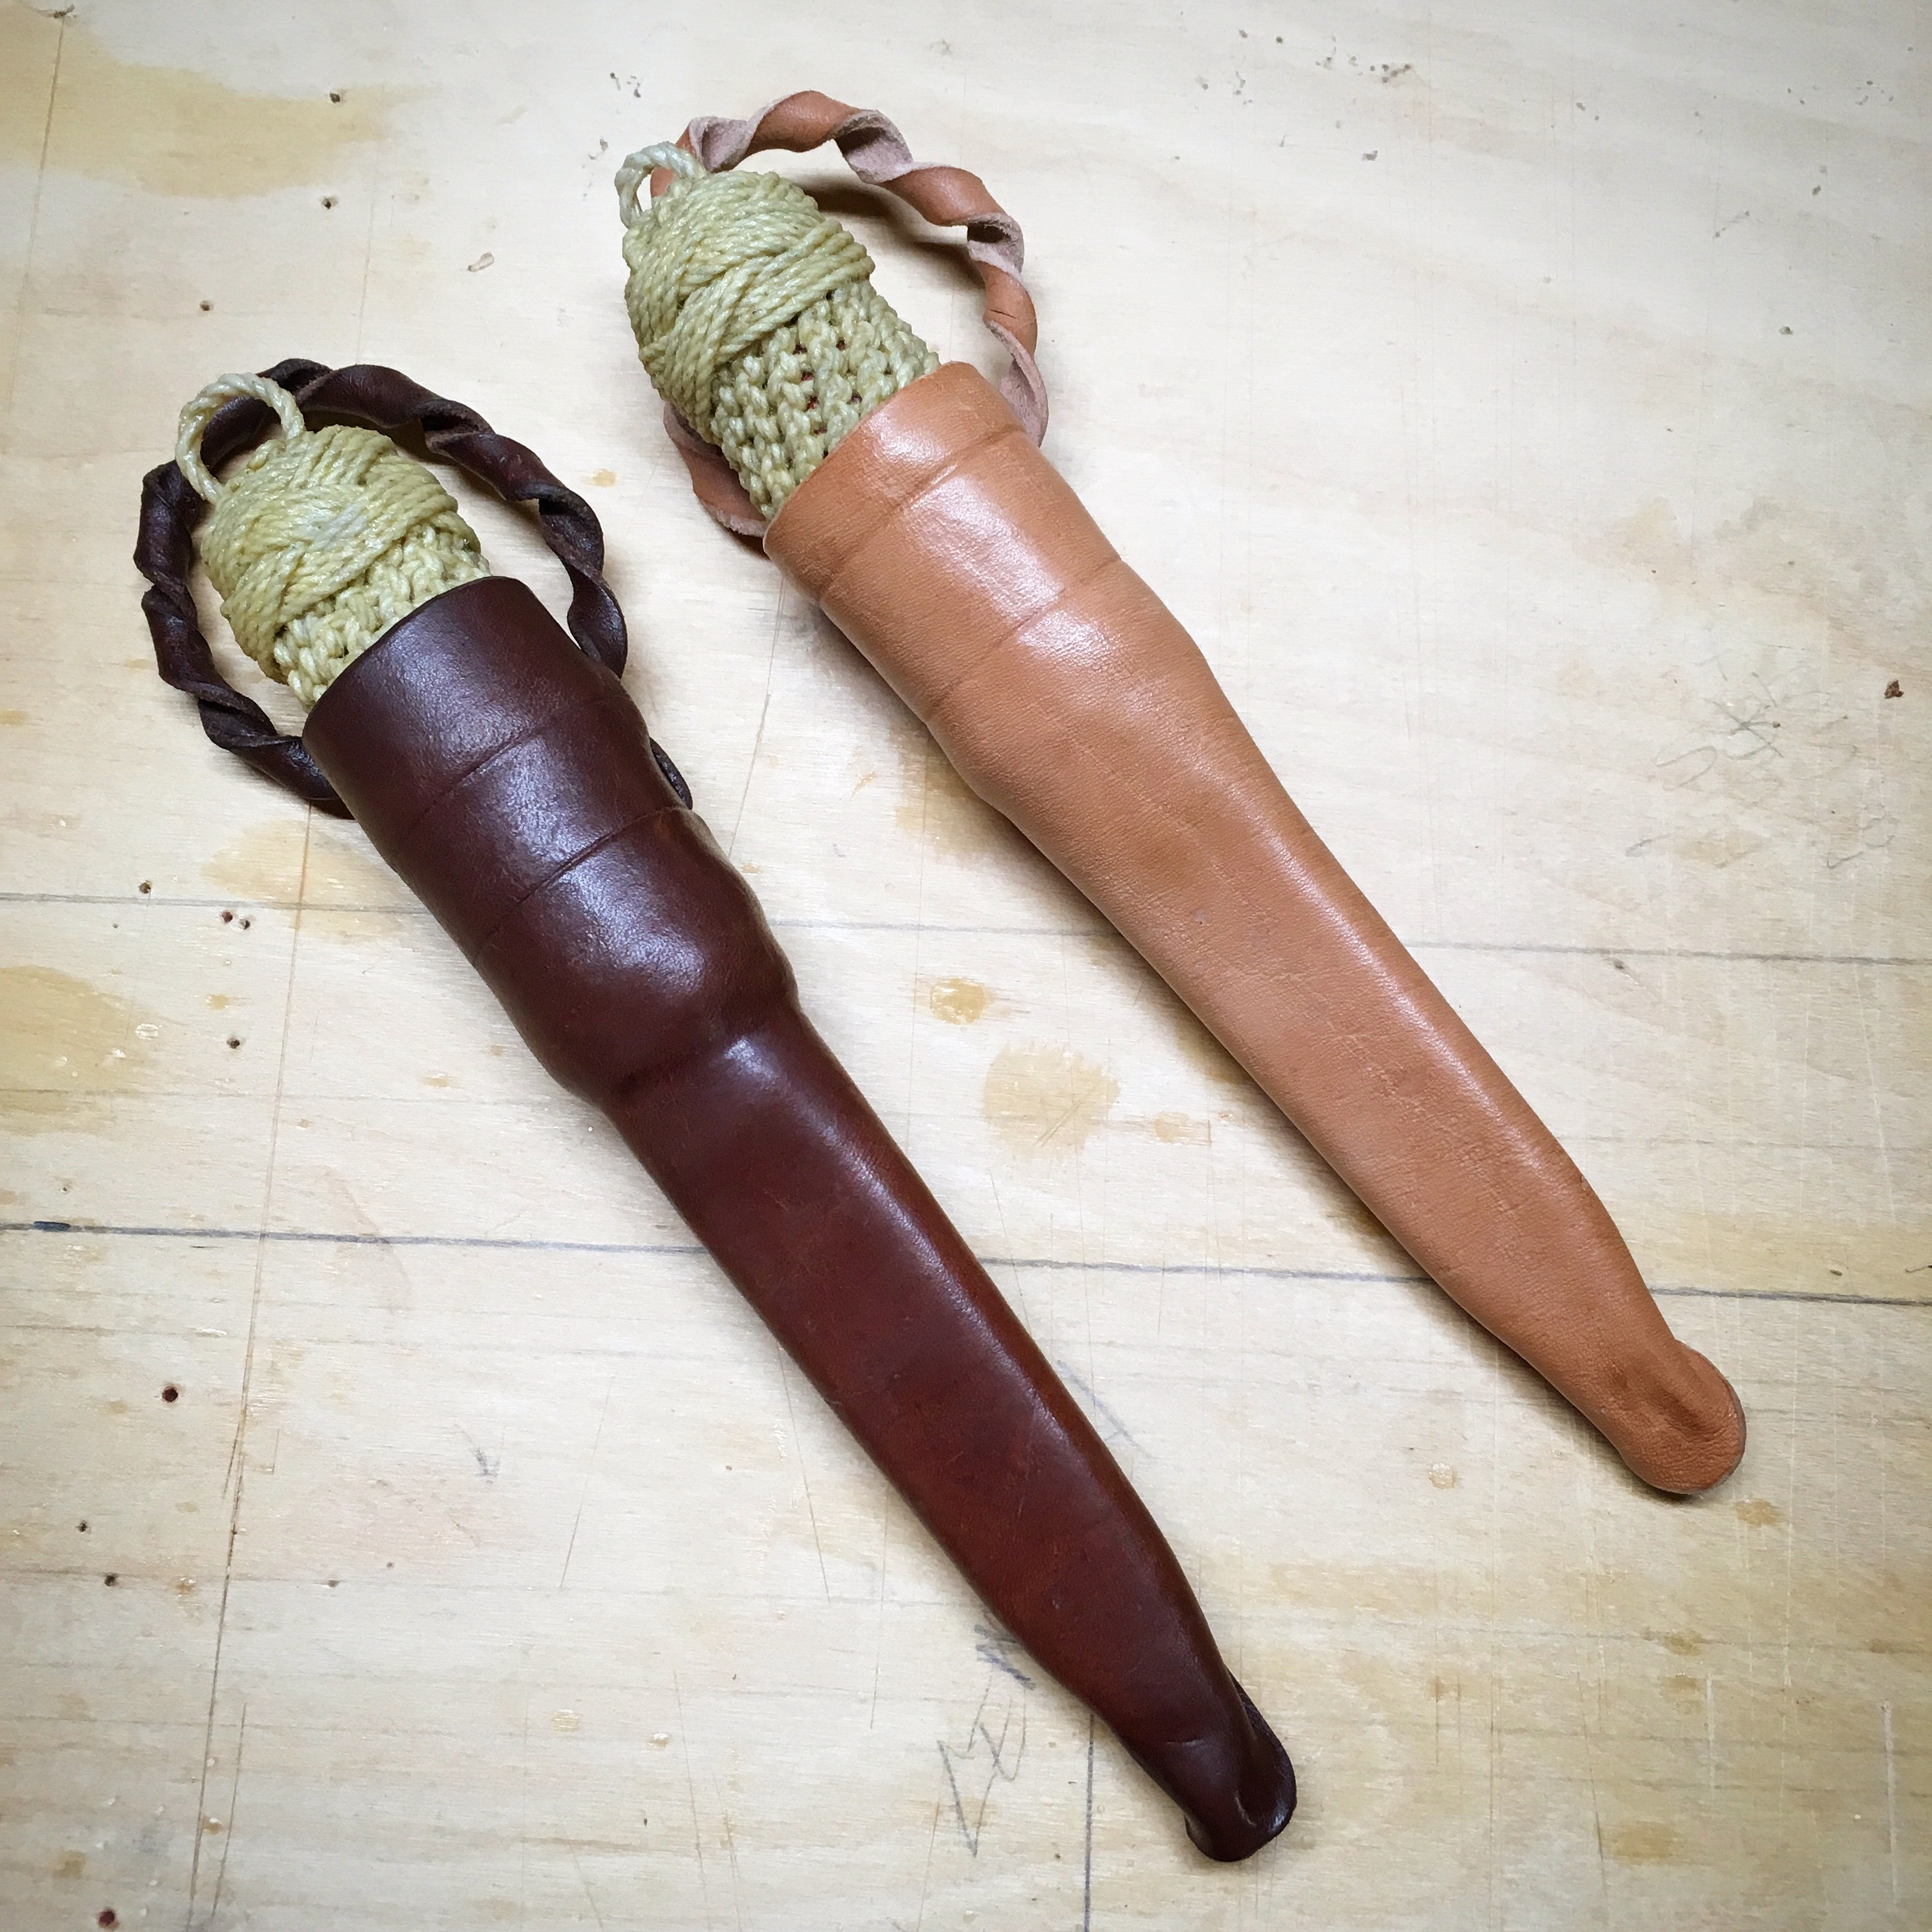
I started out with some handle work on a couple of knives to give as Christmas presents. This involved a needle hitching technique that I’ve used many times before with a couple of Turkshead knots to dress things up.

To complete the knife package I made Scandinavian style sheaths for each knife. Nothing fancy. Just solid, basic sheaths.  Before and after beeswax infusion shown.

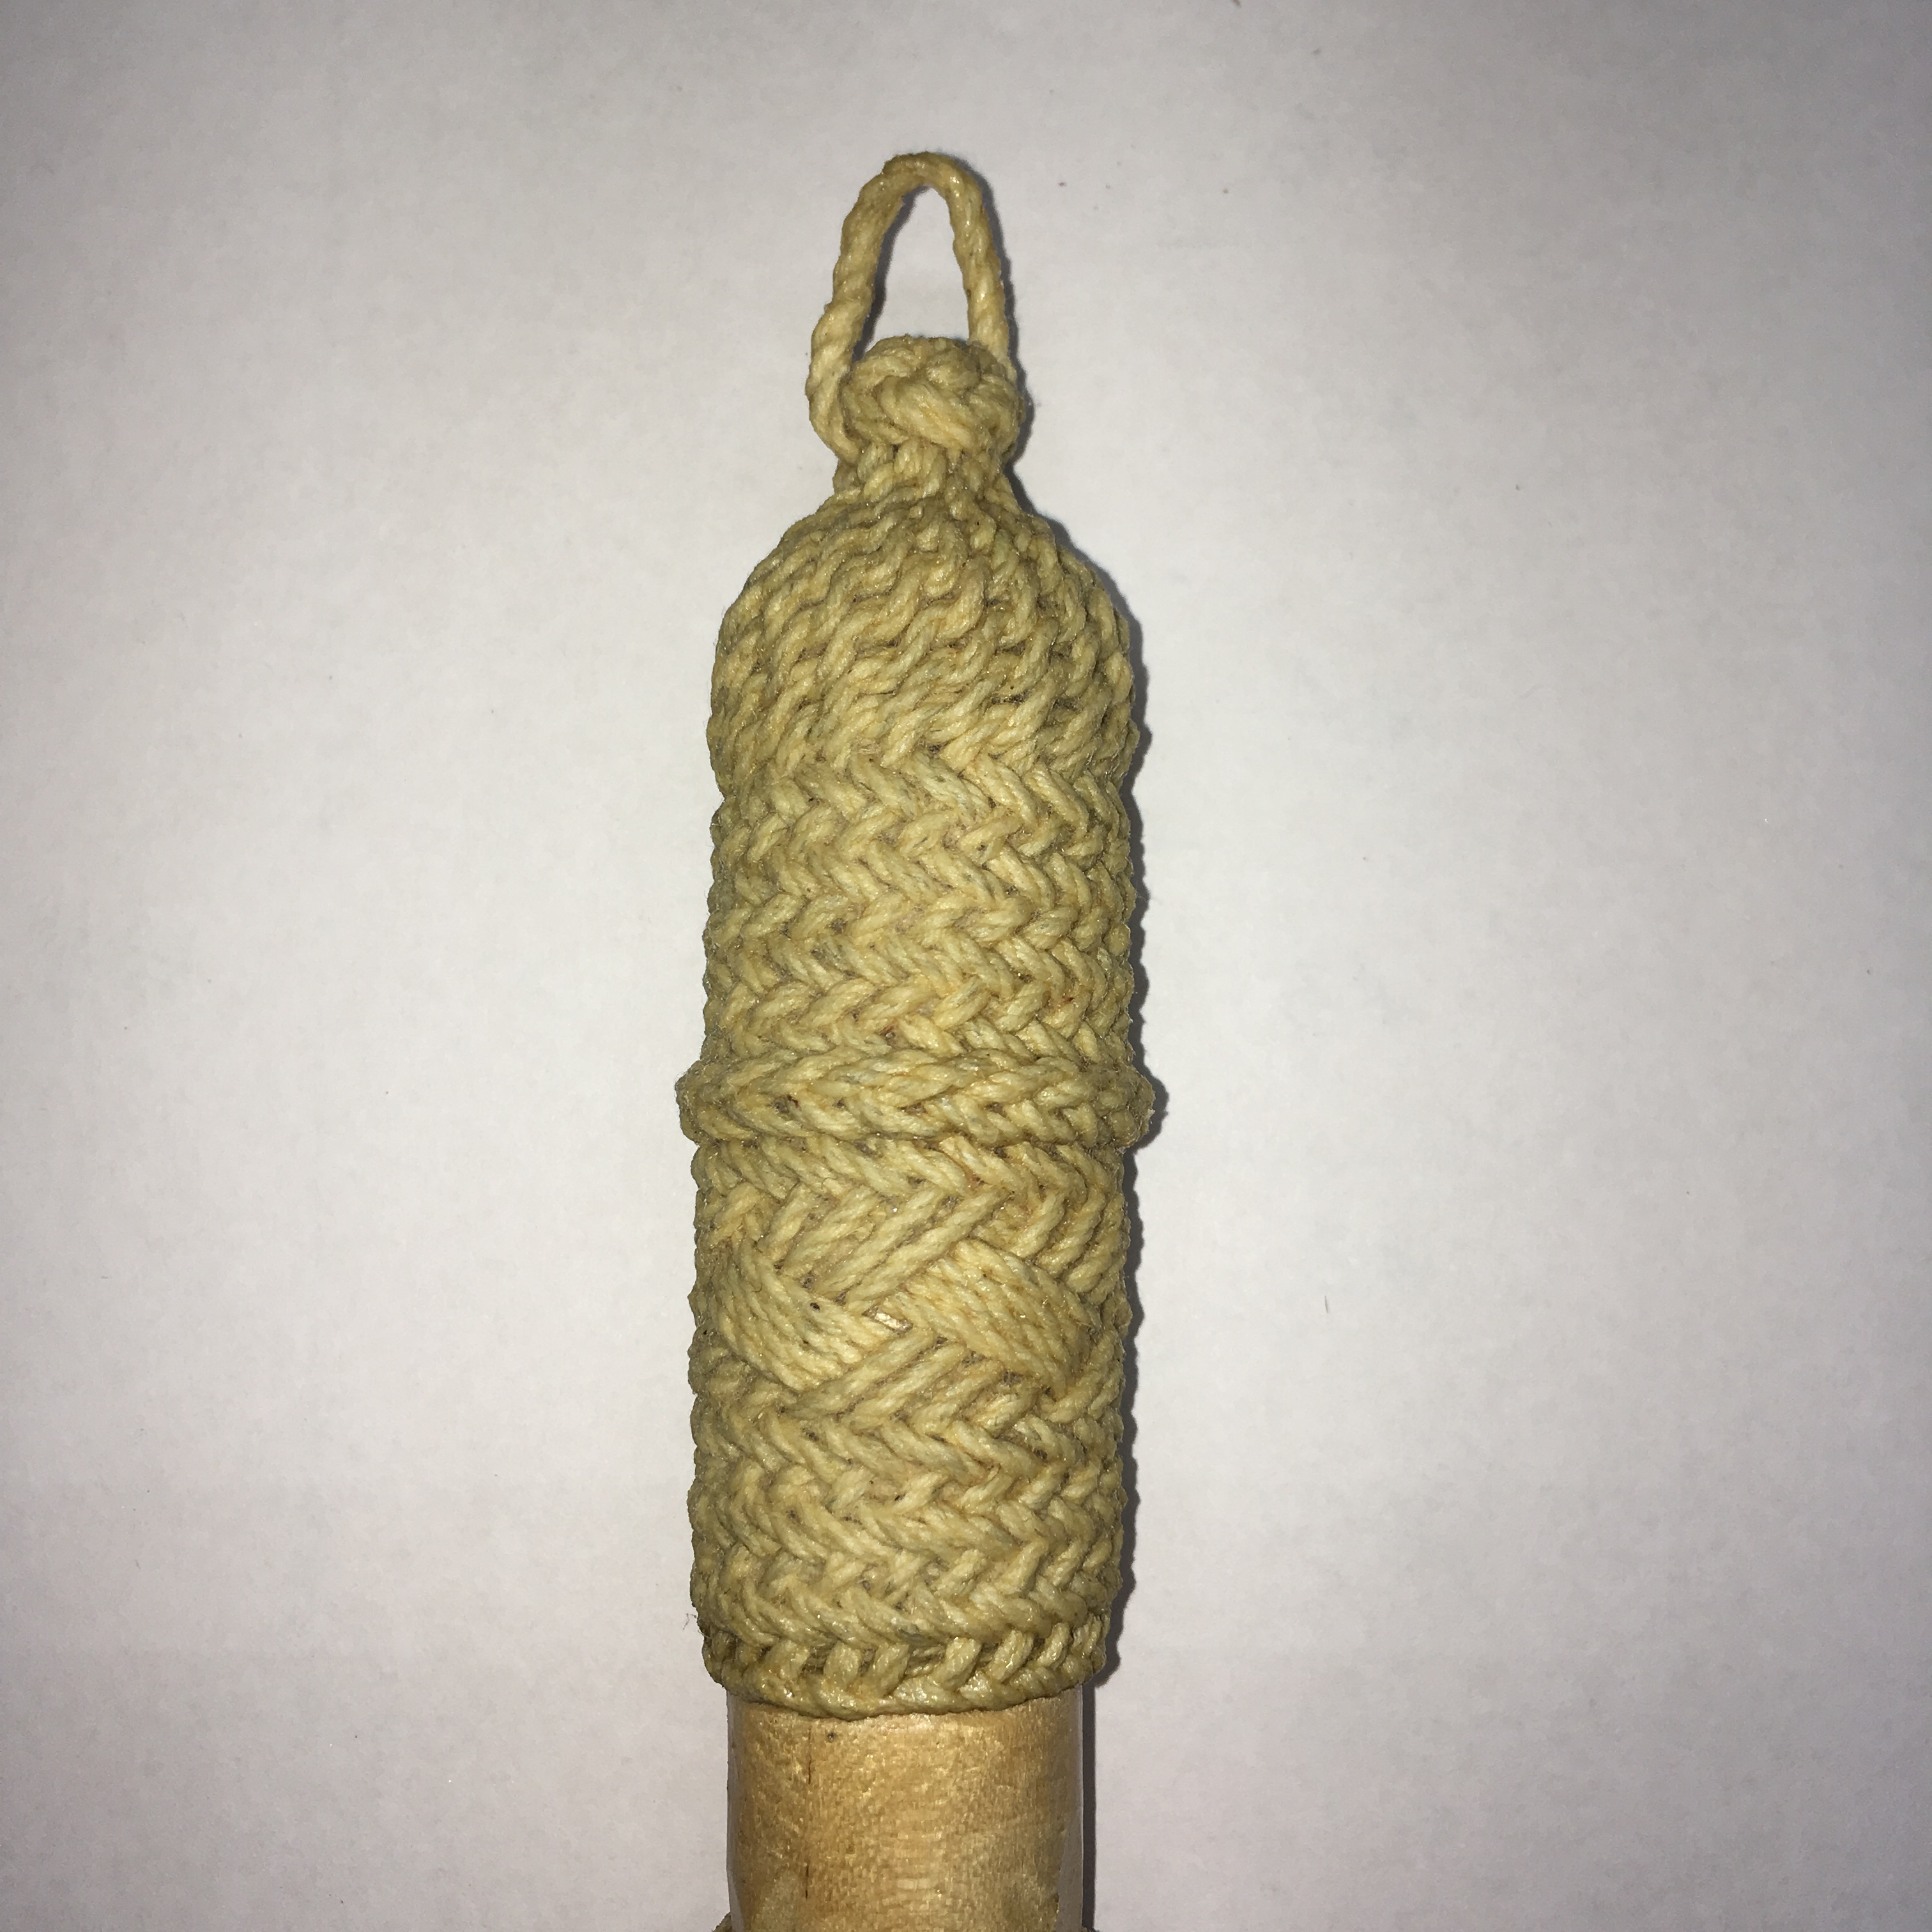
With that done I decided to tackle something new that I have been looking at for some time now. There is an Argentine method of wrapping a knife handle that has fascinated me. They use rawhide strings for the method though and I’m just no ready to go down that rabbit hole. It is surprising what all is involved in working with rawhide. So I set out to see if I could adapt their method to plain, old cotton string.

The first hurdle was that I could not find a book or any English language instruction source. I did find a few YouTube videos though. All in Spanish though. So I turned off the sound and watched them over and over again until I got my head around it. Taking notes and scribbling down sketches all the way.

Armed with a plan I dug a scrap of dowel out of the off cut bin and had a go at it.

Then a bit more practice to confirm my notes.

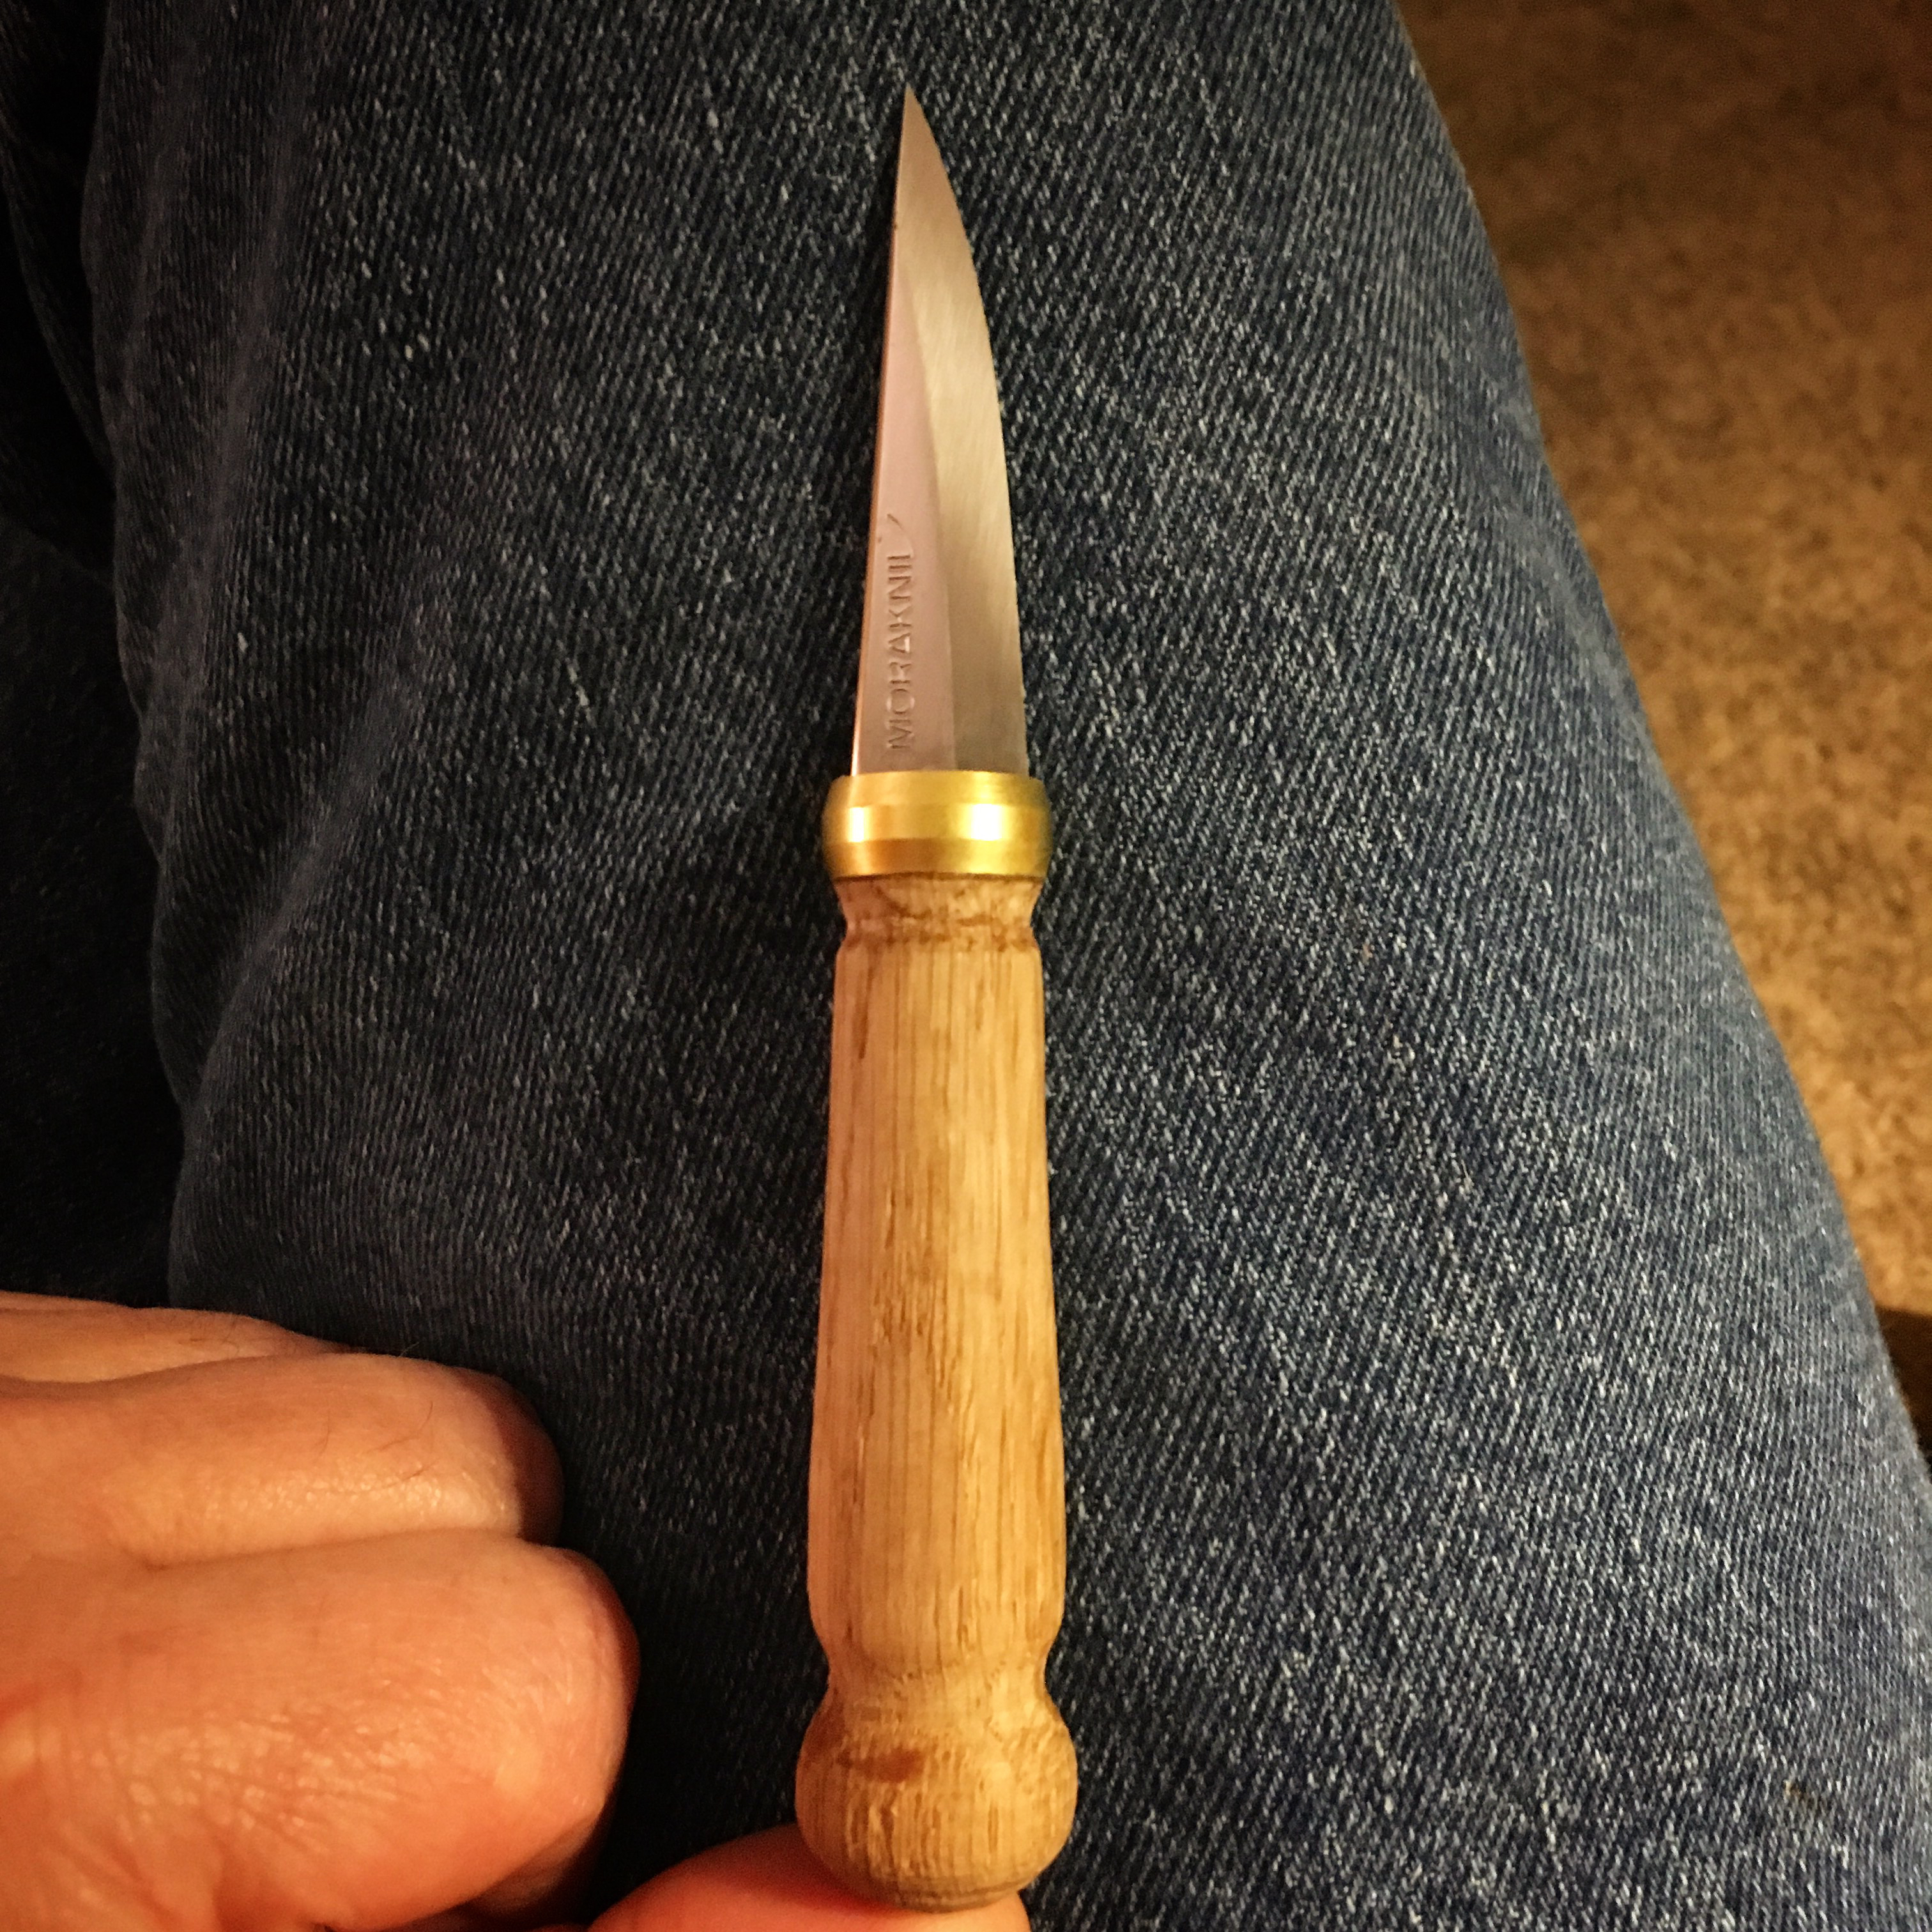
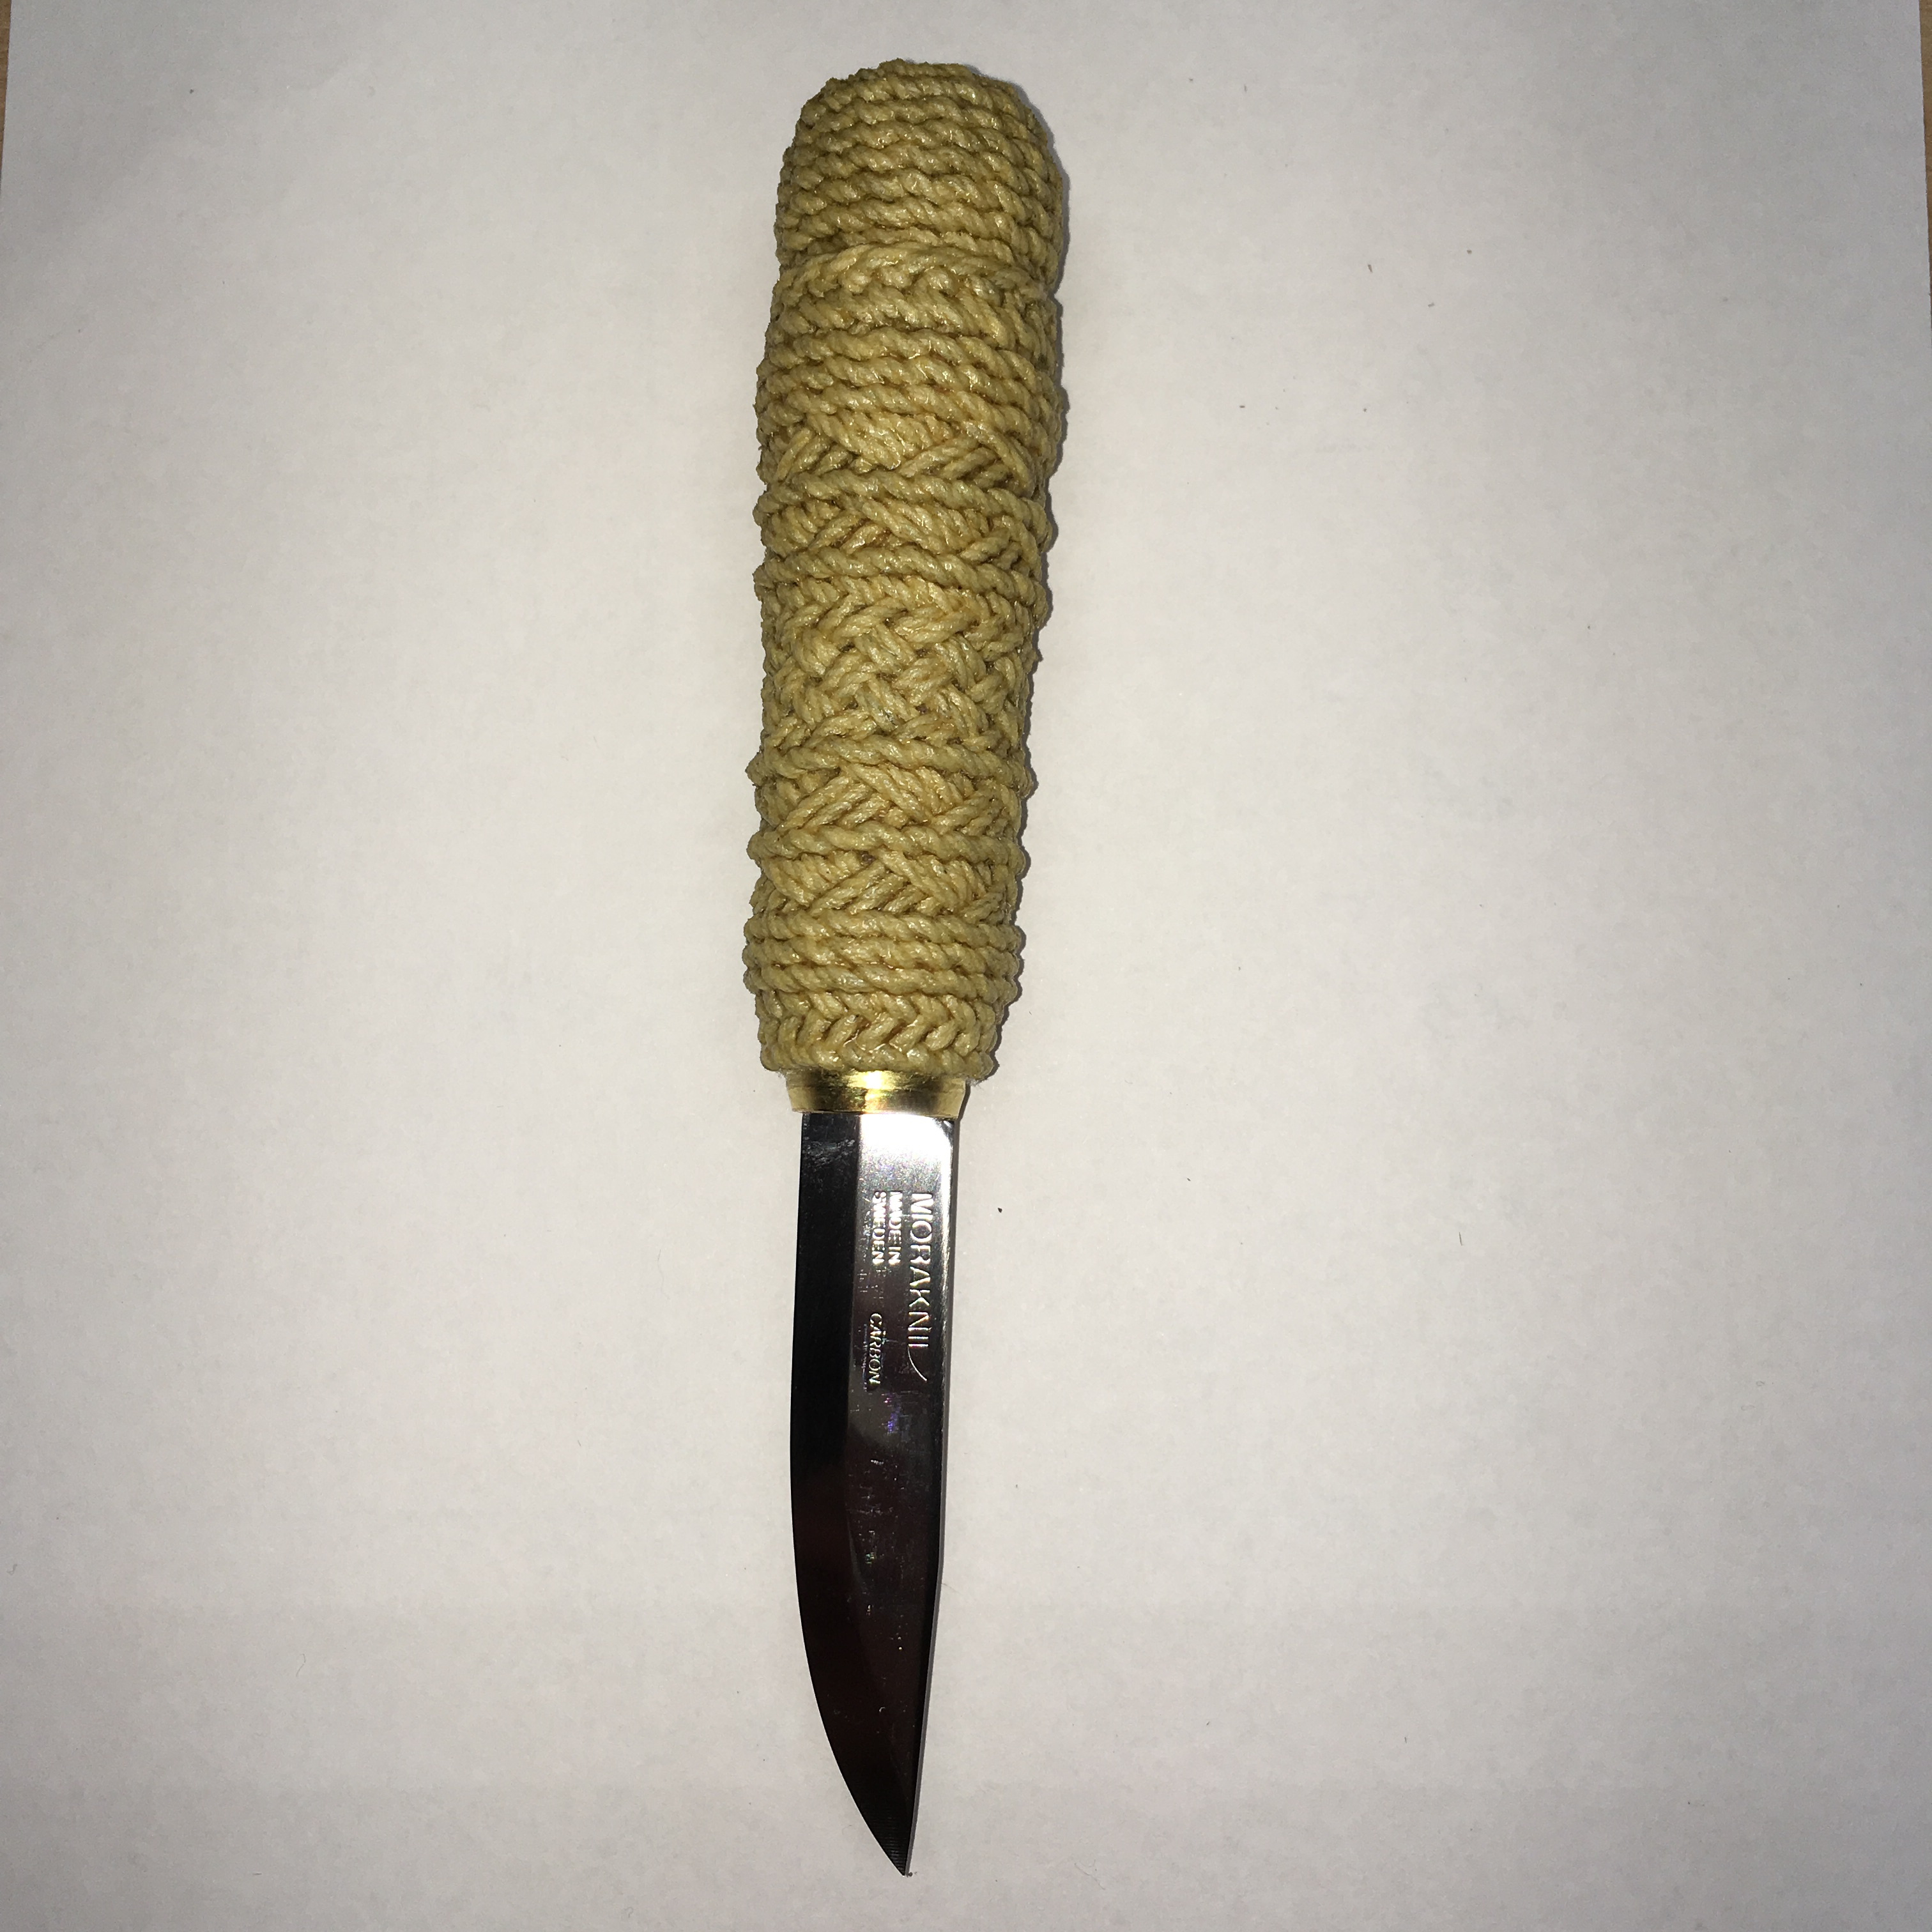
From there I ordered a couple of Mora knife blanks. A standard 2/0 blade and a laminated 120 carving blade. I made handles for each by turning them on the lathe, used a brass compression ring from the plumbing section for a bolster and mounted the blades with two-part epoxy.

While I waited for the epoxy to set, I put together a few instructional drawings for the technique and patterns that I had worked out.

I also worked up a couple of sample pieces that illustrate those patterns.

I then completed the handles. The knife handles and the sample pieces were coated with four coats of spar varnish. Spar varnish dries hard and is resistant to water and alcohol. Making it very durable for this application.

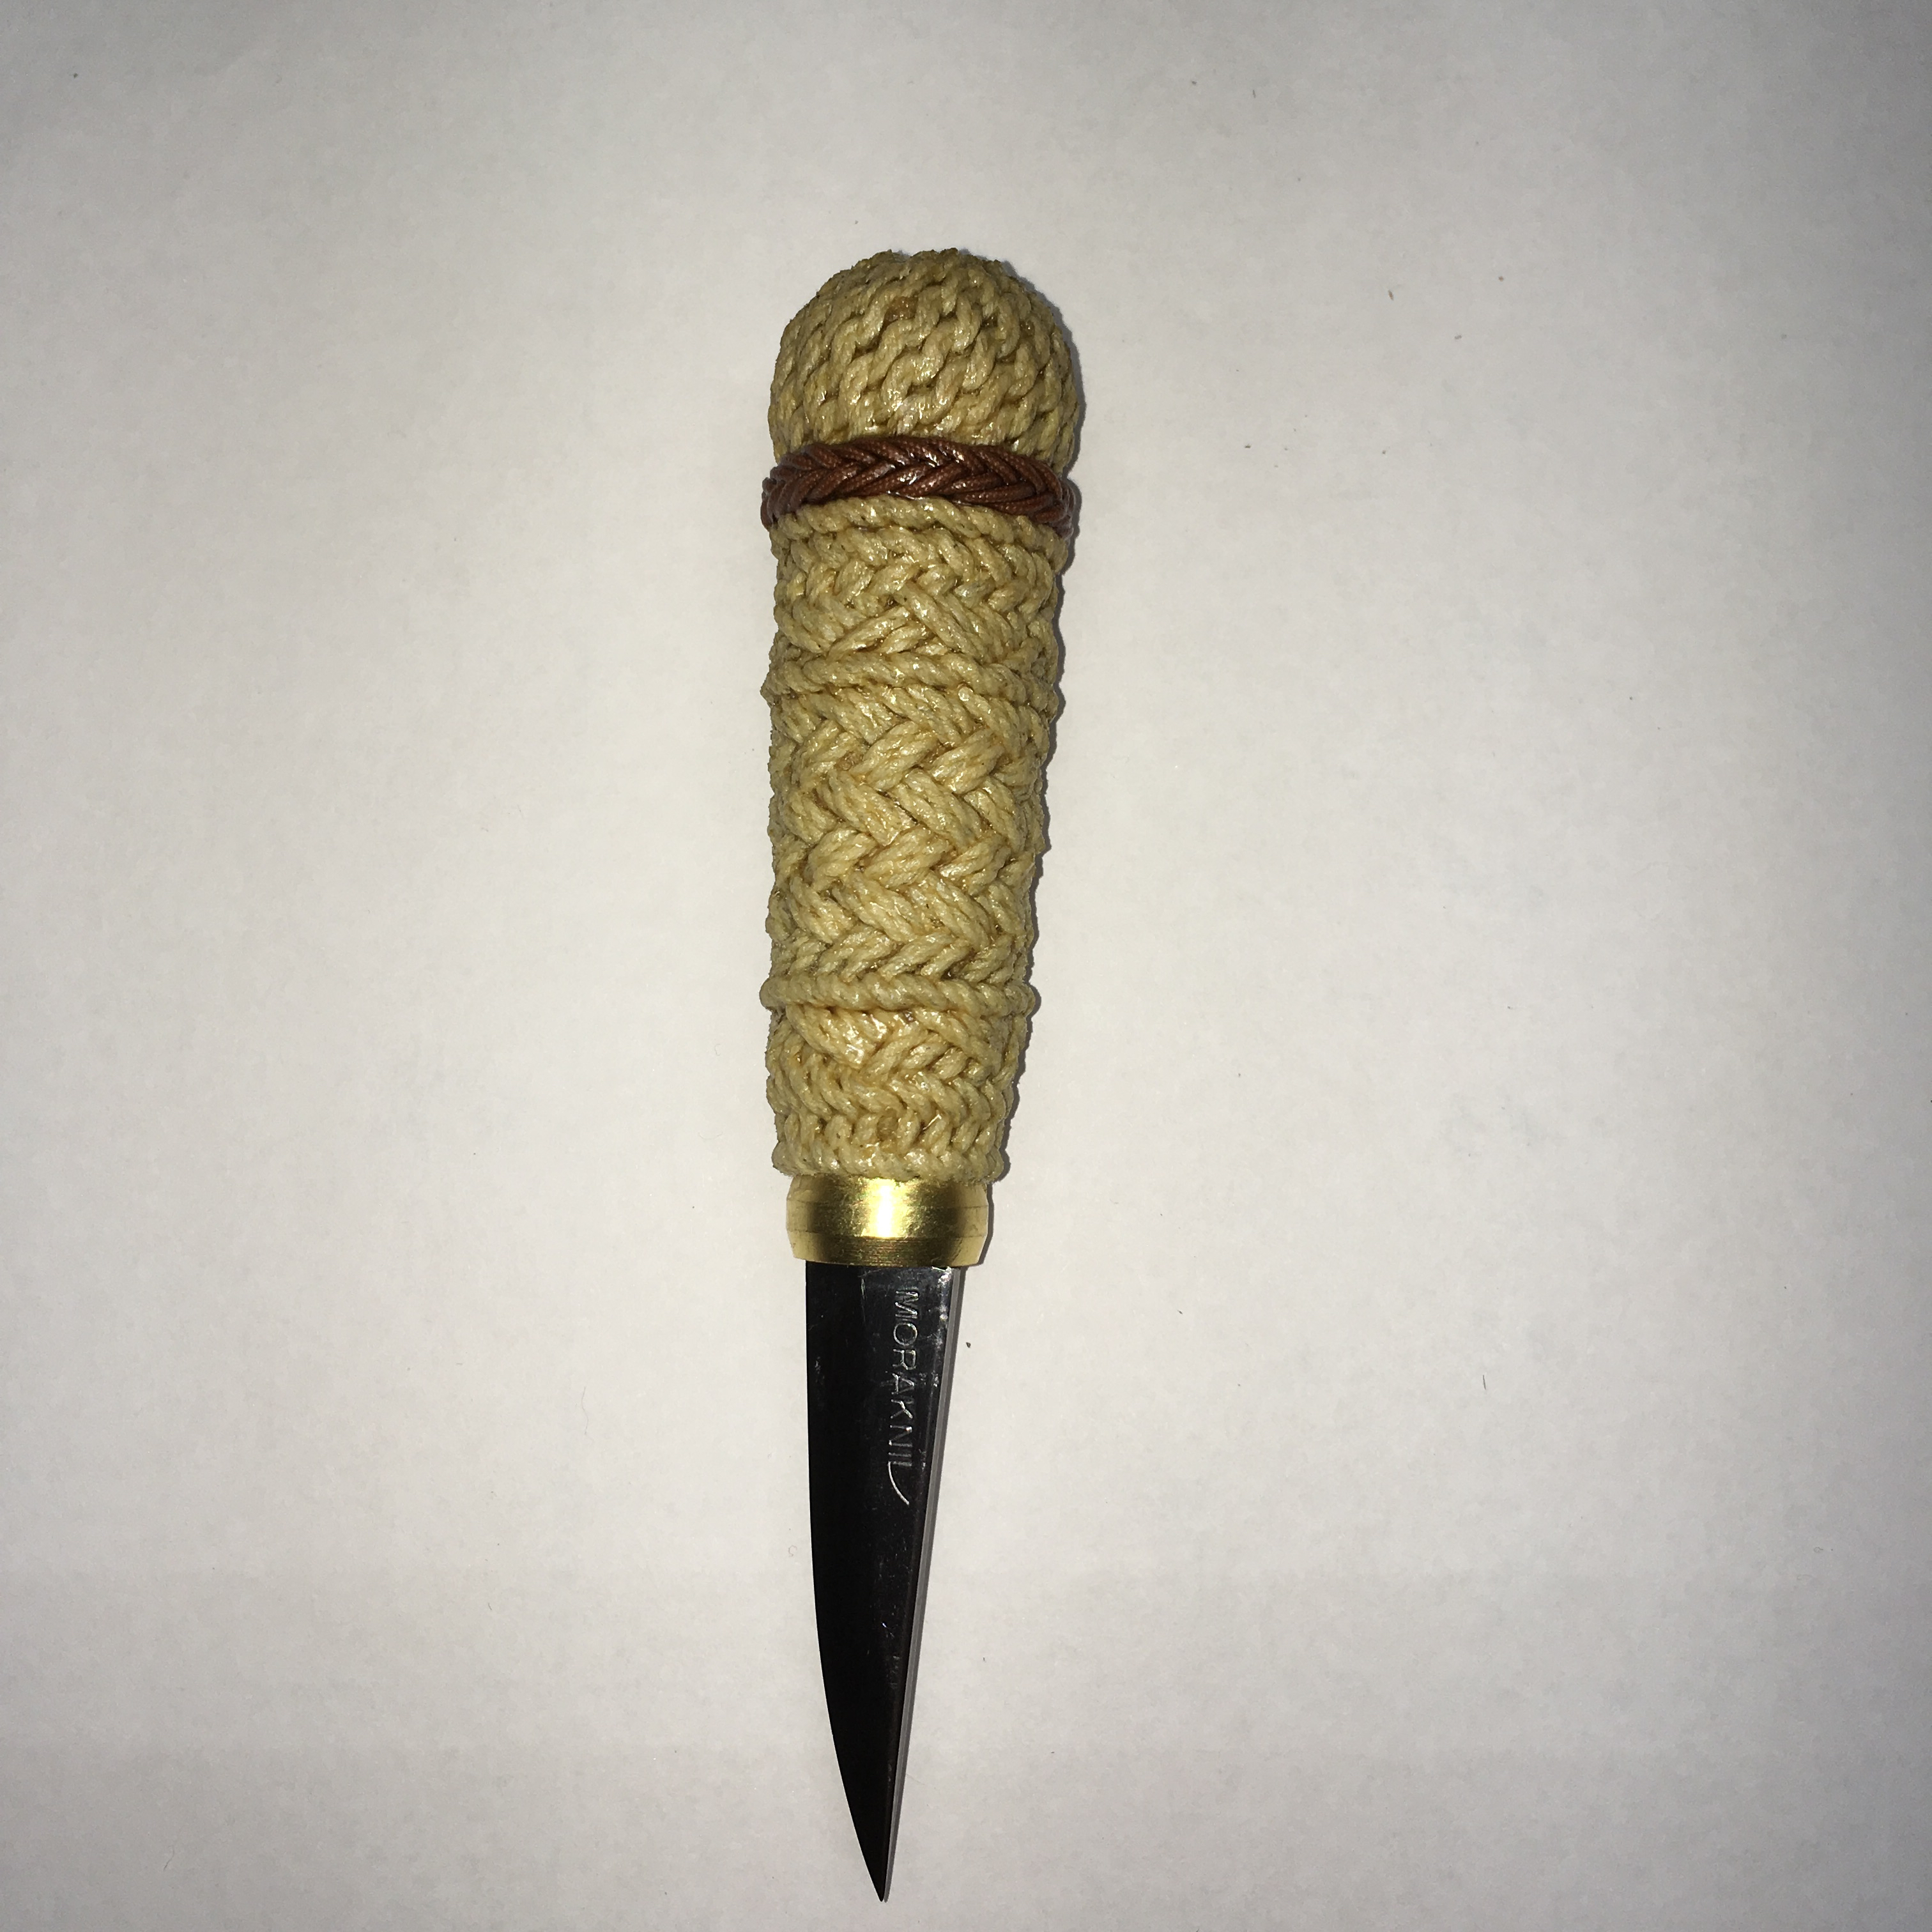
I still need to make sheaths for the knives, but the handles turned out pretty well.

One last experiment in handle wrapping involved a Japanese style, tsukamaki. I purchased an inexpensive kiradashi knife that was mounted in a wooden handle with matching wooden sheath. I put the wood burner to it, added the wrap and applied a couple of coats of varnish.

There are quite a few articles and videos to be found on the internet for the tsukamaki technique. So if your interested in giving it a try, just Google it.

Greg Merritt


Posted in Gaucho Handle Braid, Knot Tying | Tagged , , , | 11 Comments

Chairs-A Journey Stalled

Immediately after the completion of the prototype chair from my last post, I began work on the next. Gluing up a seat blank of white ash and sawing arms from brown ash. The shape of the arms being mostly dictated by the grain of the wood. Striving to keep the grain off the arm continuous. In turn, the arm blank then plays a significant role in the shape of the seat.

The process remains unchanged. The leg mortises were drilled and the seat saddled. First, roughing out with gouge and mallet. Followed with travisher and scraper. The edges of the seat were chamfered.

The chair was then legged up and stretchers fitted.

I did use this opportunity to refine a jig that I have been developing for this type of chair and to record the details. The jig provides a bit of continuity to a chair that largely develops organically.

I then fitted the arm spindles and crest rail. This crest rail is from a scrap of walnut that I found in my attic.

The contours of the arms and crest rail were then refined and the chair assembled with glue and wedges. I added a bit of wood burning to a few of the edges and a touch of knot work.

Finally, the chair received several coats of oil and beeswax.

The two chairs from this design. The prototype on the left and the slightly refined version on the right.

I still want to build at least two more versions of this chair. Unfortunately, I developed tendonitis in my right elbow somewhere along the way. The condition was so severe that I could not even grip a beer bottle. So the situation was critical. For the past several weeks I have been resting it and the tendonitis is starting to subside. Hopefully I can get back into the shop in few more weeks.

In my next post I’ll show you how I have been spending my creative energy while convalescing.

Part 2 Greg Merritt

Posted in Stick Chairs | Tagged , , | 15 Comments

Chairs-The Journey Continues

I wish that I could write about some ground breaking technique involving the making of chairs. Some new way of making this bit or that. Or maybe a new method of work holding that would be a game changer for chair makers the world over. The simple truth is, that all of the information you need to build a chair is already out there. The stumbling block seems to be a psychological one for the vast majority. Continue reading

Posted in Design, Finishing, Illustrating, Stick Chairs | Tagged , , , , | 11 Comments

Chairs-The Journey Begins

Like a lot of woodworkers I have avoided making chairs.  I can’t really pinpoint why though.  Something about the process just always seemed out of reach.  But, enough is enough!  We need chairs here at the hillbilly hacienda, so chairs it is. Continue reading

Posted in Design, Illustrating, Stick Chairs | Tagged , | 15 Comments

Brand New 100yr Old Table

My niece just graduated college and it only took here a couple of weeks to secure her first teaching position. Of course that job is out of state and she starts at the end of July. Therefore she is in a mad dash to find her first apartment or house and get moved before then. Continue reading

Posted in Sewing Table | Tagged , , , , , | 17 Comments

Andon and Kumiko-the Journey Continues-2

The goal for this most recent andon lamp was to create a stand that would essentially turn it into a floor lamp. I went through several iterations on paper and finally concluded that my best option would be to create a stand from which the andon would be hung. A chance trip up into the “magic attic” served to further focus my efforts. Continue reading

Posted in HB Andon Lamp | Tagged , , , | 7 Comments

Andon and Kumiko-the Journey Continues

Management has informed me that the little andon would make good Christmas gifts for this year and that I should get busy making several. Fine with me. At least I have plenty of notice this time and the extra time means I can do a little further experimentation.

Since this will be somewhat of a production run, I took a hard look at how to economize the materials. I found that, by adjusting the size slightly, the width of a standard small Continue reading

Posted in HB Andon Lamp | Tagged , , | 9 Comments

Ad Hoc Little Andon

Upon the completion of my first to andon projects I realized that I had enough bits and pieces left over to maybe, possibly build a smaller version. Plus, I have been bitten by the kumiko bug and wanted to try a couple of additional ideas on that front. So I jumped right in and milled up the remaining stock that I had for the outer frames and worked out the size of this andon based on that availability. Continue reading

Posted in HB Andon Lamp | Tagged , , | 10 Comments

HB Andon (Shoji) Lamp

One thing that I am doing as I update old drawings is to review my sketch books for ideas that never made it off the page.  One such idea was for a Japanese style lamp (andon).  Originally, the andon was a lantern consisting of a washi (paper) covered wooden frame which was lite with either a candle or oil lamp. Continue reading

Posted in Design, HB Andon Lamp, Illustrating | Tagged , , , , , | 21 Comments

Mini Three Drawer Chest

As I update old drawings, I will post those that I hope you will find useful.  Some may be new versions of those that you have seen before.  Others will be making a first time appearance here on the blog. Continue reading

Posted in Design, Illustrating, Mini Three Drawer Chest | Tagged , | 6 Comments