
 Almost all of the drawings that I post here on my blog are based upon proportions. I like using proportions because it makes scaling a project far easier. I did the same with the Japanese Toolbox project. I approached this knowing that the height, width and length will be variable based upon need and as such would be impractical to constrain with proportions. Instead I concentrated on the peripheral parts of the toolbox. The proportions are based upon the thickness of the handle. It’s doubtful that I will ever alter the thickness of the handle enough to change the size of the other parts so proportions for this project are mostly an exercise in consistency.
What I want to do now is explain how I work out the actual size of the elements based upon my stated proportions. In the lower left corner of the drawing you will find a “Module Scale”. The module (D) being the key starting dimension upon which all others are derived. For this project (D)=handle thickness which I will be making 36mm. The “Module Scale” simply shows this divided into proportional parts. In this case halves and thirds. Everything on the drawing is drawn to scale so that a pair of dividers can be set to a distance on the “Module Scale” and matched to a distance on the item drawn. The reverse holds true as well of course.
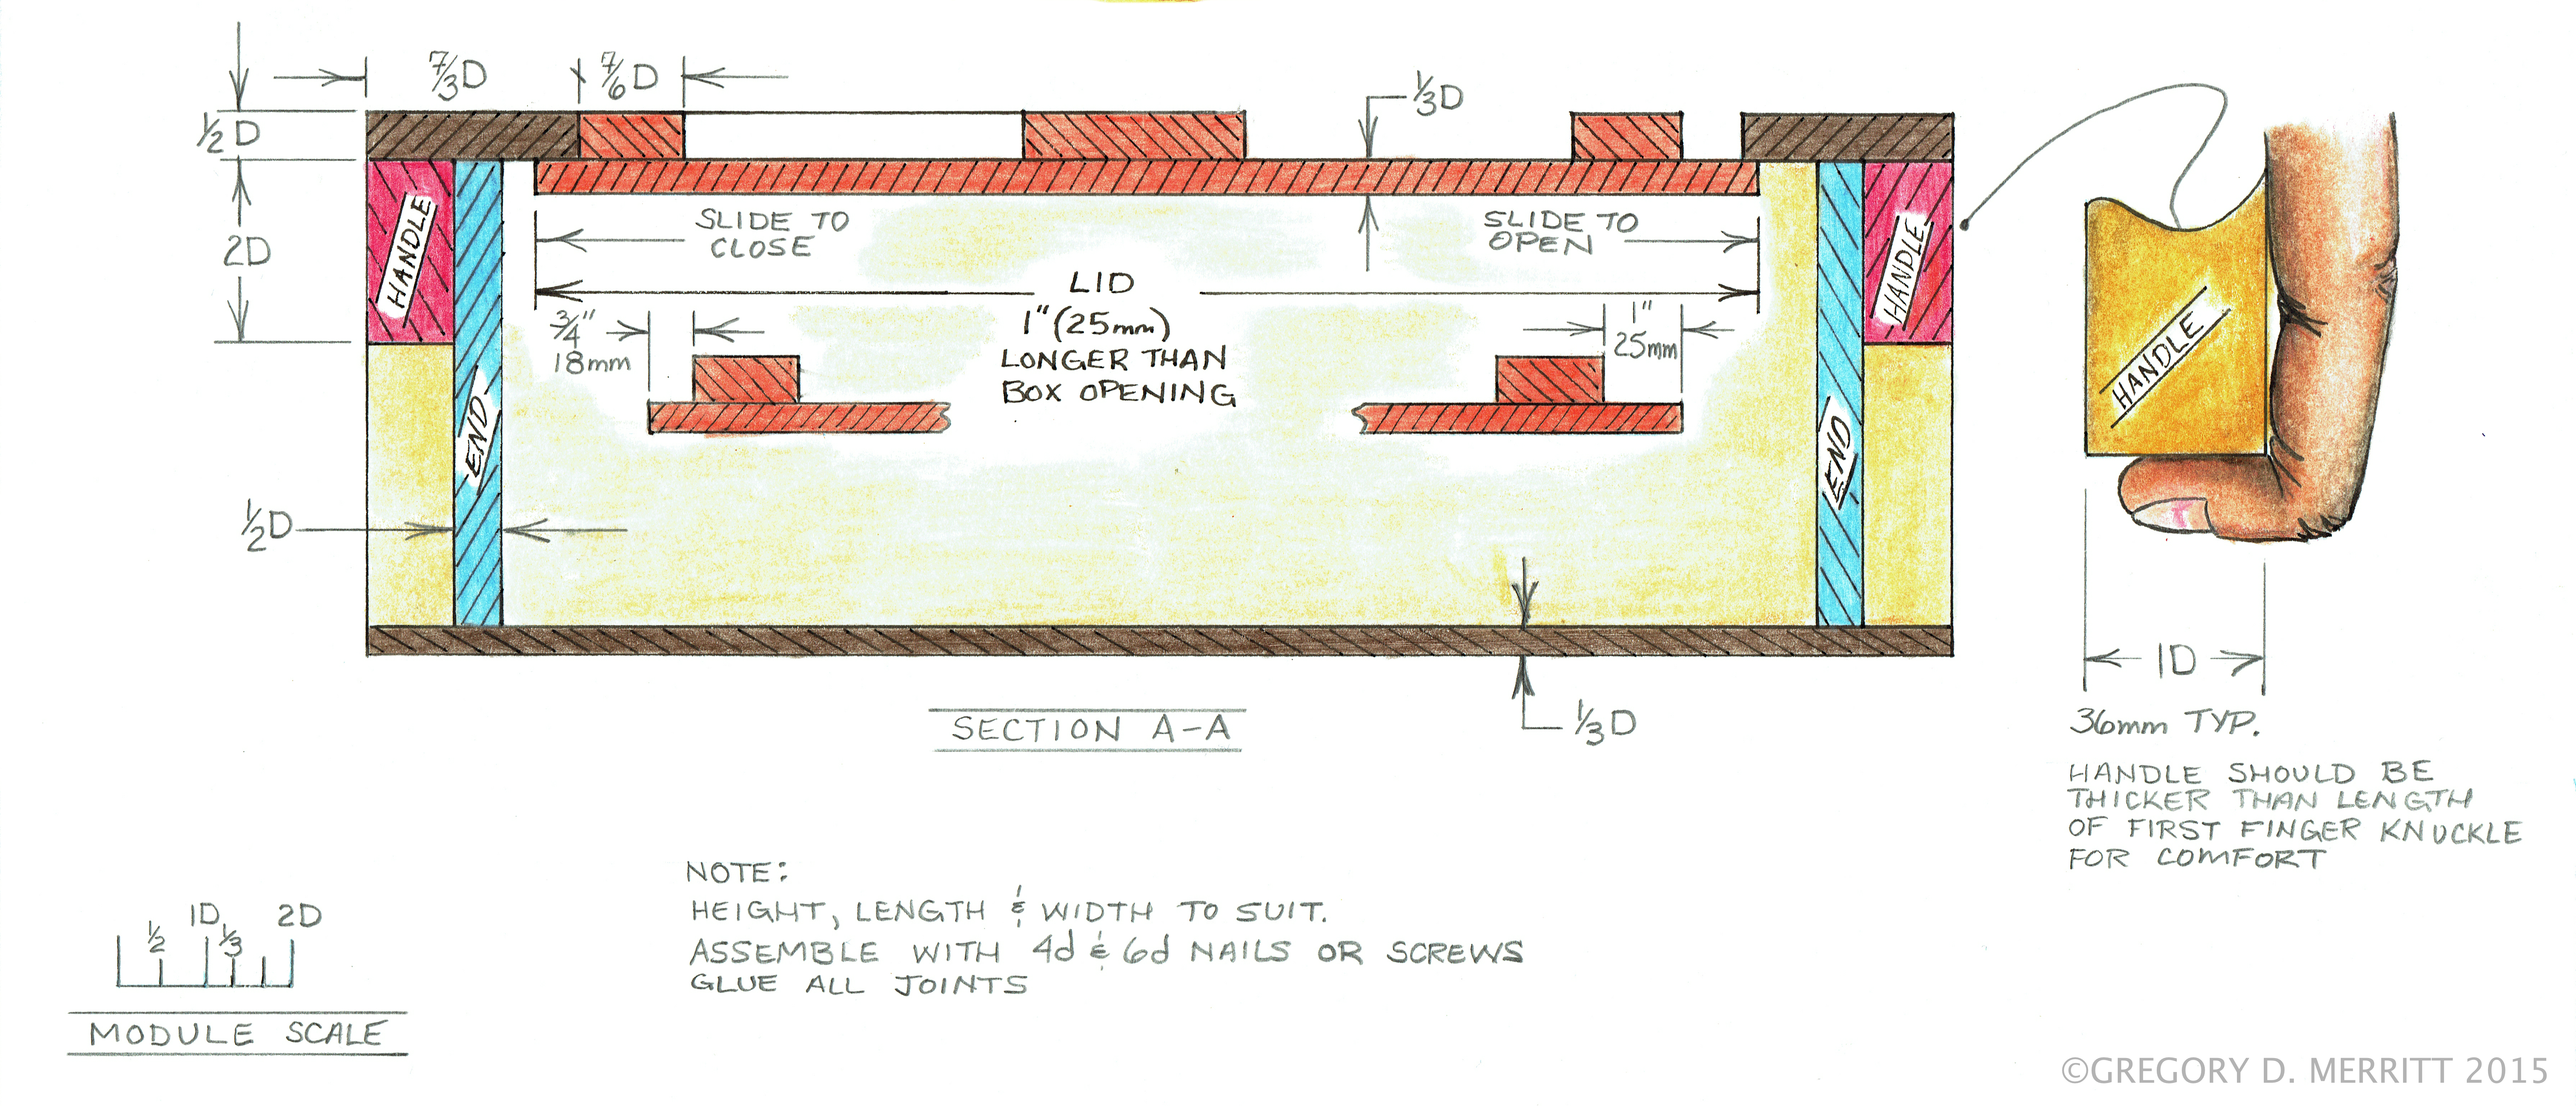
So here is a breakdown of the derived dimensions.
- 1D=36mm (handle thickness)
- 2D=72mm (handle height)
- 1/2D=18mm (thickness of sides, ends, end caps and lid battens)
- 1/3D=12mm (bottom and lid thickness)
- 7/3D=84mm (width of end cap)
- 7/6D=42mm (width of lid battens)
Hope that helps those of you who may be trying to make sense of my drawings.
Part 1 Greg Merritt

Pingback: Japanese Toolbox-Progress 1 | GREG MERRITT – BY MY OWN HANDS
Greg
Thank you for this blog. I really appreciate the time, thought, and effort you put into this.
Your most welcome! I hope that you are finding some of what I’m posting to be useful. 🙂
Hi Greg, I do the same thing subconsciously when I’m planning a project but never formally. I know that I play with the proportions until they look right to me, and if I adjust something I have to adjust all of the other parts to keep the appearance the same. My CAD software has a way to build this in as formulas for key dimensions, I’ll have to try that sometime just for fun.
PS: you’ve probably seen this, but here is a slight tweak of Odate’s toolbox with through tenons to locate the end panels
http://www.daikudojo.org/Archive/howtos/20070224_toolbox/
Yep, I’ve seen that build. It still seems too fussy for what this actually is. It would be a fun way to build one though.
Pingback: Japanese Toolbox-Progress 2 | GREG MERRITT – BY MY OWN HANDS
Pingback: Japanische Werkzeugkiste aus Massivholz - Holz und Leim