 There are two home centers in my local area, Lowes and Home Depot. So I decided to look at both locations for the best deal regarding price and quality of material.
My first stop was Lowes. They sell the infamous “white wood” as their #2 grade lumber. I’m not sure what species of wood it actually is, but I do know that it is soft, light, spongy and full of knots. Still more than serviceable for a toolbox though. I rooted thru the stacks and verified that there were a couple of boards that could be pressed into service. I also noted the price and then headed to the Home Depot.
Home Depot’s offering in the #2 lumber is actually some version of pine. Still not sure what species, but pine non the less. Much better looking stuff and far more structurally sound than the “white wood”. Still pretty light. I compared a 1″x10″x8′ pine board to the eastern red cedar that they had and the pine was only slightly heavier. The price was within pennies of what I had found at Lowes so I opted for the Home Depot pine. It only took about forty five minutes to cull through the racks and find boards that met with my approval. In the end I purchased (1) 1″x10″x8′ board, (2) 1″x12″x4′ boards ($4 cheaper than buying a single 8′ board) and (1) 1″x4″x8′ board. I doubt that I will need the 1×4 but, better safe than sorry.
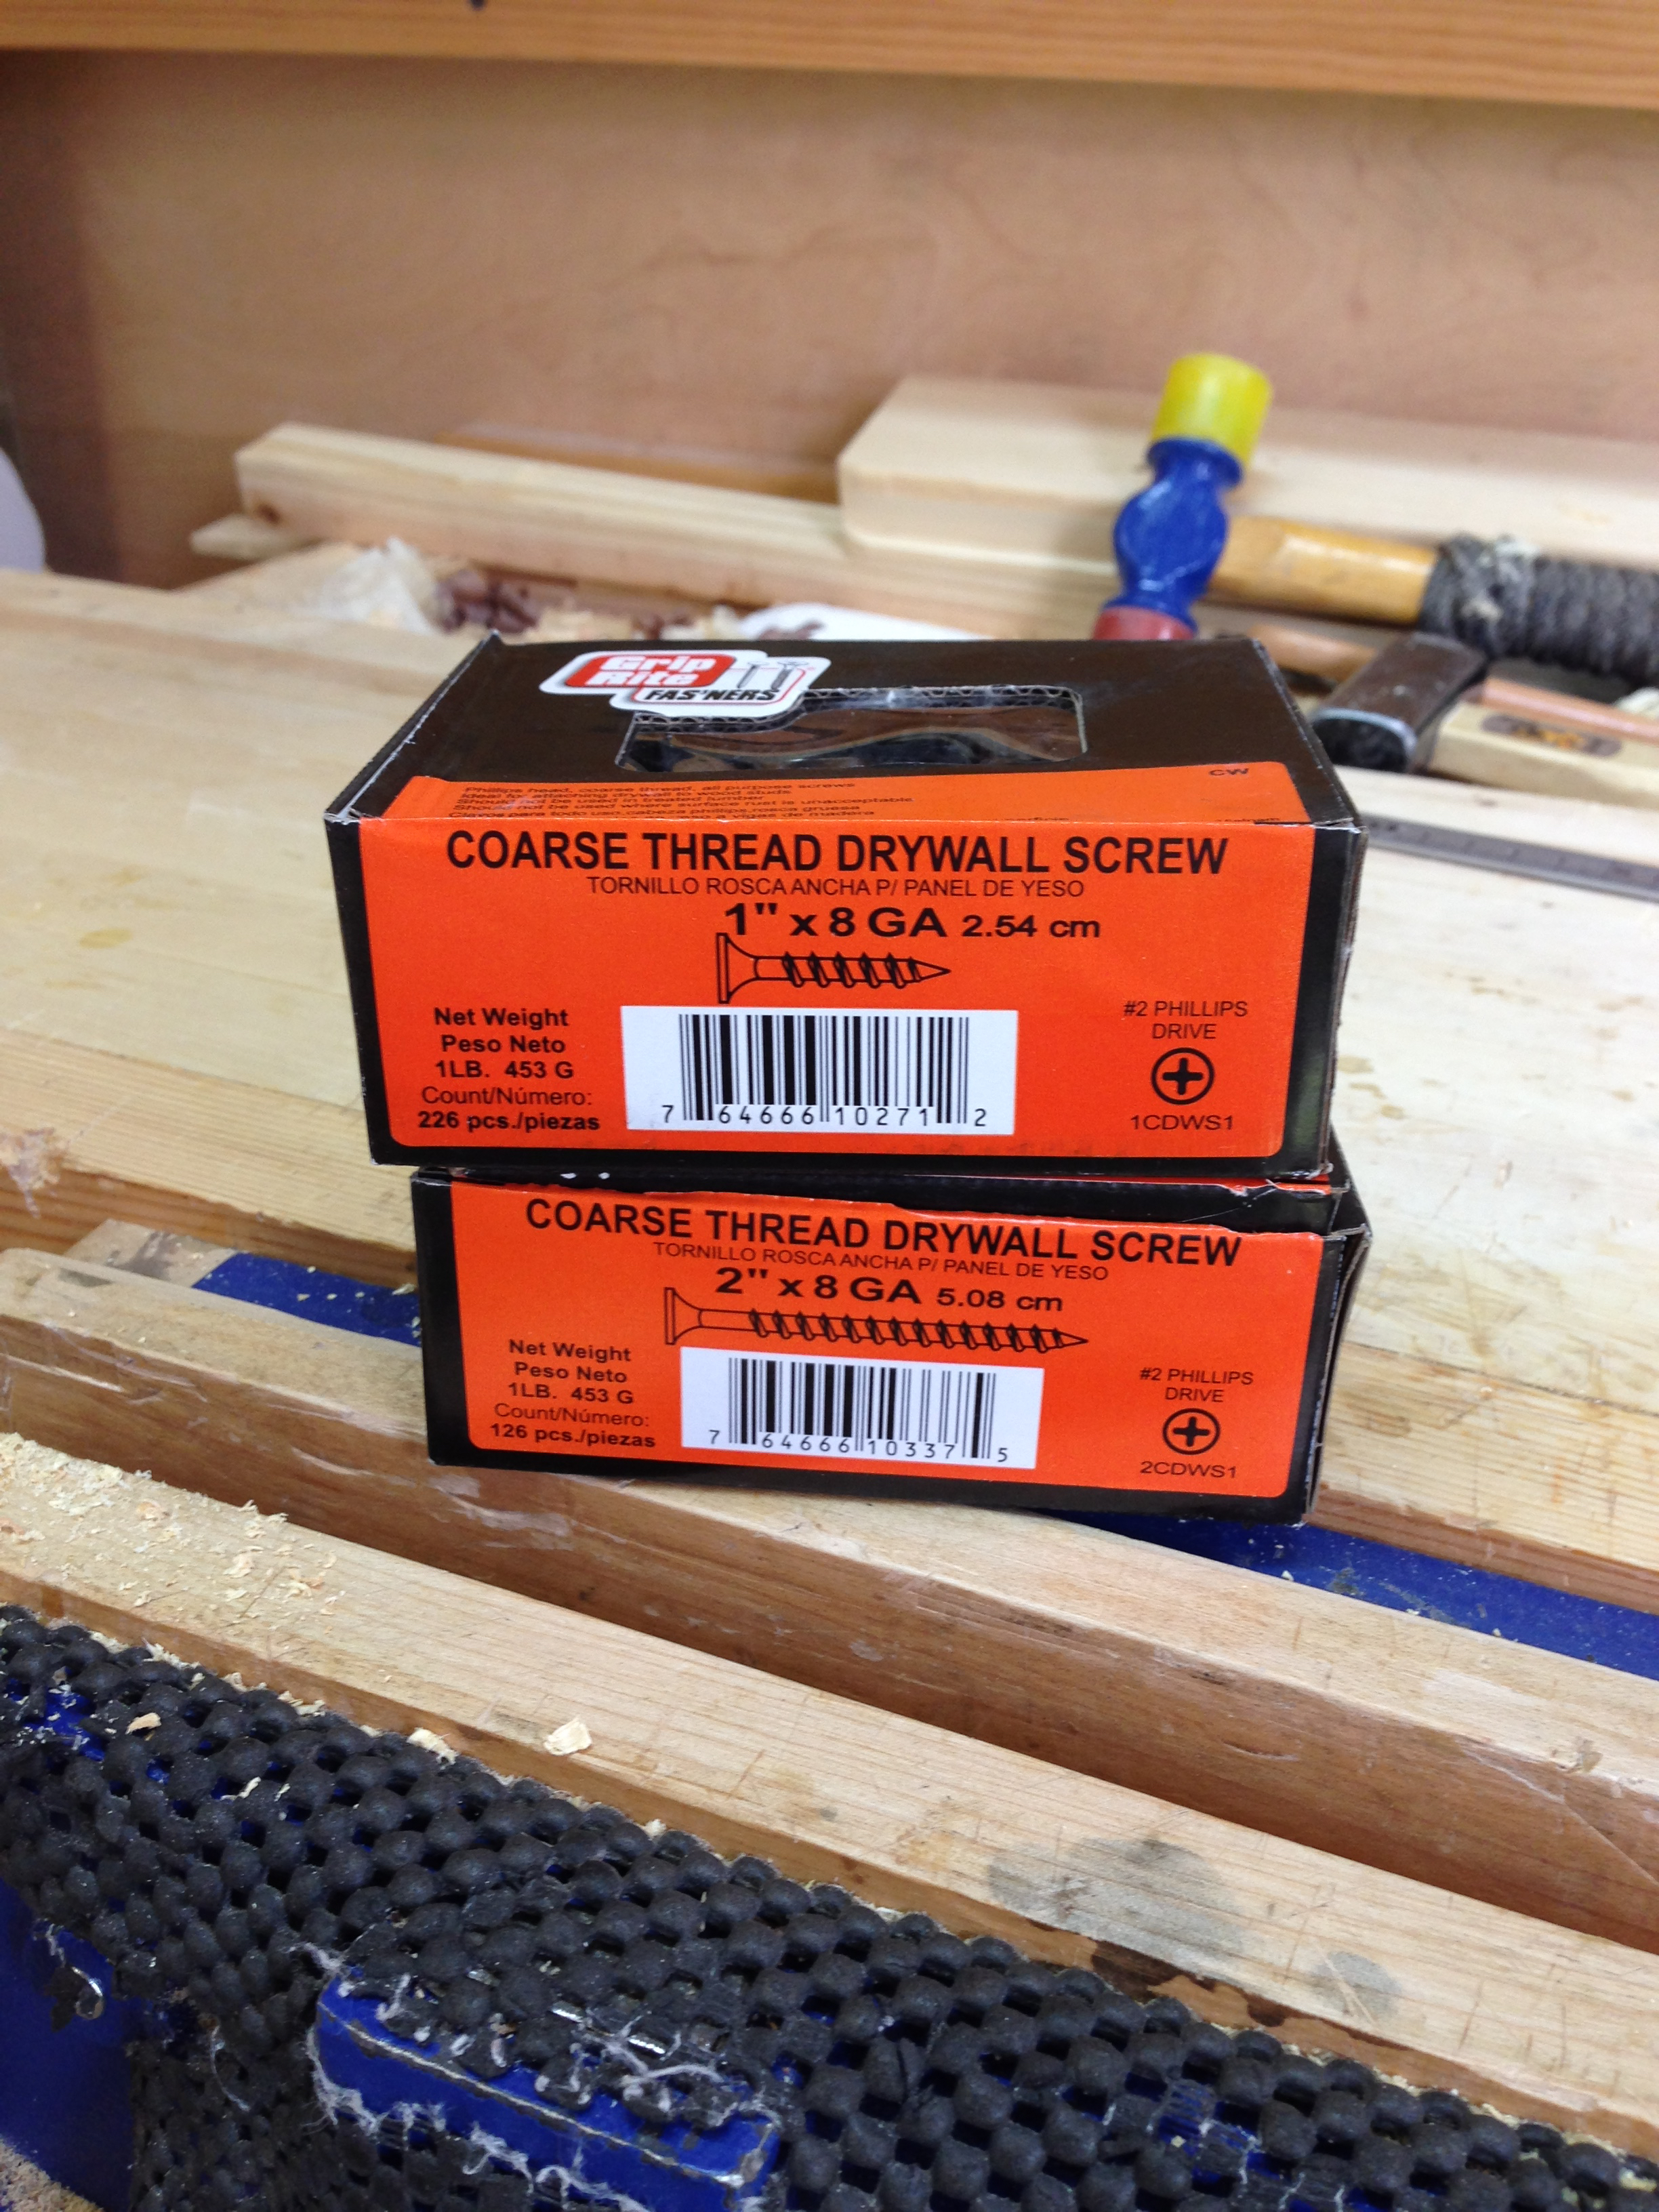
I also needed to purchase two lengths of screws. For assembling the majority of the box I need 2″ long screws. For attaching the battens to the lid I needed 1″ long screws. I went with the good old standby, coarse thread drywall screws. They are inexpensive and will work just fine for holding this toolbox together. I wouldn’t use them for any furniture building though. Hell, their even black oxide finish. So I get a “decorative” bonus to boot.
All said and done I left Home Depot $50 poorer, but had all that I needed to build at least one toolbox. I jumped the gun and started cutting the 1×10 before I took a photo, but here is generally what I am starting with. Actually not too bad and I can cut around most of the knots.

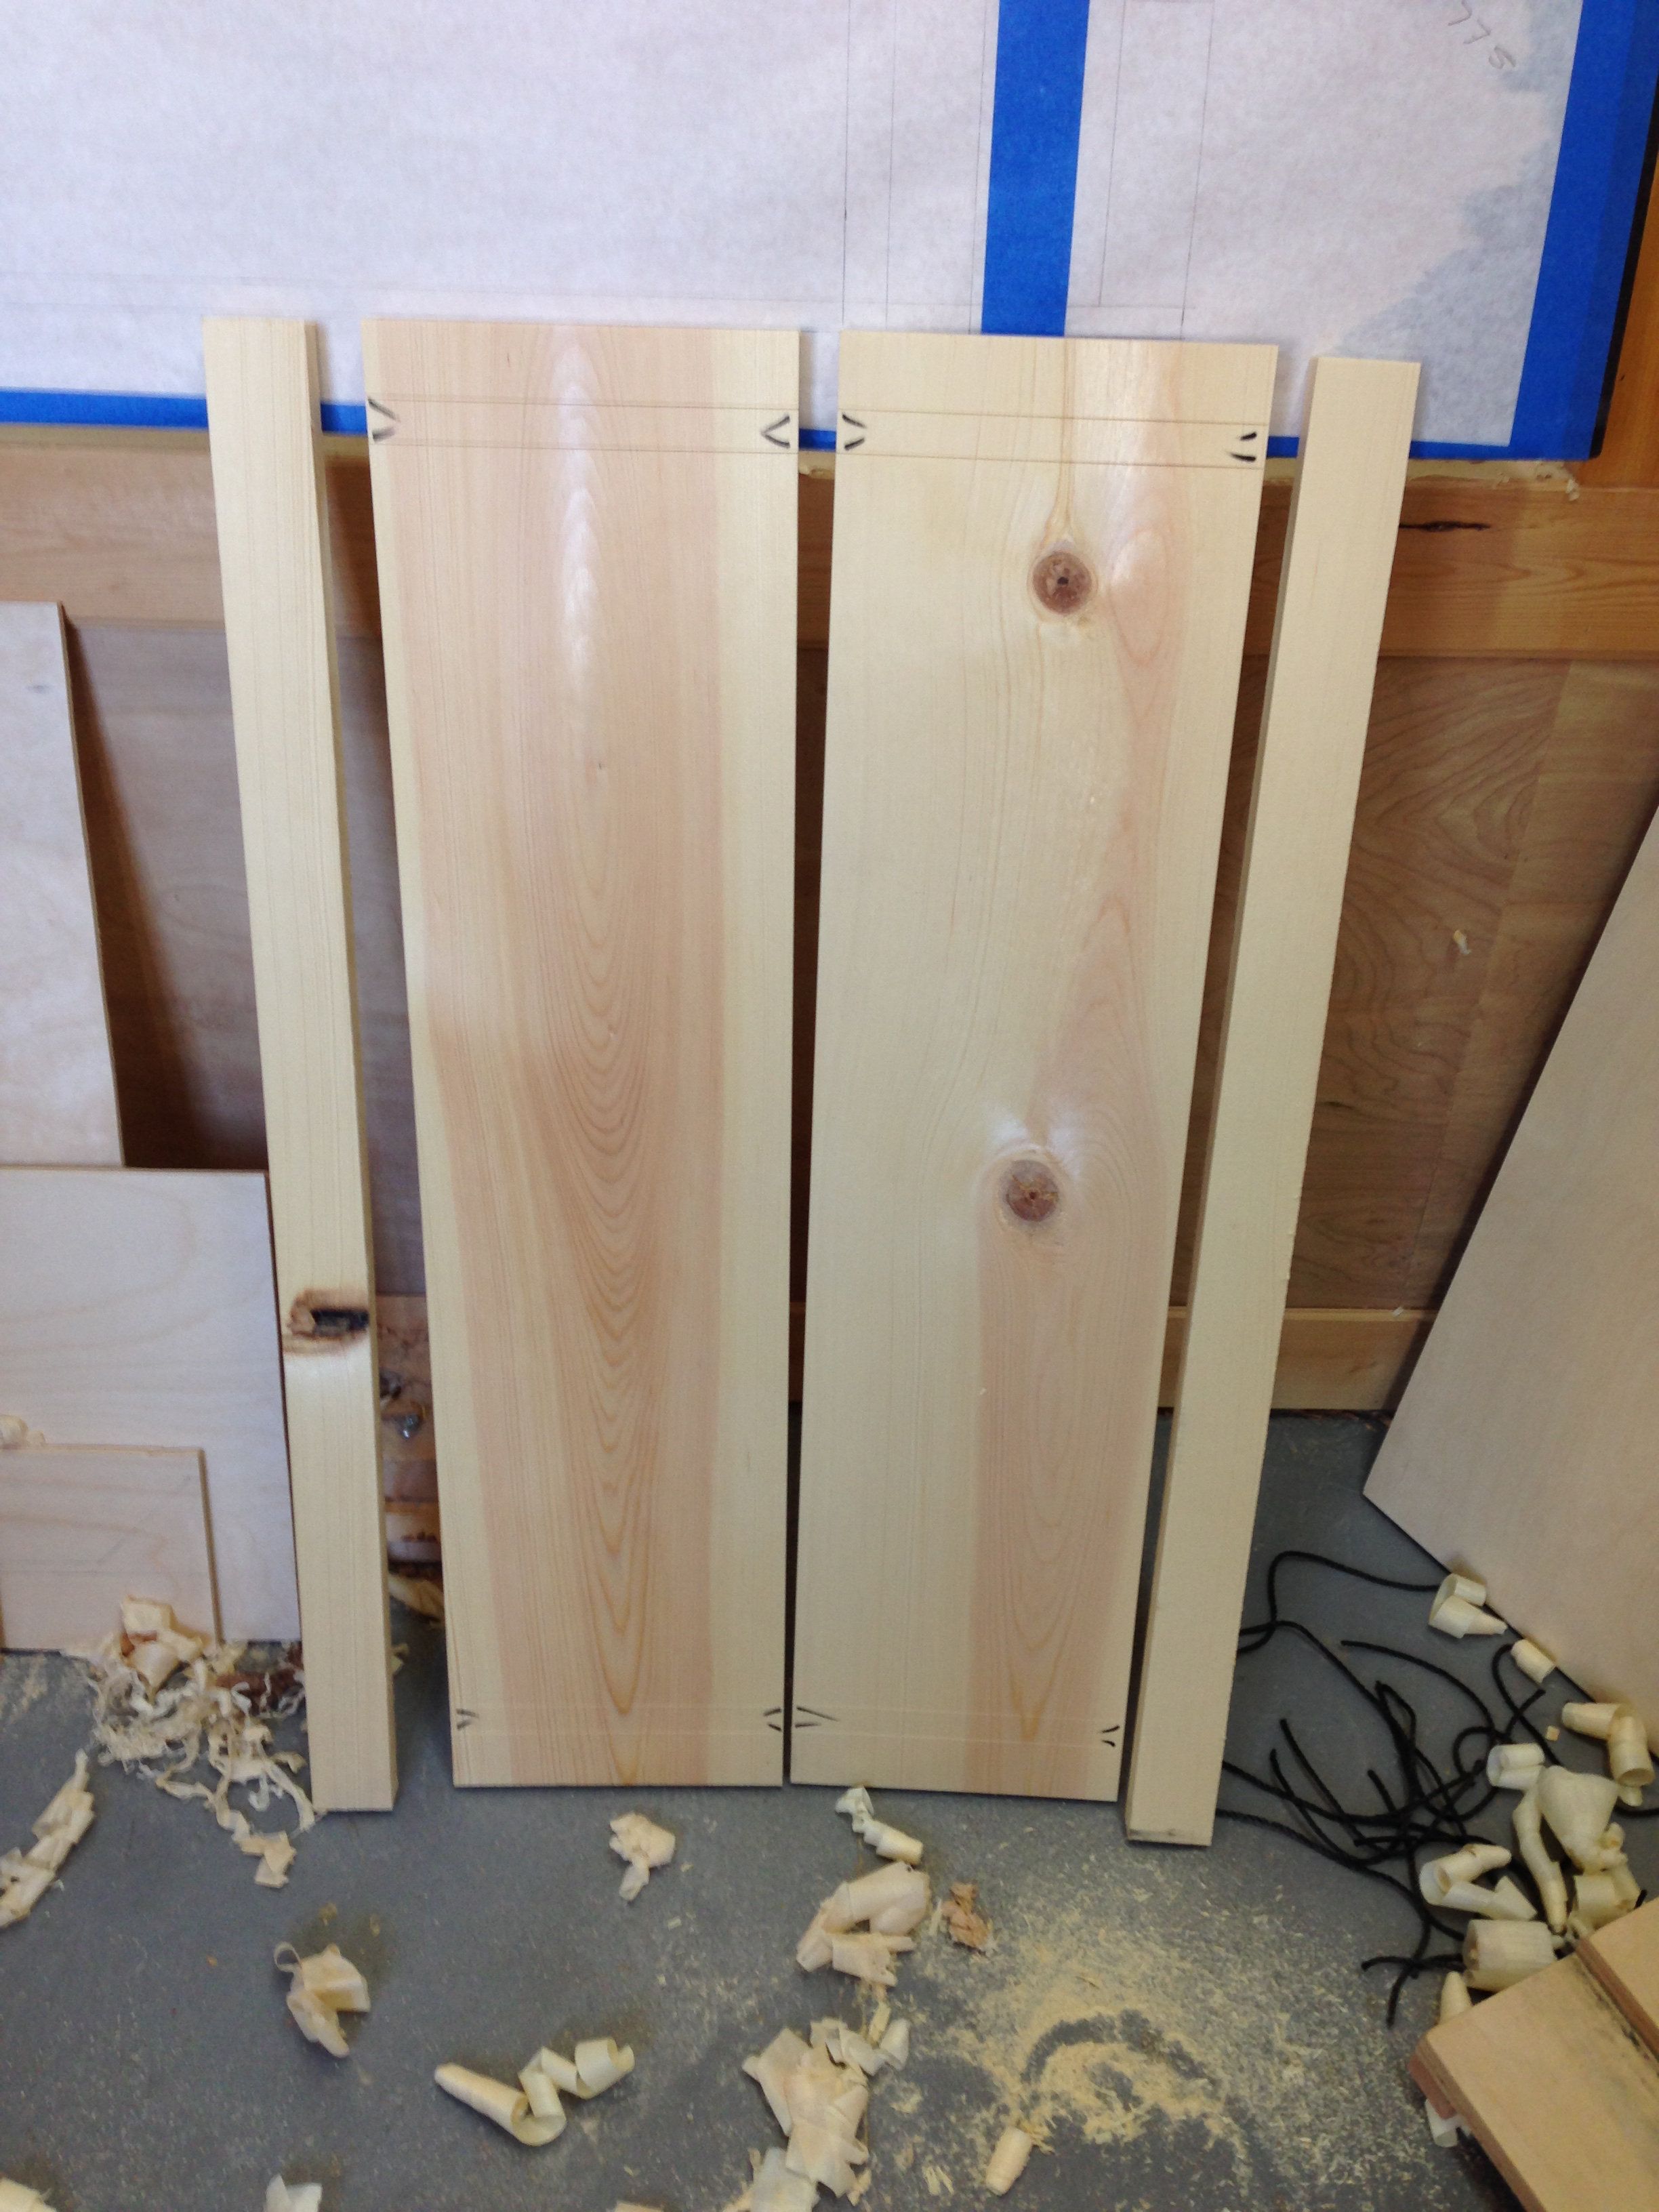
The required length and width of the sides was pulled directly from my full-scale shop drawing. I marked the boards and went to work with the saw.

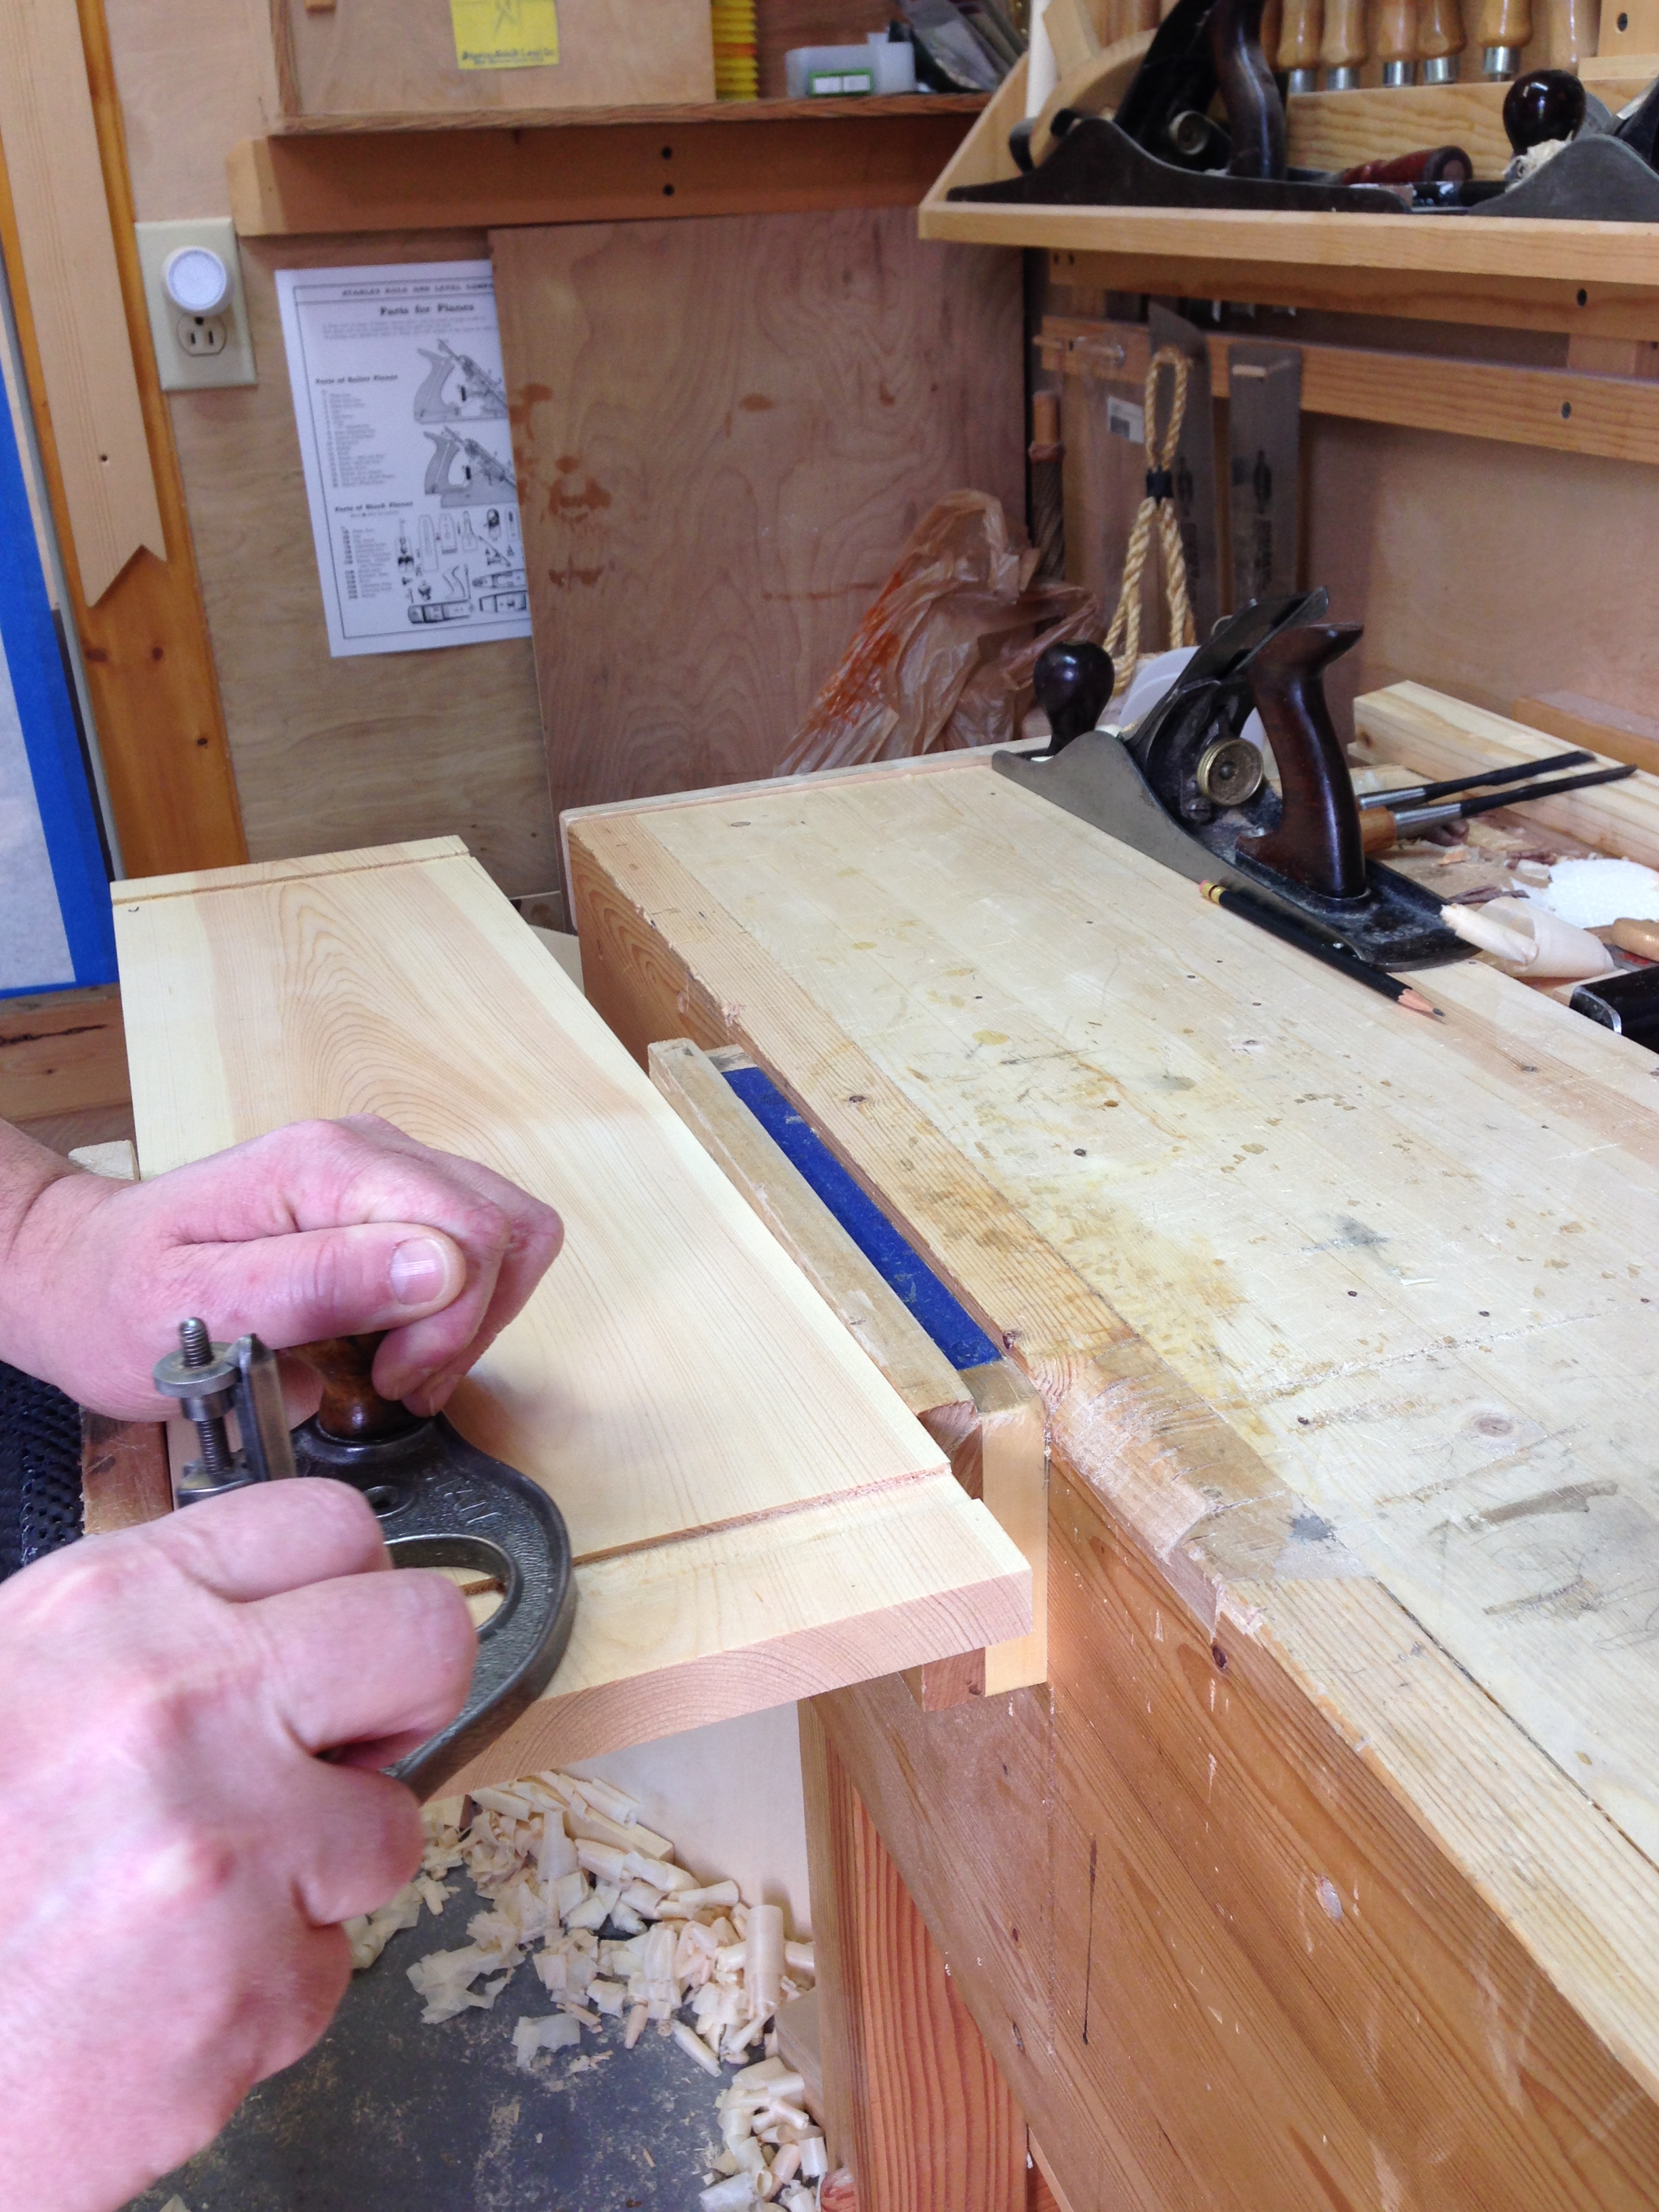
The end pieces for the toolbox were then cut per the drawing as well. All of these boards were surface planed with the #5 jack and had their ends squared on a shooting board. I paid particular attention and made sure that the corresponding pieces were exactly the same size. With that done I clamped the sides together in the vise and gang marked them for the housing dados.
There are a lot of ways to create and fit a housing dado. I simply marked mine to be narrower than the end boards. Then chopped, paired and finally leveled them up with a light skim of the router plane. I then planed the end boards until they fit snugly into the dados.
To lay out for the screws I took a few minutes and set up two pair of dividers so that the screw holes would be spaced uniformly. The first pair of dividers were set so that they stepped off across the width of the side board exactly equal to the number of screws that I wanted to install. So (5) steps for (5) screws. The other set of dividers were set to exactly half the setting of the first pair. This will give me the offset from the edge of the board.
Draw a center line and set out the offset from the edge with narrower pair of dividers.
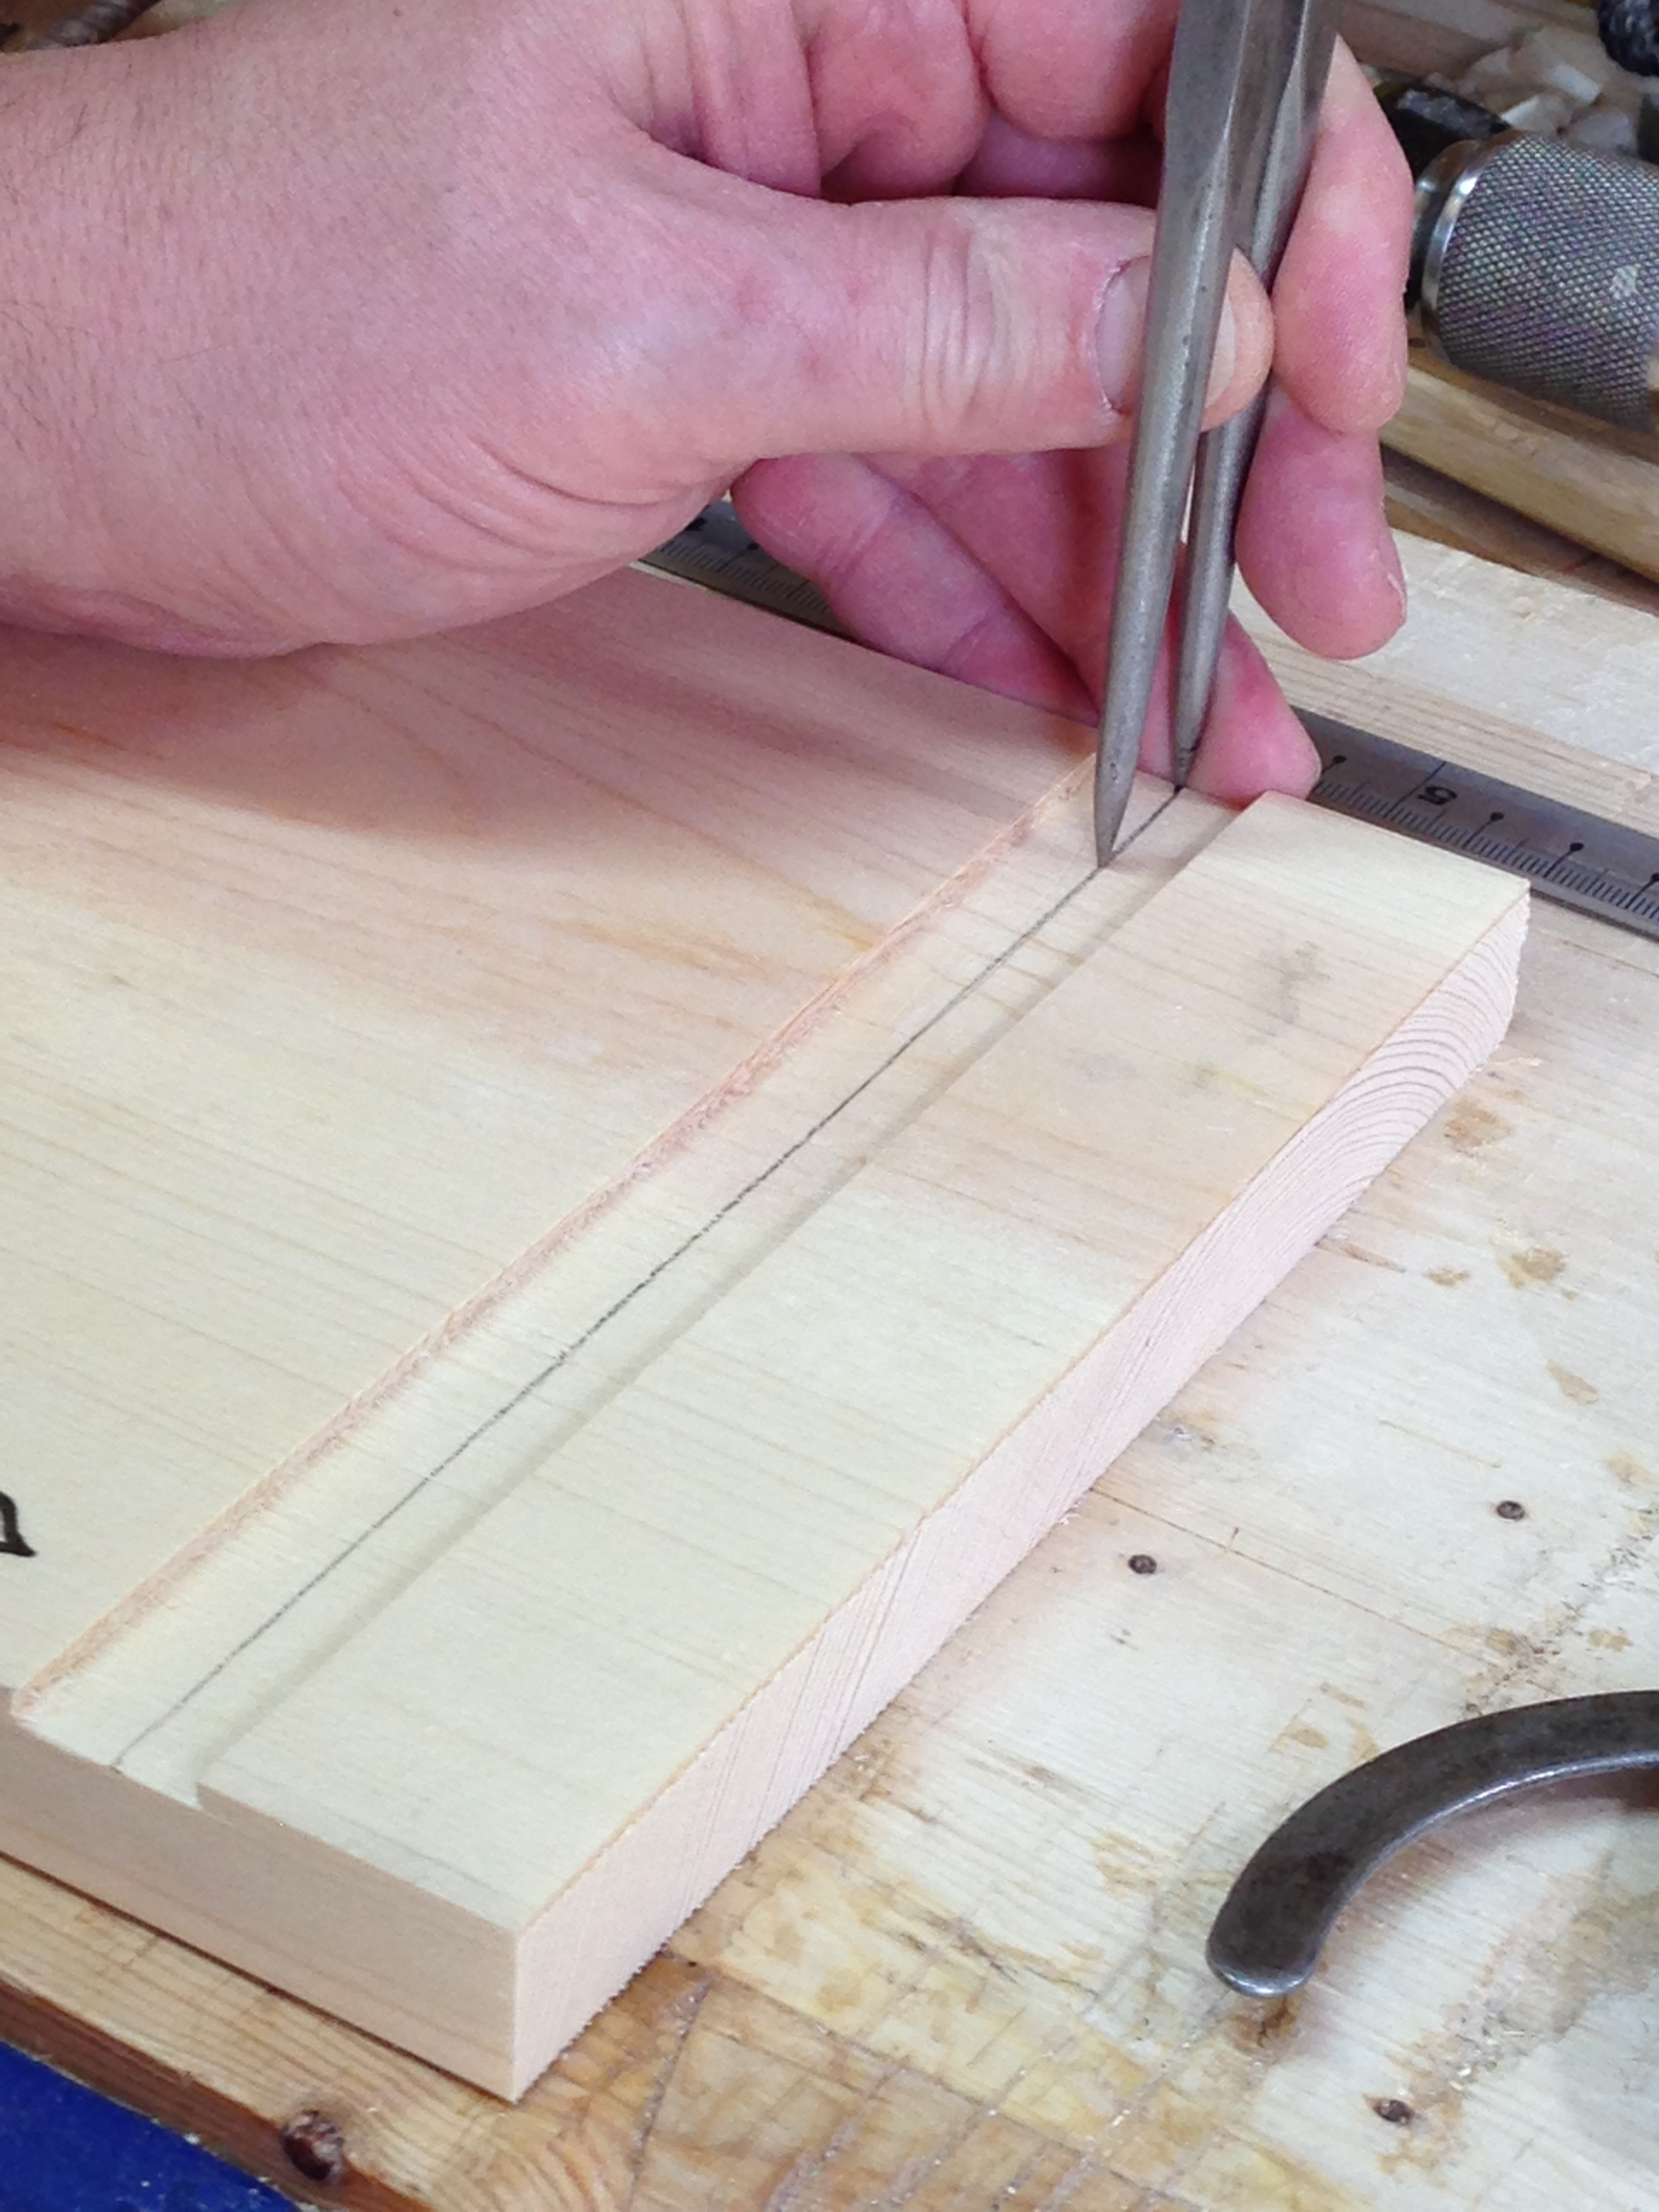
Step off the locations for the remaining screws with the other pair of dividers.

With all of the holes located, it was time for the drill. First, I drilled a clearance hole that the screw will push thru. No thread engagement here.

Then I added a countersink so that the head of the screw will set just below the face of the board.

Note that there are a couple of edge knots that I couldn’t avoid including. So I positioned them at the top edges of the end pieces. They will eventually be covered by the end caps and won’t be visible nor be able to collect any debris. Lastly a quick dry fit to ensure that all is copacetic so far.

Next up will be to size and thickness the bottom board and then some initial assembly.

I’m following along because I have a bunch of tools that I need to be able to move and I figure that a few of these boxes will be easier to manage than a giant tool chest. I got my wood from Home Depot as well. The store here in Toronto had 4′ pine shelving 1x10s for about $6. I’ll glue on some scraps to make them a little wider. Great blog.
Thanks Paul! I would much rather move a couple of 50lb boxes than to try and lug around a 100lb tool chest. I’ll have to keep an eye out next time for those shelving boards. That’s a pretty good price.
Surface planning — planning for smooth and flat or just smooth (leaving the fasteners to draw it all up)? When I look at pine at the local big box stores, the wide stuff usually has a decided bow in the center for the width.
Regards,
Mike
Smooth and flat-ish. Flat is good but not essential for this application. Like you said, the screws will draw it up. At the home center I look for the obvious things first. Little to no runout of the grain on the faces, very few knots and no twist. Cupped I’m not too anal about. Joinery will usually remedy most of it. Another thing I look for is dry. I’m not too scientific about it. I just go by weight. Since all the boards in a stack are the same size, weight is generally an indicator of how dry a board is. If its fairly dry, it probably won’t move all that much more once I get it home and acclimated. Of course once in a while I’ll get a board that is dry but under tension. All bets are off with those.
Jeez, you’re almost done already. I’m eager to see what you do for surface finish.
I’m actually farther along on the box than I am with the writing.
Ask and ye shall receive. First post is now up on the uzukuri.
Pingback: Japanese Toolbox-Progress 3 | GREG MERRITT – BY MY OWN HANDS