 Progress marches on. By drips and drabs over the course of the week and with a little more gusto this weekend.
Most evenings this past week I was able to slip out into the workshop and chip away at the bookcase. I managed to cut and size the parts for the angled shelf and the lower shelf that is located just above the drawers. I then glued and pegged together the two boards that make up the angled shelf and set them aside to dry.
Once I had the bottom and lower shelf fitted, I could locate and cut the required dados for the drawer dividers. Then a quick dry-fit to verify I hadn’t gone off the rails yet.
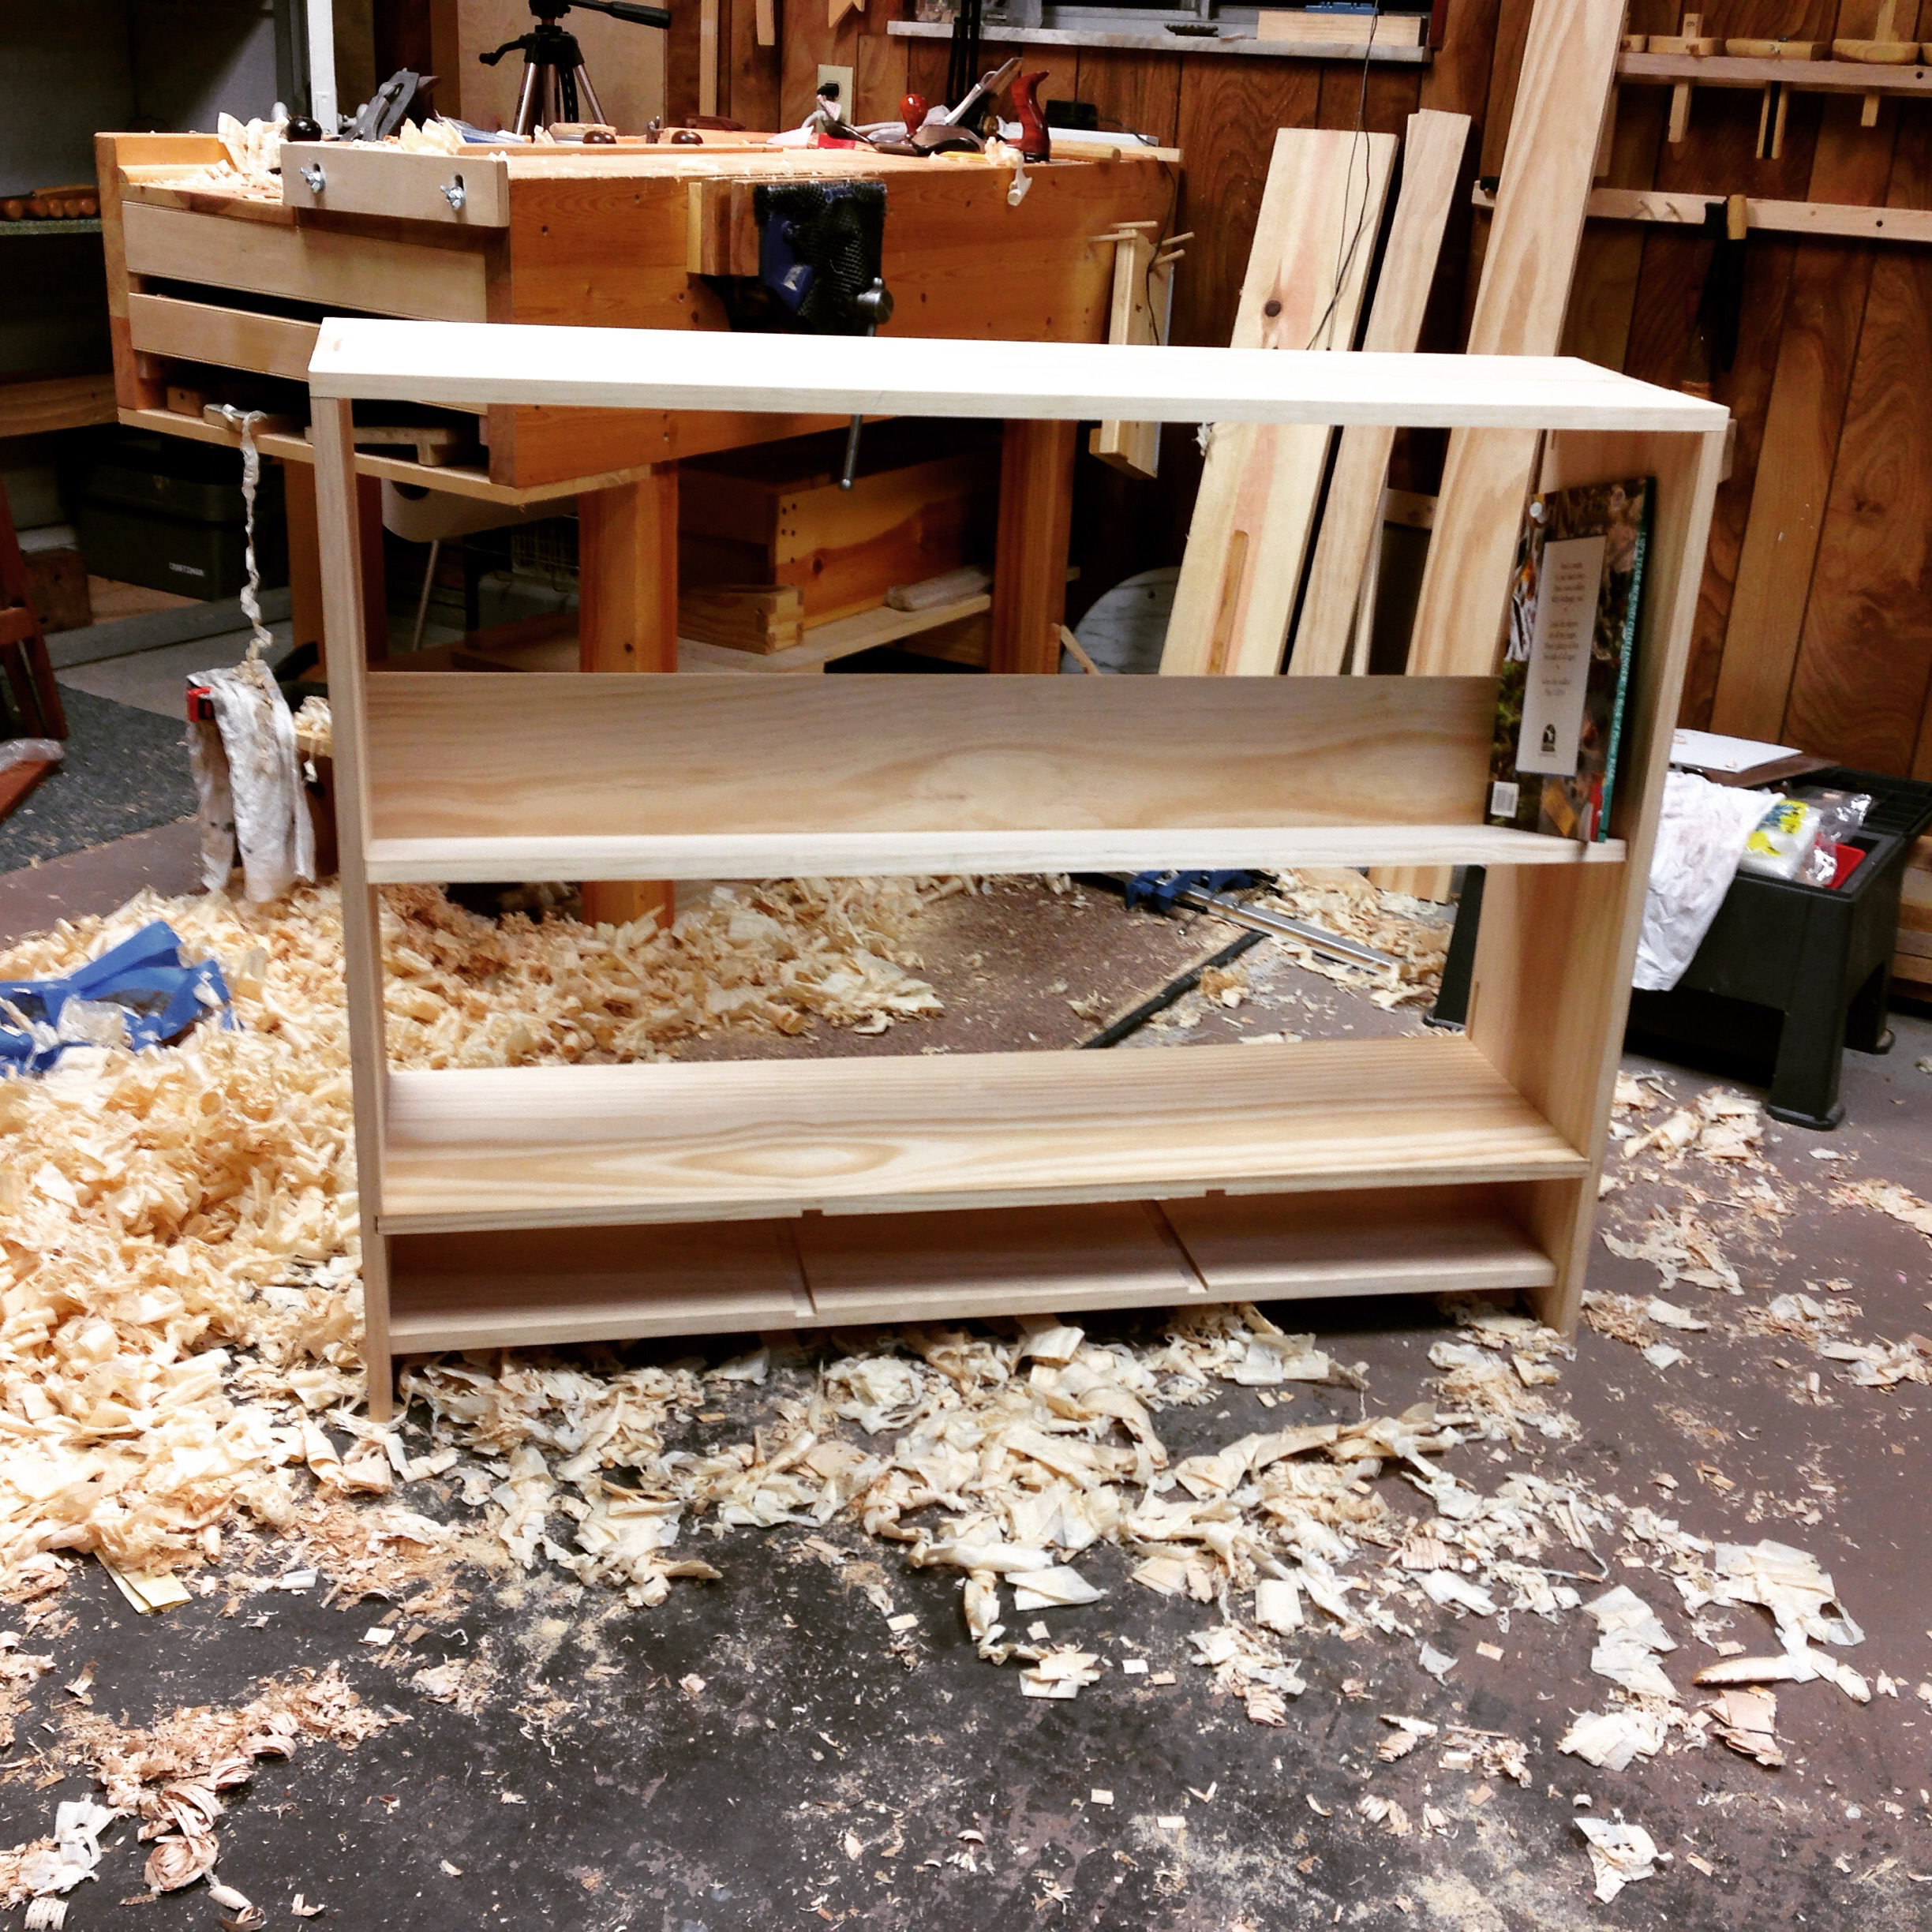
A quick word about the marginal pine from the big-box store. It’s actually pretty decent clear pine, but these wide boards are prone to cupping and bowing. I know this and try to use it to my advantage as best that I can. Case in point is the two boards that create the drawer bank. I oriented them so that they are bowing towards each other. This will keep them tight to the dividers during installation and should flatten them out once everything is assembled and further supported by the aprons. Speaking of aprons….
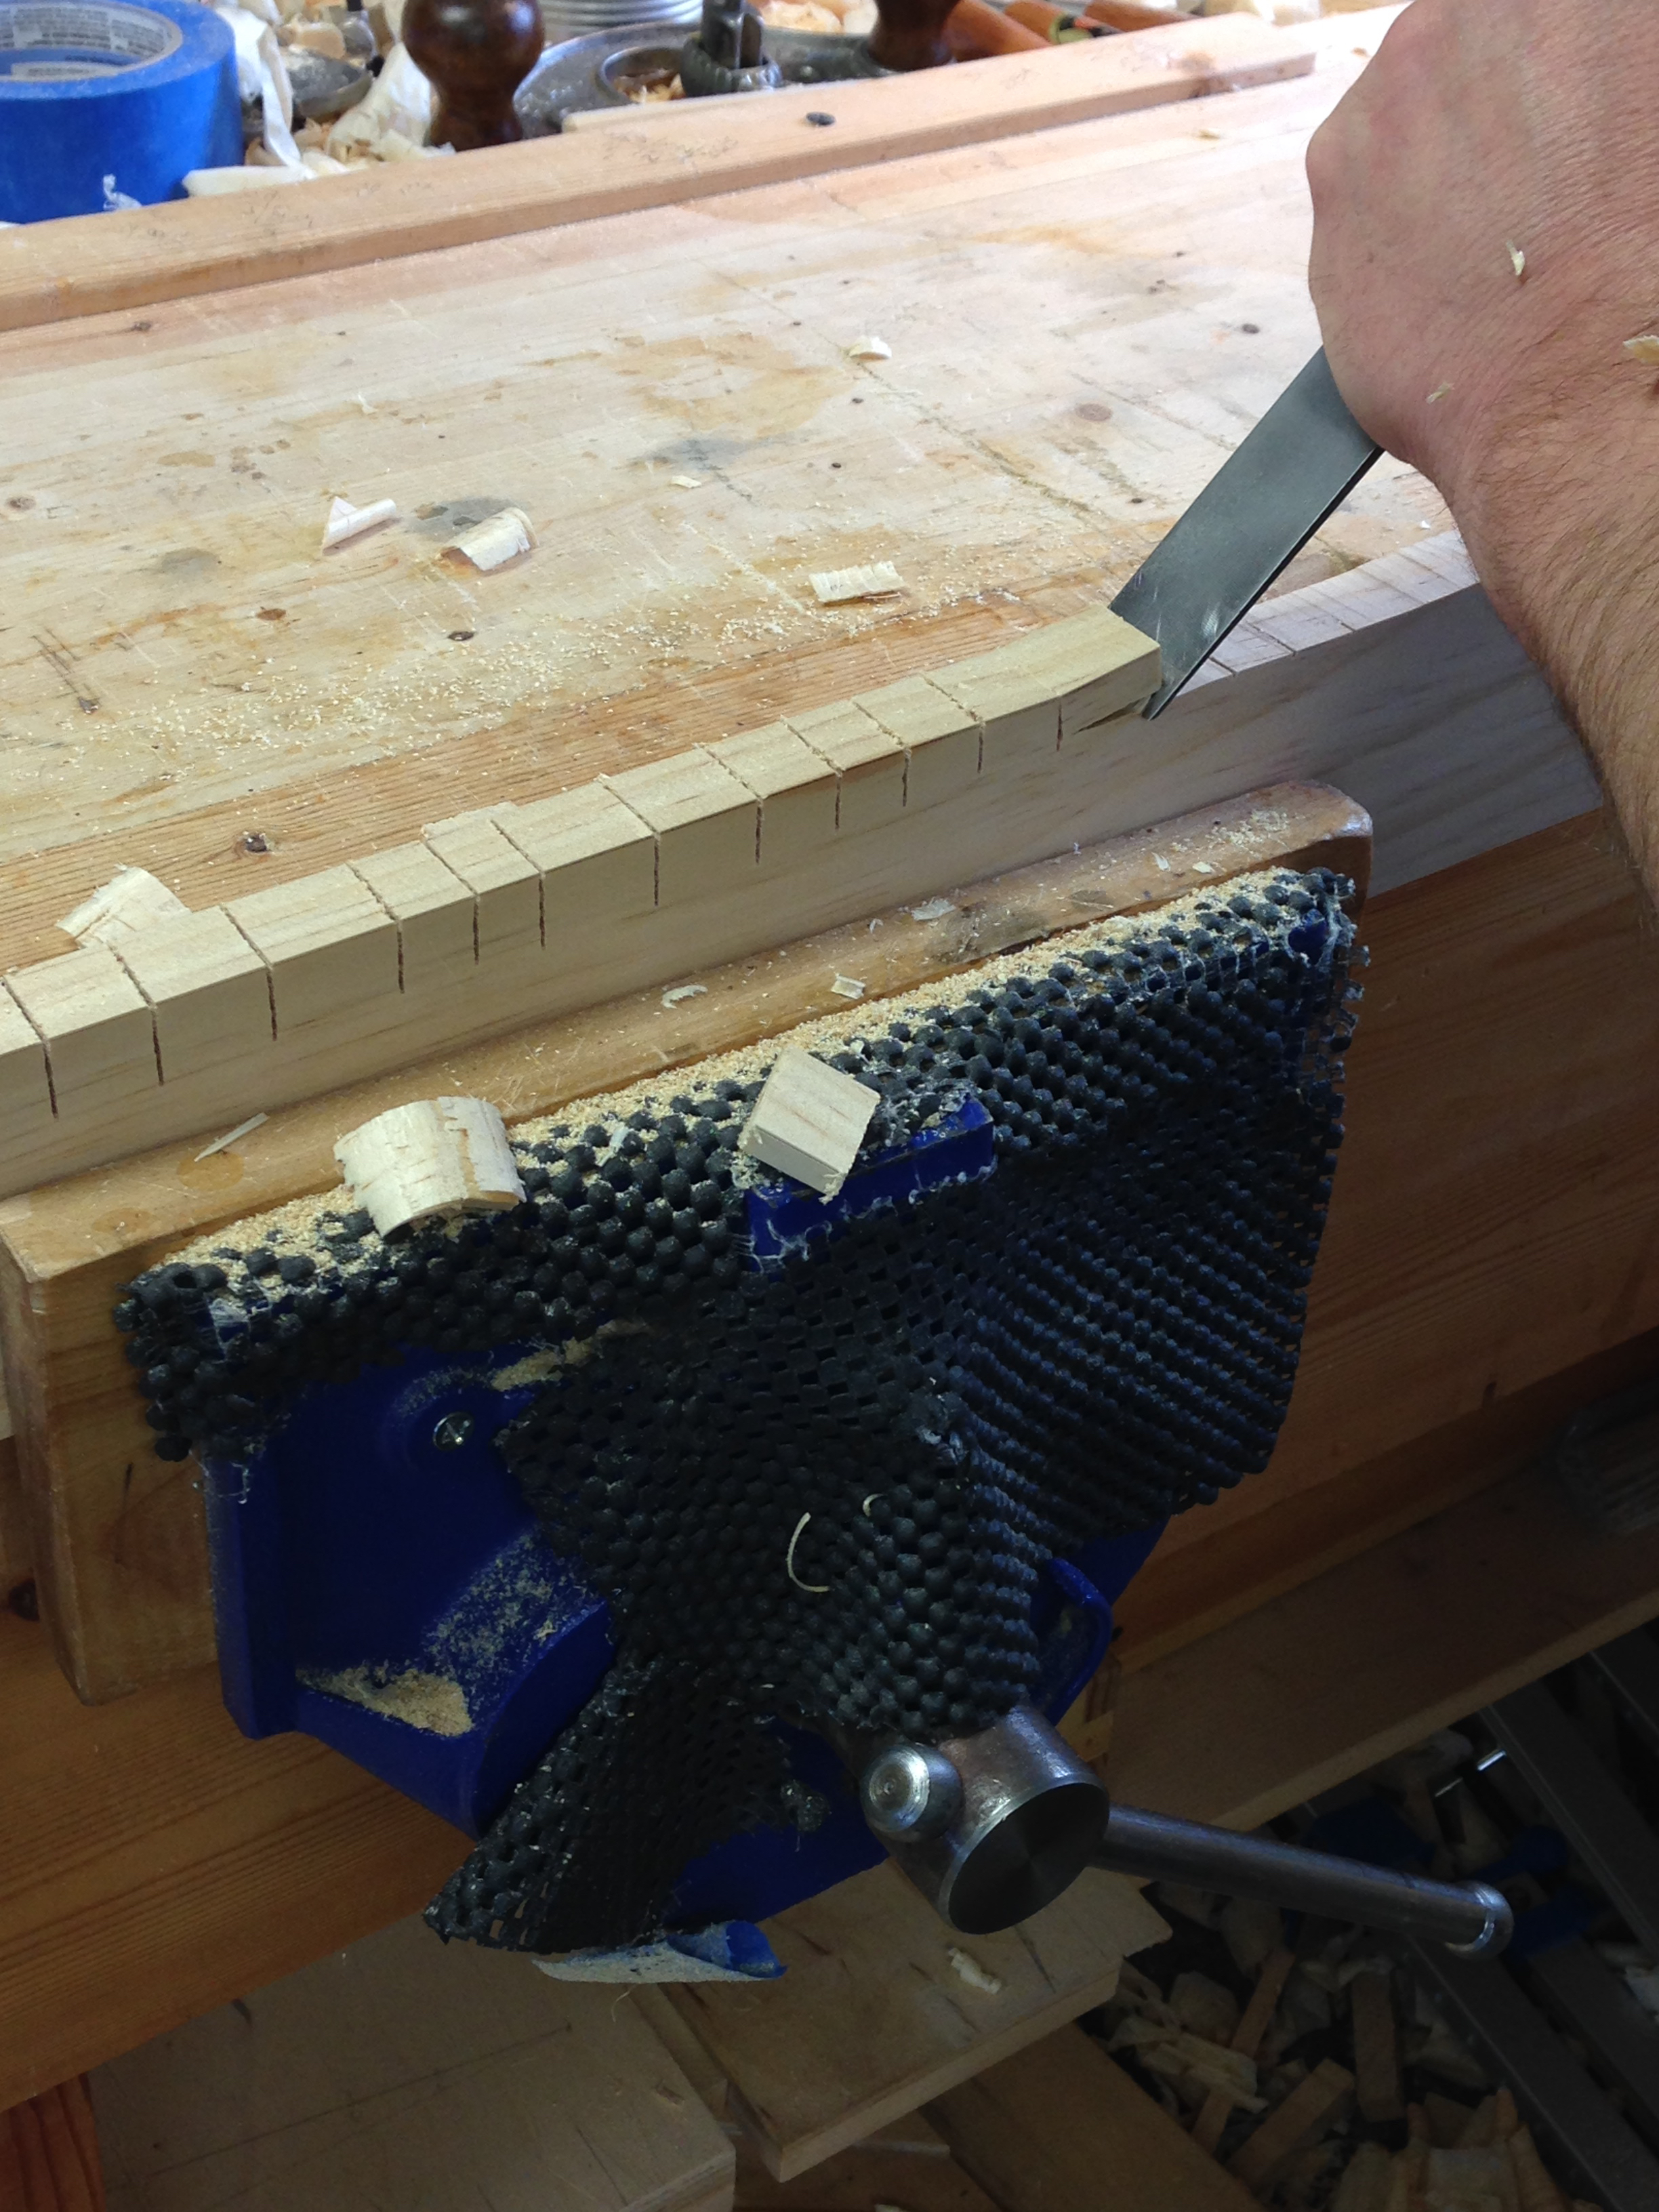
There are four aprons required for this assembly. Three of them will receive a long sweeping arc and the lower bottom apron will have more of a scroll detail. I started with the aprons that needed the sweeping arc. To set out the arc, I first marked the center depth and the extreme terminal ends. Then employed the ye old bent stick method. Since I only have two hands, I clamped a couple of stop blocks at the terminal ends, bowed the center of the stick and traced the resultant arc.

There are several ways to remove the waste wood. You could use a coping saw or a turning saw, but I opted to use stop cuts, chopping with a chisel and followed up with a spokeshave. I find this method pretty quick and somewhat therapeutic.
Stop cuts and chopping out the waste.
Spokeshave work.

A completed example.

To make the more decorative apron I first made myself a pattern. Typically I like to use 1/4″ plywood for patterns, but I didn’t have any large enough for this. So I found a piece of scrap 1/4″ beadboard and pressed that into service. To draw the design I delineated the transition points and freehand sketched the shape. To remove the waste I then used the same method outlined above with the addition of some coping saw work. The cleanup required a little rasp work as well.

Once the pattern was traced onto the apron, the cutting and shaping was just the same as to make the pattern.

So yet another dry-fit to check my progress and get in a little practice for the dreaded glue-up.

Still lots of work to do. I want to glue and peg the aprons to their respective shelves before assembling the entire case. I need to add the decorative elements to the feet and the side panels. I also need to fabricate the rear panel for the drawer bank and add the associated grooves to house it. Damn, I’ve a good way to go yet.

Pingback: Bookcase-Progress 2 | GREG MERRITT – BY MY OWN HANDS
It’s looking great. I do enjoy your posts
Thanks Randall!
It’s coming out nicely. Yes, a few steps to go but the way is the goal. 🙂
Aren’t we doing it because it’s fun to do?
Cheers,
Stefan
Thanks Stefan. I agree that we should enjoy the journey. However, in this case I’m getting pressure from management(wife) to get this bookcase done and installed. 😉
Yeah, I know that kind of management attention pretty well .-)
The apron Under the drawers makes a big difference; it comes out nicely. You write:
“I then glued and pegged together the two boards that make up the angled shelf”
That would prevent sagging under the book load.
I see you have 3 holdfast but I don’t see any hole in your bench; where do you use them?
Sylvain
You are correct about the shelf. I’m working on a post now that addresses some of the structural elements with this bookcase. It looks as though I’m pushing the limits with pine for this one but, in reality I’m not. More on that to come.
The holdfasts…the smallest one I’ve had for almost twenty years and I used to have a set of sawhorses that I used it in regularly. The other two are Gramercy and I purchased them with the intent of adding holes in my bench. Just haven’t gotten around to it yet. After the move they ended up hanging on the rear apron of the bench. But I may soon be pressing them into service. Yet another post that is currently in the works.
It looks awesome! The scroll work in particular has turned out nicely. I notice that you and I make our arches/curves the same way…great minds I’m not sure if you have mentioned finish as of yet, but I was wondering what you are planning on using.
Thanks Bill! Yep, I like the way the scroll turned out too. Adds a little movement to the piece. I’ve used just about every hand tool method out there to cut arches/curves. Like you, I find the stop cut and chisel method quick and easy. So yea…great minds.
The finish on this one is still up in the air. I have a little experiment planned though. I’m going to try and tint BLO with either dye or artist pigments. Artist oil paint is linseed oil and pigment. So in theory it should work. Basically a poor man’s version of wood conditioner and gell stain rolled into one. Won’t know till I try.
It looks great, Greg!
Thank you Emilio!
Hey Greg,
I love the profile that you used on the apron. It looks great!
Jonathan
Thanks Jonathan.
Pingback: Bookcase-Progress 4-Structural Notes | GREG MERRITT – BY MY OWN HANDS