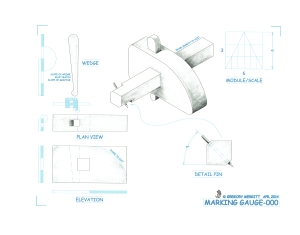
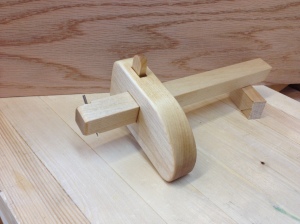
 I know, I know, there are a plethora of marking gauges out there to be had. You can pick one up second hand for just a few dollars or you can spend some serious money on a fancy new model. I have a few of the former but none of the latter. From my experience the marking gauges that I’ve purchased have all been lacking in one way or another. Some were hard to adjust, some wouldn’t hold there adjustments, some had beams that were too loose in their mortises and some worked just fine.
So why did I go to the trouble of designing and making myself a marking gauge? Because that is what I do. I make stuff. There is nothing more satisfying than making stuff with tools that you made yourself. Besides, making tools is a great way to practice precision in your skills. Making a marking gauge will cost you next to nothing, so a mistake won’t set you back much more than time.
 I designed and built this marking gauge over a year ago and it has been my only gauge since. It’s comfortable in my hand, its easy to adjust, it holds its setting and has the added bonus of the pin point being visible at all times during use. That last bit is thanks to a suggestion from Paul Sellers and it turned out to be a true gem. The only caveat is that the pin positioning means the gauge really only works on the push stroke. I have never found this to be problem. I’ve found that I actually prefer the push stroke. One other nice feature of this design is that it can be easily adjusted and set with one hand. I’m not saying that my gauge is better or worse than any other, but I like it and I thought you might too.
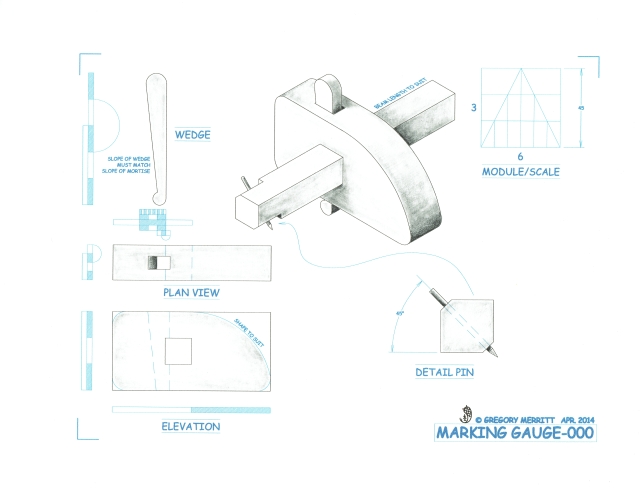
Originally I laid this gauge out using imperial dimensions. That works fine but I’m hooked on proportional layout and I find that the proportional layout will work universally for everyone. The layout is based on the chisel width that will be used to chop the beam mortise. I used a 16mm chisel, my chisels are a set of metric Narex. They are great but that is another post. So on my illustration, 1/3D=16mm. Your size will very if you use a different size chisel, but the gauge will look and function the same. Thanks to the proportional layout method. I would recommend using a 5/8″-3/4″ or 16mm-19mm chisel. The important thing is that you can use what you have available. Any dry, straight grained hardwood will work. Again use what you have. For the pin I used a heavy gauge darning needle, I’ve not needed to sharpen it in the last year. You can use a needle, a finish nail, a piece of piano wire or any other such thing.
Hopefully my illustration will be enough for you to build your own marking gauge but let me point out a few things that will make the build go a little smoother.
- Lay out your gauge full scale on a piece of heavy weight paper, plywood or any flat stiff surface. of course you don’t have much choice in this since I didn’t provide you with any traditional dimensions. I find a wood surface to work the best for this. As you lay out your module key the dividers will leave an indent in the wood. These indents make it easy to reset your dividers to a desired distance from the module key.
- Chop the beam mortise first then make a plug to install in the newly chopped mortise. This plug will prevent any major chip out of the beam mortise walls when you chop the mortise for the wedge.
- Make your beam any length you want but make it fit the mortise fairly snug. Sneak up on this, it a fine line between tight and loose.
- Shaping to fit your hand is a process. Go slow, use the gauge for a while and adjust as you see fit.
- Take your time and enjoy the process.
Greg Merritt


Thanks for this Greg. I will definitely put this project on my short, but browning, “must-do” list. I too have seen many second-hand, “vintage” ones for sale (ebay, etc.) but worried about precisely the same things – stock would be too loose, thumbscrew wouldn’t lock down the adjustment, needle badly worn. I wound up getting a new pricey one at but would have much preferred making one. Now with these steps and the illustration, I think I’ll give it a go as soon as my workbench is done.
“So why did I go to the trouble of designing and making myself a marking gauge? Because that is what I do. I make stuff.” Well said!
Your welcome Carlos. I would love to see a photo of your gauge when you have it built.
Pingback: Your Most Handy Measuring Tools | GREG MERRITT – BY MY OWN HANDS
Pingback: Hillbilly Tansu Marking Gauge | GREG MERRITT – BY MY OWN HANDS
Pingback: Graminho… – Marking gauge… | Coisas EM'adeira
Hi: Very nice! I’m new to all this, and I think this is one of the first mini-projects I’ll try. There were a few things I didn’t understand, though. You said: “As you lay out your module key the dividers will leave an indent in the wood. These indents make it easy to reset your dividers to a desired distance from the module key.”
What is meant by the module key, the dividers, and dividers’ distance from the module key? The diagram you posted looks quite elegant, and once I decipher it I’m sure it will be useful… Between the wedge and the plan view, for example, there’s a very detailed figure, but I don’t see what it is describing or how I can use it. Thanks, david