 I spent Saturday completing the side rail joinery. Basically just more of the same like I posted in Progress 5. With the side rails completed, I turned my attention to the front and rear bearers.
The first step was to cut the five rear and the five front bearers to rough length. This length is taken from the full-scale shop drawing. Adding additional length for the tenons on each end. Then I surface dressed all the pieces. Using one piece for a master, I once again turned to the full-scale shop drawing to establish the absolute distance between the tenons. I then clamped all the pieces together and marked the rest of the pieces from the master.
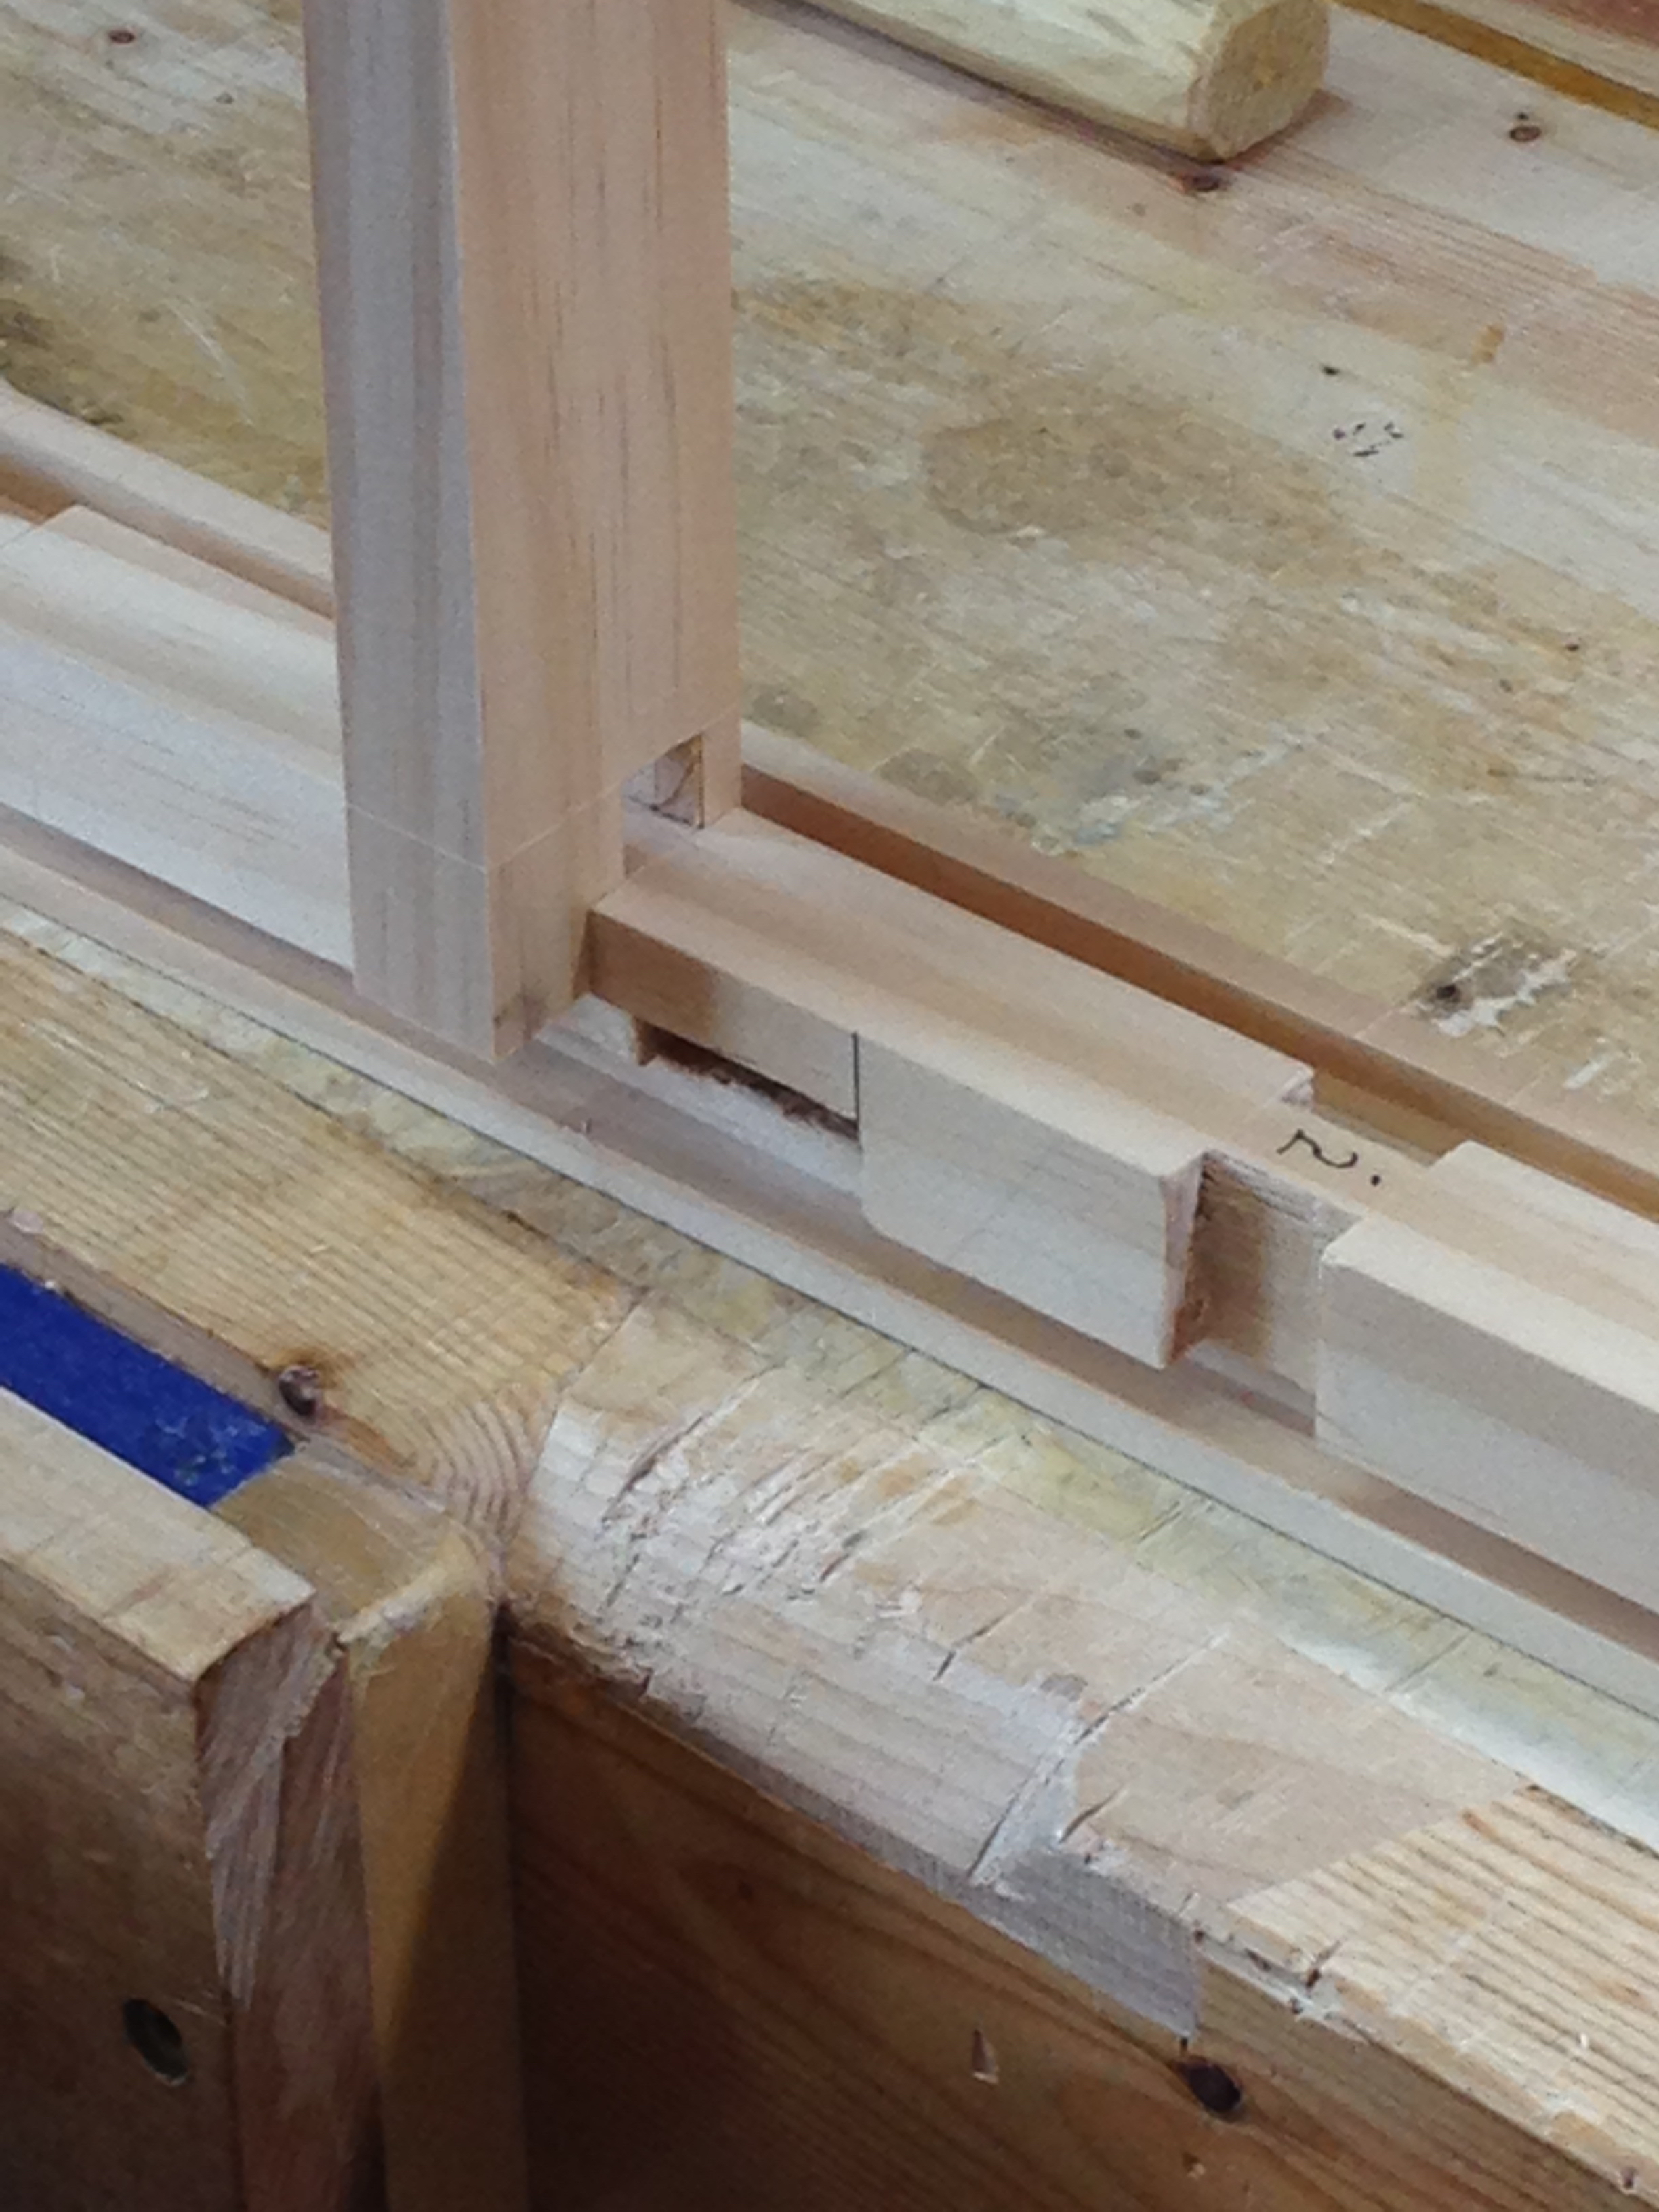
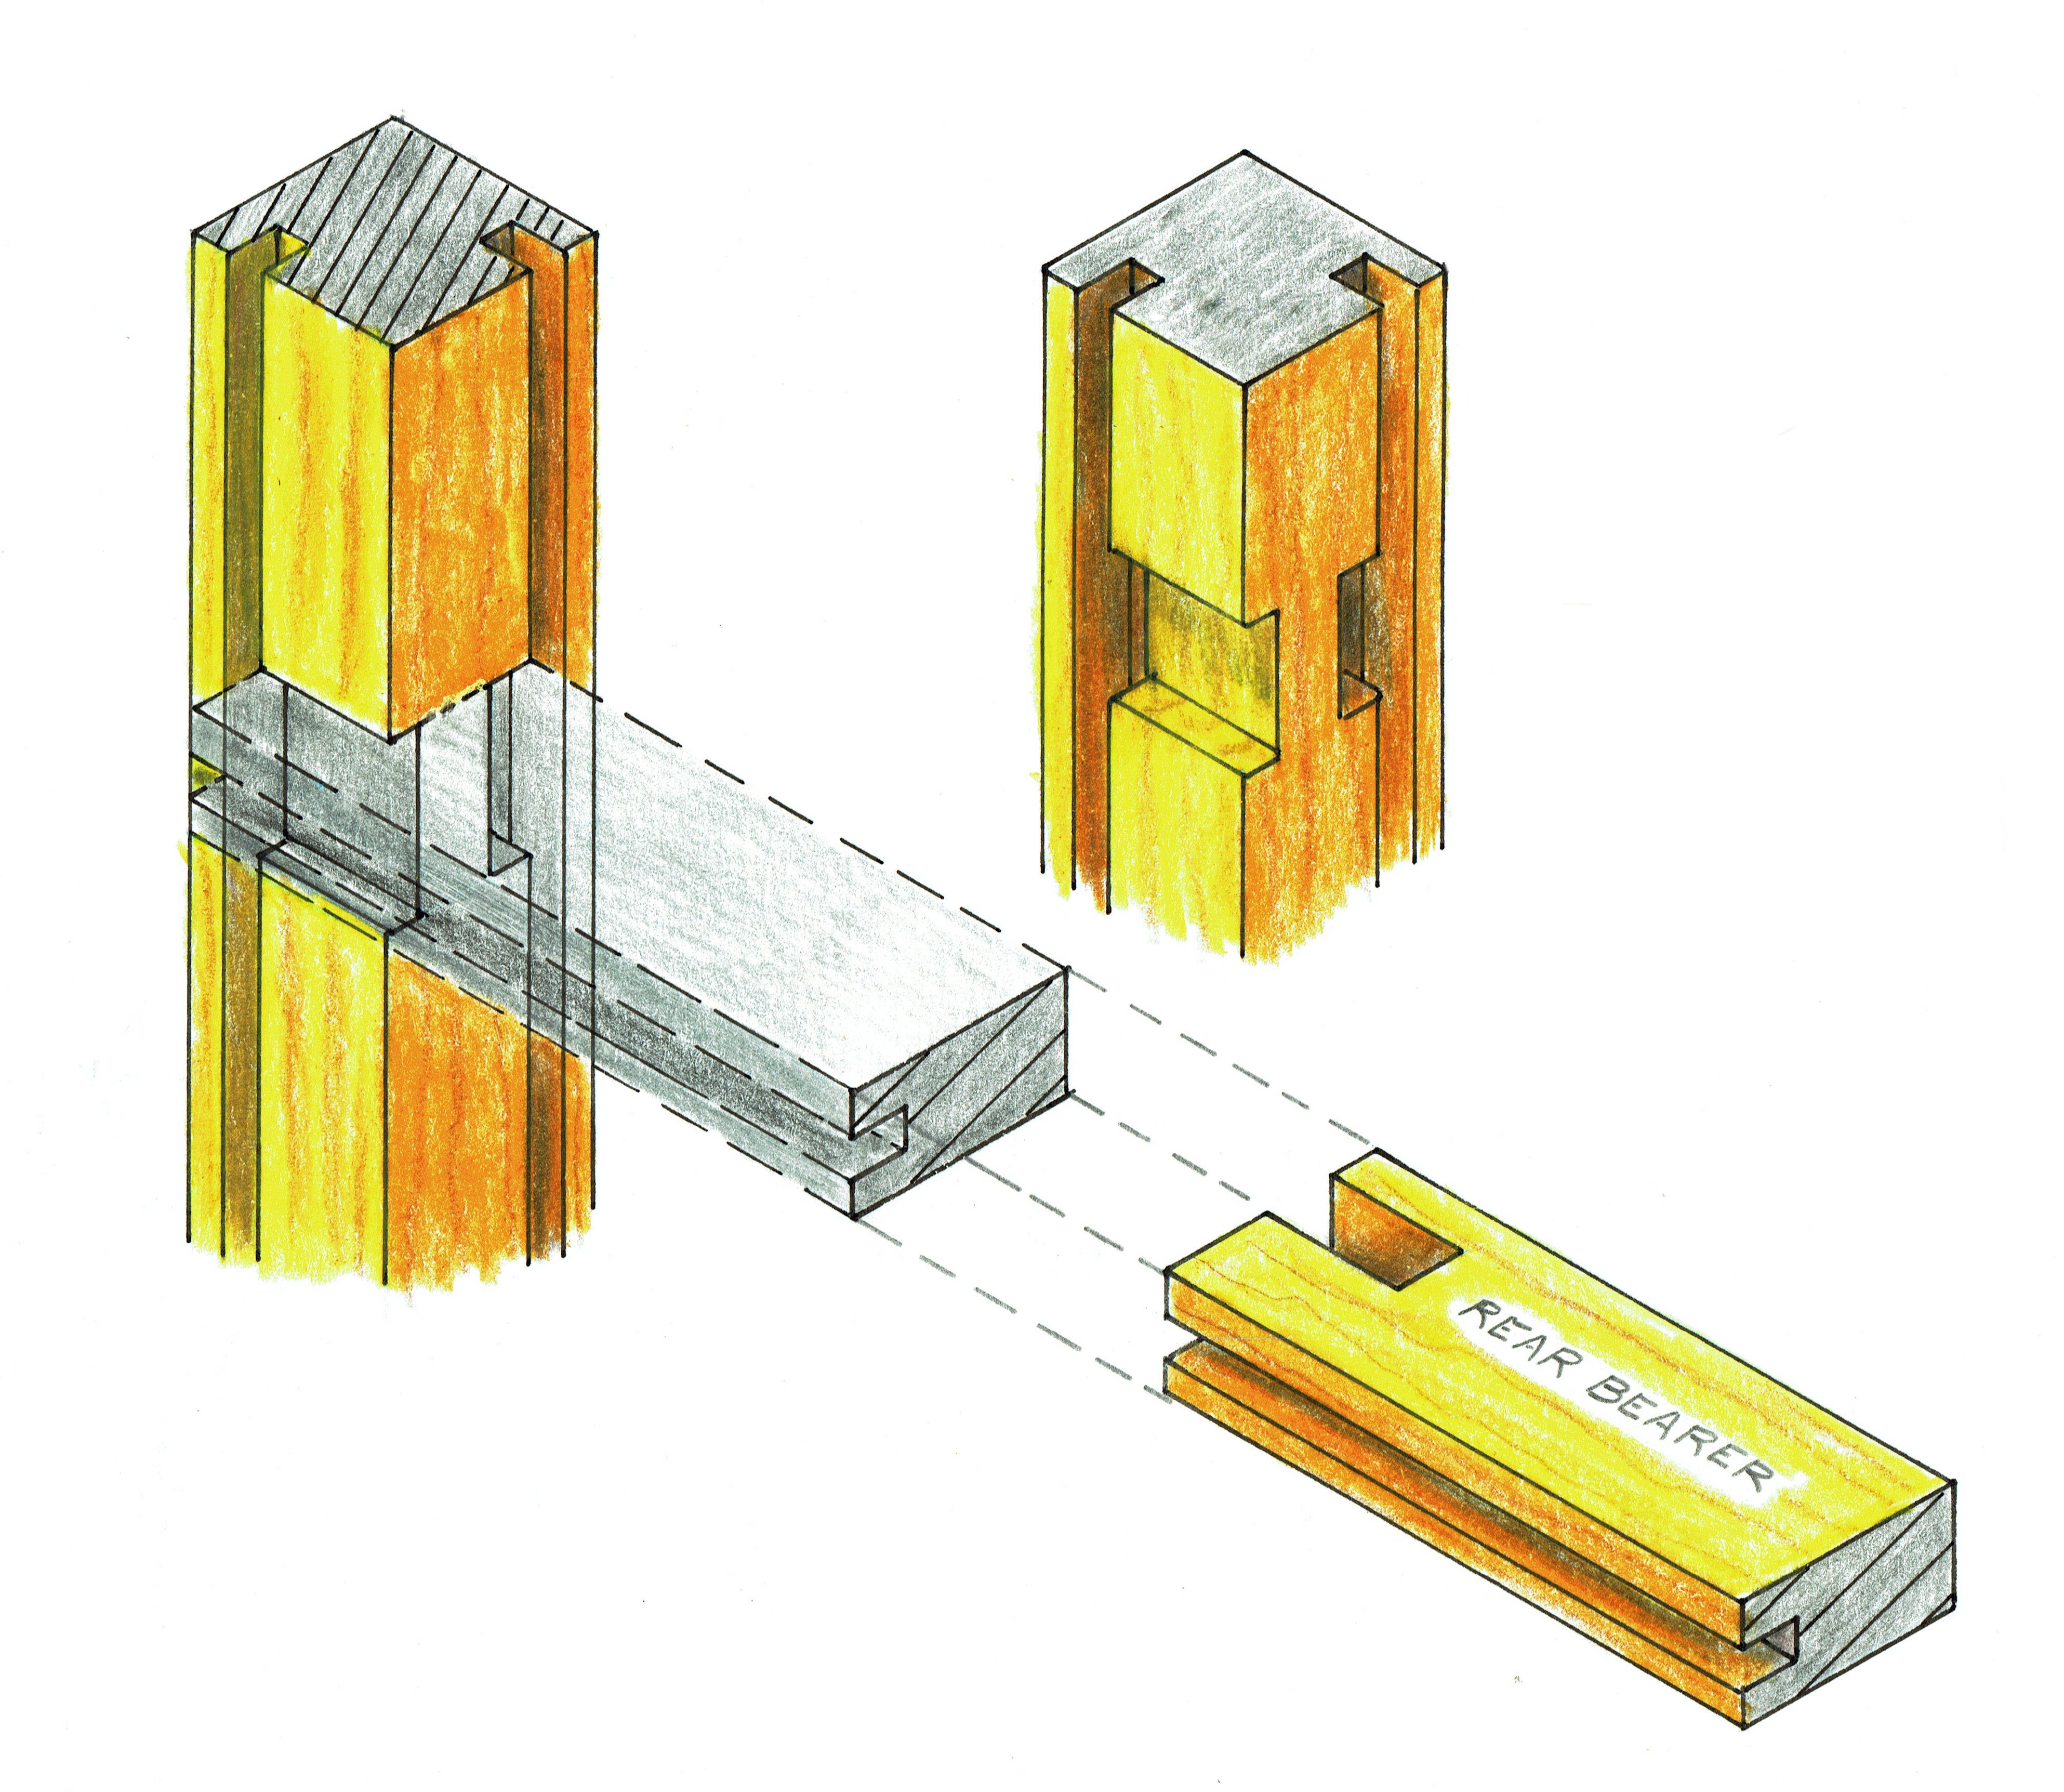 I began with the joinery for the rear bearers. The joinery for these is a little simpler and gave me a chance to warm up. The joint is a modified saddle joint. By adding the housed portion to the mortise and tenon, a great deal more rigidity is achieved. It also creates additional support for the drawer as well as ensuring the post is held square.
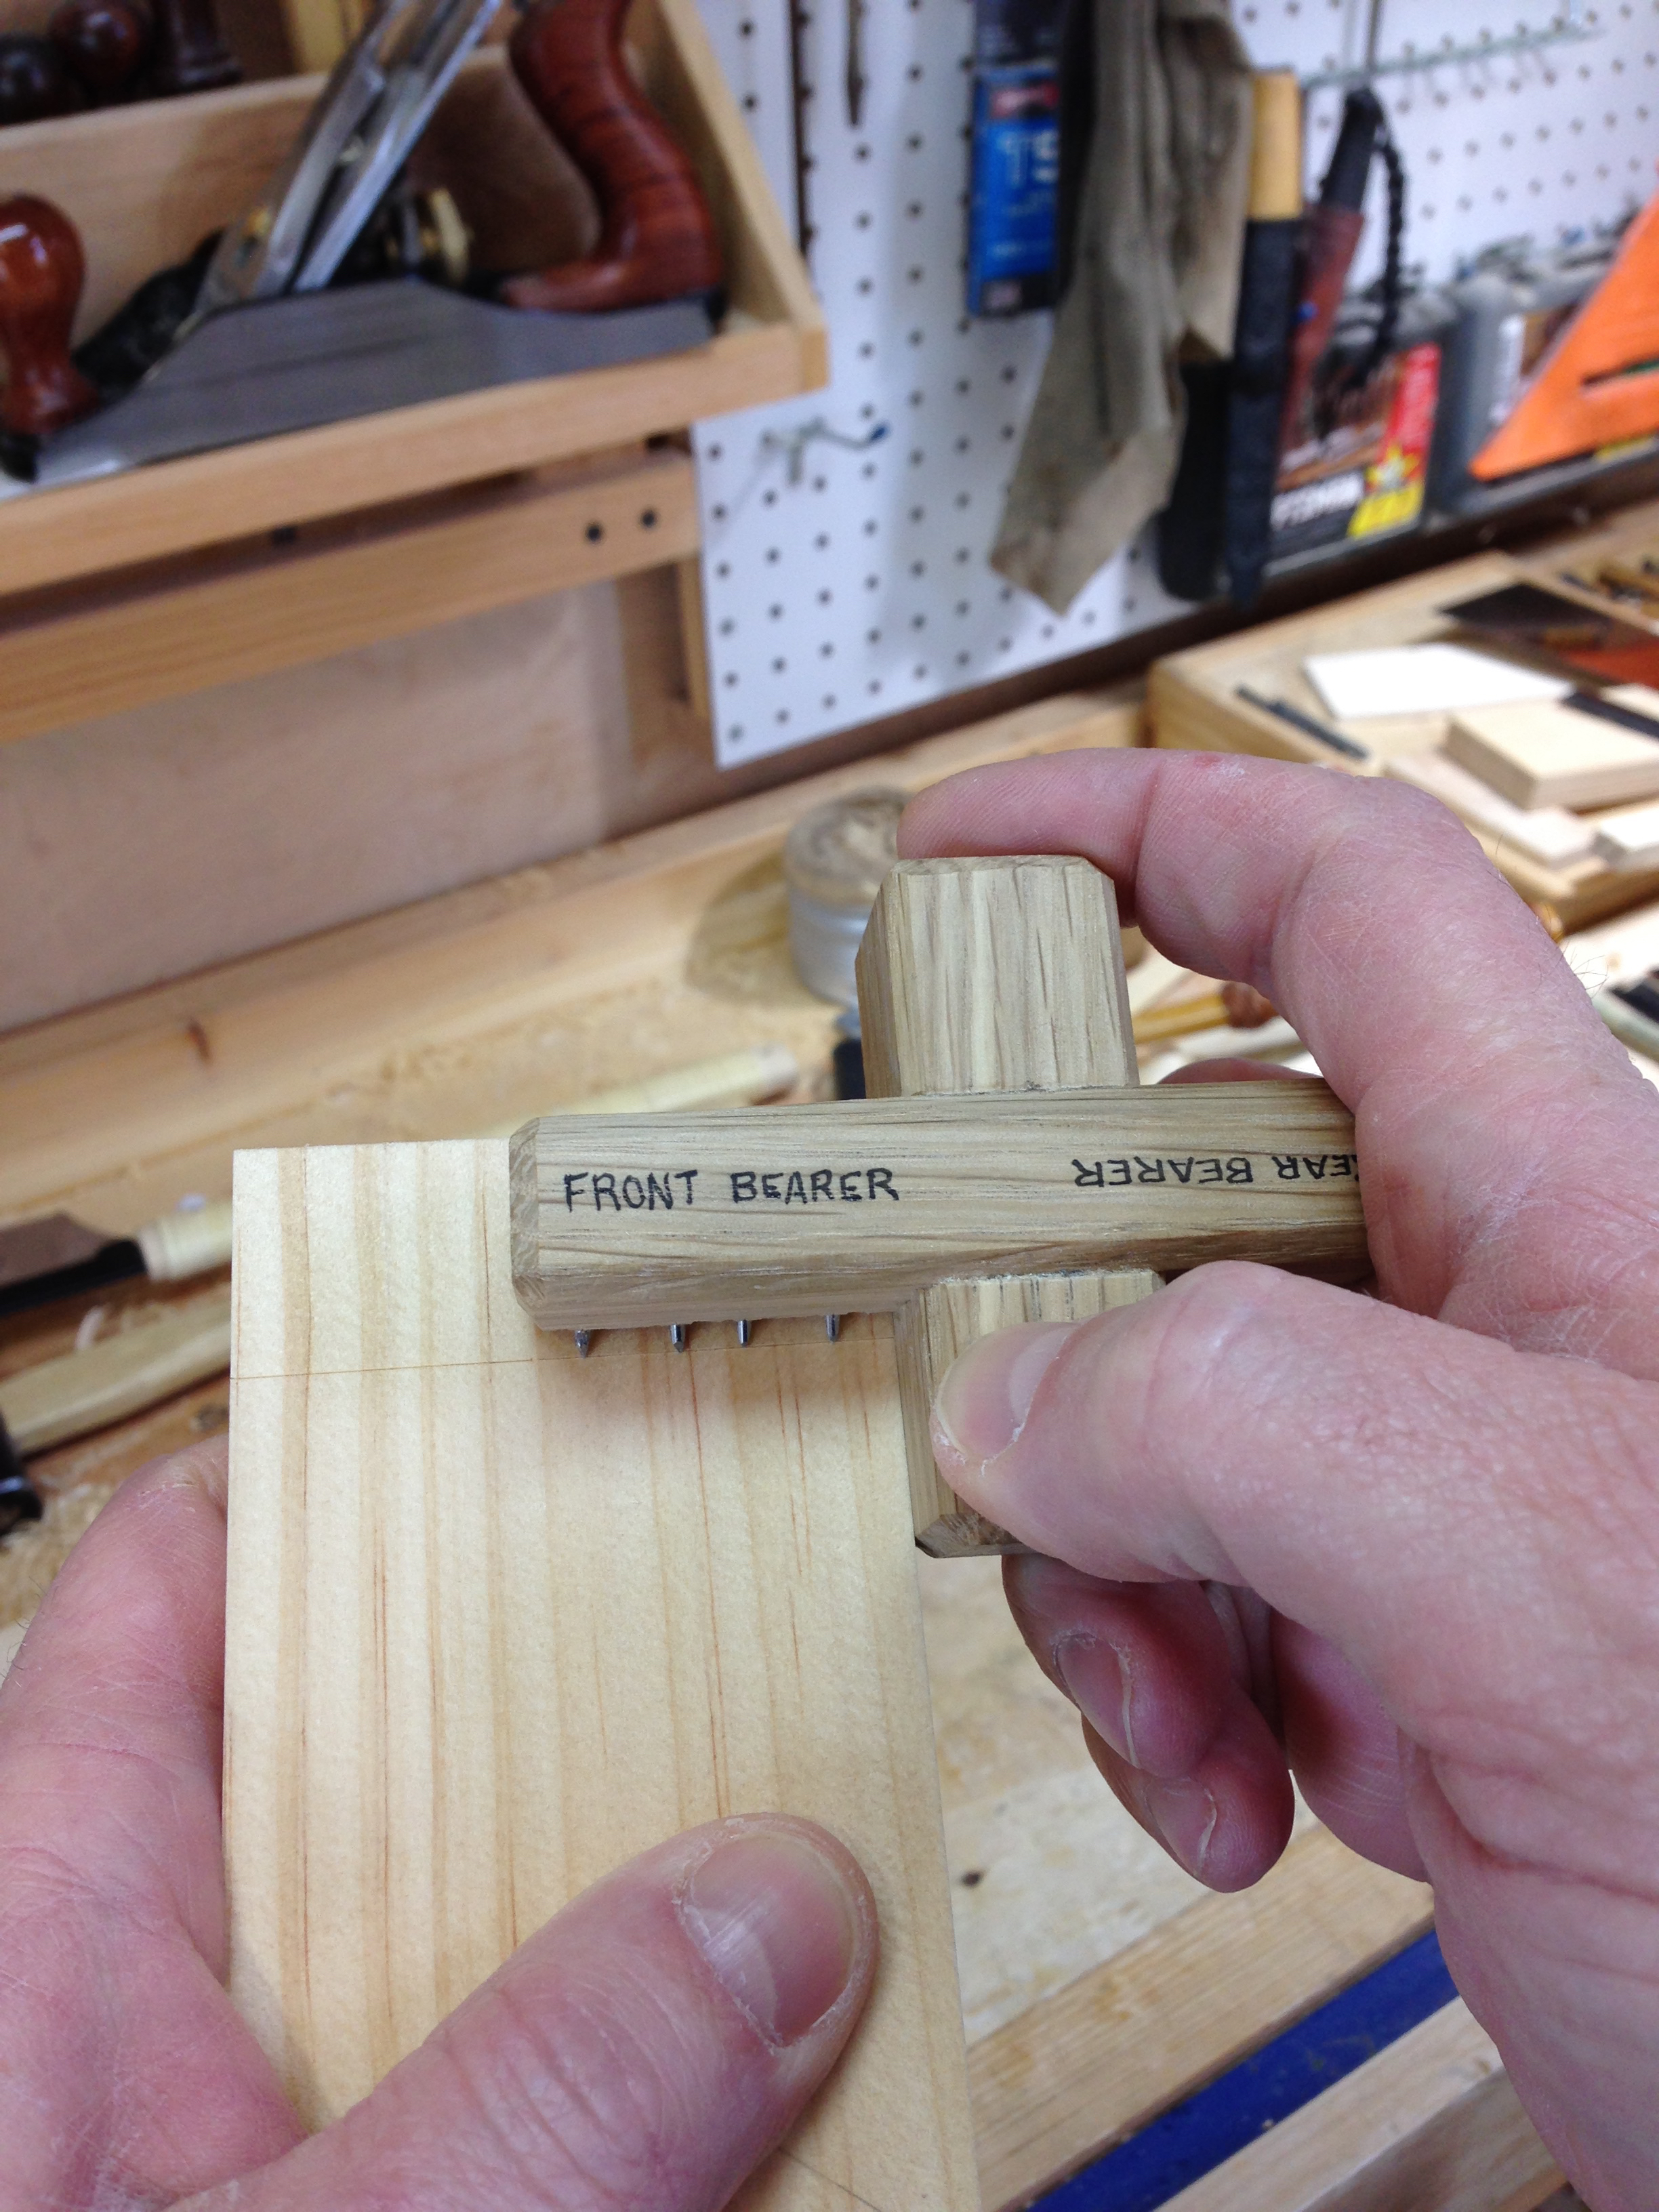
OK, back to the rear bearer. The layout of the joinery is done with my purpose built gauge.
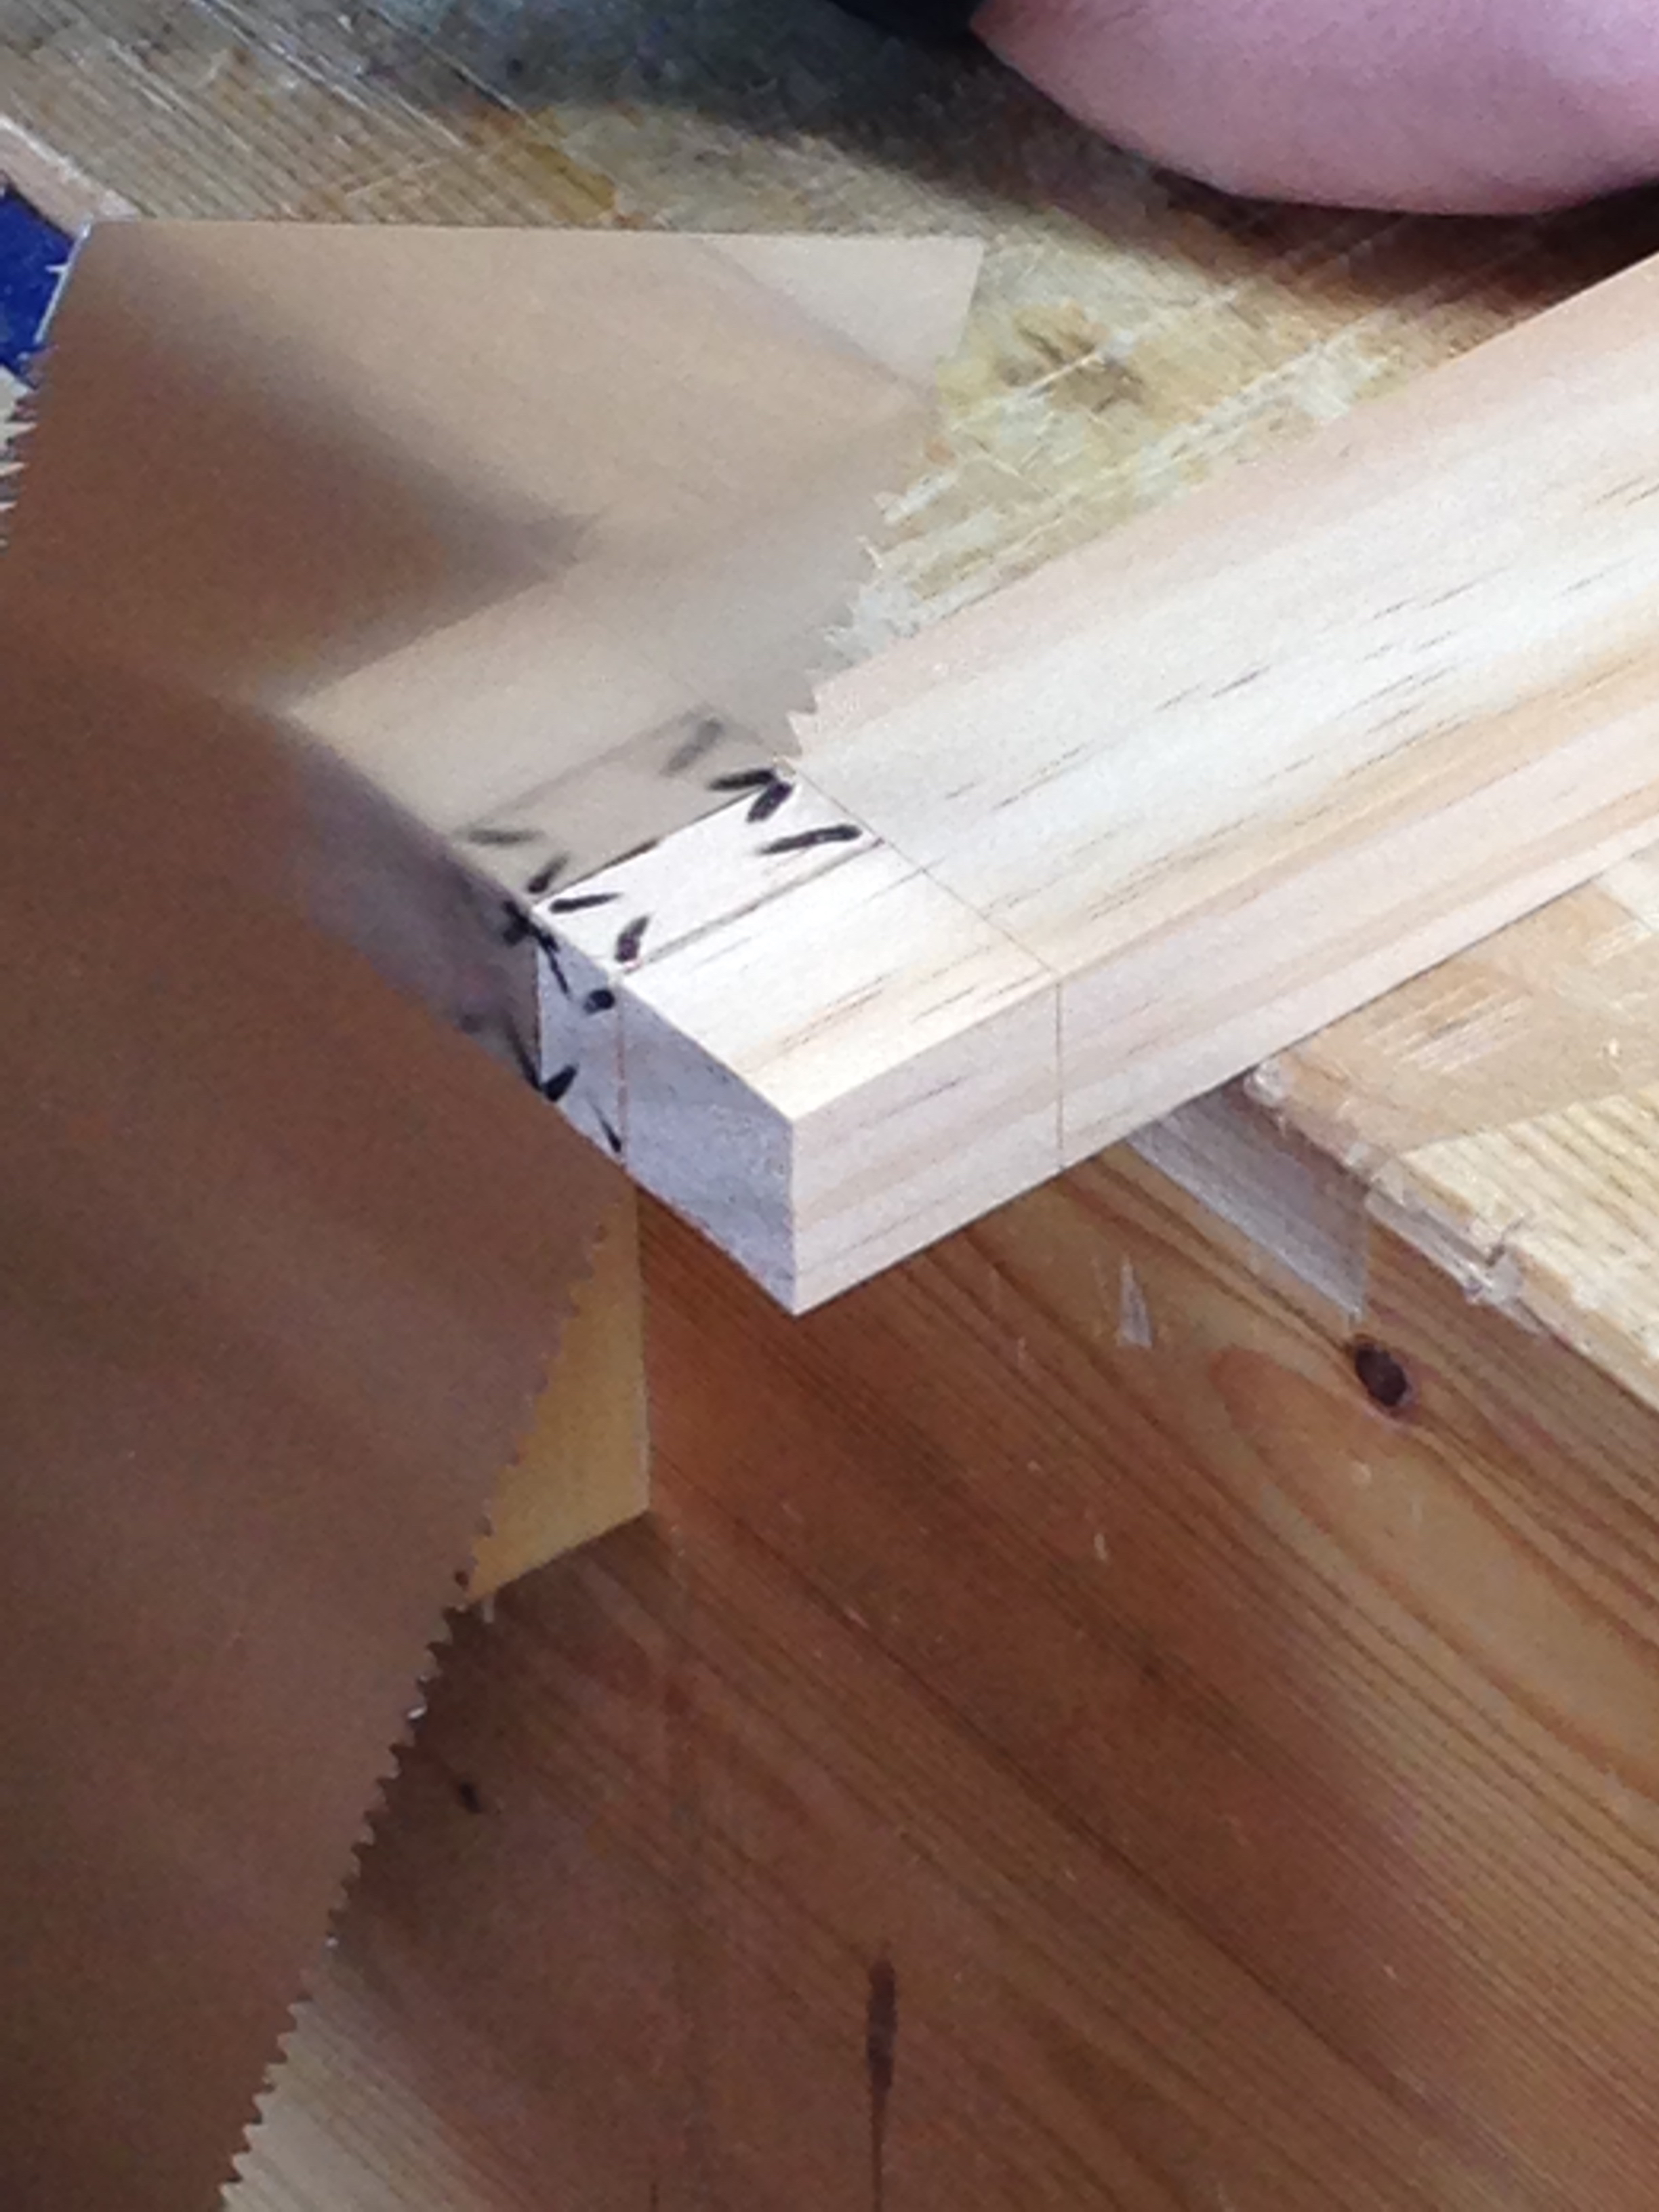
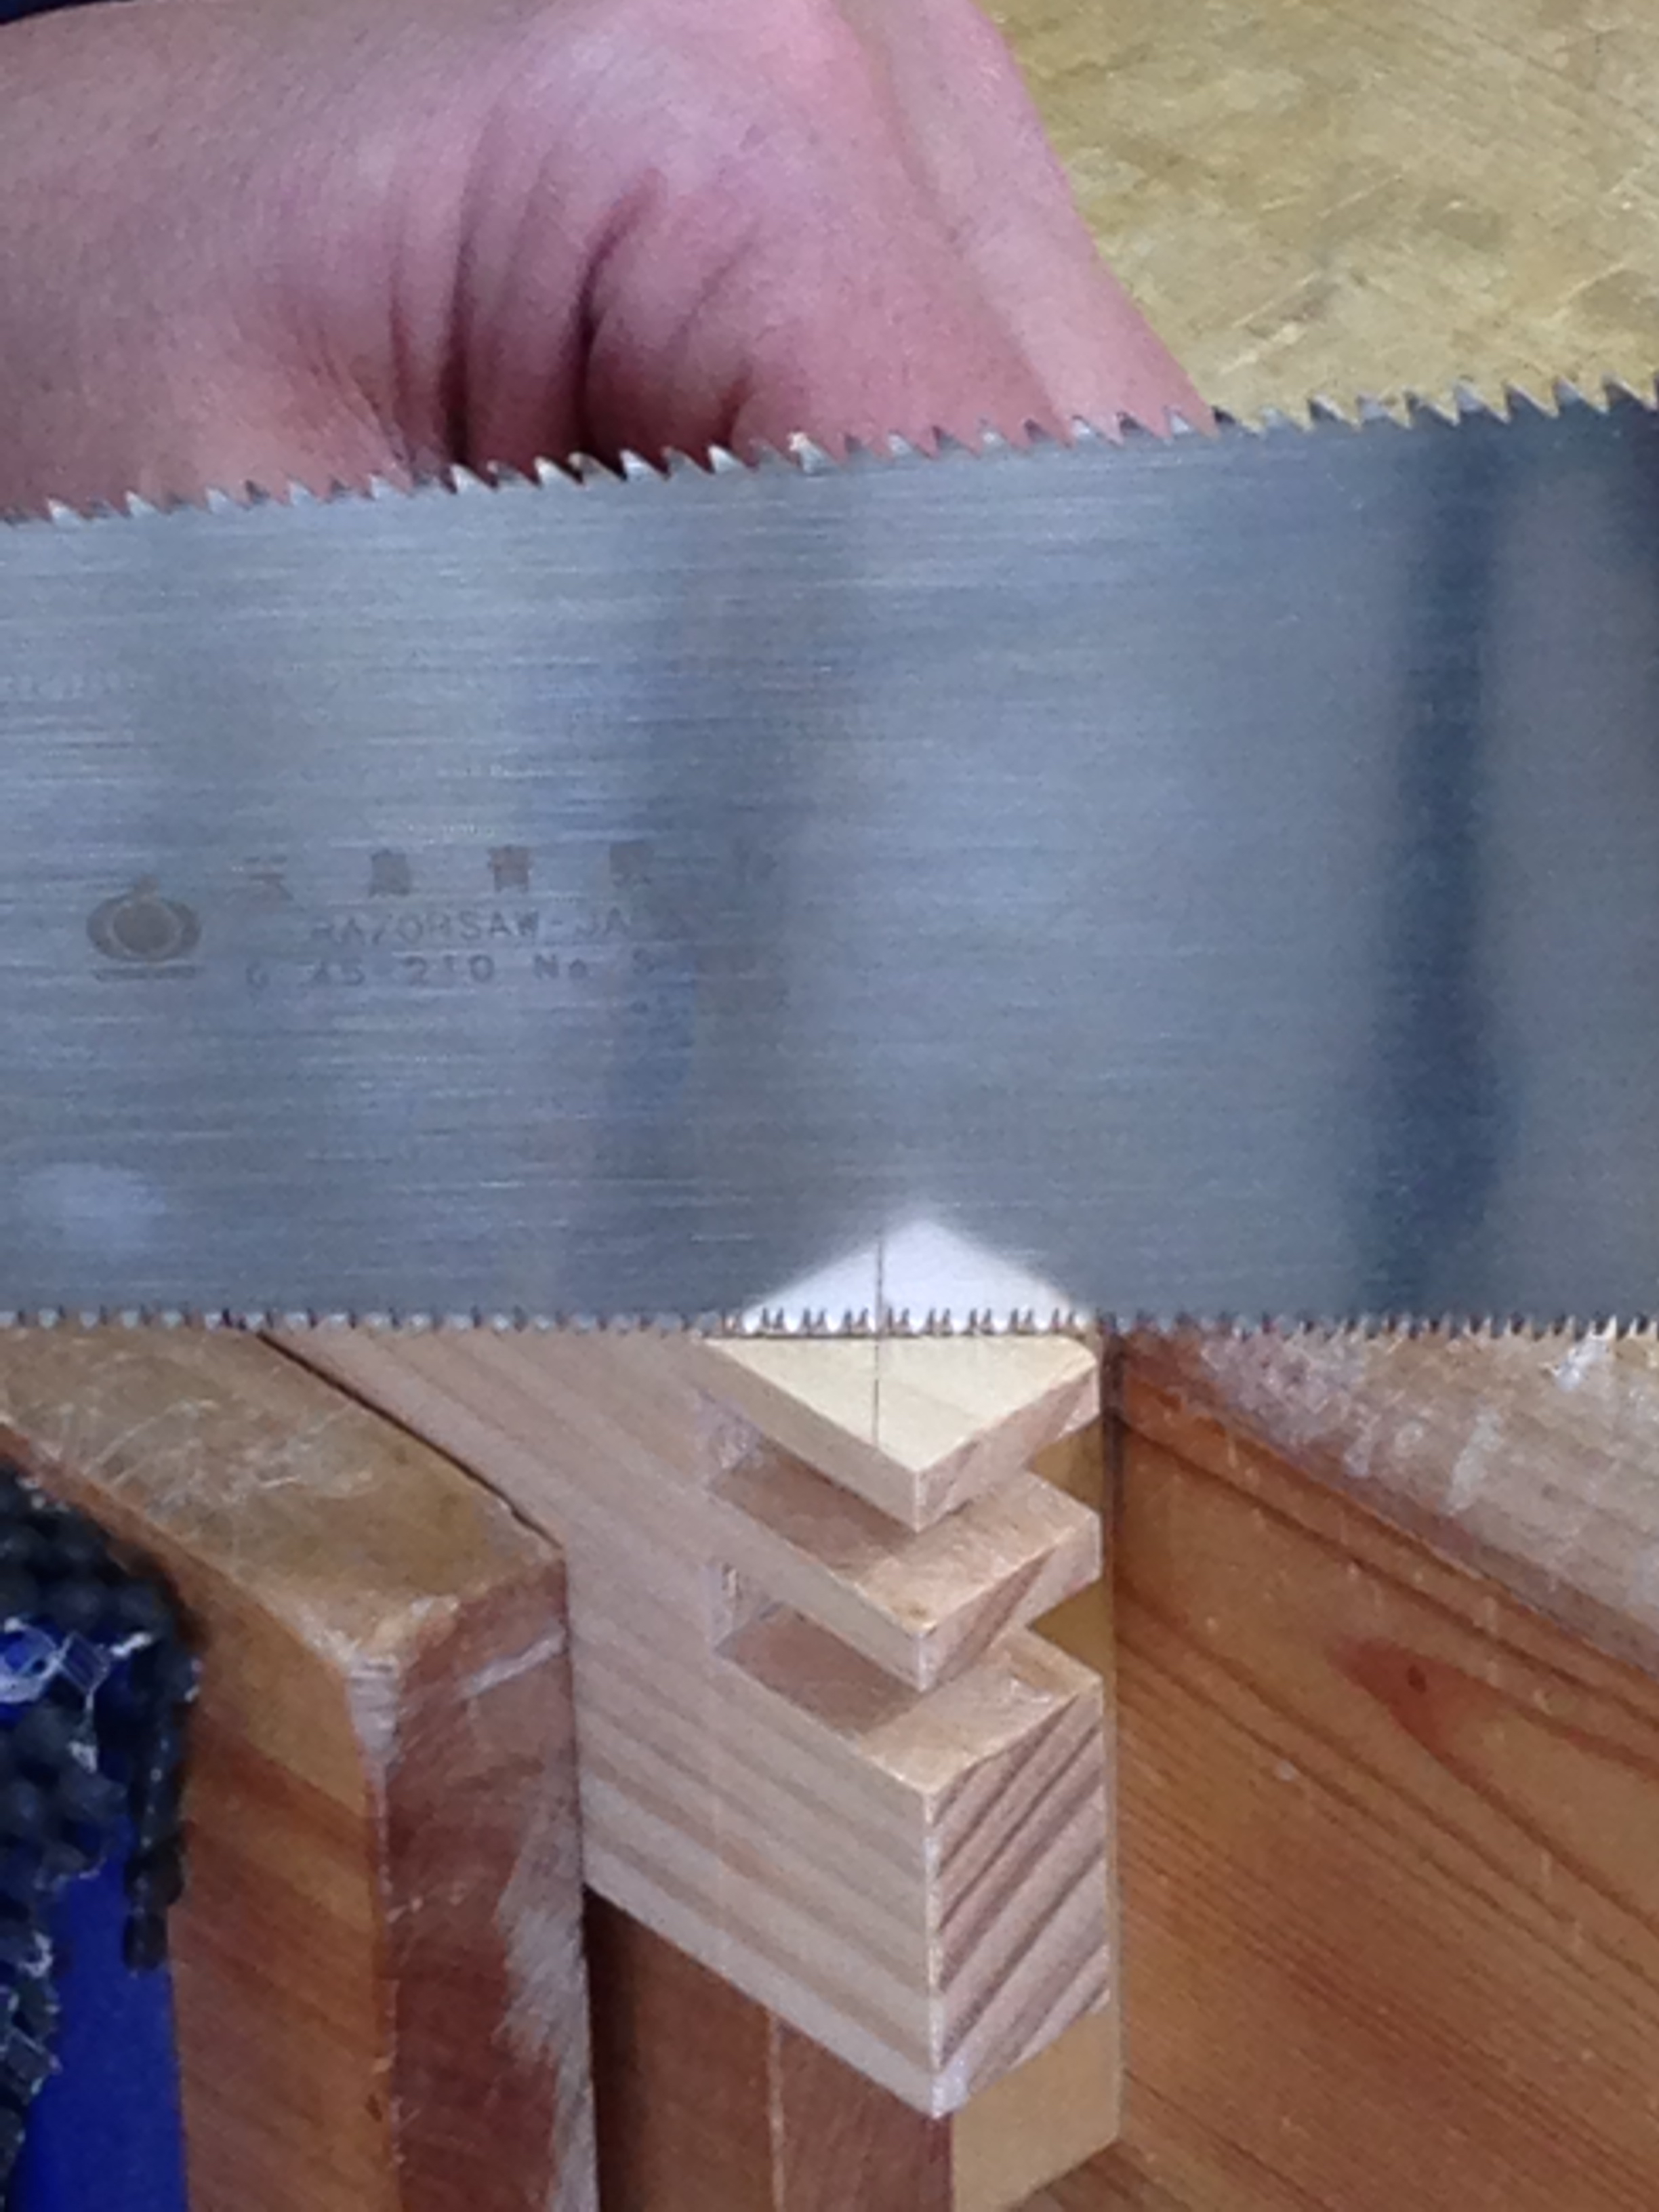
First order of business is to saw the walls. Note the reflection in the saw. My sawing is getting better and I’m consistently sawing square.
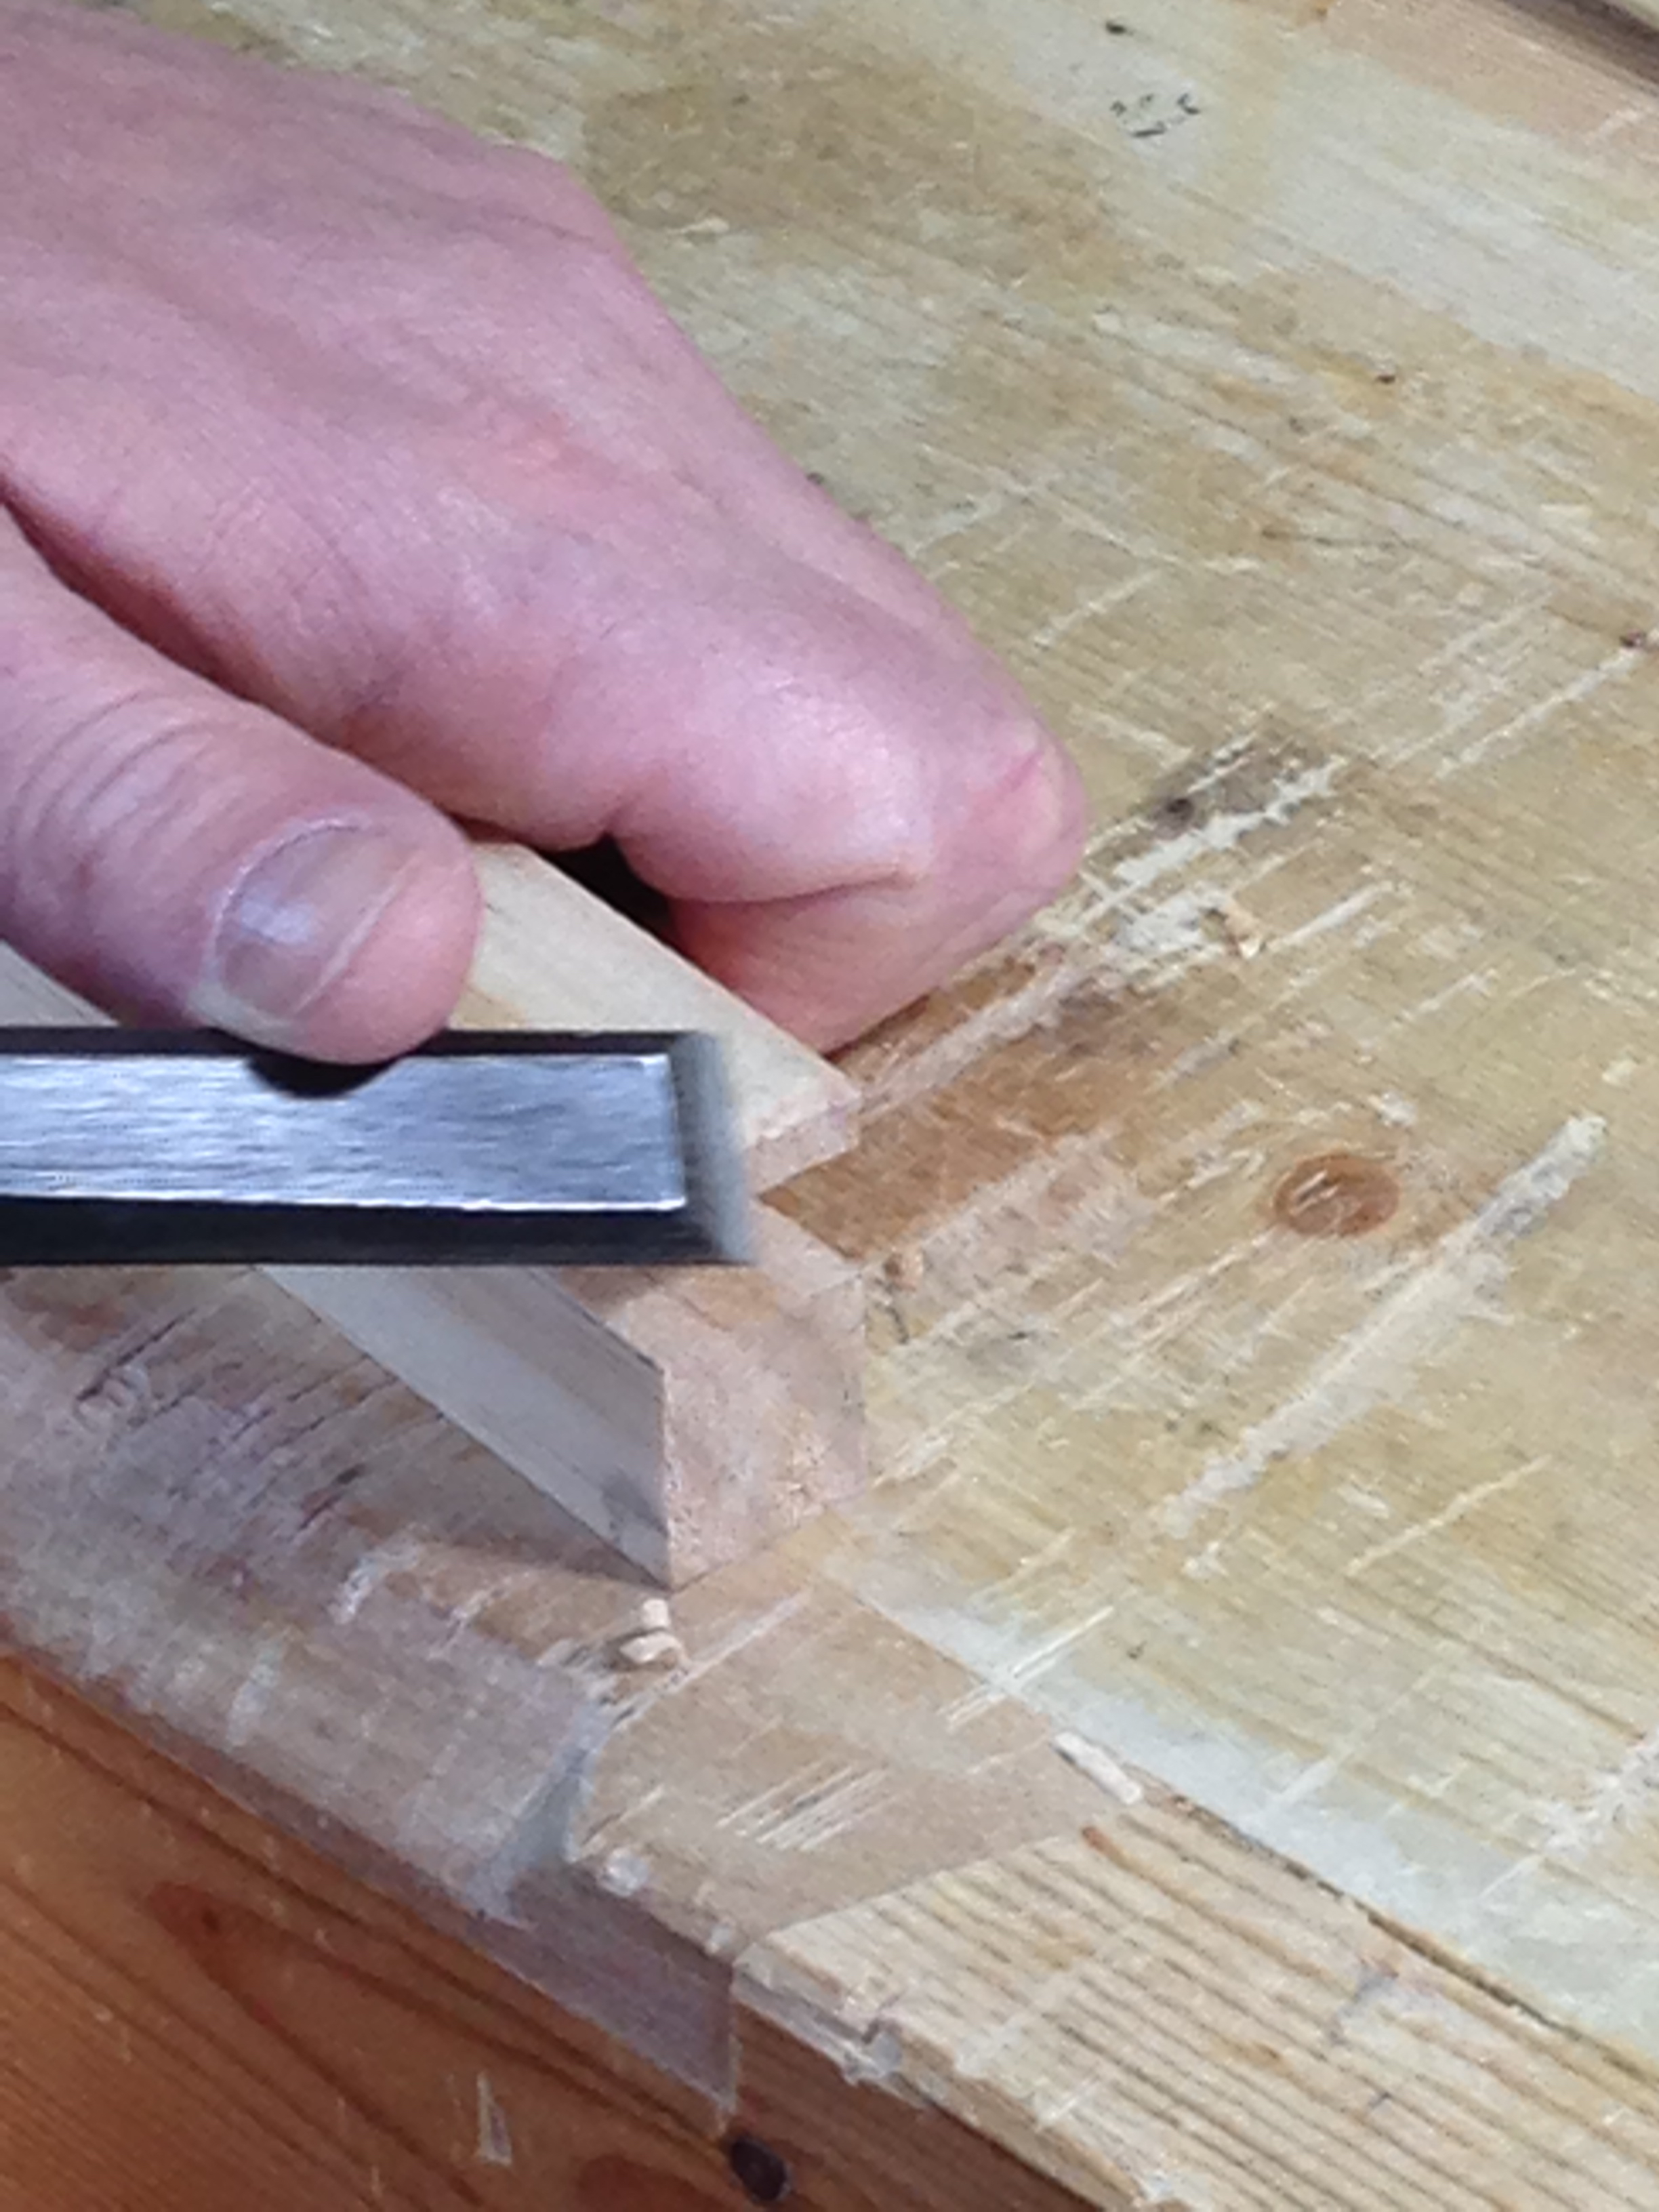
Then chisel out the waste.

I always chamfer all of the leading edges to avoid any hangups when assembling the joints.
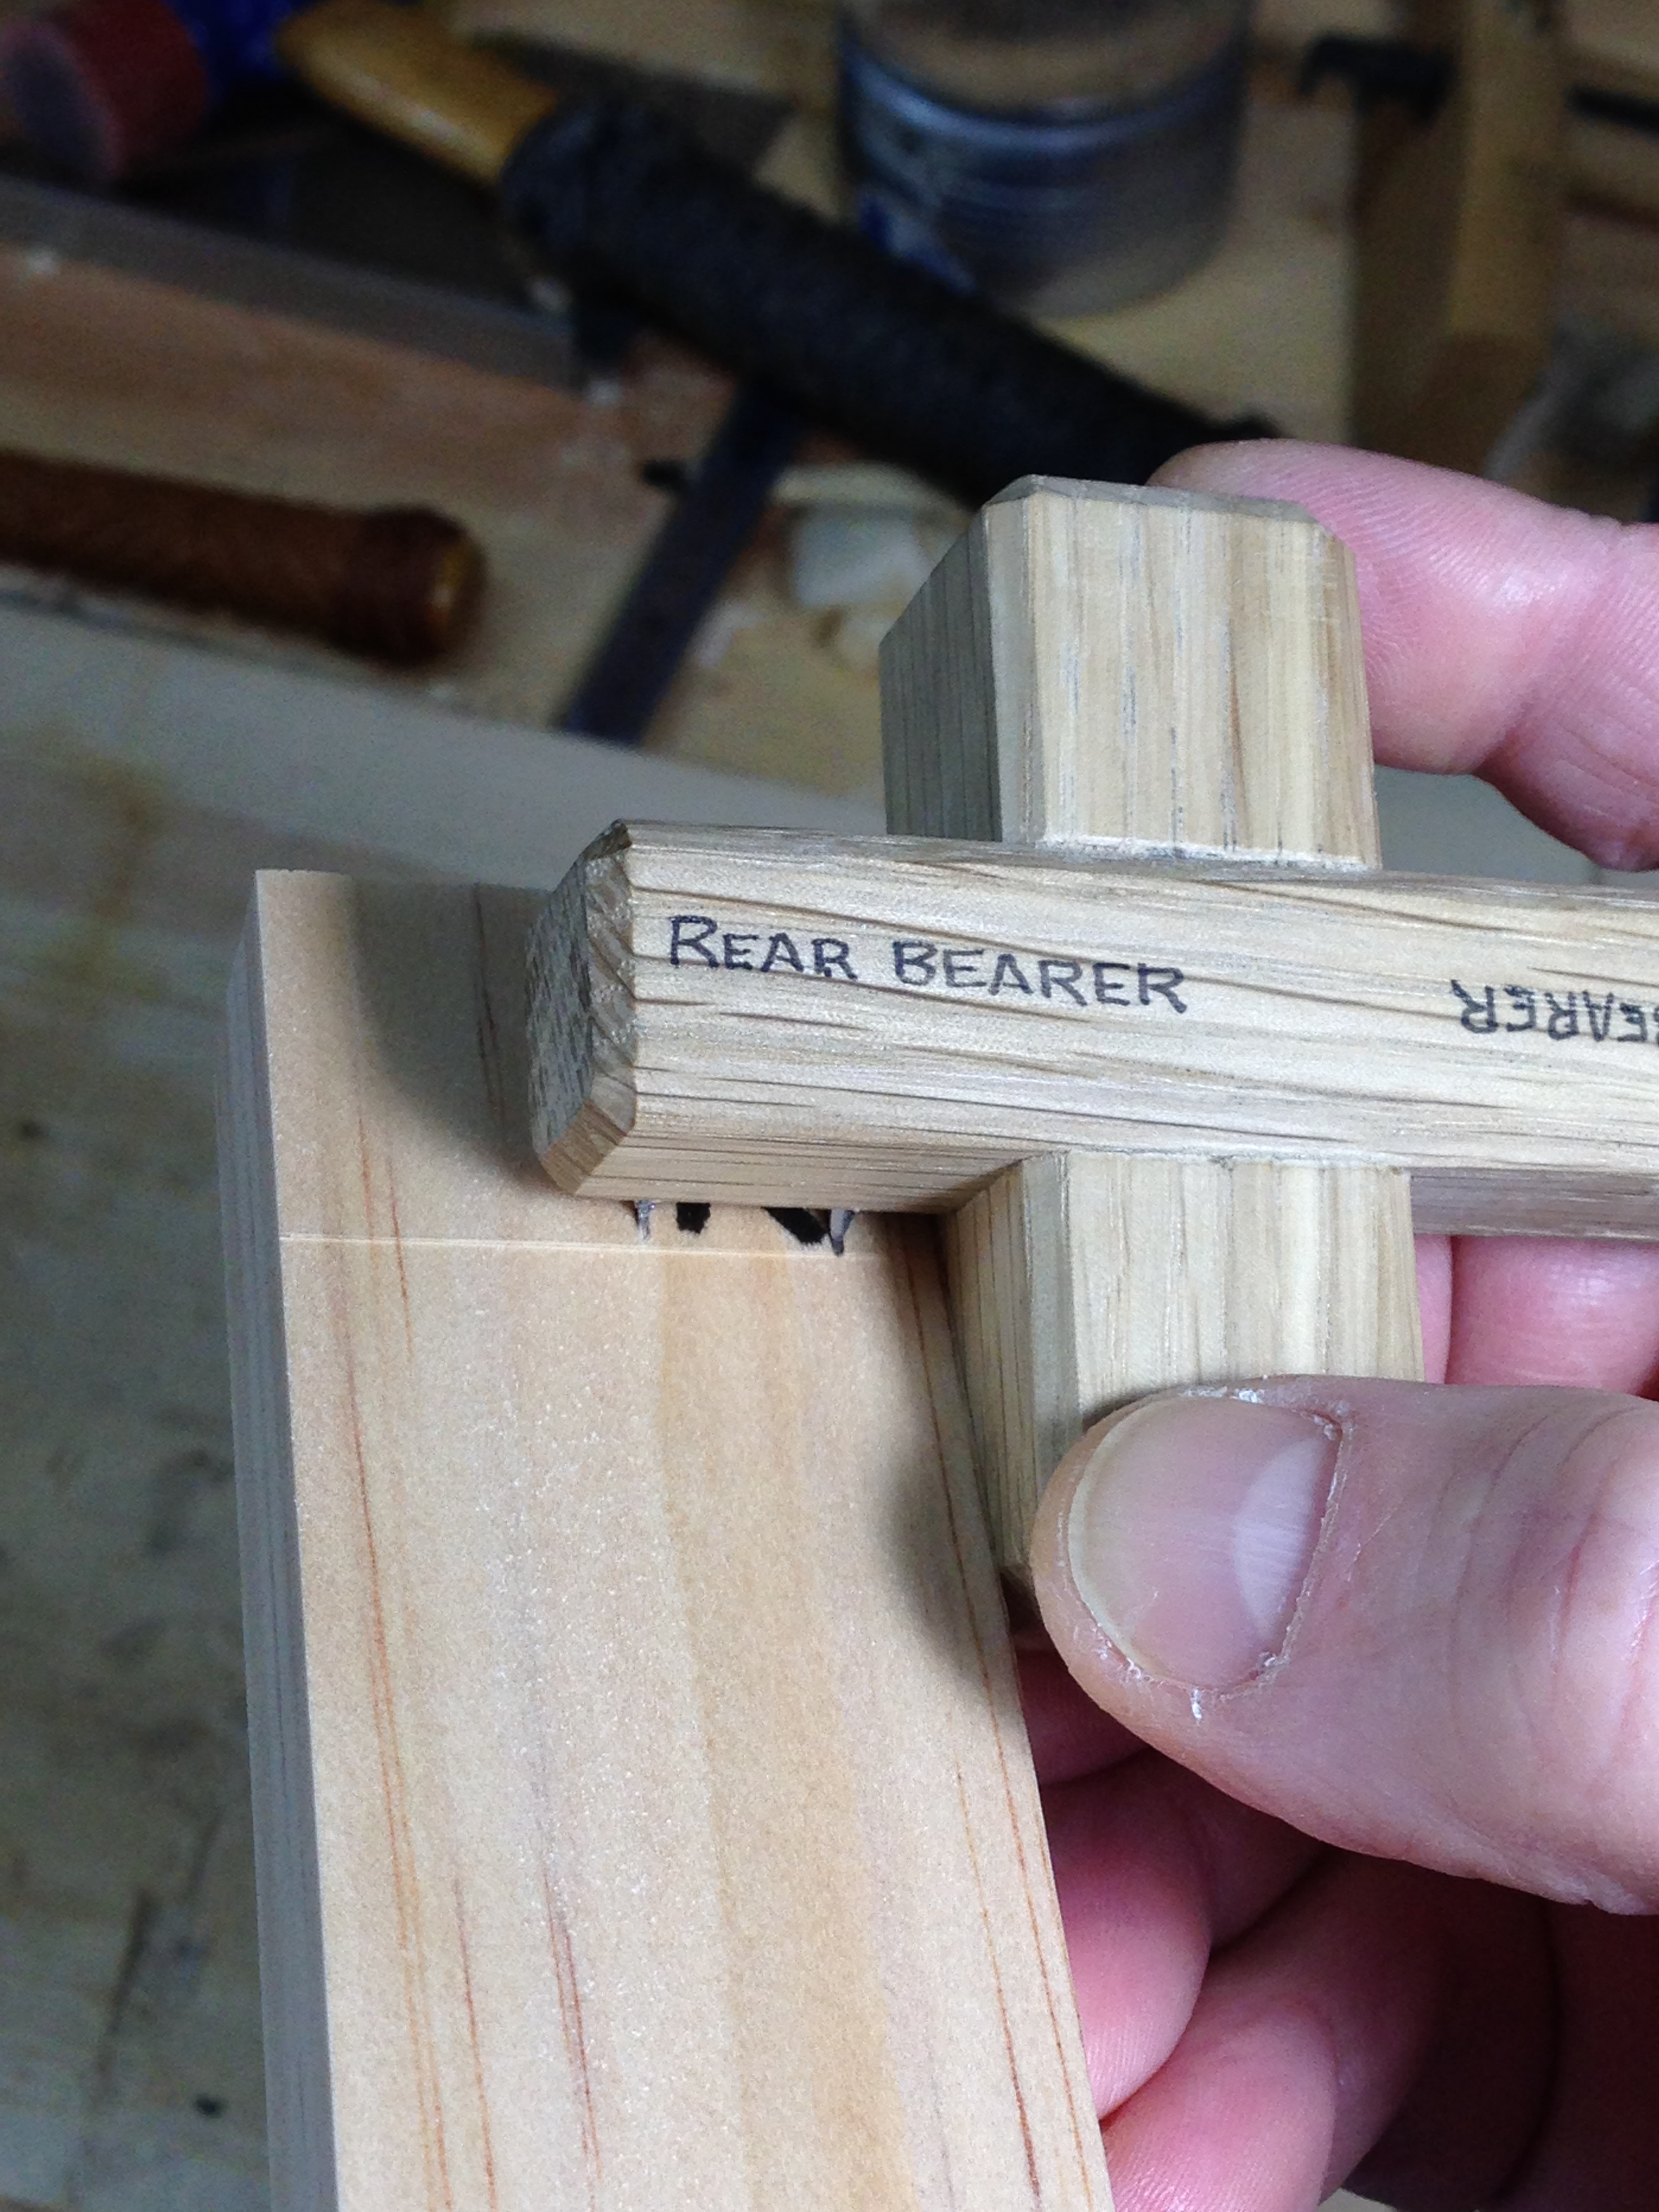
Lets see if it fits straight off the saw.
Not too bad.
Once I had all of the joints cut and fitted I needed to add a groove to each of the pieces. This groove will eventually hold both the side drawer bearers and the dust panels.

Finally a dry fit of the rear frame assembly.
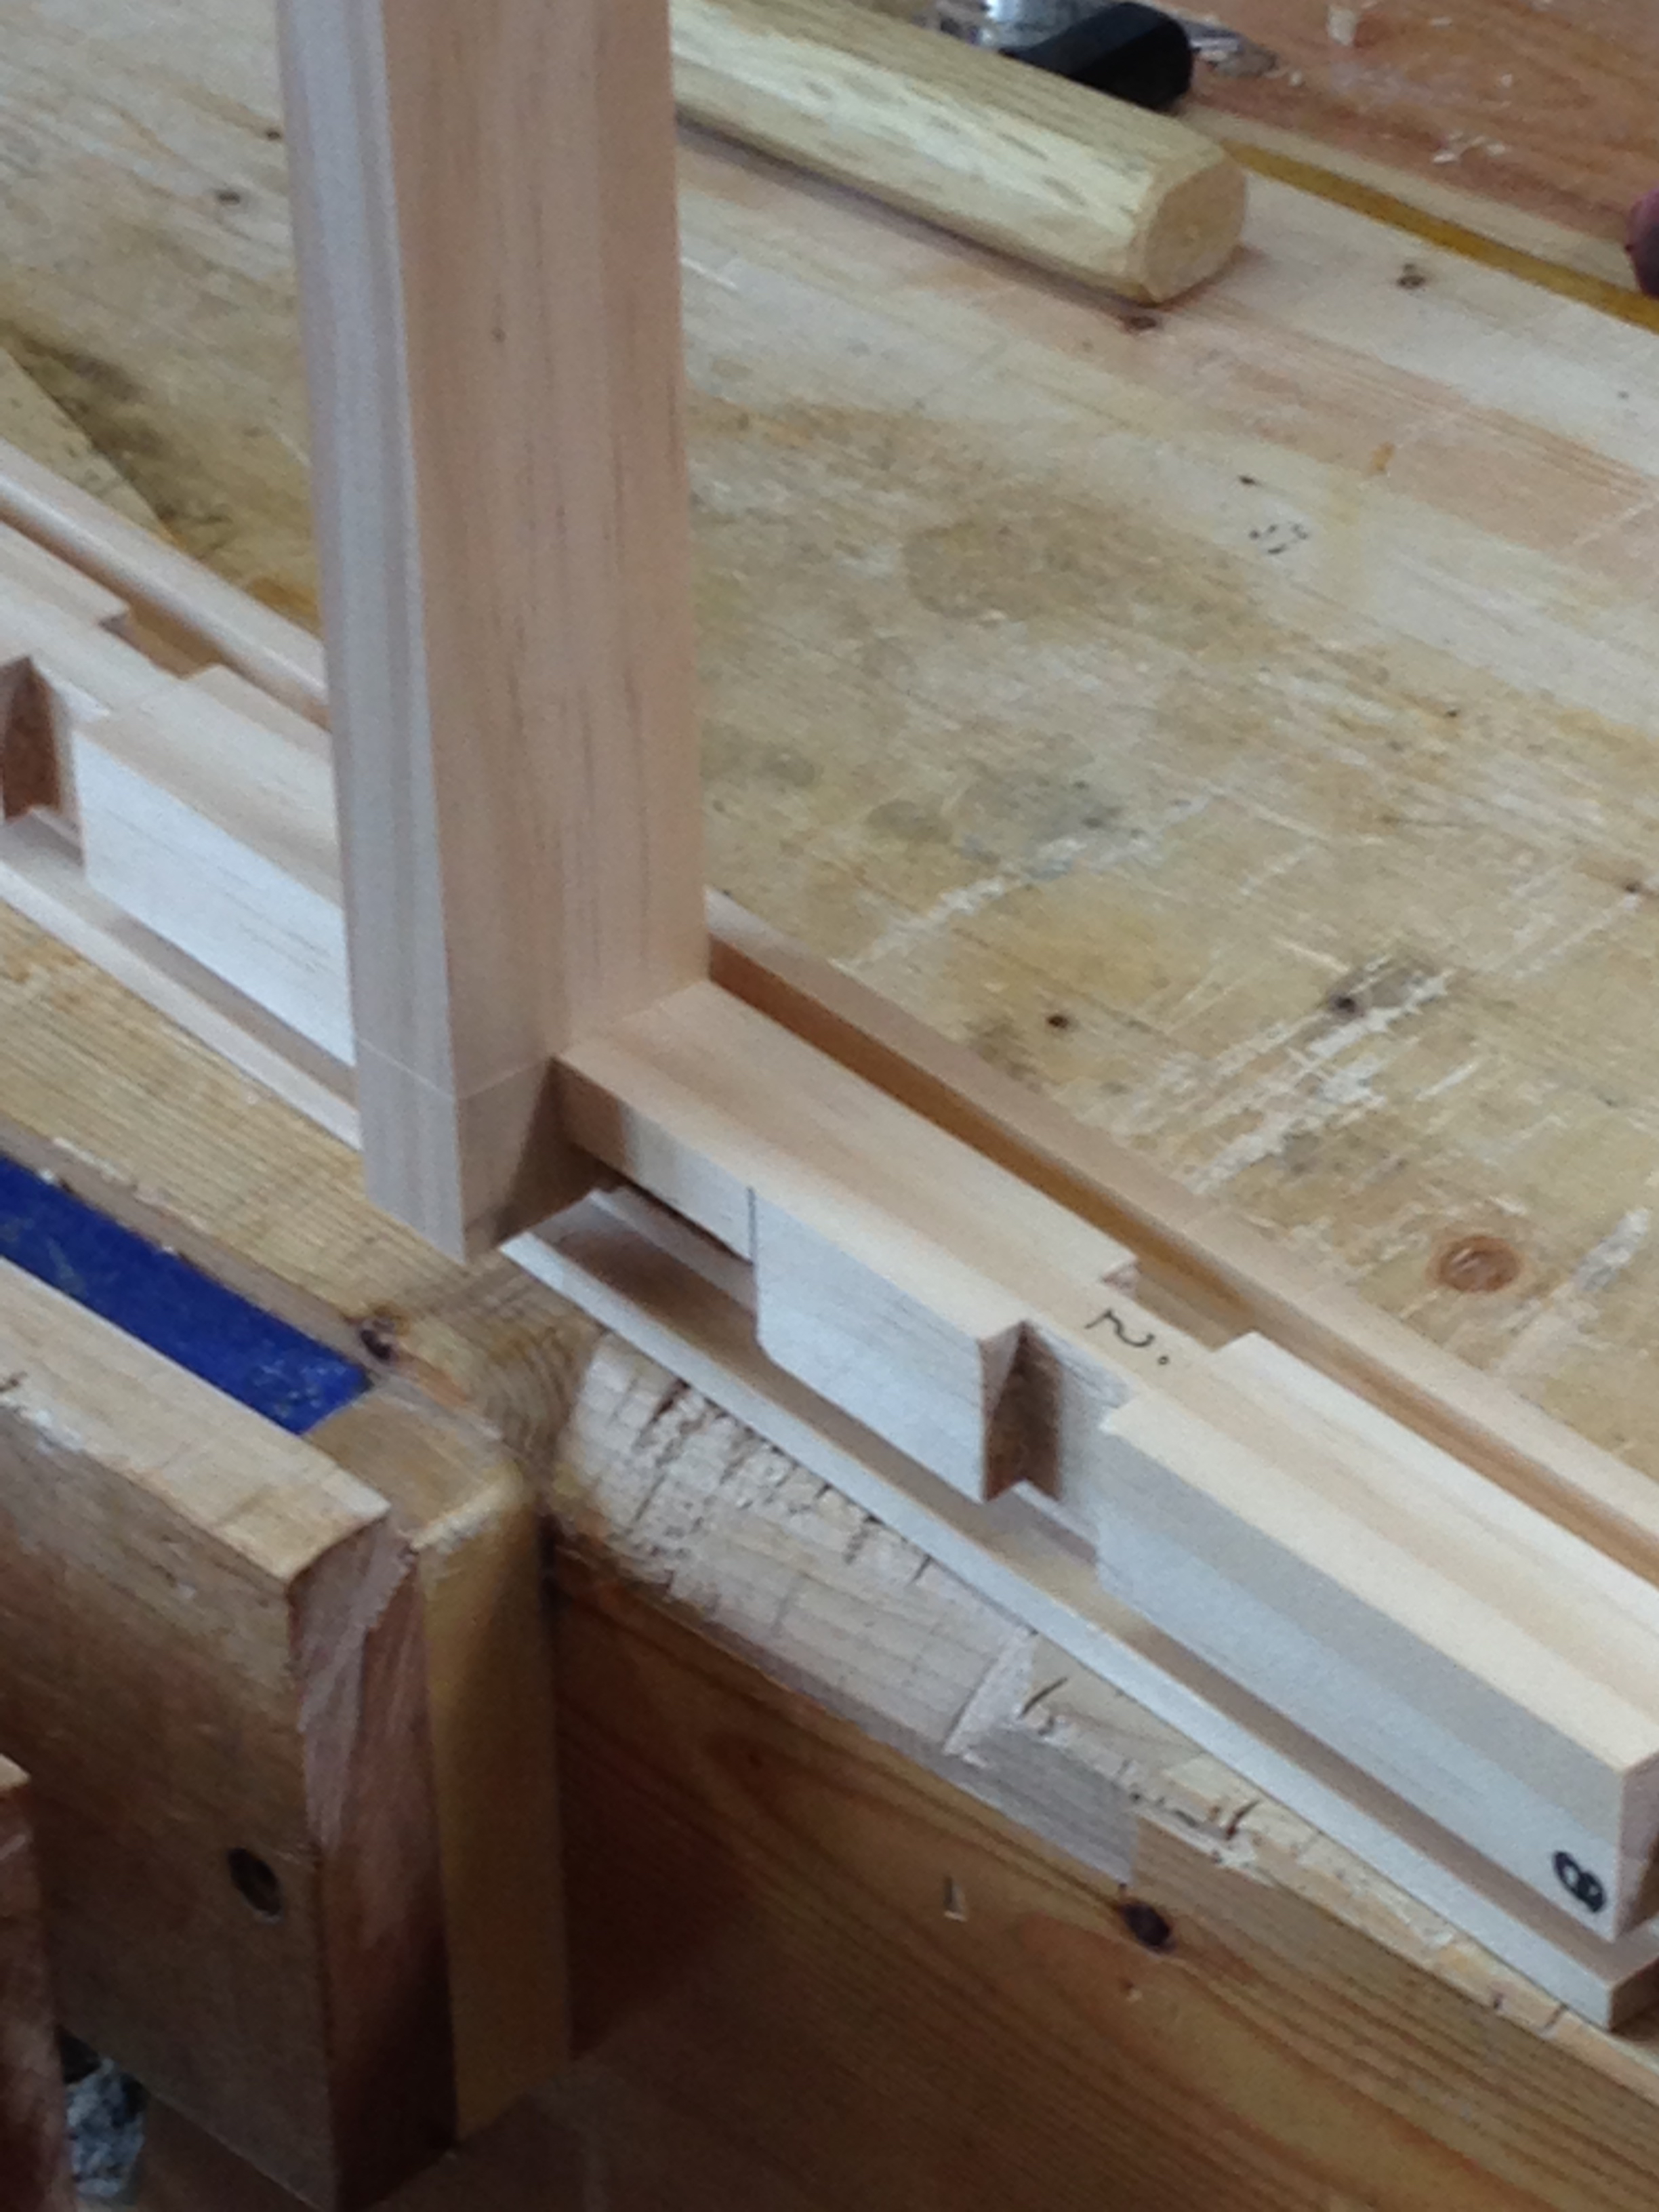
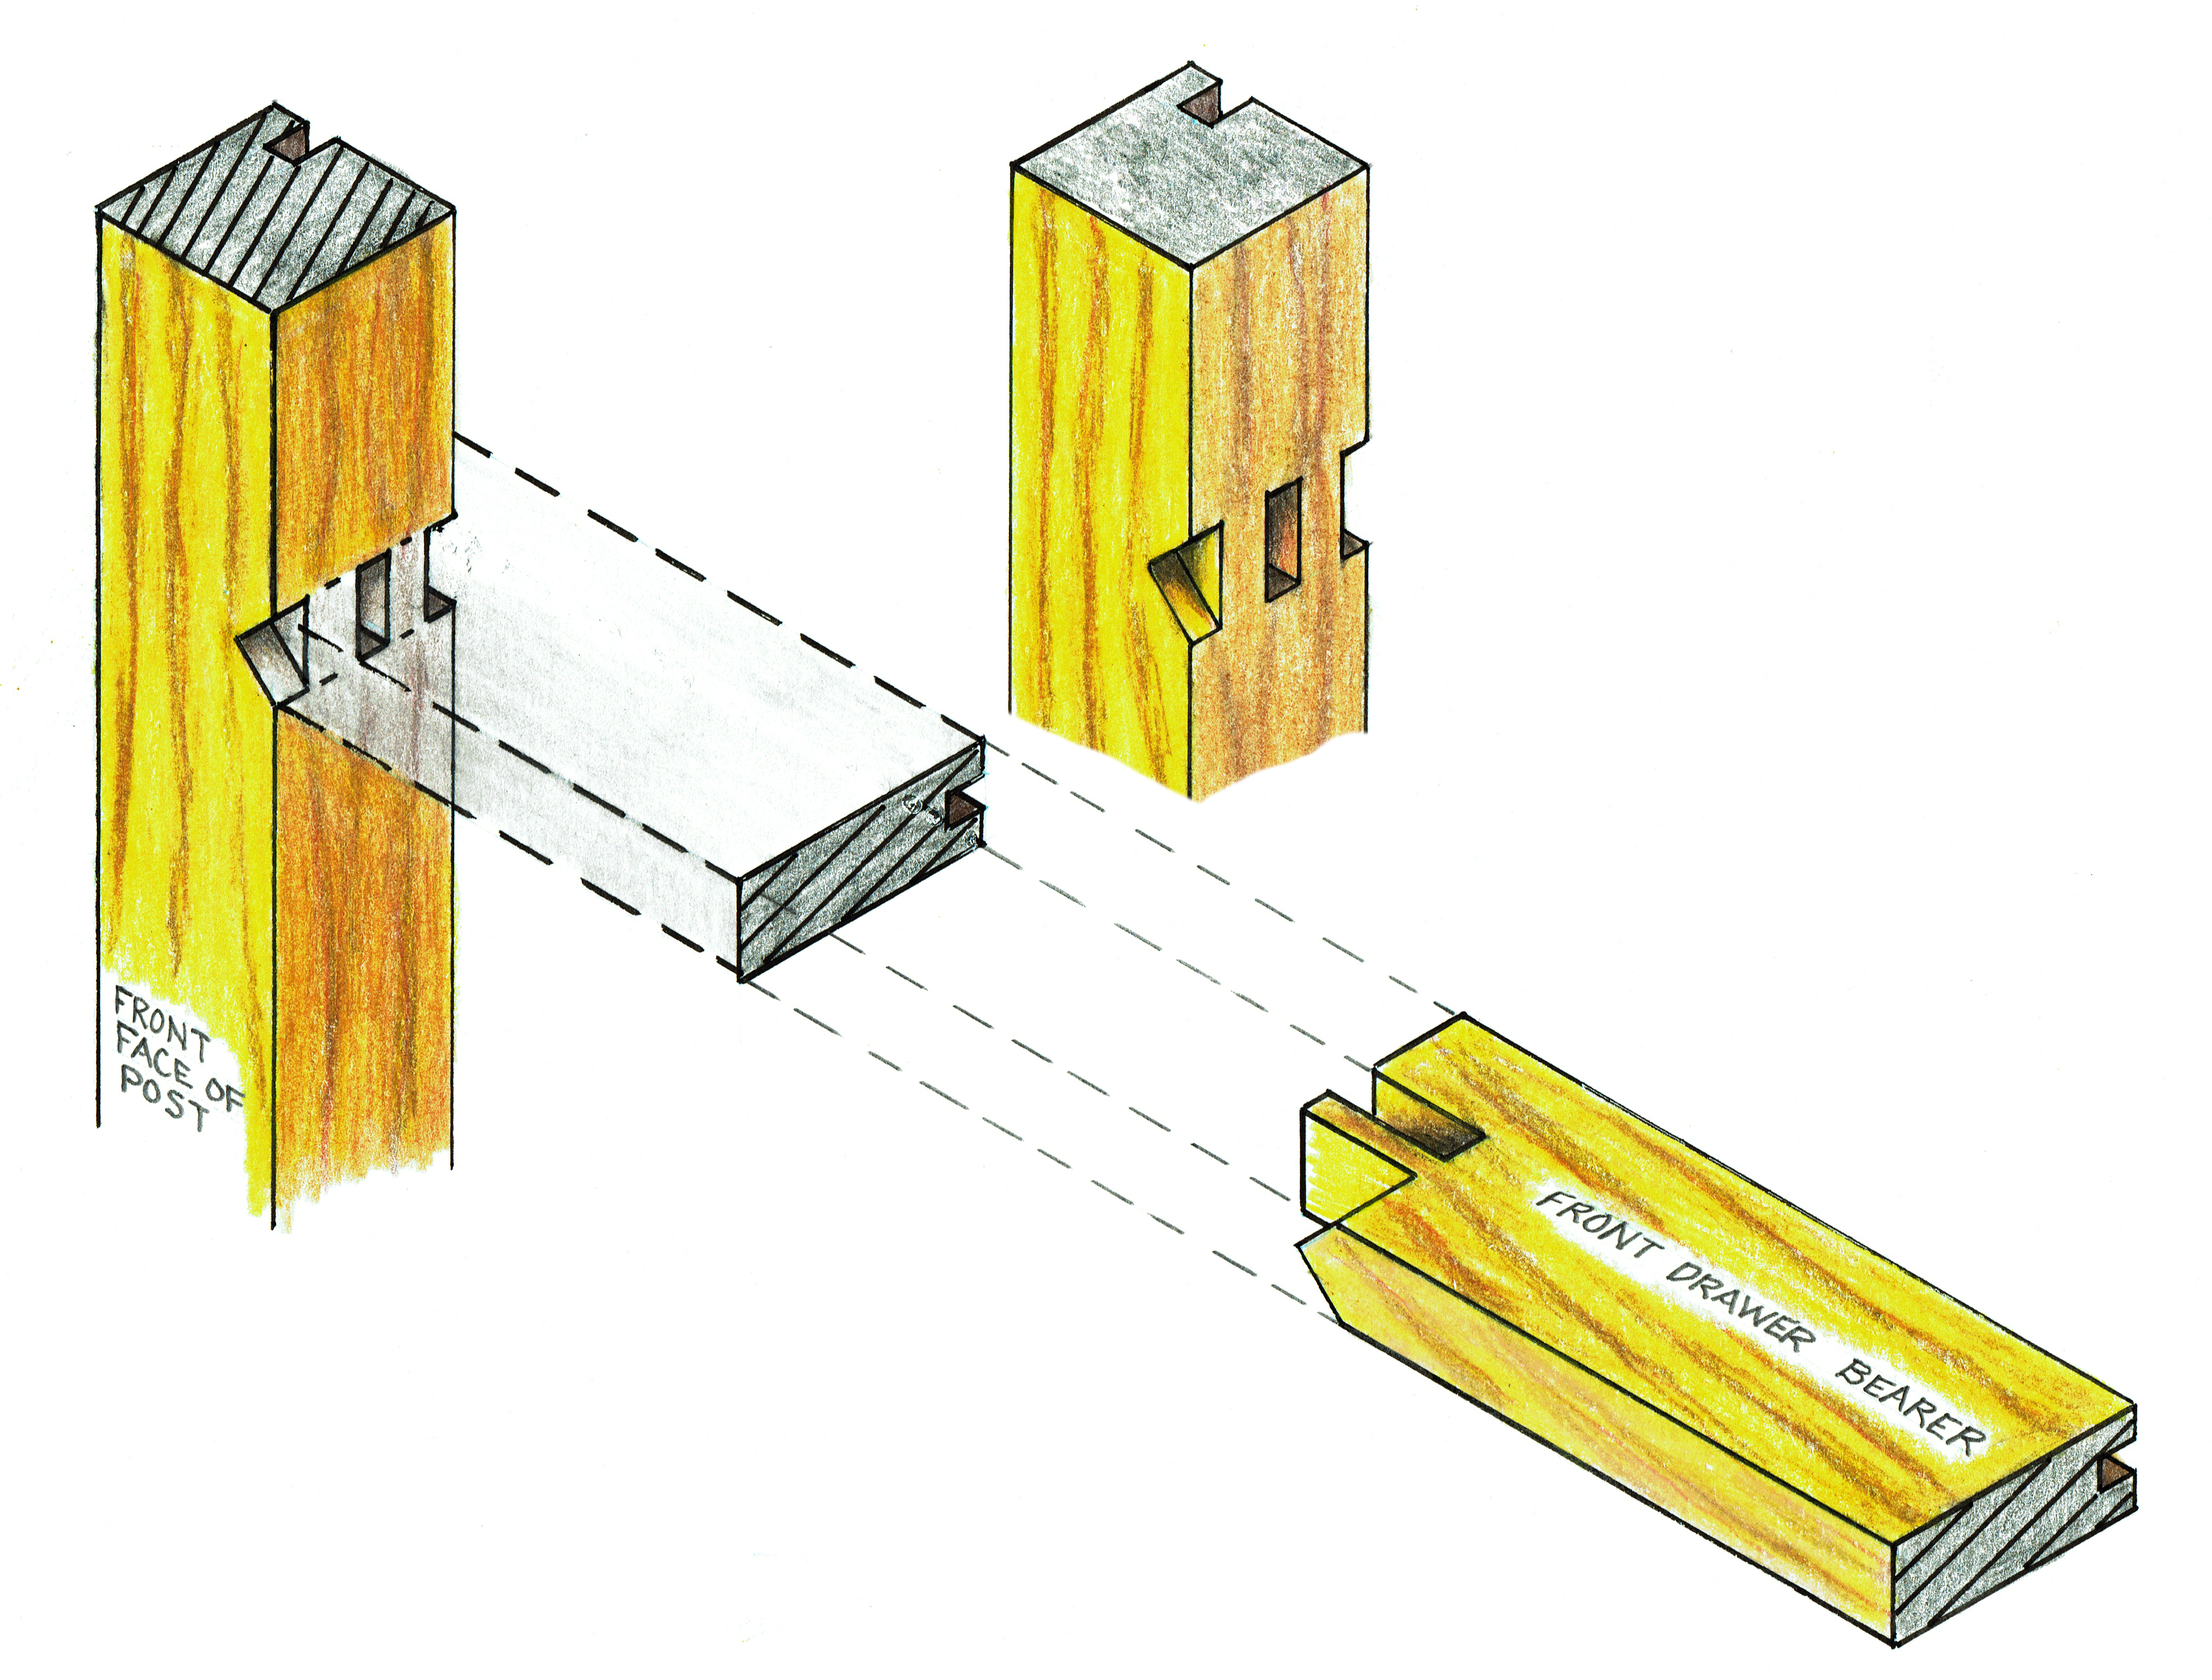 With all of the rear bearers completed I began tackling the front bearers. This joint is similar to the rear bearer but with the addition of a bird’s beak detail. While mostly decorative, the bird’s beak adds some additional strength, glue surface and helps to index the front bearer square.
The joint is pretty simple to cut. The one thing that I have yet to do is create a paring guide. The guide would make any trimming a lot less nerve-wracking. But for this set of joints I just went freehand.
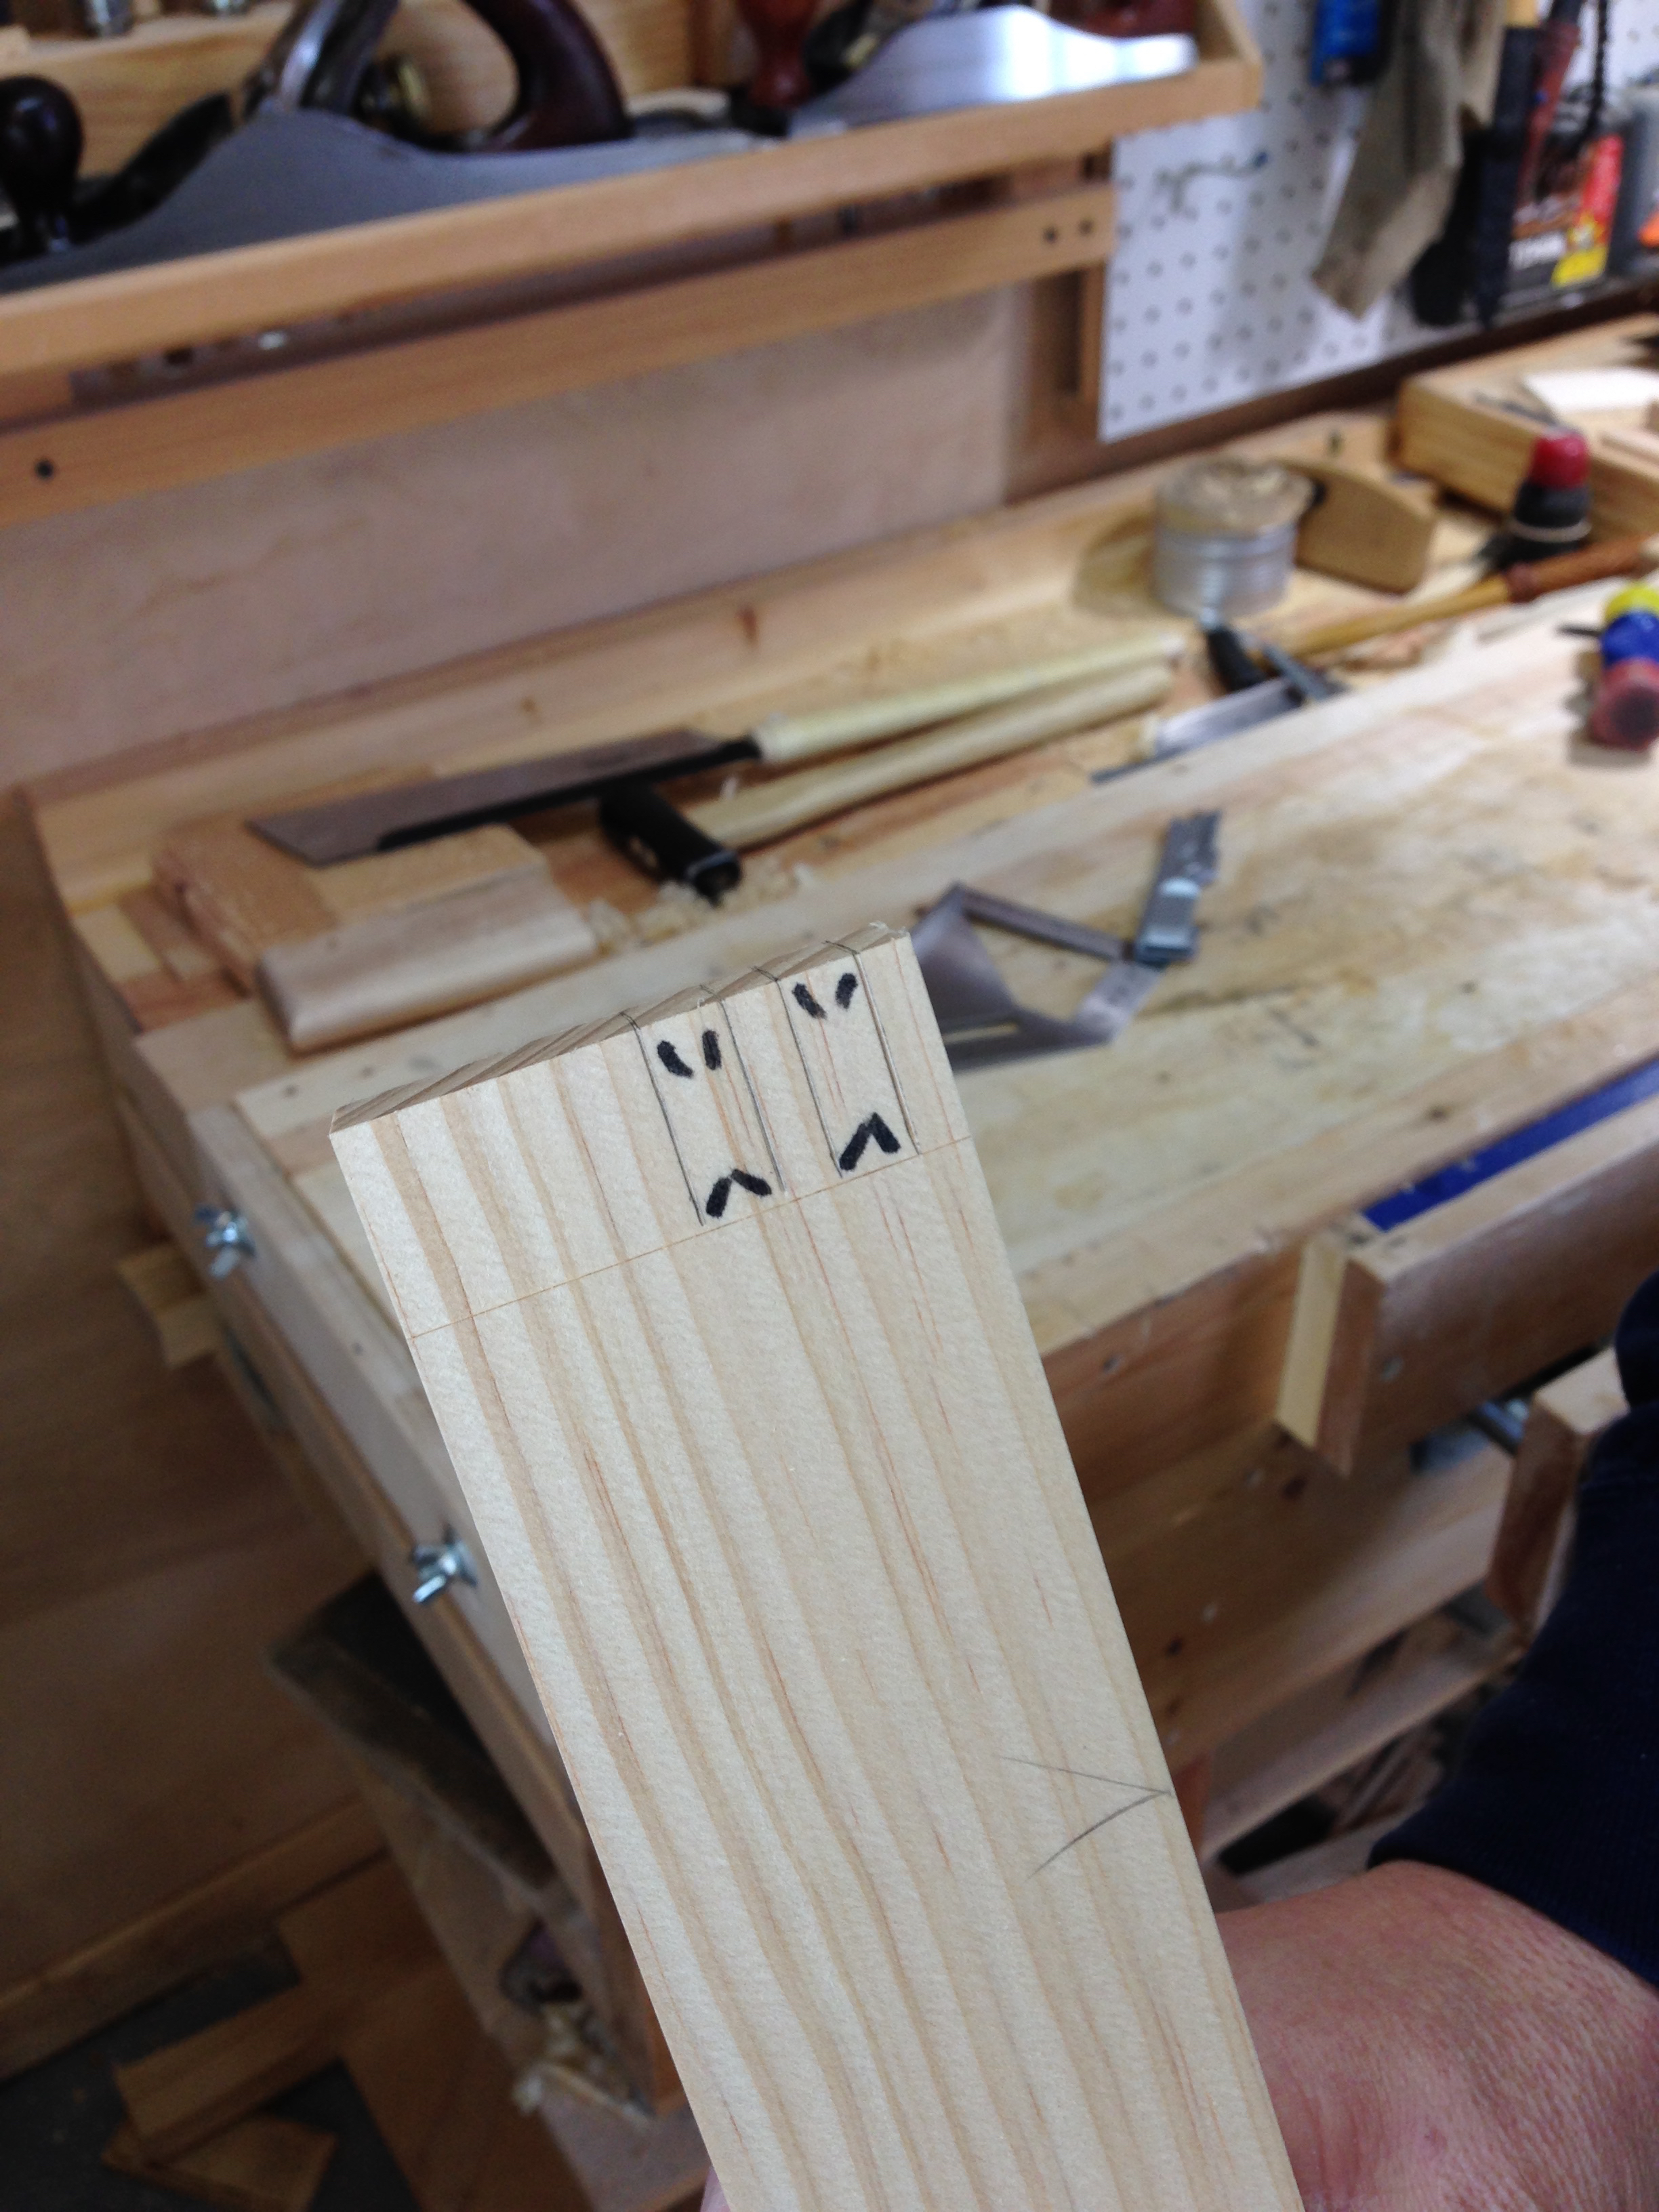
Like with the rear bearer, I began with the gauge.
A joint marked and ready for cutting.
To lay out the bird’s beak I use a miter square and a knife. The knife registers in the shoulder knife line and I slide the miter square up to it.
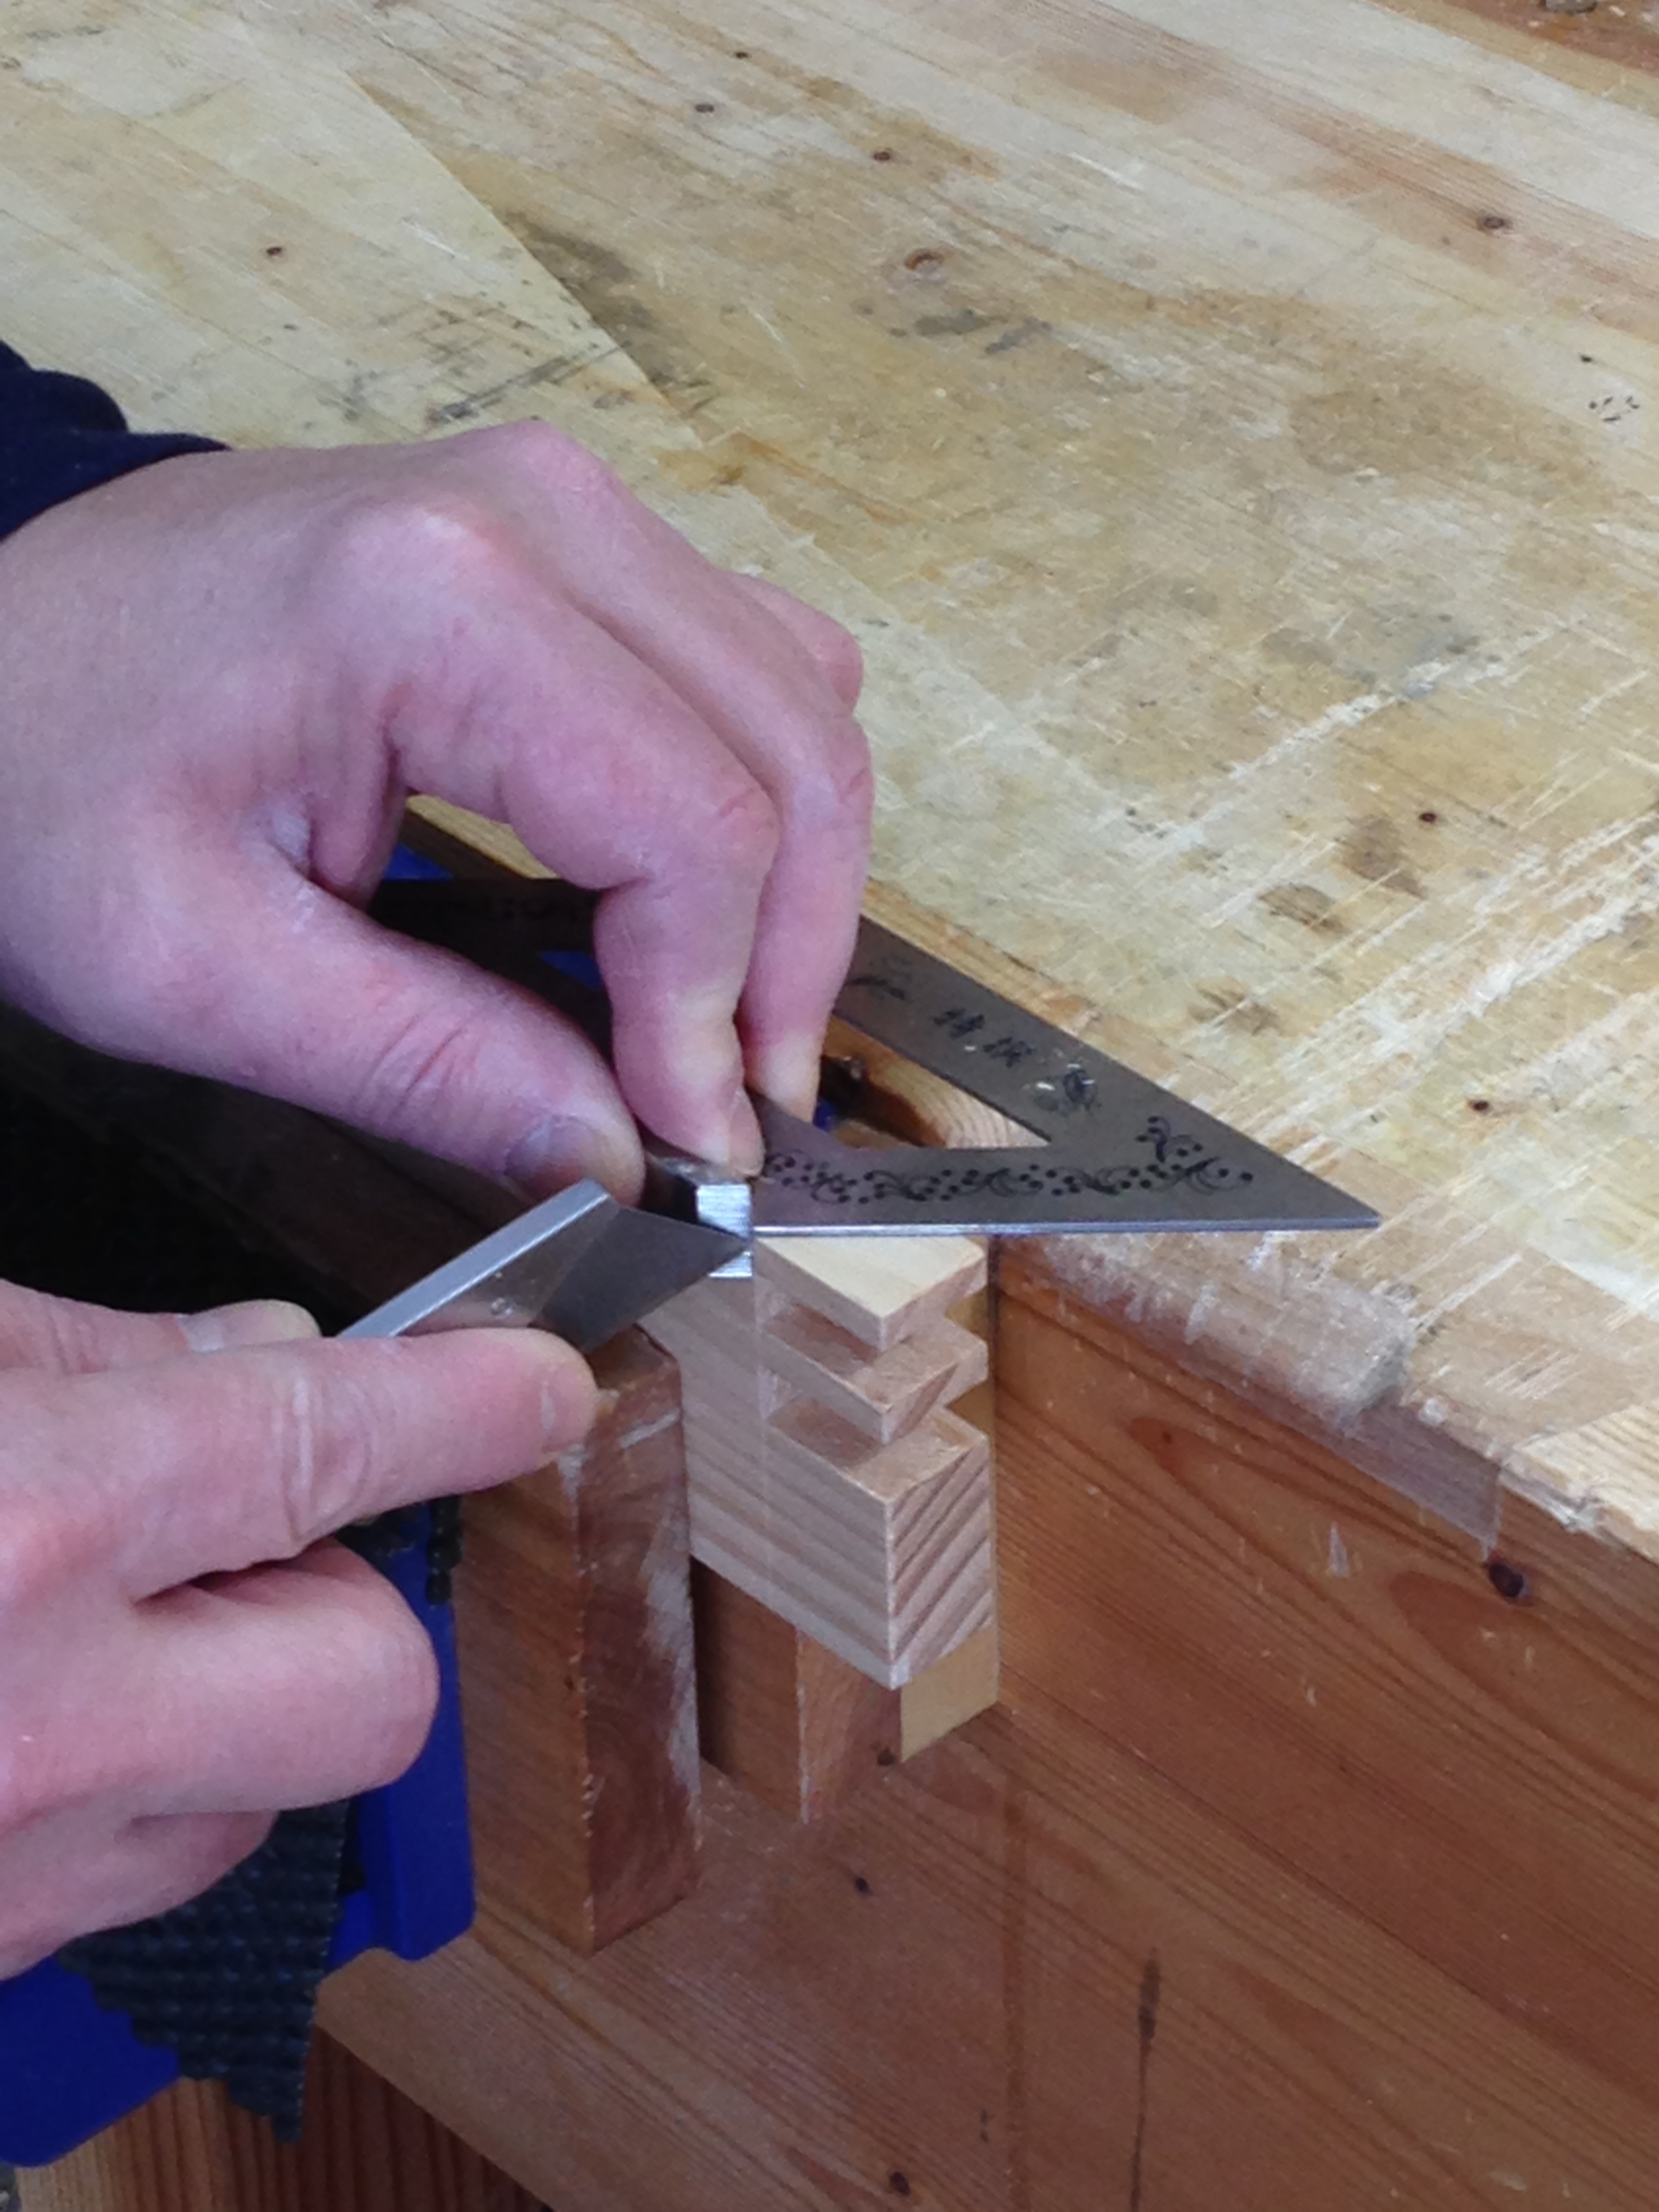
Then flip the miter square to the opposite side.

I then used a chisel to create a trough for the saw and sawed the waste.
Light paring is usually all that is needed. Just enough to remove any discrepancy between the knifed line and the sawn waste. So went the procedure for all of the front bearers. Once the joinery was cut, these pieces also received a groove same as the rear bearer.
A dry fit of the front frame assembly. I still need to fiddle with a couple of the bird’s beak joints. Clamp pressure draws all of them tight, but I feel better about it if the set tight without the need of clamp pressure. Maybe I’ll make that paring guide before I tackle the final fitting.
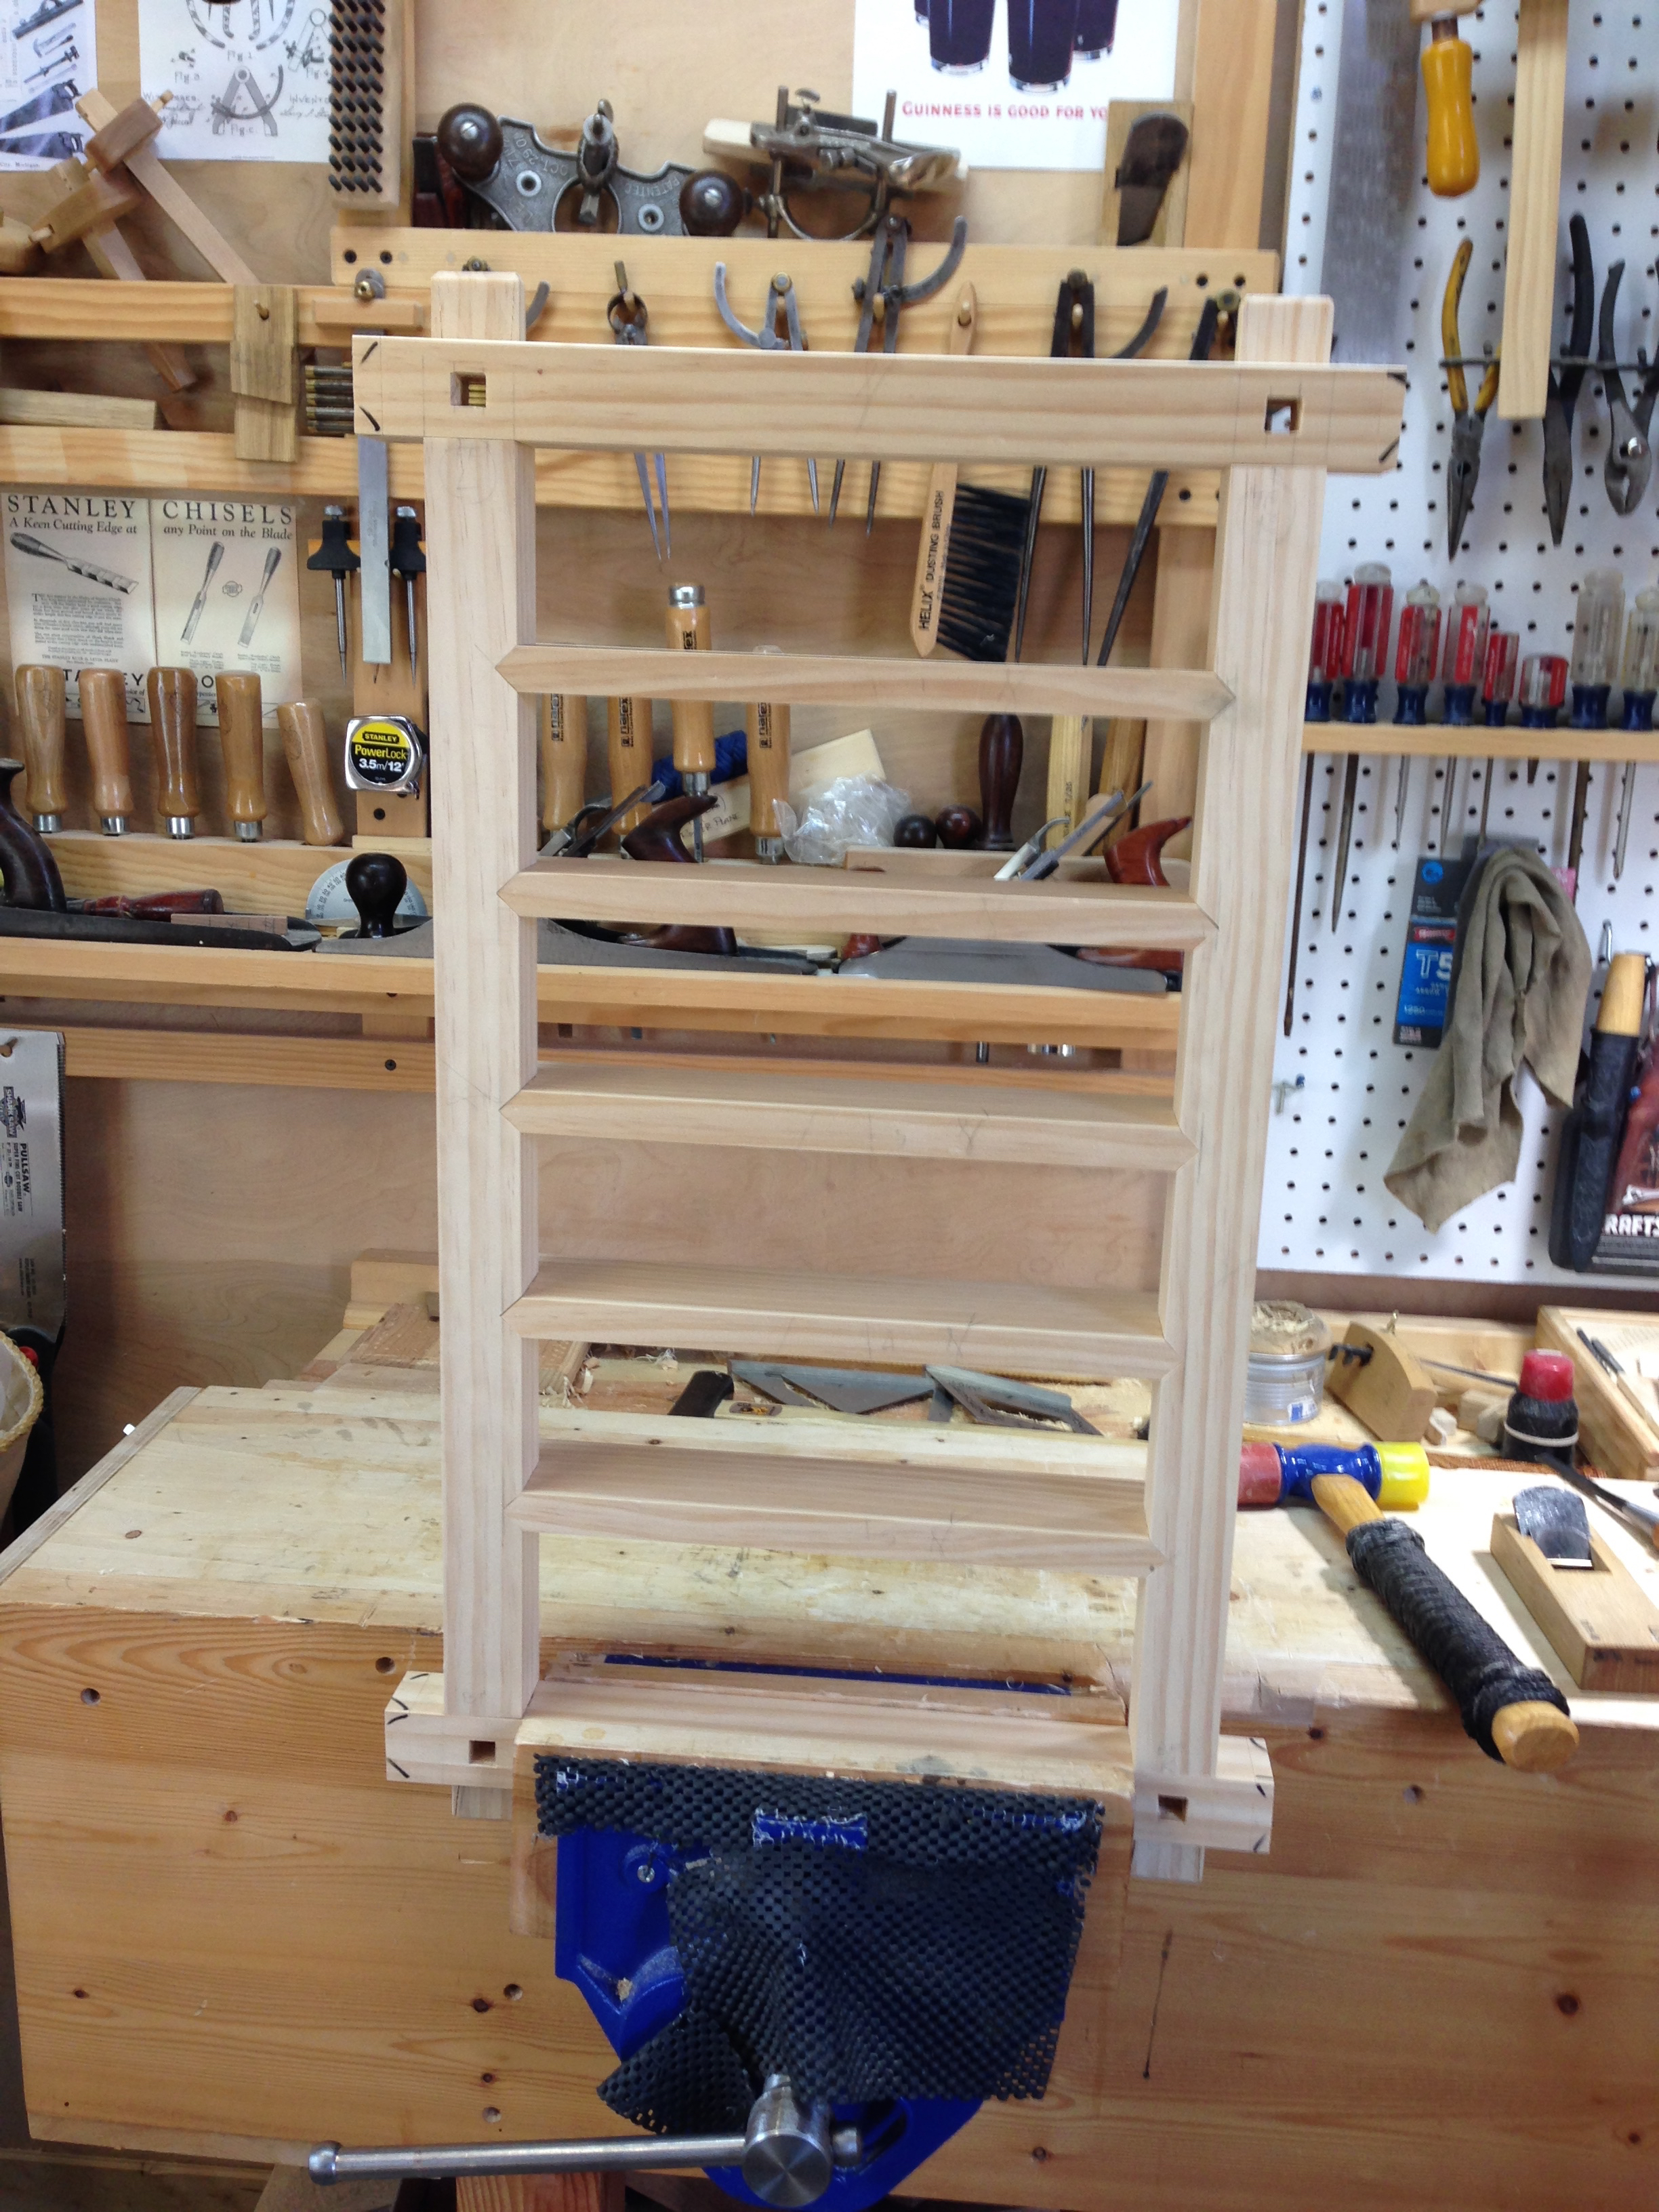
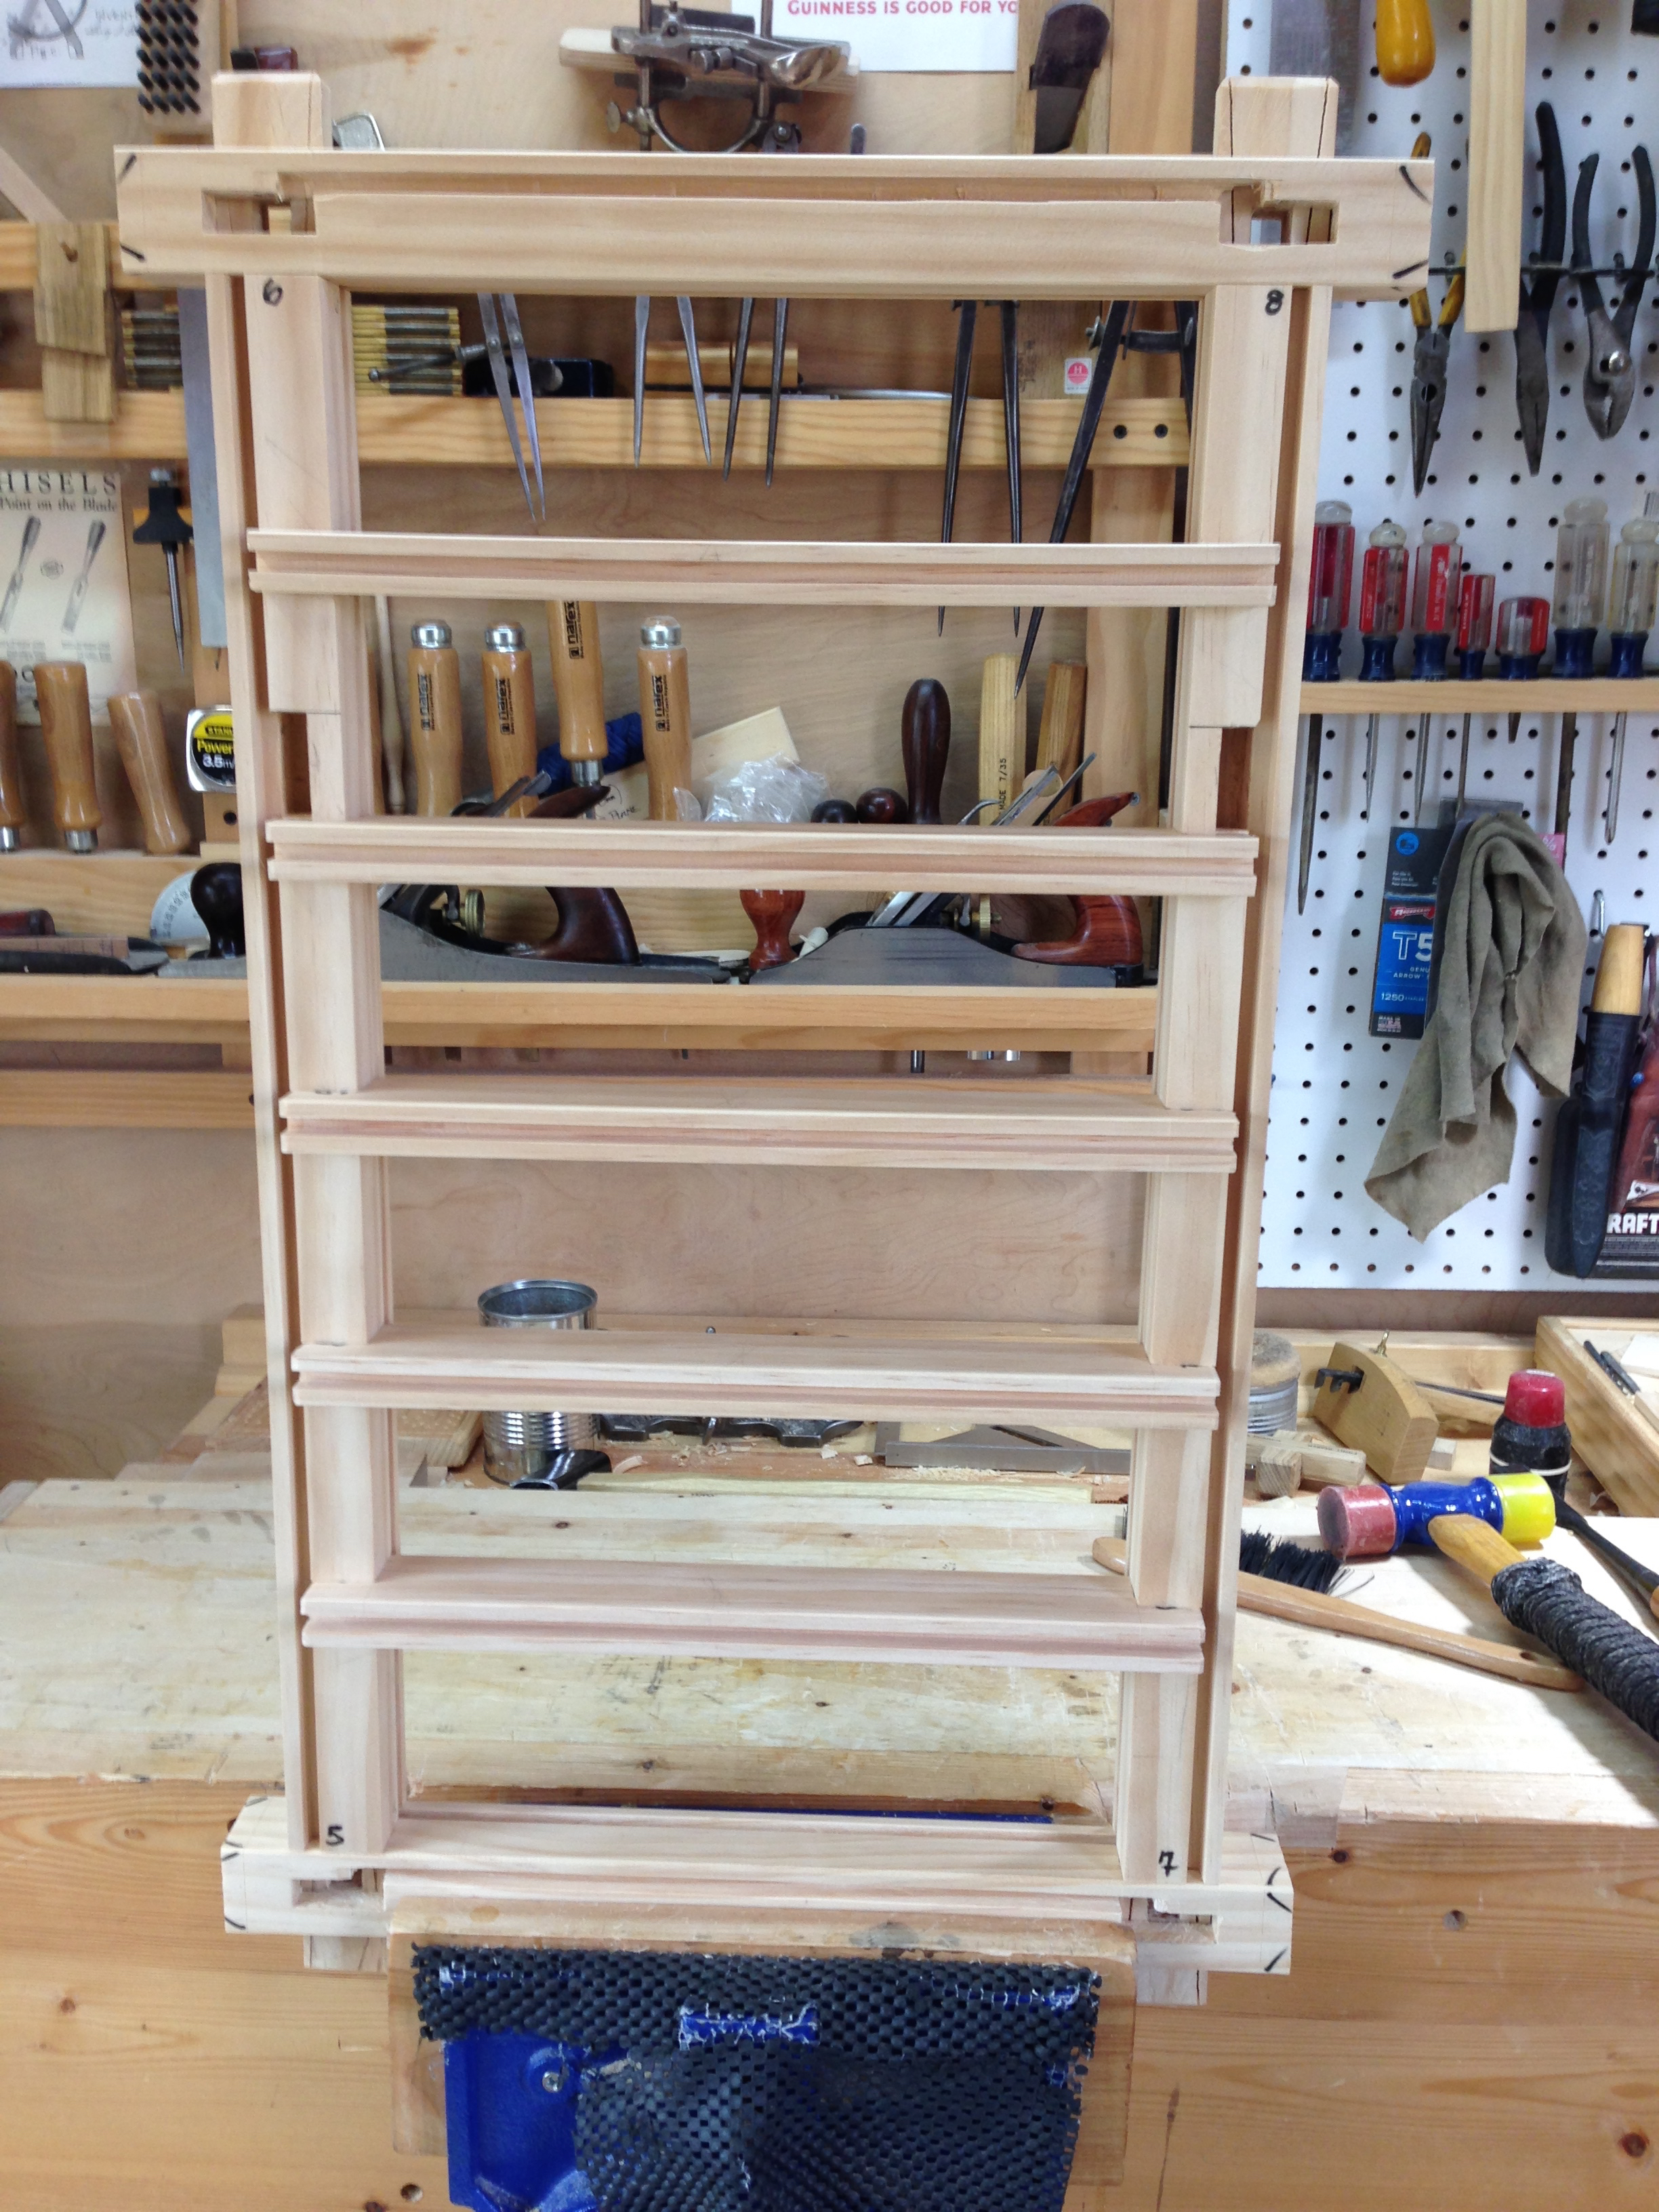
I couldn’t resist a dry fit of all the components that are completed to this point.
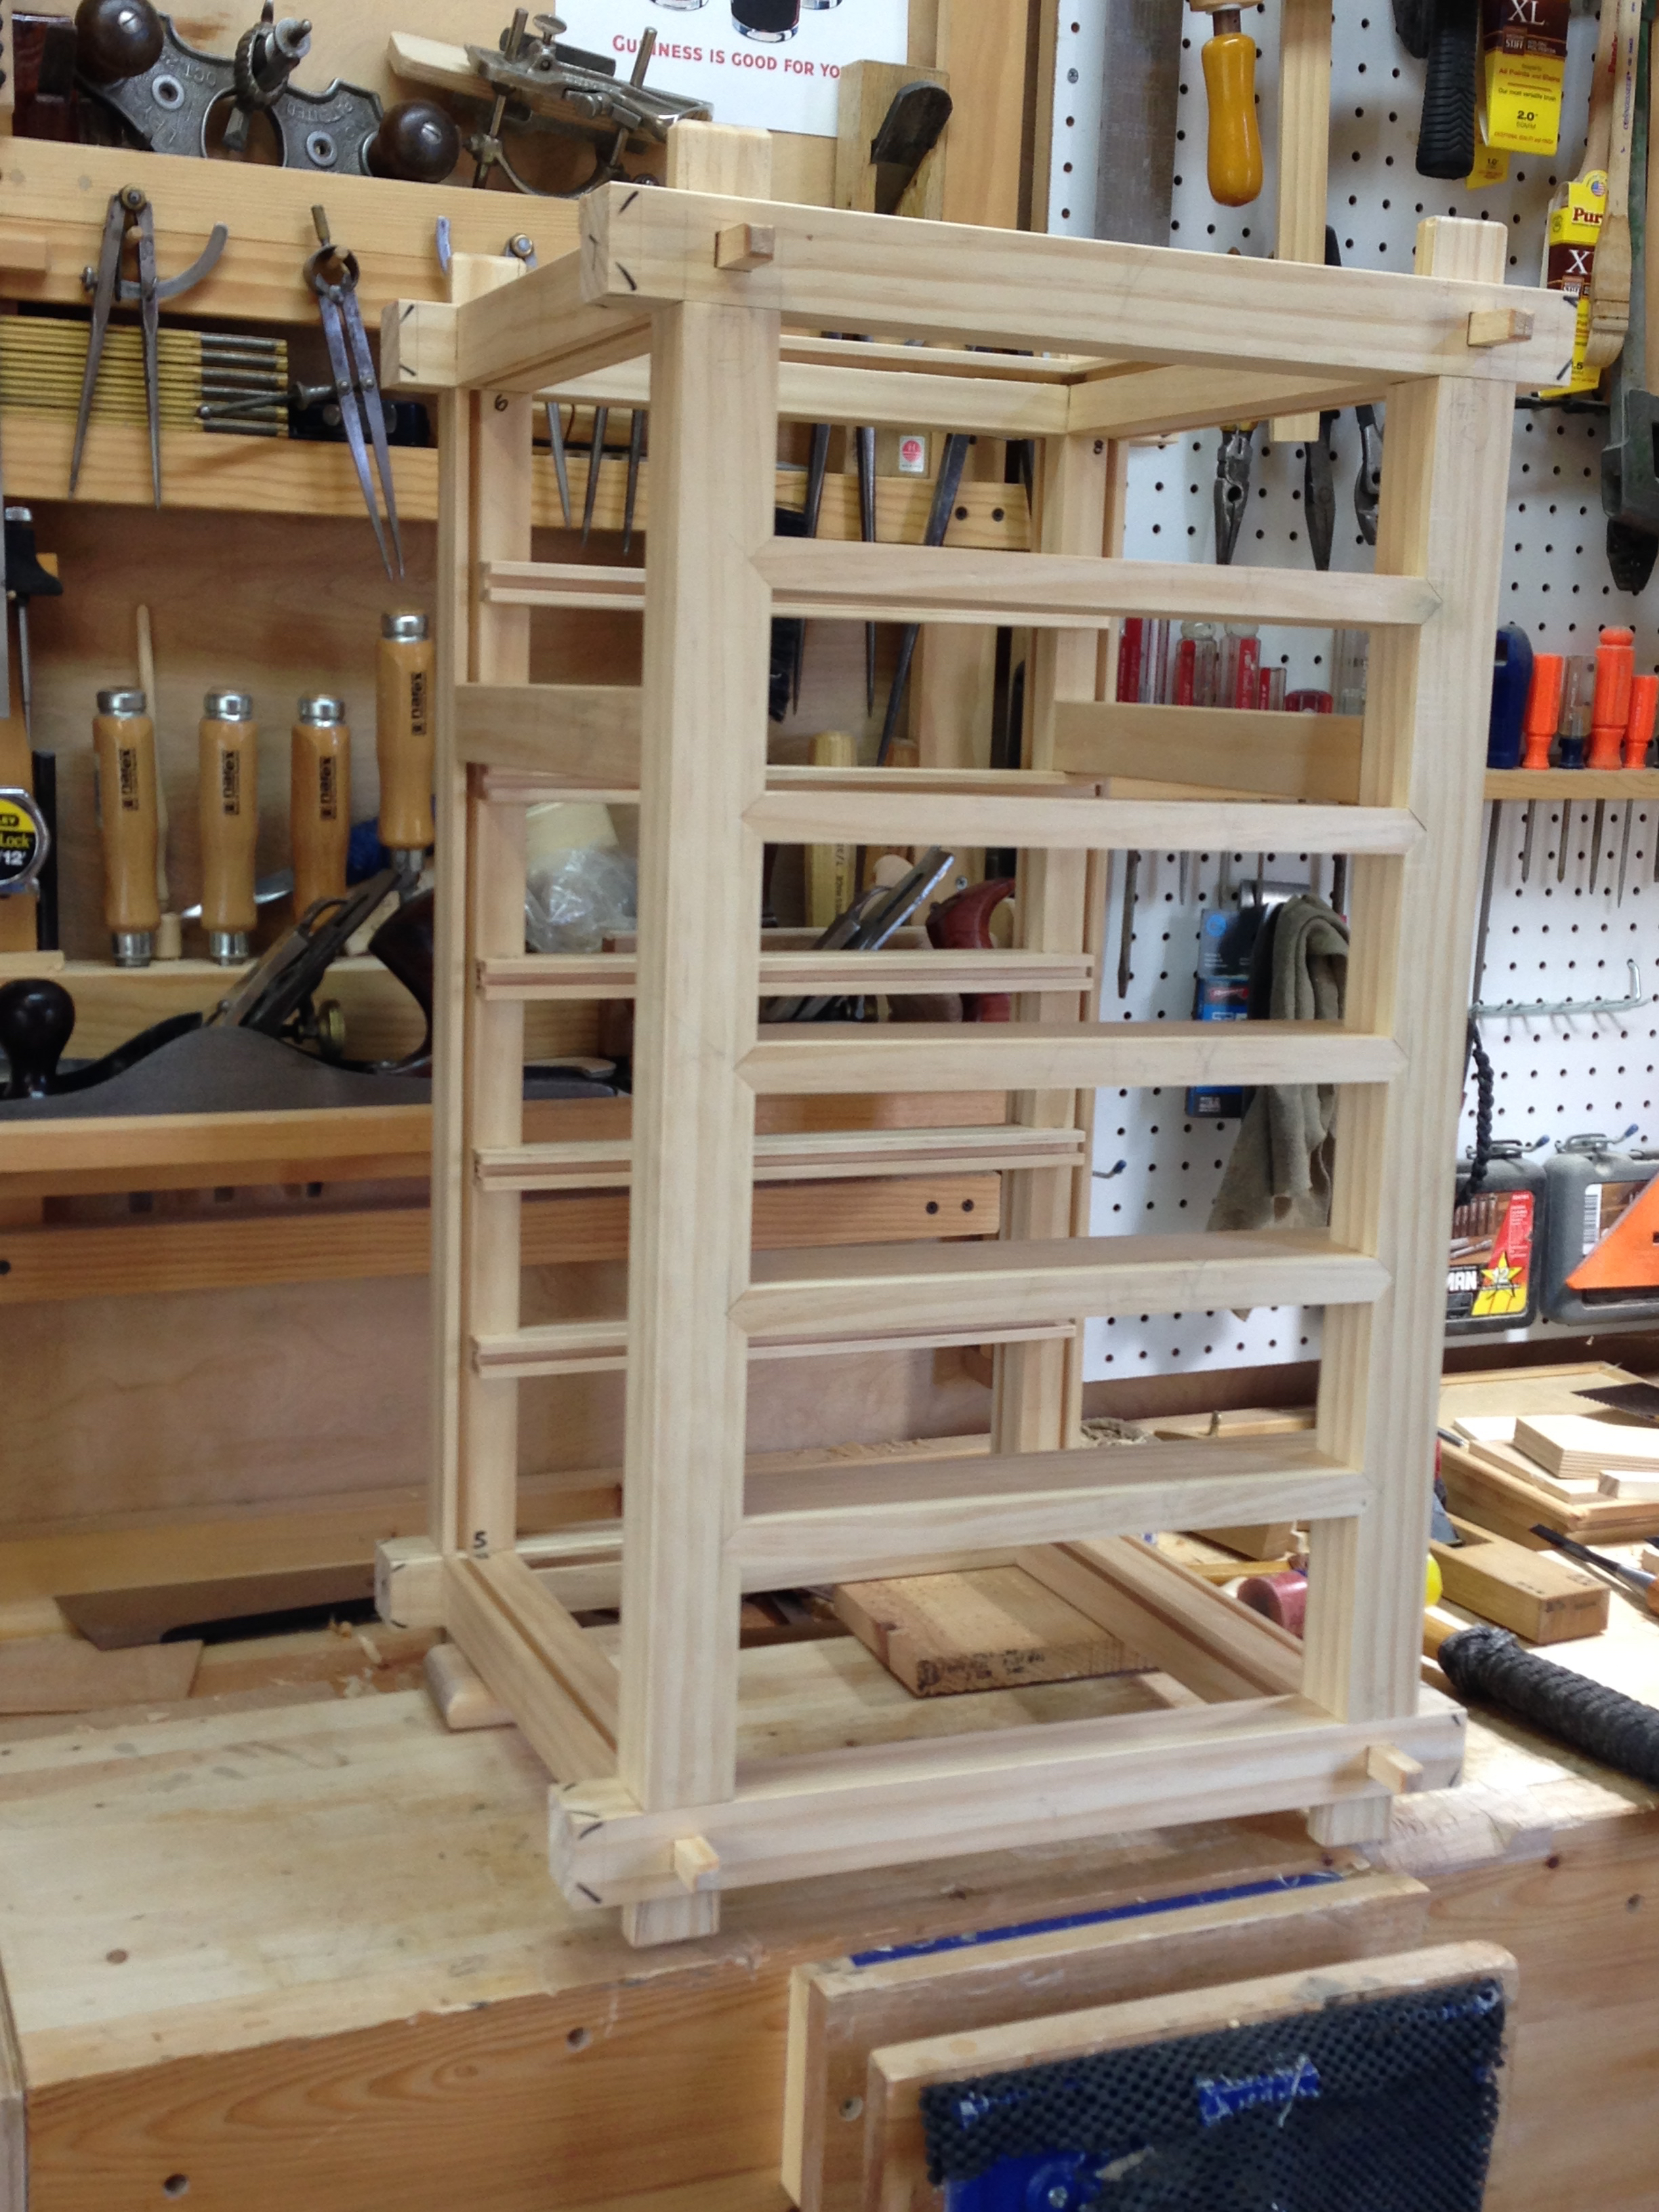
I have deliberately changed from my normal sequence on this build. Normally I would have completed and glued the front and rear frames before moving on to the side rails. I changed it up this time because I want to get some photos of the entire frame assembly sans panels. It still amazes me just how rigid this assembly becomes when it’s assembled.
Still a lot to do. So more yet to come.

Nice post Greg great set of photos have you employed a photoraphy assistant , a number of photos with both of your hands in view? it looks like a great project but a bit too challenging for me.
If you ever get around to holding a class here in the UK I would look to attend maybe you could be a guest presenter here at the castle.
Is all the frame timber clear pine , I think only boards are available here
Thanks David. No, no photography assistant. I’ve been experimenting with a tripod and the camera timer. Its not all that complicated. There are a lot of parts, but the joinery is repetitive. The key is the layout.
The material for this one is clear pine. I’m lucky. The local big box store sells lengths of 2×2 clear pine. Construction grade 2x could easily be used for the frame work. I actually plan to do that in a future build to show that this design is accessible to just about everyone. Just as I did for the Chinese Gate Bench project.
I highly doubt that I’ll be invited to present at the castle, or anywhere for that matter, any time soon. I’m not entirely sure Paul and Joseph are even aware that I’m writing a blog. Writing this blog is as close to self-promotion as I come.
Greg
Greg, fabulous joinery going on here. It’s really inspirational, every time I read your blog I want to build a tansu so I can get proficient at joinery. After the Escher Tool Chest massacree (with 5 part harmony) it might be time well spent 🙂
Thanks Joe! It’s just mortise and tenons and half laps!
I was actually thinking about this build and your penchant for Greene and Greene. You could leave the exposed tenons long and round them over. Then build the the drawers with protruding finger joints. Heck the posts of the carcass would be perfect for a cloud lift detail.
Of course once you build one you’ll realize what a hack I am and loose what little respect you have for me. 😉
Greg
Pingback: HB Tansu #3-Progress 5 | GREG MERRITT – BY MY OWN HANDS
Greg,
Marking gauges made on purpose. A great idea when you have a lot of repetitive marking to do. No risk of unintentional change. How did you made the pins and fixed them to the exact place?
Sylvain
I have found your posts about marking gauges (dated July 20 and April 19).
Sylvain
The gauge is a great time saver and adds a measure of consistency. At the beginning of a project I’ll check the pins against my chisels and dress them so they are sharp. The pins are just finish nails. So they are a little soft, but easy to sharpen. If one of the pins becomes too short I can remove it with a pair of pliers and install a new one.
Without this dedicated gauge I would need at least two separate mortise gauges. Which would work just fine, but adds to the chance of error creeping in.
Greg
Pingback: HB Tansu #3-Progress 7 | GREG MERRITT – BY MY OWN HANDS