 Finally some shop time! It’s still getting cold at night here. Below freezing at night cold. So I planned ahead and turned the space heater in the shop on low last night before I went to bed. This morning the shop was a toasty 50F. OK, maybe not toasty, but plenty warm to start working. Today my focus was on the drawer dividers on the front of the tansu and the drawer bearers that run front-to-back. I started with the drawer dividers.
I began with the front frame dry assembled and clamped tight. I transferred the distance from the post to the divider using a scrap piece of wood. The distance marked on the scrap piece of wood was taken directly from the full-scale shop drawing. Then I used a square to drop the locations for the dividers from one front bearer to the next. This little exercise ensures that the dividers are plumb in the assembly. Since I have a handy marking gauge already made, I pressed it into service once more for laying out the dados for the dividers. The arrangement is a stopped dado with an additional stub tenon towards the front of the divider. The thinking being that any expansion or contraction will be limited towards the front of the divider and will be forced to the rear of the divider. Hopefully this will keep the divider flush on the face of the tansu.
Marking with the gauge.

Waste marked and ready for cutting.

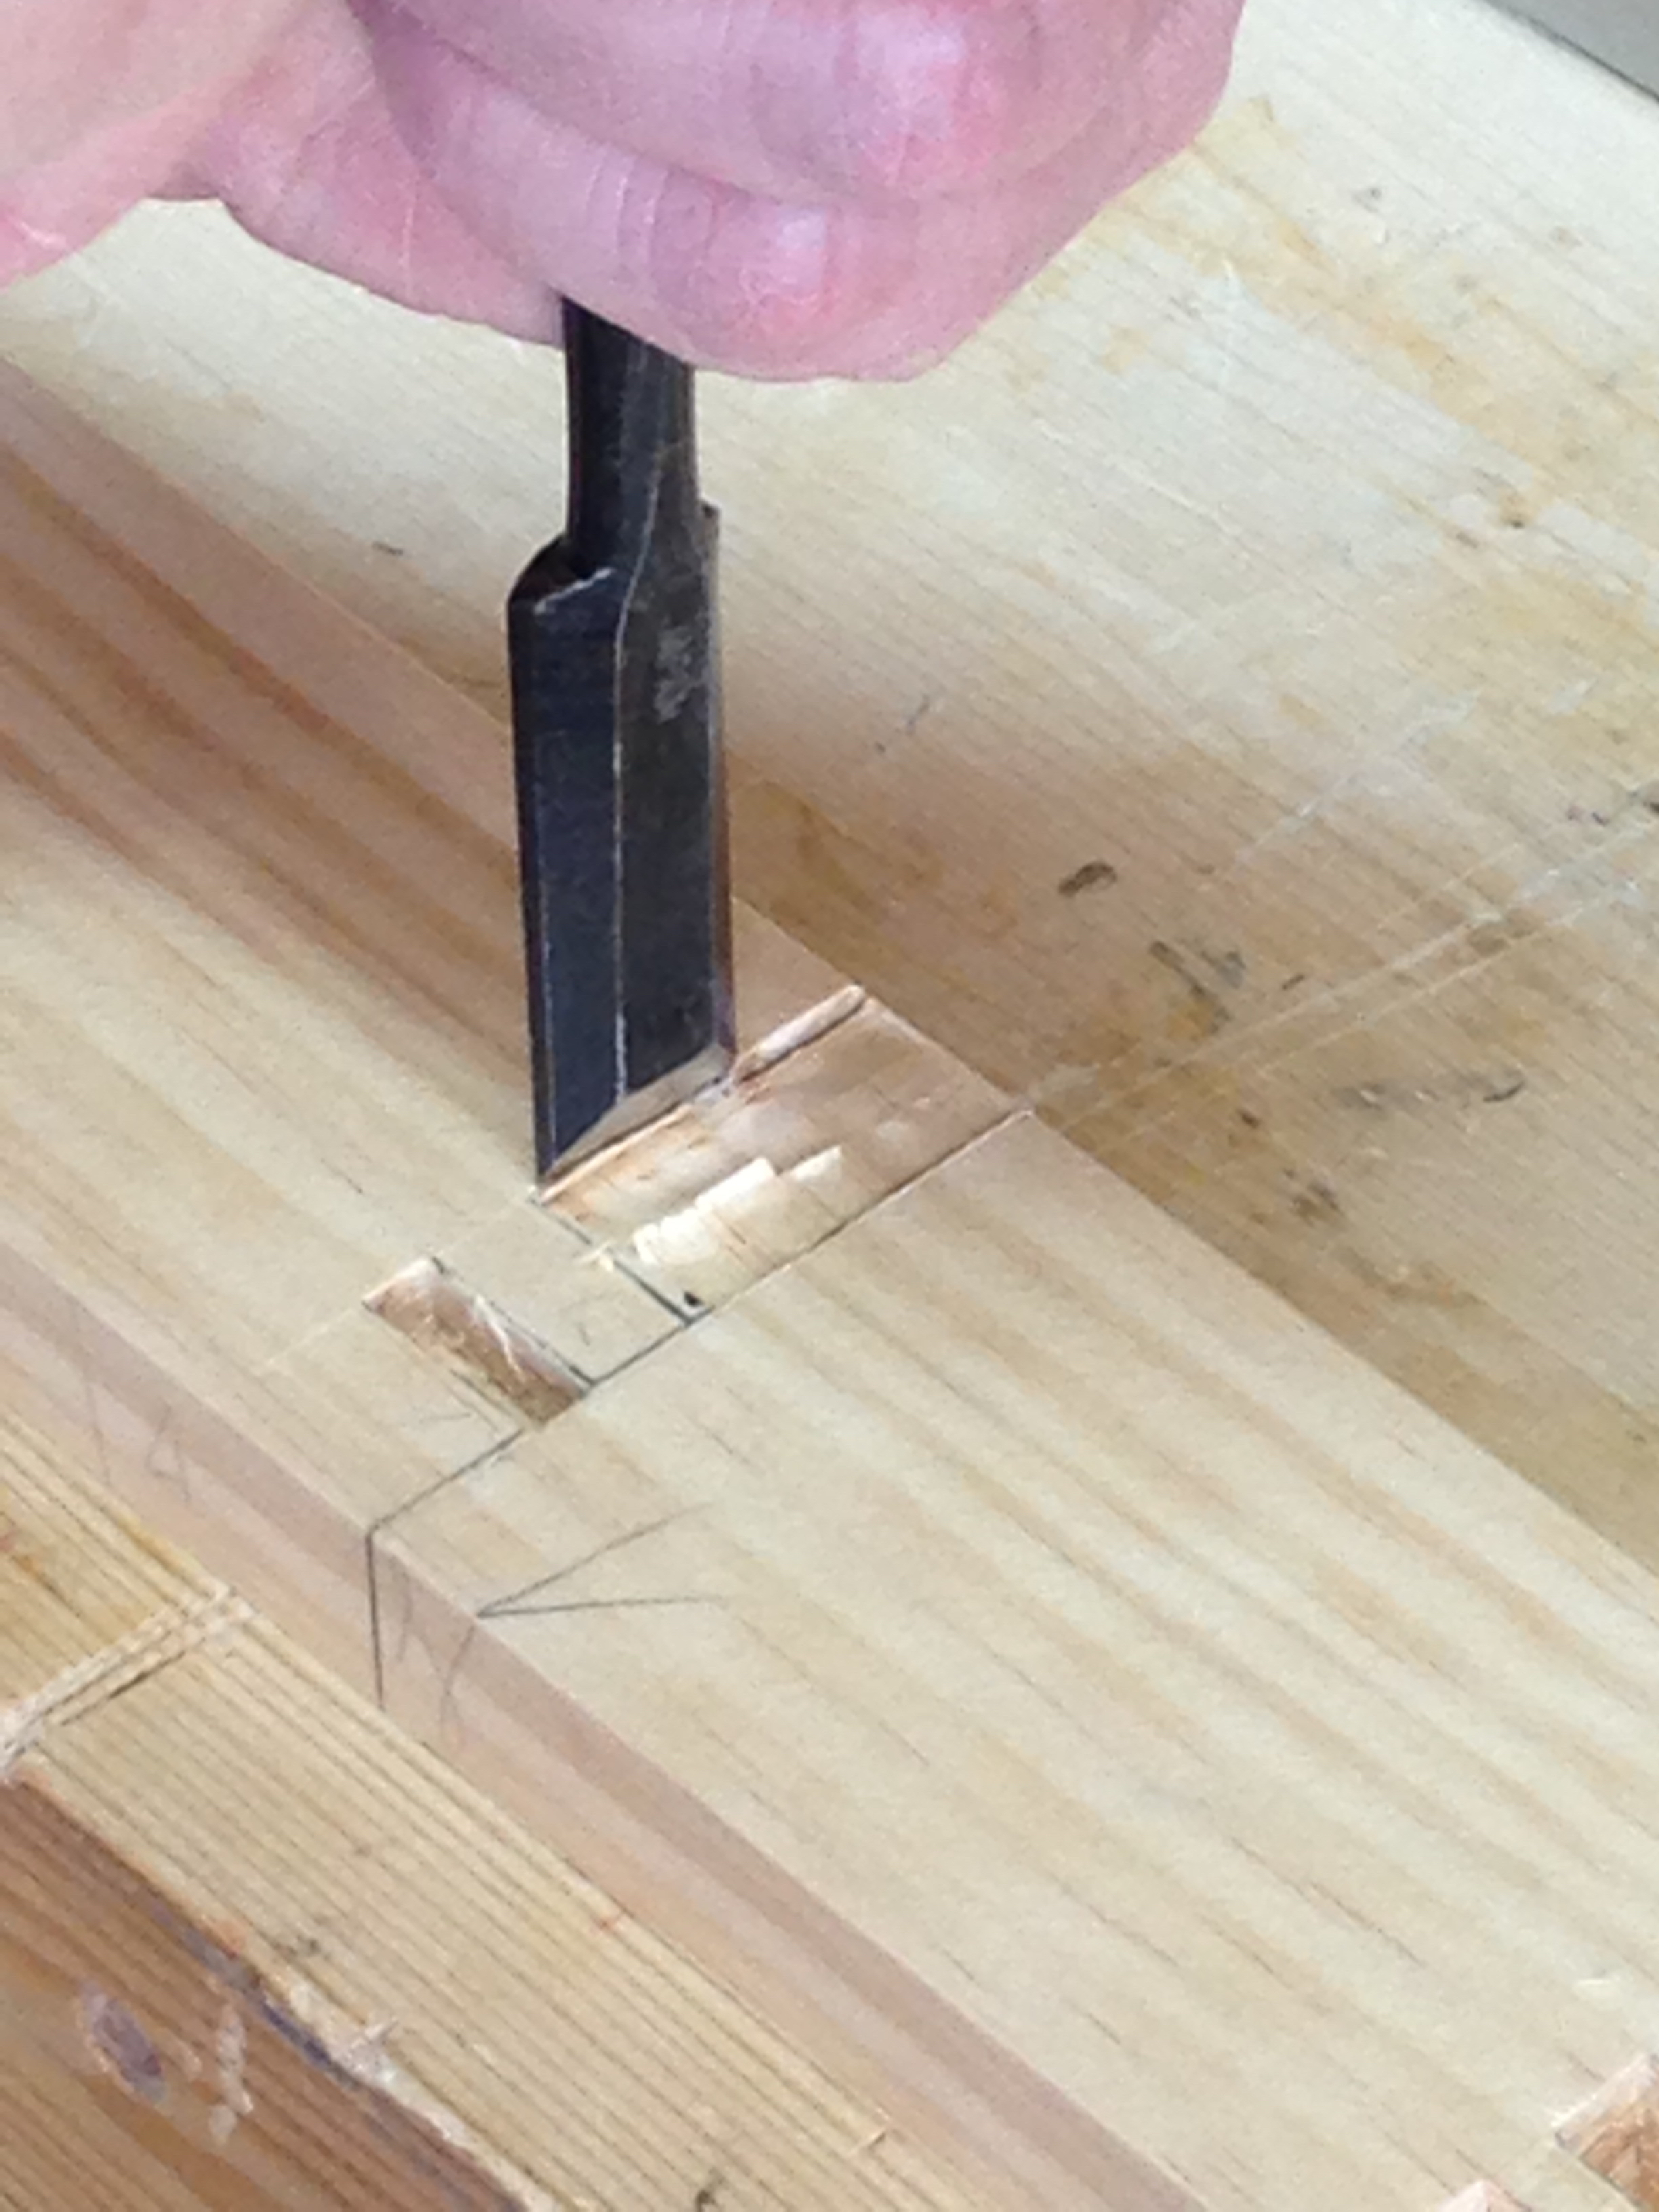
Mortising for the stub tenon.

Cleaning up with the bottom cleaning chisel.

I sawed the portion of the dado that falls over the dust panel groove to prevent any blowout when I began chopping.

Chopping the walls of the dado.
Paring the bulk of the waste.

Final cleanup with the router.

Completed joint. Only five more to go.
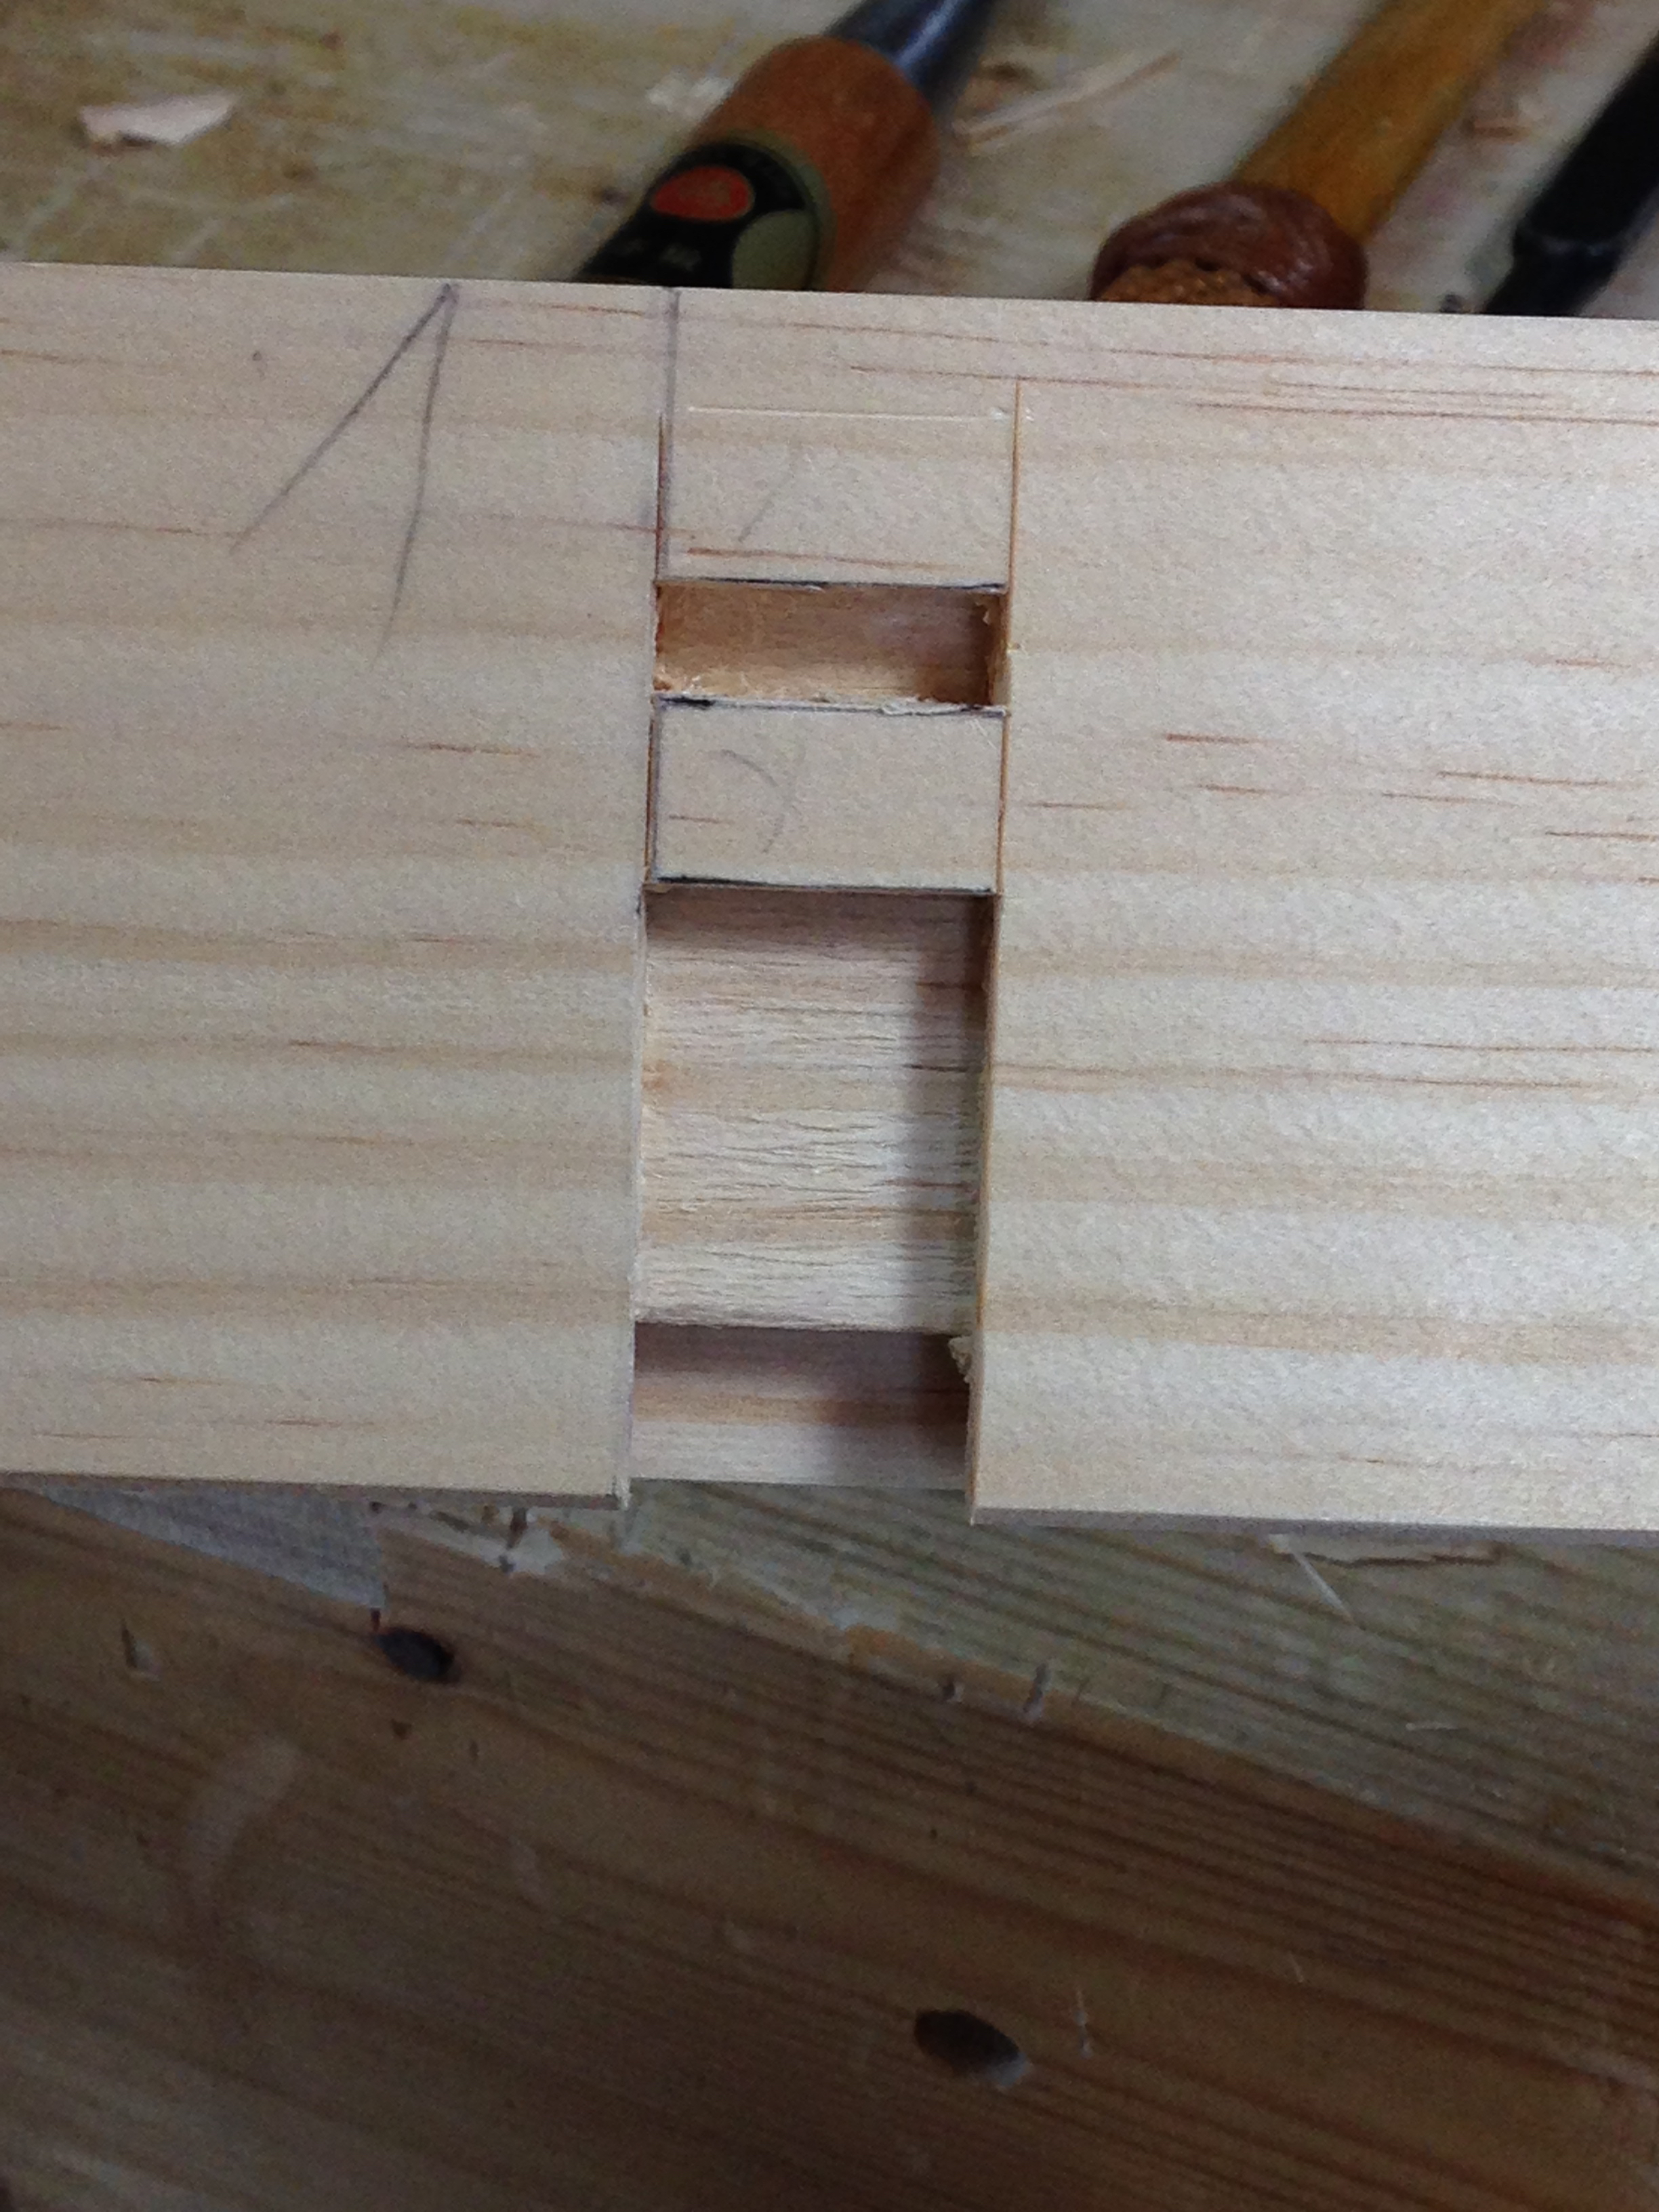
Dry fit. Sorry I don’t have any photos of cutting the mating portion on the dividers. I became engrossed in the work and forgot all about taking photos.
With the dividers completed I began work on the from-rear drawer bearers. These are pretty simple and go fairly quickly.

All of the pieces were cut to length, surface planed and ends squared on the shooting board. One thing to note is that these are fitted with a deliberate gap at both ends. Again, this is to address expansion and contraction. In this instance the movement that I am concerned with is that which will occur across the width of the front and rear bearers. If everything is tight to start with there is a chance that parts will buckle and create issues with the operation of the drawers. Anyway, there is a gap.
To begin the joinery I plowed all of the required grooves. Then set my cutting gauge for the depth of the stub tenons on the ends of the pieces.

Using the cutting gauge to quickly define the shoulder. Remember, I squared all of these pieces on the shooting board.

Now the mortise gauge to mark the thickness of the tenon.

Sawing the shoulder walls.

Splitting off the waste.

Like I said, these pieces goes quickly. The one variance is the pieces that are in-line with the drawer dividers. These are wider and receive a groove on both edges.
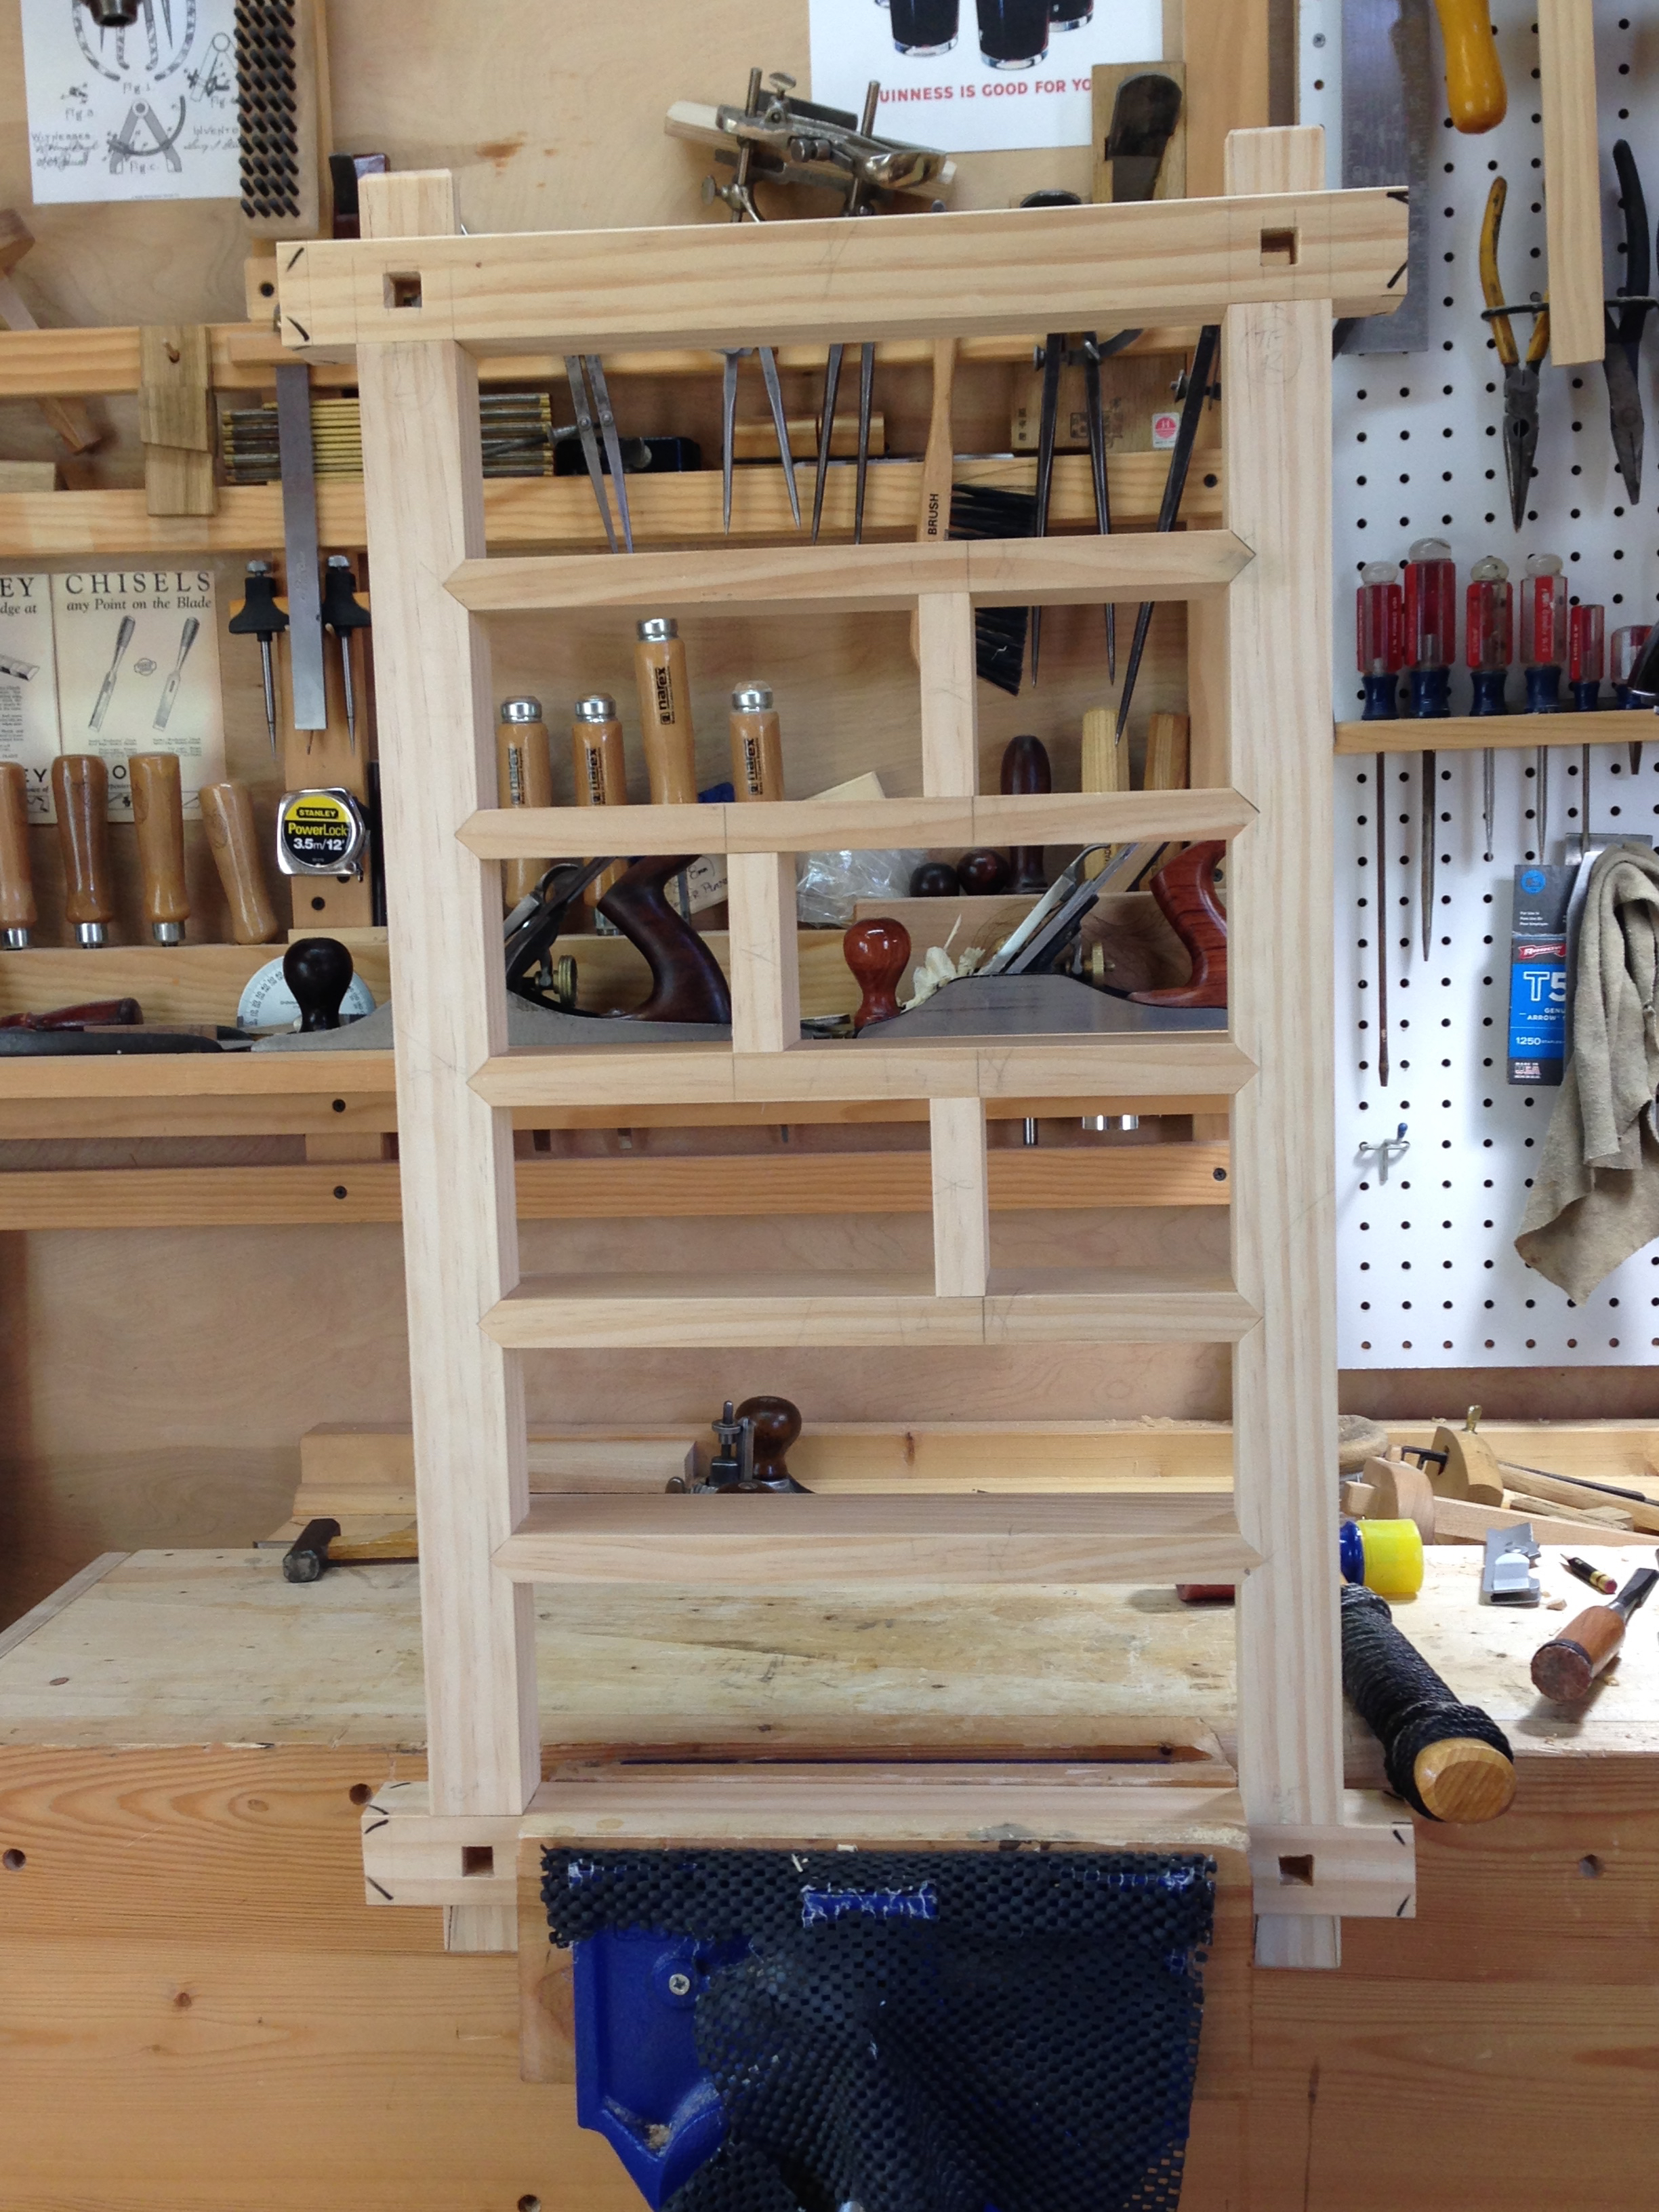
Yet another dry fit of the carcass assembly with all of the framing in place.
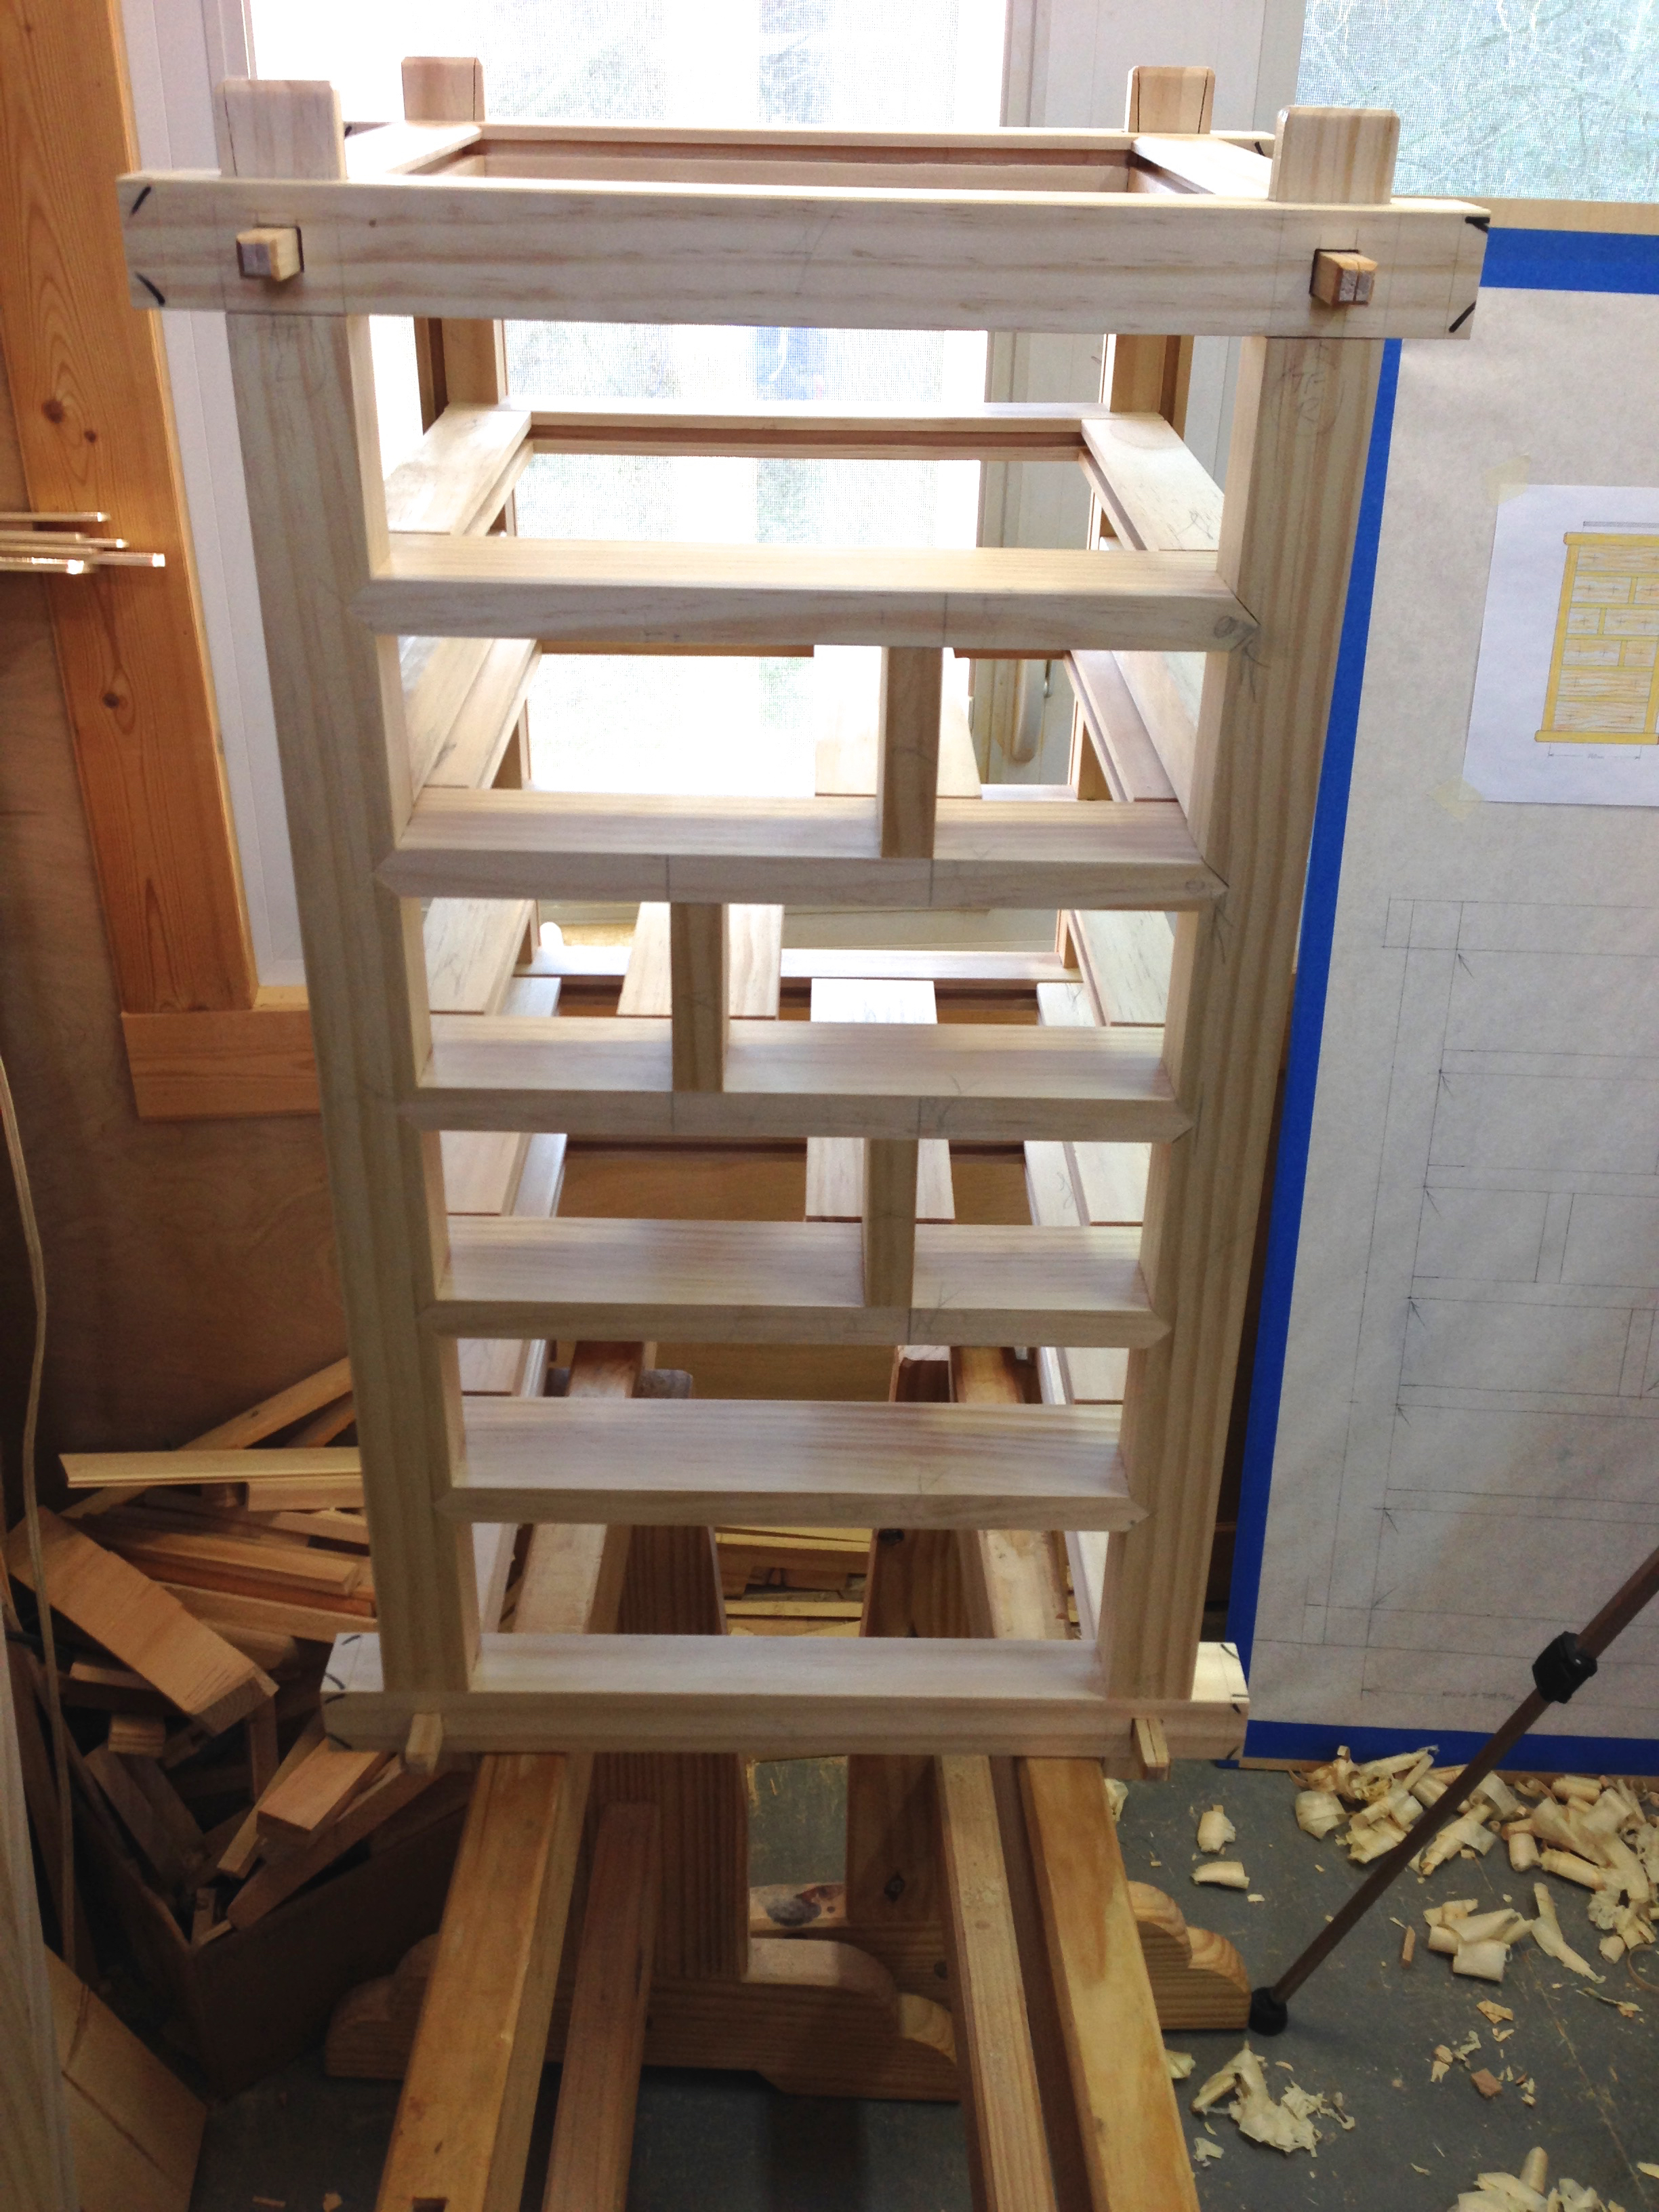

I need to drill the holes for the handles and do a final cleanup of the parts and the carcass work is just about completed. Tomorrow I hope to have the front and rear assemblies glued together and wedged.

Pingback: HB Tansu #3-Progress 6 | GREG MERRITT – BY MY OWN HANDS
Great set of photos showing the utilisation of a number of your homemade tools , good luck with the glue up
Thanks David. I had to go back and look at the photos to see which tools you were referring to. There are several! They have become so common to me that it no longer registers that I made them when I use them.
Greg
I was completely distracted by your cutting/mortise gauge. Did you set up an arm for each of your chisels and a separate cutting arm? Second question – is your workbench based off of Paul Sellers I feel like I read that somewhere on your blog before)? I’m thinking through what I want to build, I’d be interested in what have you found to be the pros/cons of it.
The cutting gauge is a separate animal all together. It’s made in the traditional style with an wedge in-line with the beam. It works well but I want to remake it and use the wedge configuration that I use in my other gauges. The mortise gauge has a double ended beam. Each end has fixed pins that correspond to a chisel width. The beam can be removed and turned end-for-end. If you look close at the photo there is a clearance slot in the lower corner of the beam mortise. That slot is to allow the pins to pass through the head when removing or flipping the beam. Maybe not as fancy as a mortise gauge with an adjustable pin, but simple to make and works just fine.
The bench is a Paul Sellers’ design. Built according to the plans in his book. I’m quite happy with it. Its plenty solid and lends itself to adaptation well. I’ve added an adjustable stop to the left as well as drawers. My bench is only 60″ long due to space constraints in my shop. Longer would be better.
Another bench that looks like it would be good is the one built by Mike Siemsen on “The Naked Woodworker” video. Easy and quick to build.
Greg
adjustable is overrated. fixed pins that match your chisels actually make a lot of sense. I’ve reached a point where I’m not buying anything I could reasonably make, so this was pretty cool to see.
I like Siemsen’s bench, especially the split top. But I want it to be knockdown and a well. So, probably going to end up with a lovechild from Sellers, Siemsen and Schwarz. Maybe I’ll christen it the “SSS Bastard”.
I like simple too. I also find that most of the odds and ends tools can be made without any problem or compromise in function. I didn’t realize how many tools in the above photos that I had made until David pointed it out. All of the gauges and the bottom cleaning chisel were made by myself.
There is a video on using the Naked Woodworker bench here. There is a blog post on the knockdown version of the bench here.
There is a good chance that I will be moving this summer. If that happens my shop space will quadruple and I’ll be building the full size Naked Woodworker bench.
I added an instruction sheet for the mortise gauge to the Marking Gauge post. This drawing is a little rough but all the info is there.
Mortise Gauge Instructions
Greg
Pingback: HB Tansu #3-Progress 8 | GREG MERRITT – BY MY OWN HANDS