 I started my day in the shop by gluing and pegging the two drawers that I had ready. I tend to build drawers one or two at a time. It’s not the most efficient way of doing them, but i have limited space in the shop. So to avoid damaging the drawers, the safest place for them is in the carcass. That’s why I build, glue and fit a drawer before starting on the next one. Anyway.
Liquid hide glue was smeared on the appropriate parts, mostly, and each drawer was assembled in turn. I was able to clamp the smaller of two drawers in the vise. This made it much easier to install the bamboo pegs and easier to photograph the process too. To install a peg, I first drill a pilot hole and then slowly drive in the peg. Slowly is the key here. I found that if I just bash the pegs in, there is a good chance for a split. If I slowly drive the peg in the wood has a chance to compress and a split becomes very rare.

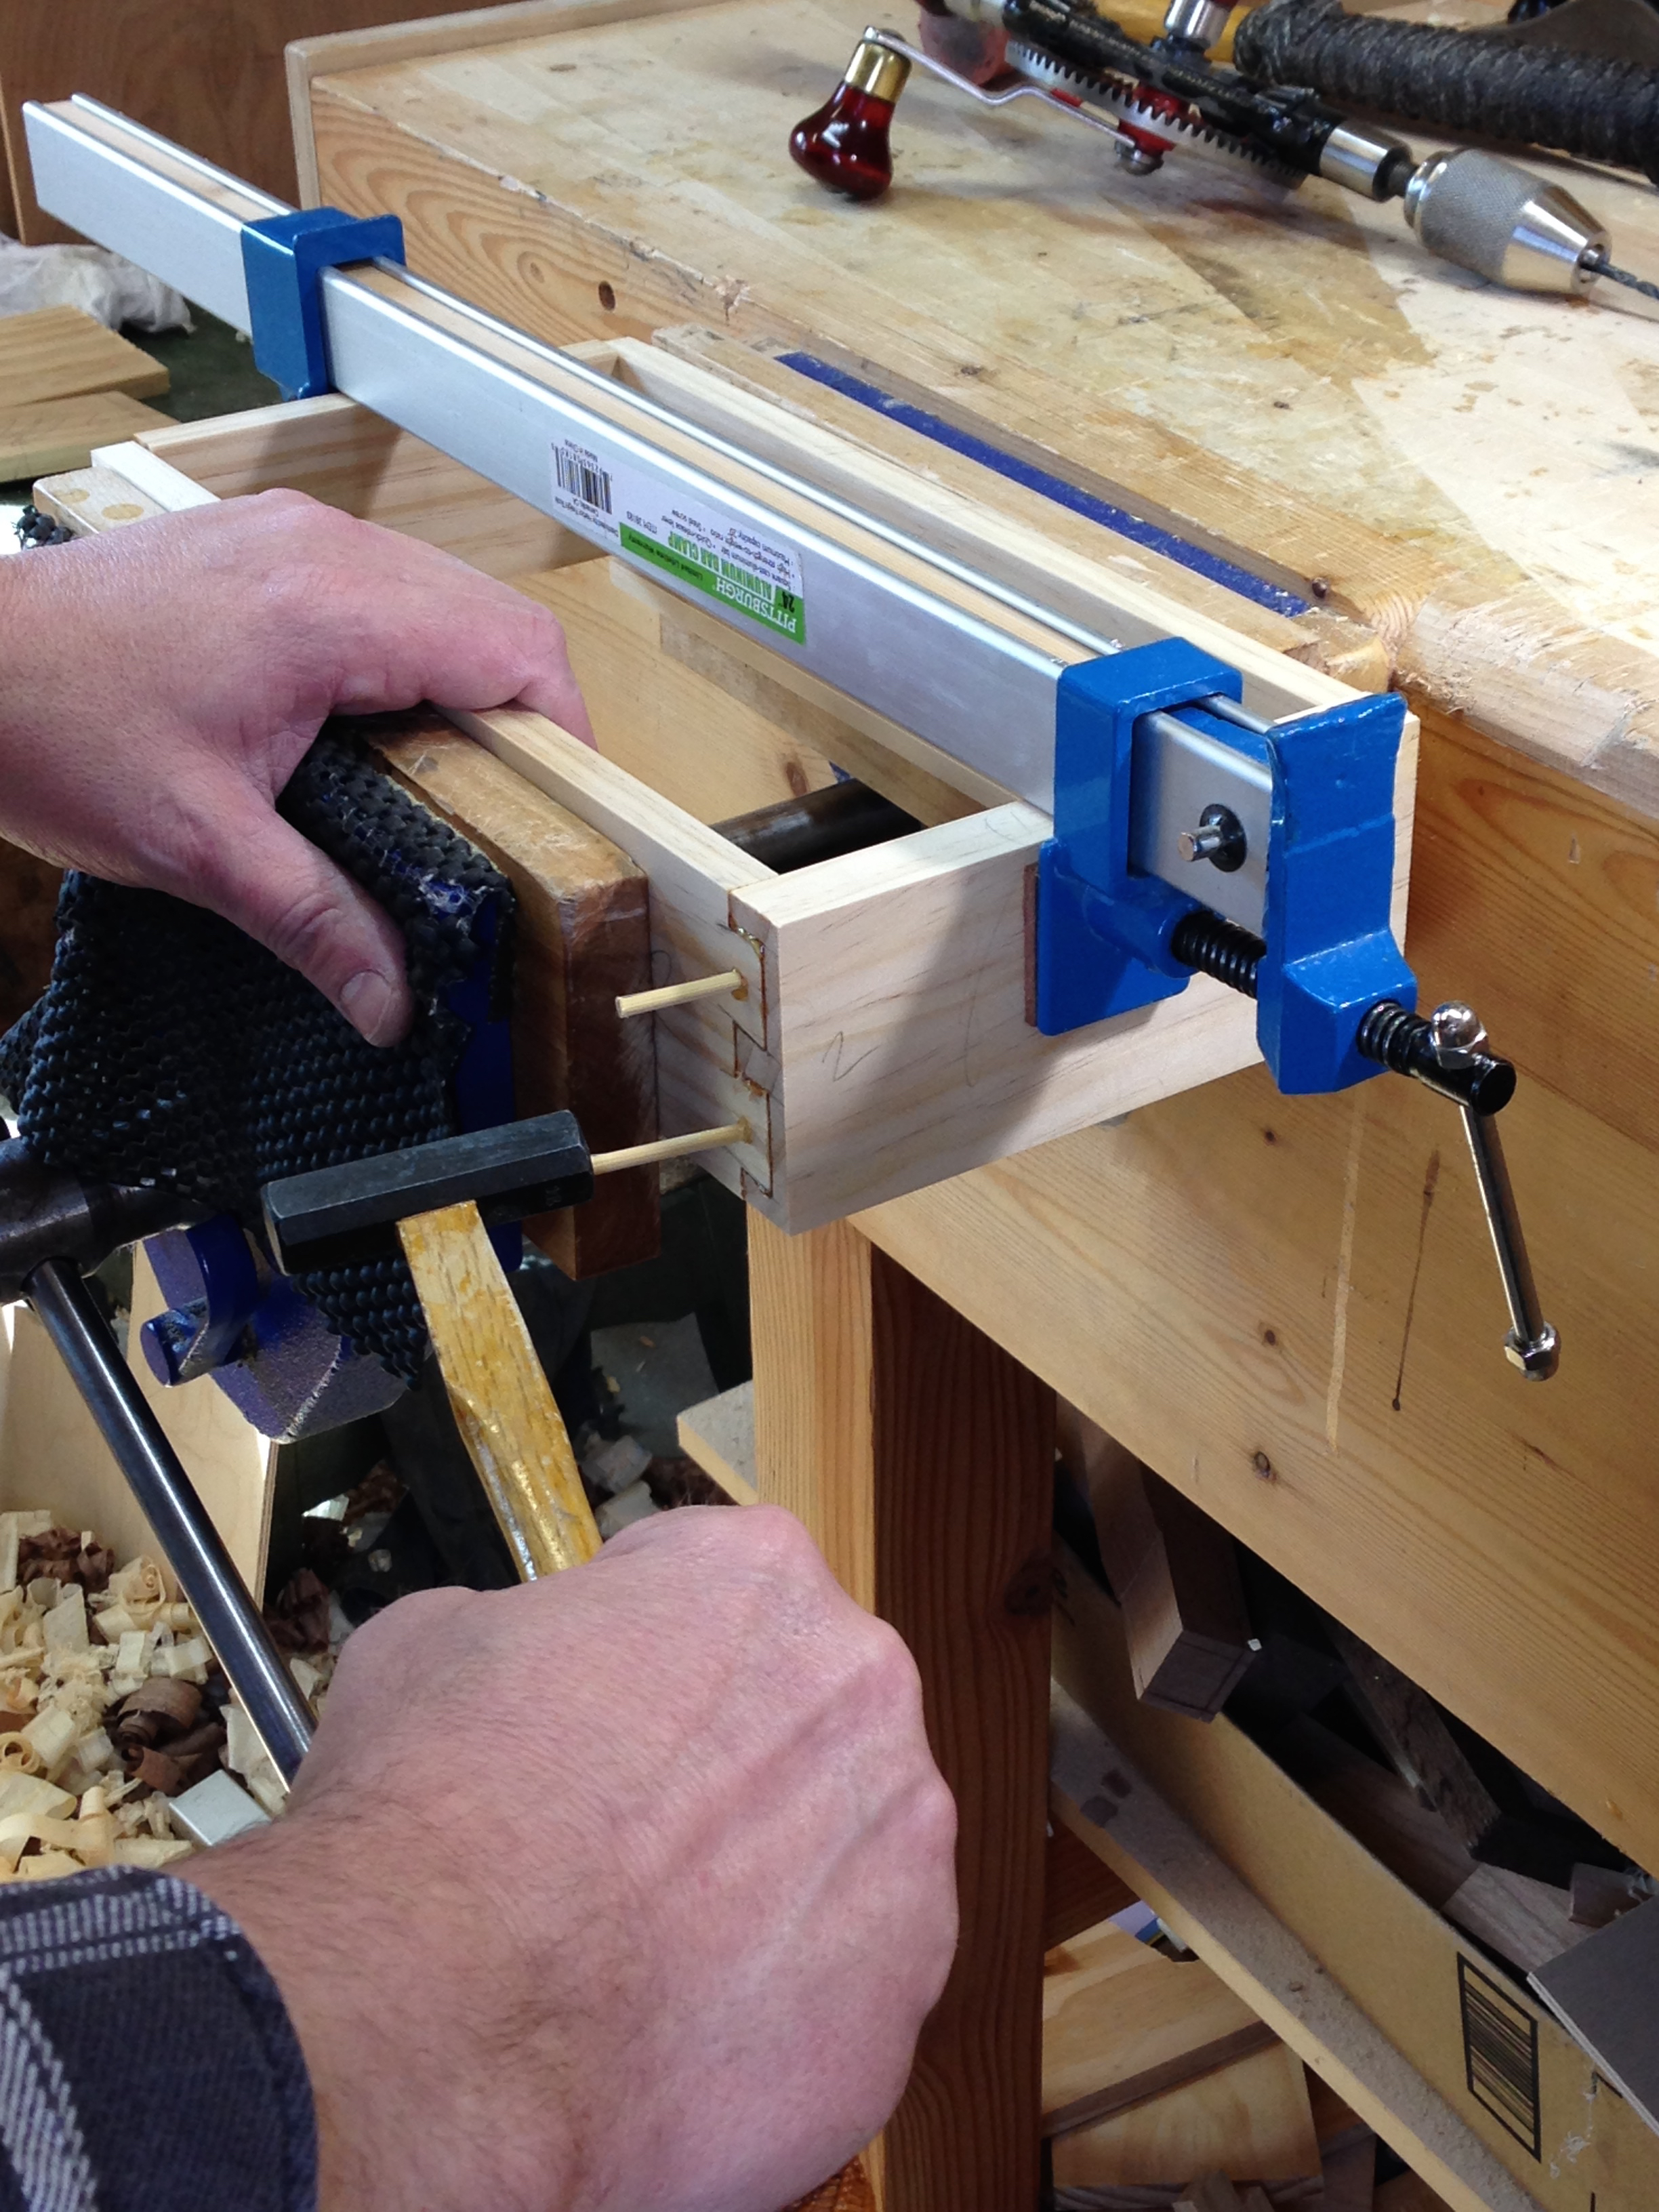
I install these pegs at angles that will best strengthen the joint. We all know dovetails are strong in one direction, but are dependent on friction and glue in the other. So I install the pegs in the dovetail joint so as to lock it in both directions. Overkill? Probably, but it makes me feel better knowing the joint will not be coming apart.

The finger joint at the rear of the drawer receives opposing pegs. Same idea as before and these are installed at angles to best strengthen the joint.


Once the glue dries I’ll trim off the pegs and begin fitting the drawers to their new homes.

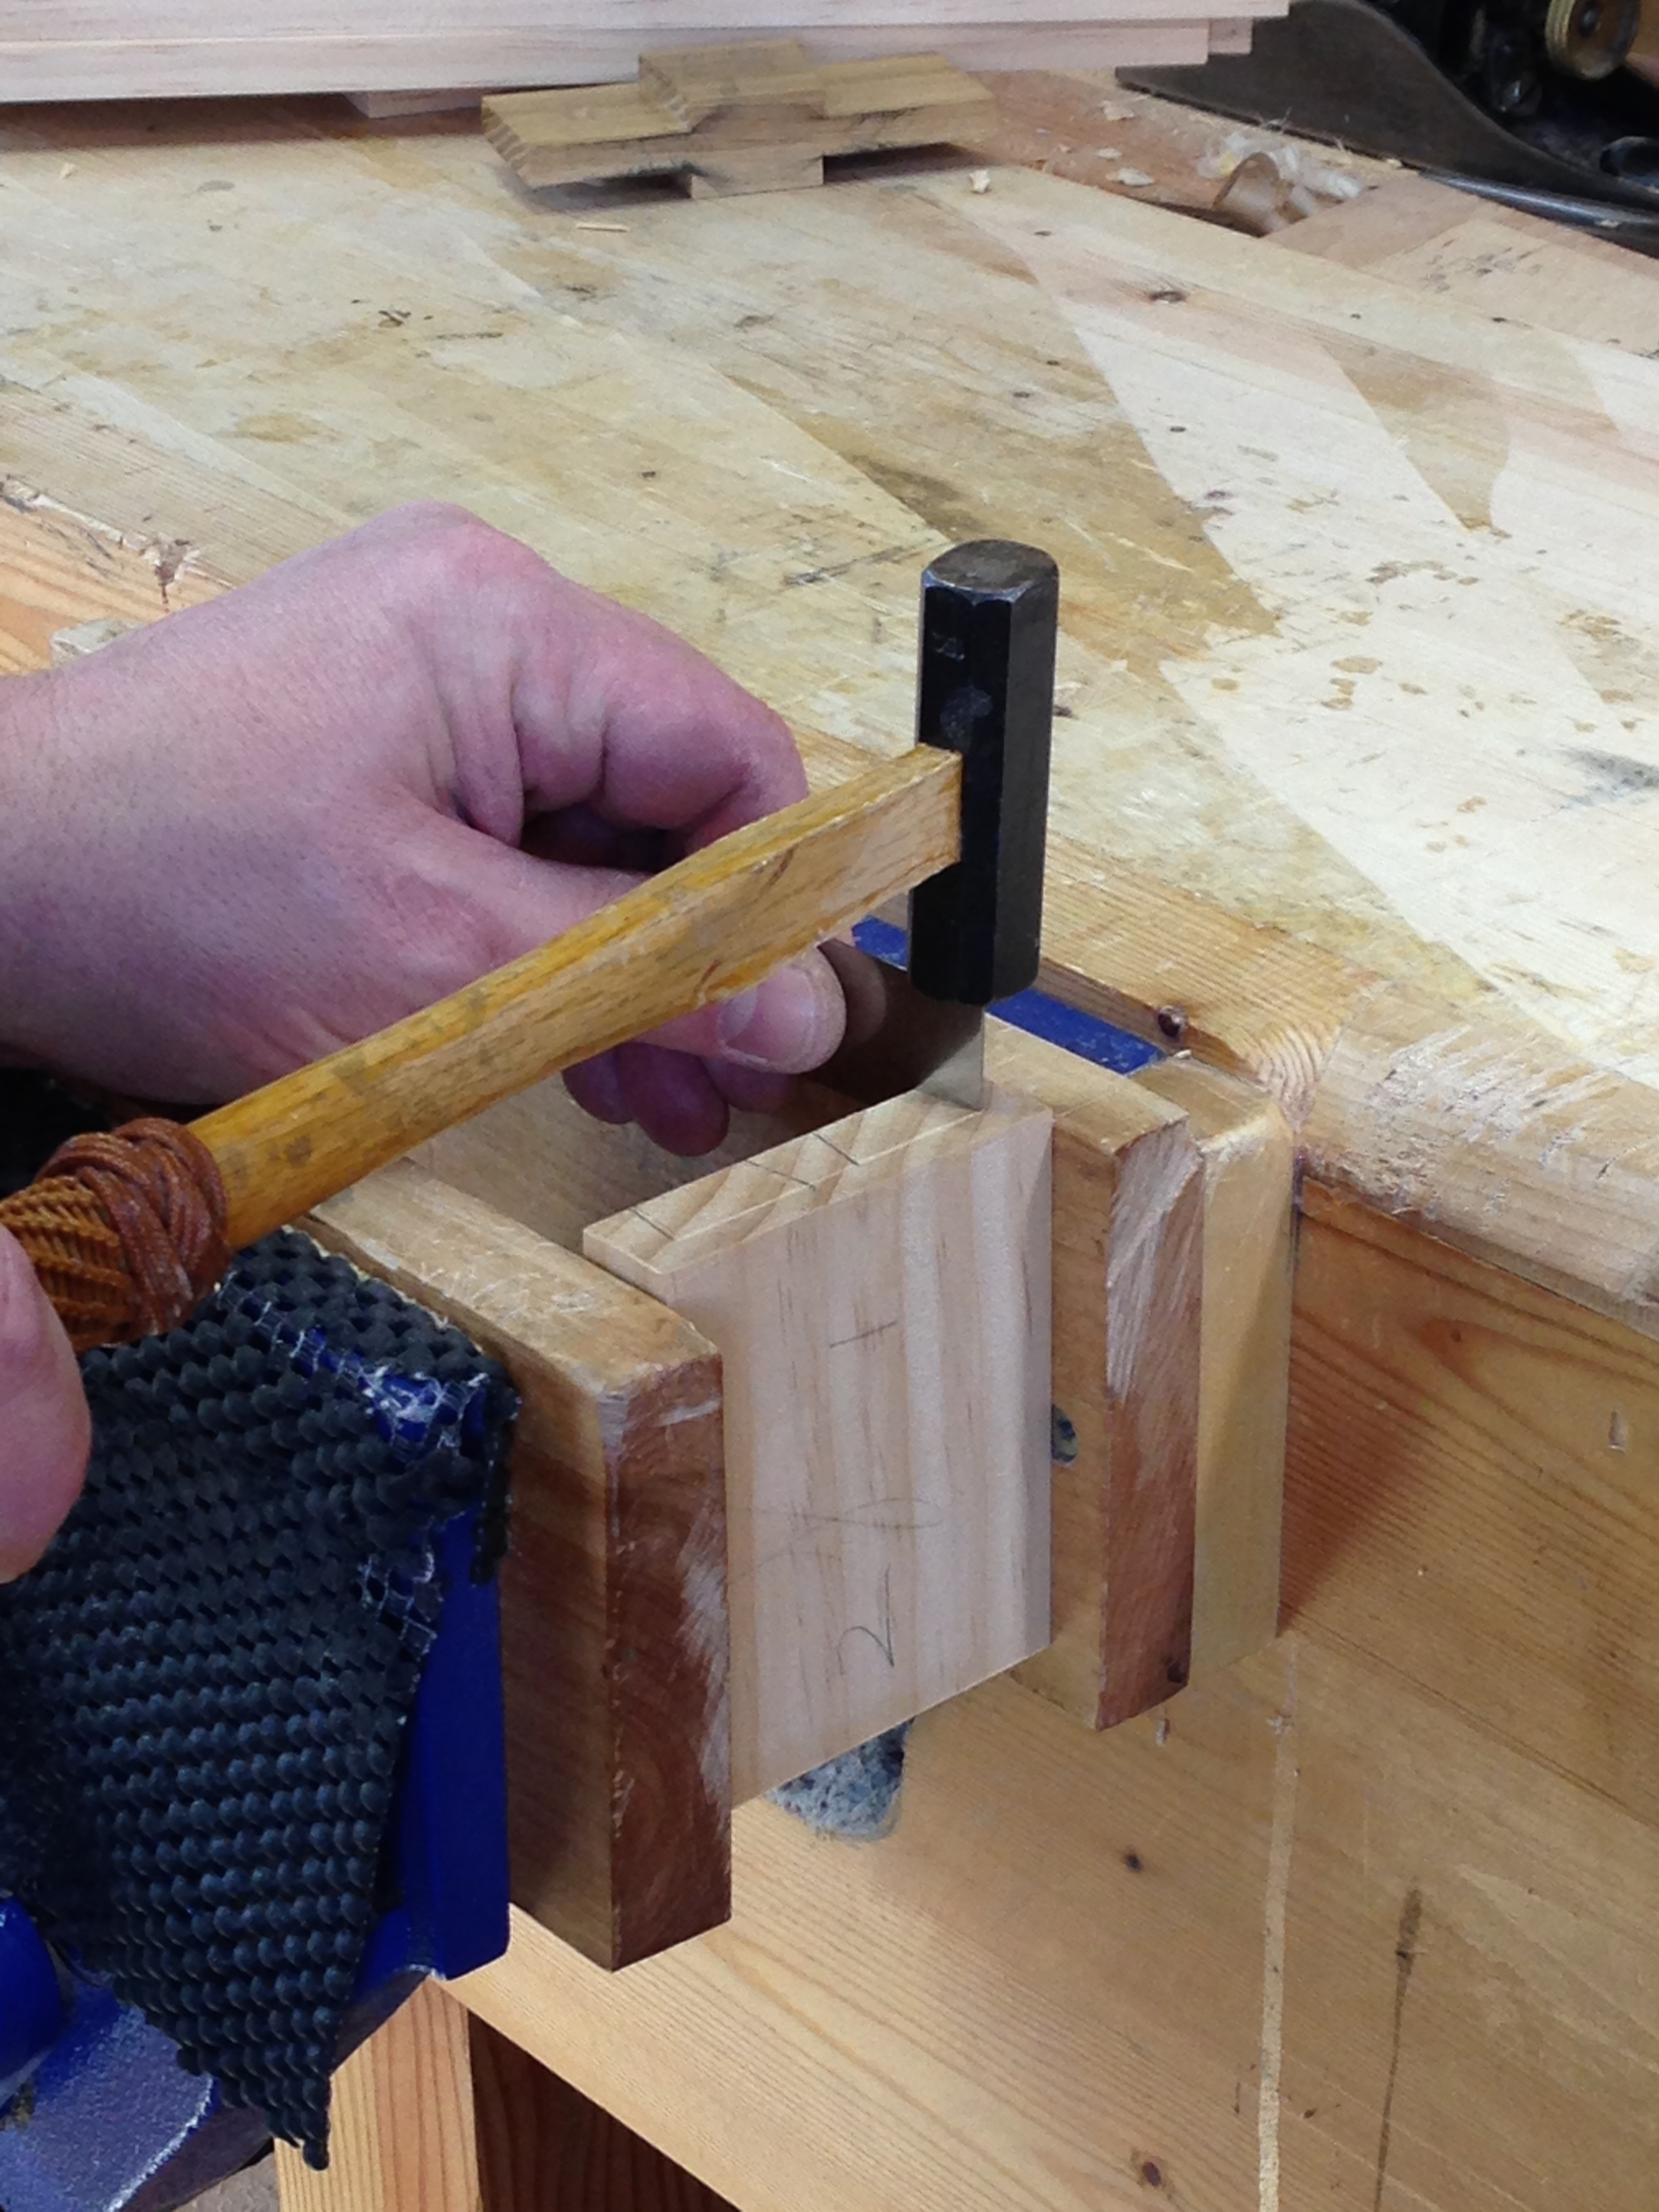
With the first two drawers glued and pegged I started work on the third drawer. The lapped dovetails at the front are first up.
Once they are marked out I then saw the diagonals.

Then I drive a piece of card scraper down into the wood to sever the fibers all the way into the corners. Note the position of the workpiece in the vise. This supports the outer sections so they don’t split. I picked up this trick from a Lie-Nielsen video on Youtube and it works great. From there its just a matter of chopping and splitting out the waste.
Once the sides are dovetailed to the front I plow the grooves for the bottom. It’s only then that I cut the rear piece for the drawer since it needs to set flush with the top of the bottom grooves.

Of course I zoned out when cutting the finger joints so no photos. There are still six drawers to go so I should, at some point, obtain some photos. I will tell you that my normal layout for the finger joint is divide the rear piece into thirds. The middle third becomes the male portion of the joint and is cut into the rear piece. This arrangement gives me two pegs through the side and one peg through the rear. Its a strong joint when all is said and done.


Pingback: HB Tansu #3-Progress 13 | GREG MERRITT – BY MY OWN HANDS
Hi Greg, just dropping a note to let you know I enjoy reading about what you’re making and how you’re going about it. I have had some problems splitting wood when driving pegs and from your experience I think I might be a little too enthusiastic with my hammer. Ha!
Thanks Lief. It’s nice to know that you are enjoying the blog. Pegs can be tricky. Slow and steady seams to work for me.
Greg
Drawers are looking great Greg!
The Walnut fronts are going to be really special I think.
Thanks Joe! Now if I can get all of them built with screwing them up.
Greg
I agree with you – I don’t think those drawers will be coming apart. 🙂 Nice work.
It’s my belt and suspenders approach to drawer building. LOL
Greg
Pingback: HB Tansu #3-Progress 15 | GREG MERRITT – BY MY OWN HANDS
Is that a record 43, fun little plow.
Yes it is. I think its a great little plow plane. I’m surprised that no current manufacturer has picked up the pattern and started offering it again.
Greg