
I began the weekend by finishing the fitting of all of the drawer frames. I must say that leaving the bottoms out for now has been a very good way to go. It has been much easier to work on these and hold them in the vise without the bottoms to get in the way.
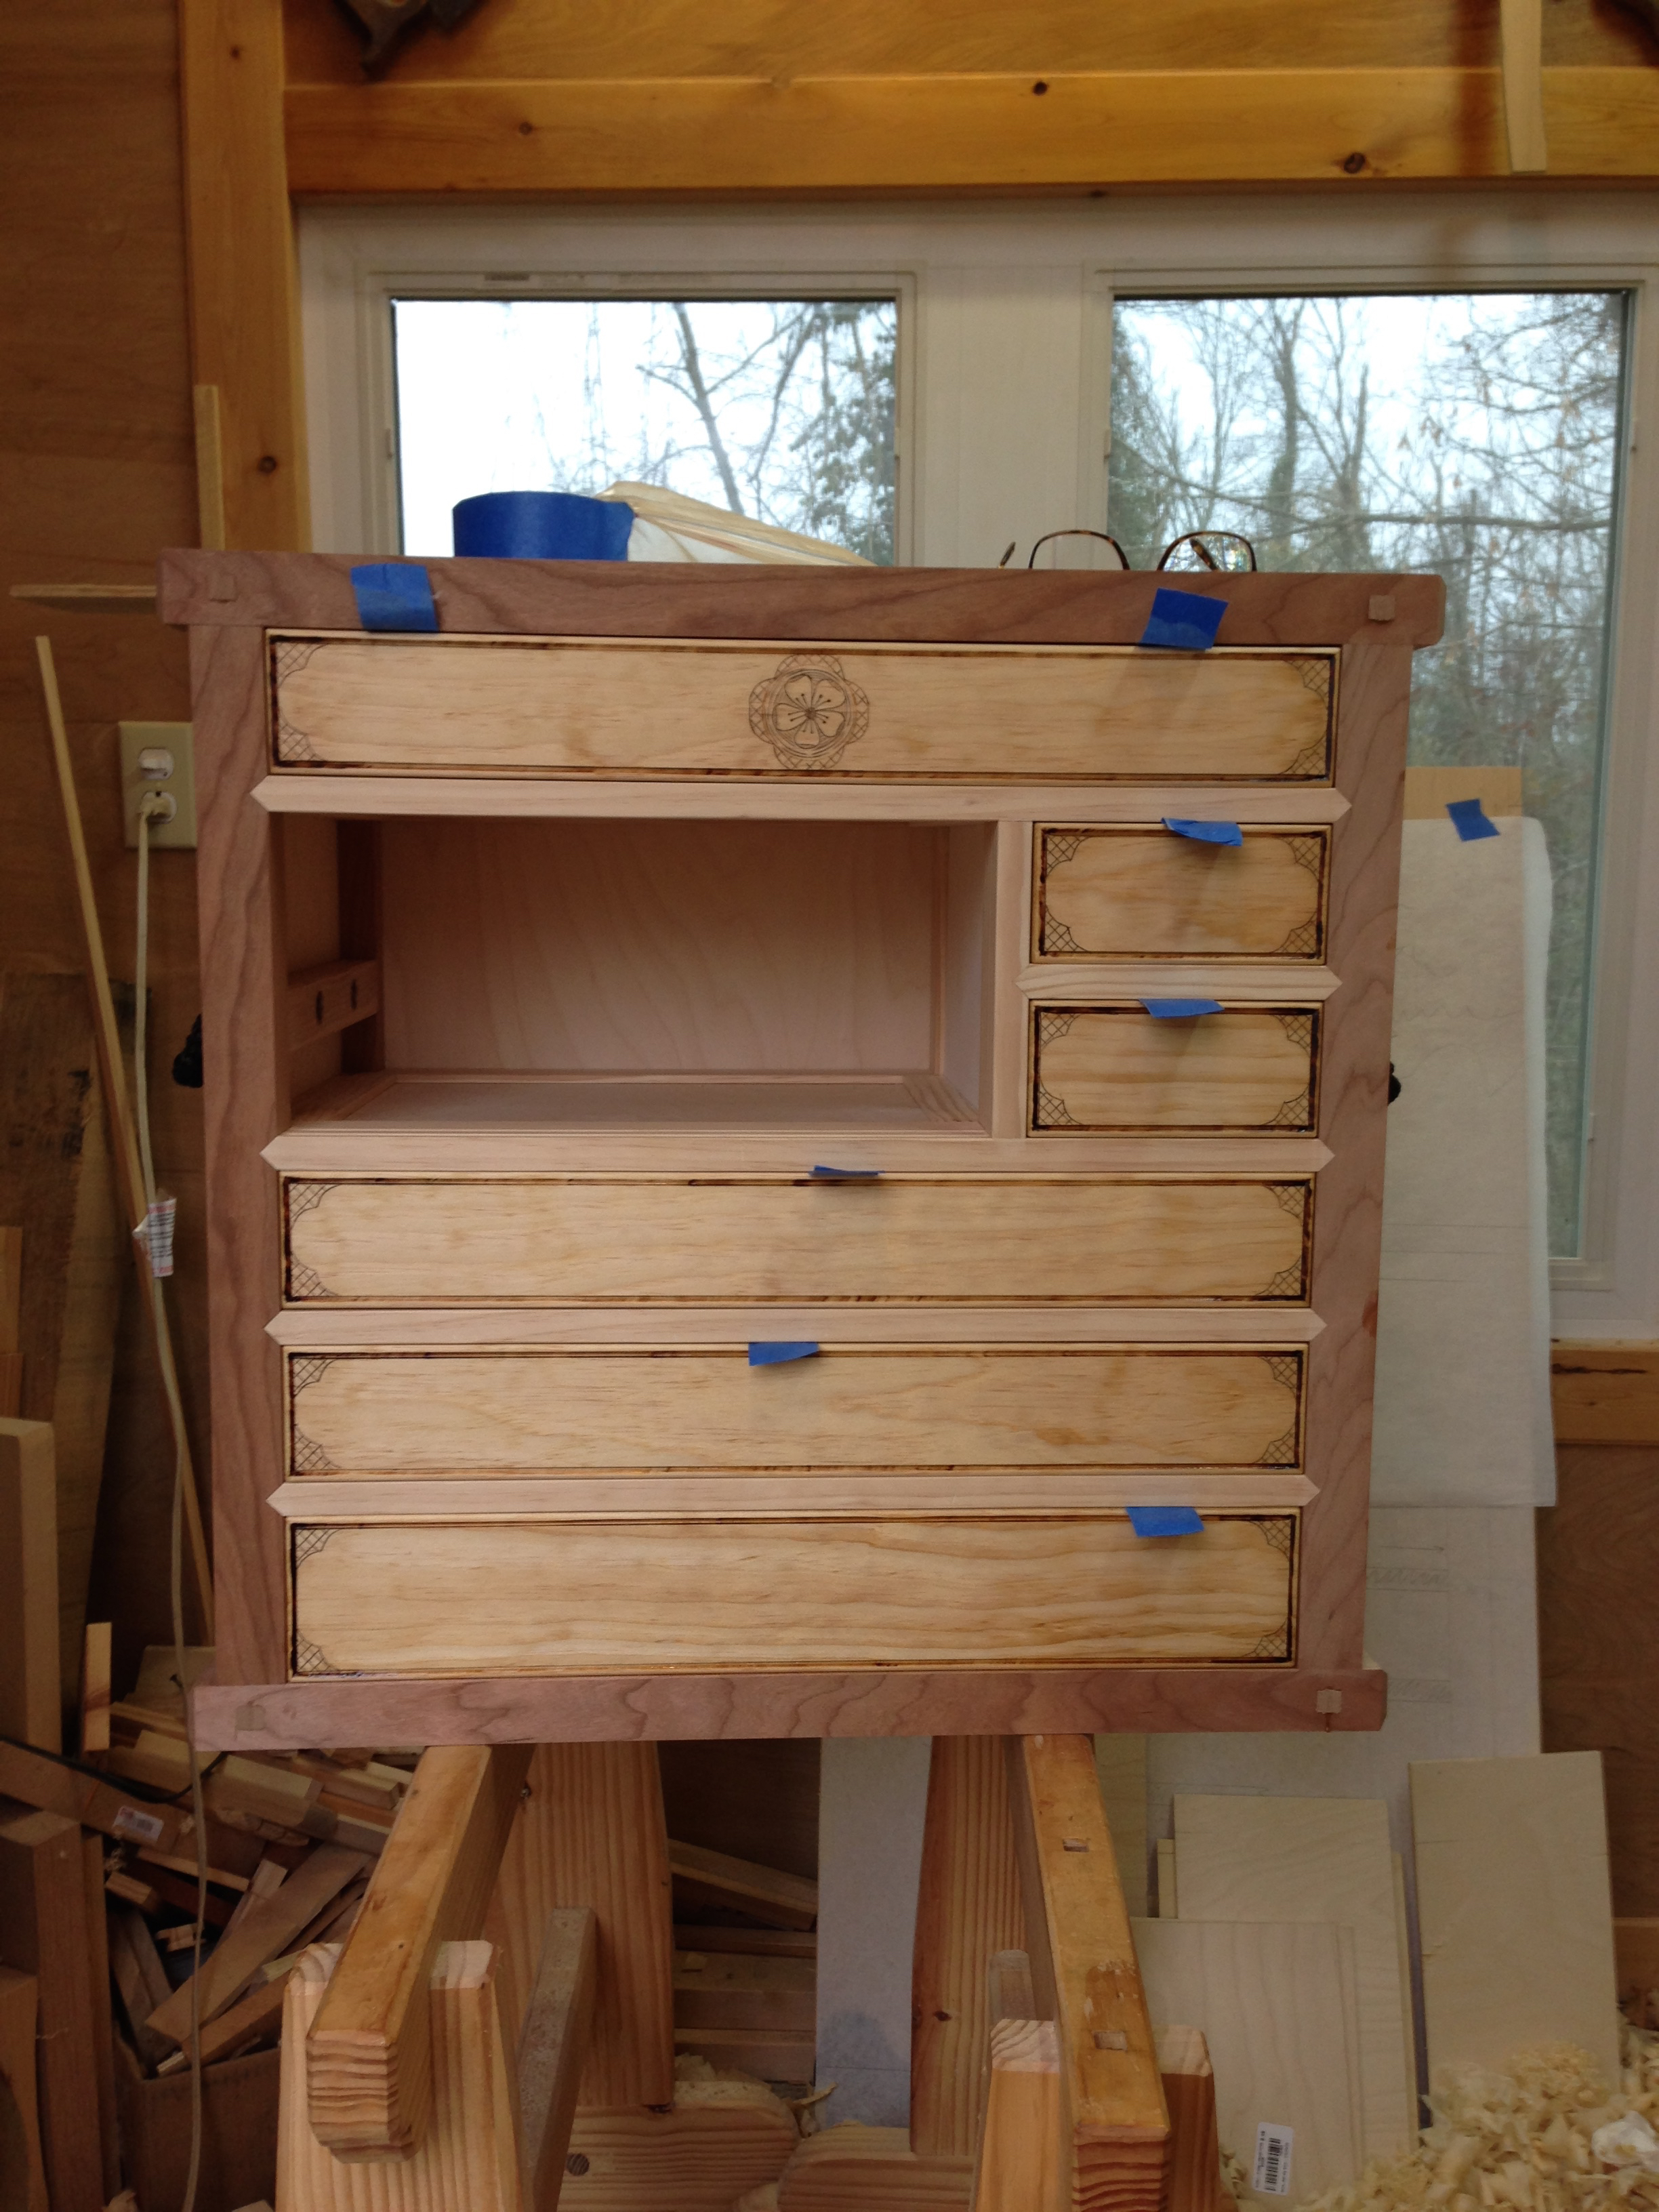
With the drawer frames fitted to their openings it was time to start adding some details. All of the frames received a corner bead. This is accomplished on the the long grain with a simple screw in a block of wood. The screw trick takes care of the interior portion of the bead and the exterior of the bead is shaped with a plane. The whole thing is refined with sandpaper. The cross grain is a little more work. I use a knife to establish the interior wall and the interior portion of the bead is simply chisel work. The exterior sees the plane employed once more and sandpaper finishes off the lot.

The next detail I added was some kolrosing to each corner and a center medallion on the topmost drawer. I created a pattern to make this go a little quicker and to ensure uniformity. I lined up the pattern on each corner and traced along it with a utility knife. I then added some additional incised lines to complete the design. The center medallion was created with the same pattern with the addition of a freehand cherry blossom motif. Once all the lines were incised I rubbed instant coffee into them and used a fine grit sandpaper to remove any areas that had been raised by the knife.

The next idea that I had was to use a wood burning tool to darken the interior portion of the beads. My wood burner is a cheap craft model that I’ve had for years and it’s nothing special. With that bit done, the panic set in. The burnt areas really stood out against the whiteness of the pine and began to think that I had completely ruined it. So I slated on a coat of BLO to see how it was really gone to look. Then the panic began to subside. Once the black knobs are installed and the rest of the tansu gets a coat of BLO and darkens, I think it’s going to look pretty good.
I’m getting close. I can see the light at the end of the tunnel on this build. The drawers still need bottoms installed, I need to build the doors, install the knobs and the whole lot needs a final cleanup. At least I have a jump start on the finishing process. As to that, everything will get at least on coat of straight BLO. After that there will be two or three coats of Tried and True Original finish. Then lots of buffing with steel wool.
Greg Merritt

I like those details … a lot!!
Thank you!
I think it looks freaking awesome! It makes me want to give this style of furniture a try. I once attempted that beading technique but I couldn’t seem to get it uniform throughout. At that, I lost a bit of patience and didn’t stick to it. Yours looks a lot more even than mine did. I think you are making me want to revisit it and give it a shot.
Bill
Wow, thanks Bill. There is no better compliment than being told you inspire someone to try something.
That little beading tool is one of my favorite tools. Works like a charm. The key is to file all the surfaces 90deg to each other. ie., the slot should be 90deg to the face if the screw. Dress it once in a while like any other cutting edge. Long grain only though. All the end grain work is done with a chisel.
Greg