
 I’ve been kicking this project around for a while. I’m not sure why, just other projects kept moving this one down the list. We actually could use a bench here at the house by the front door and, besides, a bench is a handy thing to have around. One issue that I wanted to address was the style. Almost every culture and furniture style has a bench design. Like I said, they are handy to have around. Since most of my projects, especially the larger furniture pieces, have and will continue to have, an asian flavor to them, I needed to design a bench that followed suit.
A few months ago I stumbled on Chinese Gate benches. I knew immediately that this was what I needed. These benches have a lot of possibilities. Sort of a cross between a bench, a table and a sawhorse. What’s not to like about that? The photos below are of the one that caught my attention. There are much fancier versions out there, but this one has stood the test of time and use. If you look really close you can see a few patches and a lot of wear. It looks to be simply made. Possibly by a country craftsman who needed a bench by his front door.

So I did some sketching and worked out my best guess as to the joinery required. The short rails on each end are simple wedged mortise and tenon joints. The legs are double wedged mortise and tenoned into the seat. The long rail/stretchers are, I think, saddled onto the legs. That’s how I’m building mine anyway. With the joinery figured out, I began sketching to find the proportions for each piece. My bench will be much shorter in length to fit by my front door. An additional modification will be the shape of the long rail/stretcher. I’m using a Japanese influenced shape.
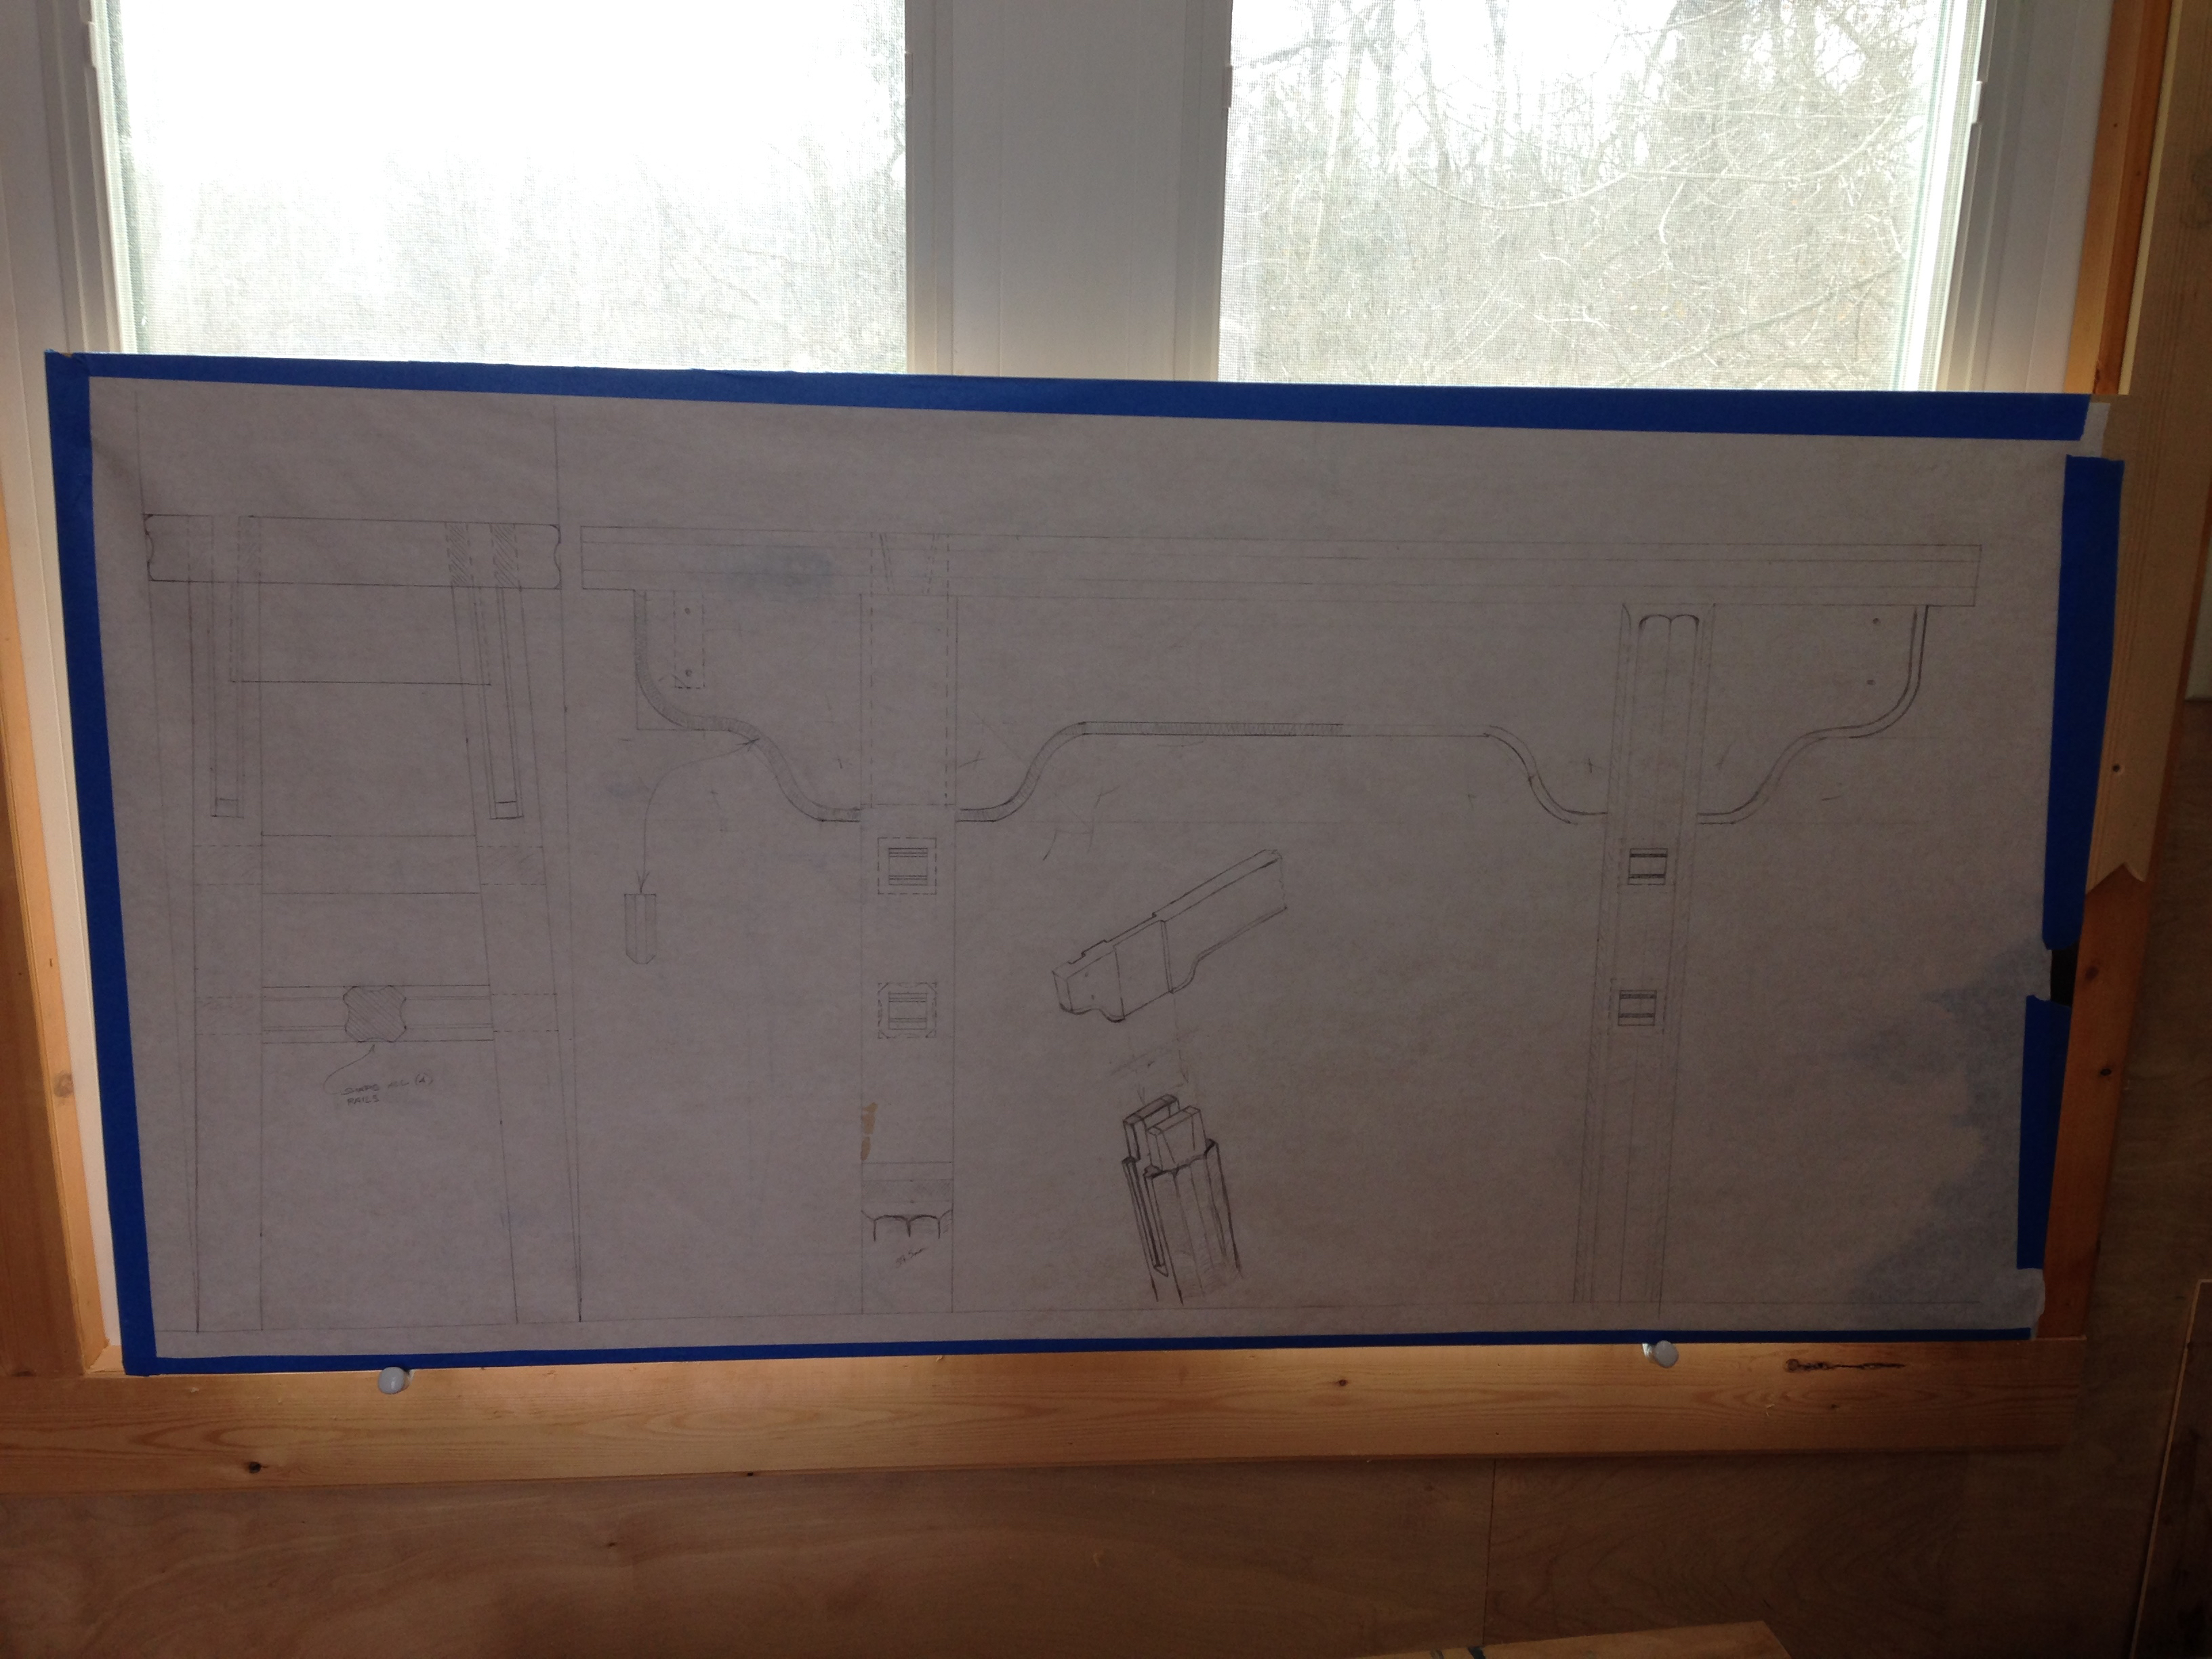
With the joinery and proportions in hand I taped a fresh sheet of paper to my plywood and began drawing the bench out full-scale. A few tweaks to the shaping and I was ready for wood.
I made a trip to the local Lowes. All that is required for this bench is one 2″x10″x8′ board and one 1″x6″x8′ board. In my area most of the construction grade 2x lumber is SPF (spruce, pine, fir) but the 2x10s and the 2x12s are southern yellow pine. It took me about an hour of digging thru the pile of 2x10s to find one that suited me. This always makes the employees nervous, but I always but the pile back together when I’m done. The 1x material in my area is either radiata pine or whitewood. The whitewood stuff is light and spongy. It also has fairly large knots. So I usually spring for the clear radiata pine. Which I did again for this project.
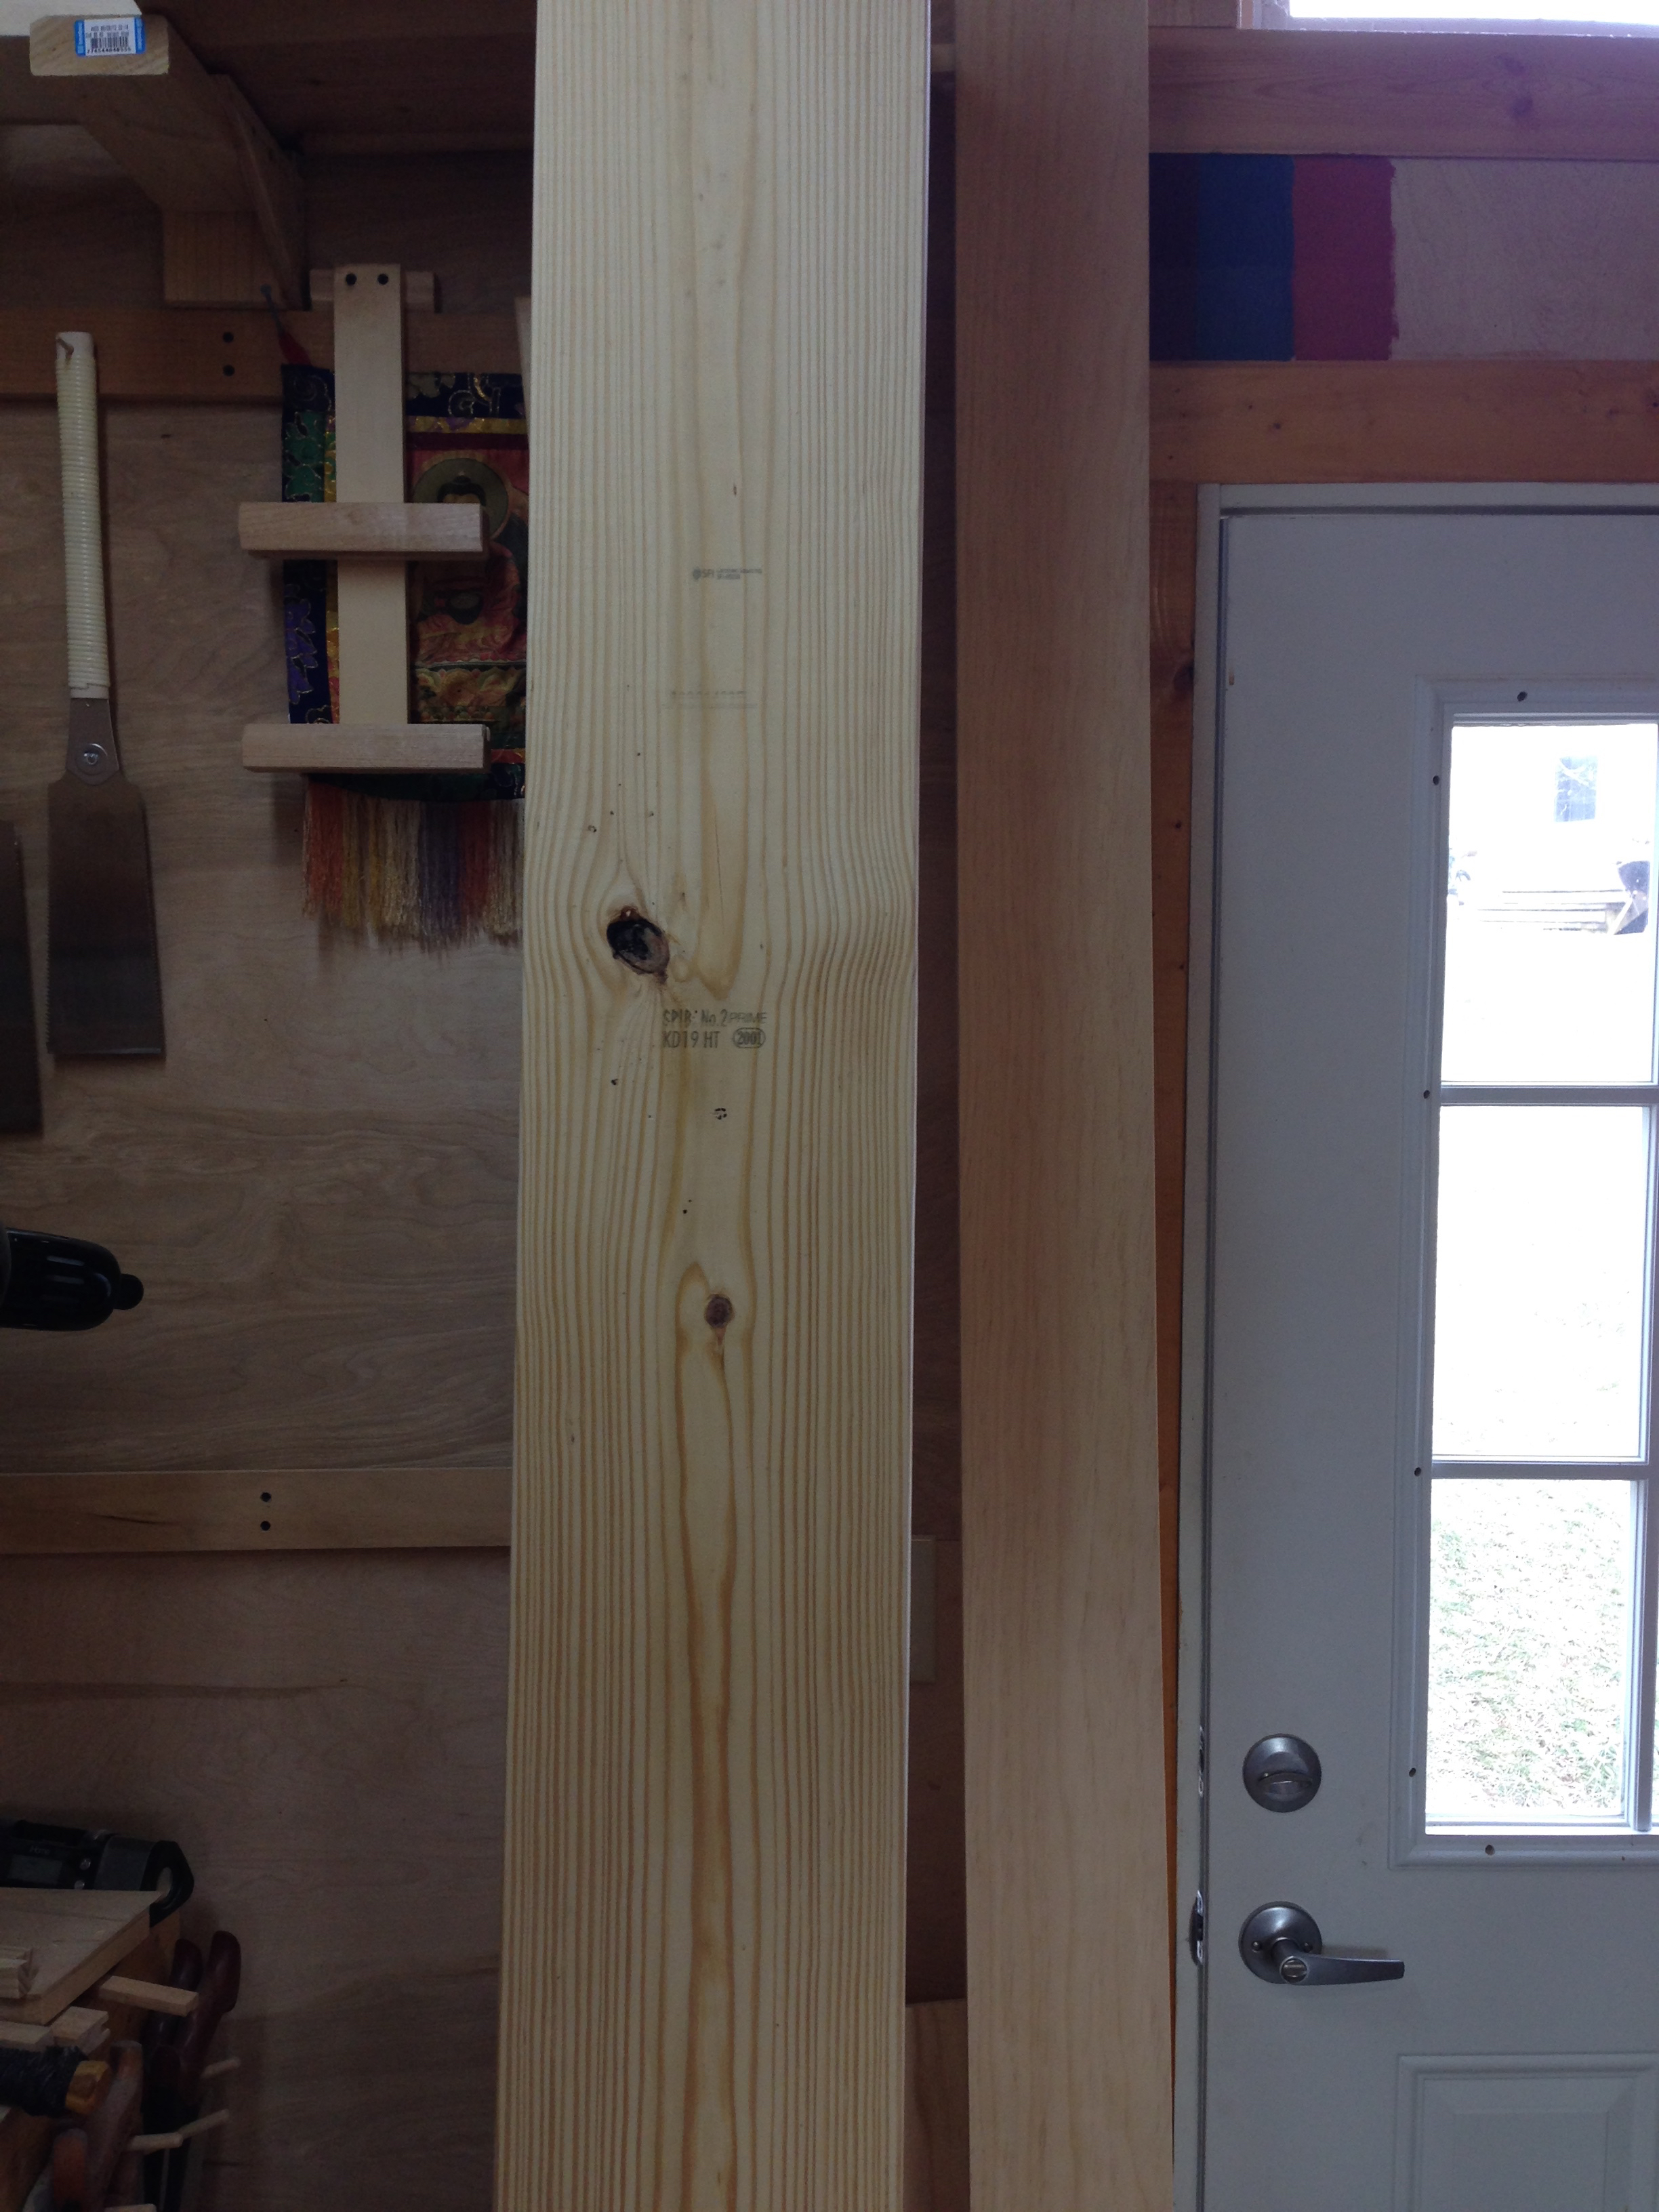
All of the needed parts can be gleaned from these two boards with some judicial layout and cutting. However, my short end rails will be from the cherry offcuts that are left over from HB Tansu #2. I think the cherry will look pretty good and will tie the bench in with HB Tansu #2. My time spent sorting thru the wood pile at Lowes, resulted in a 2×10 that will generate legs that have almost quarter sawn grain and almost no knots.
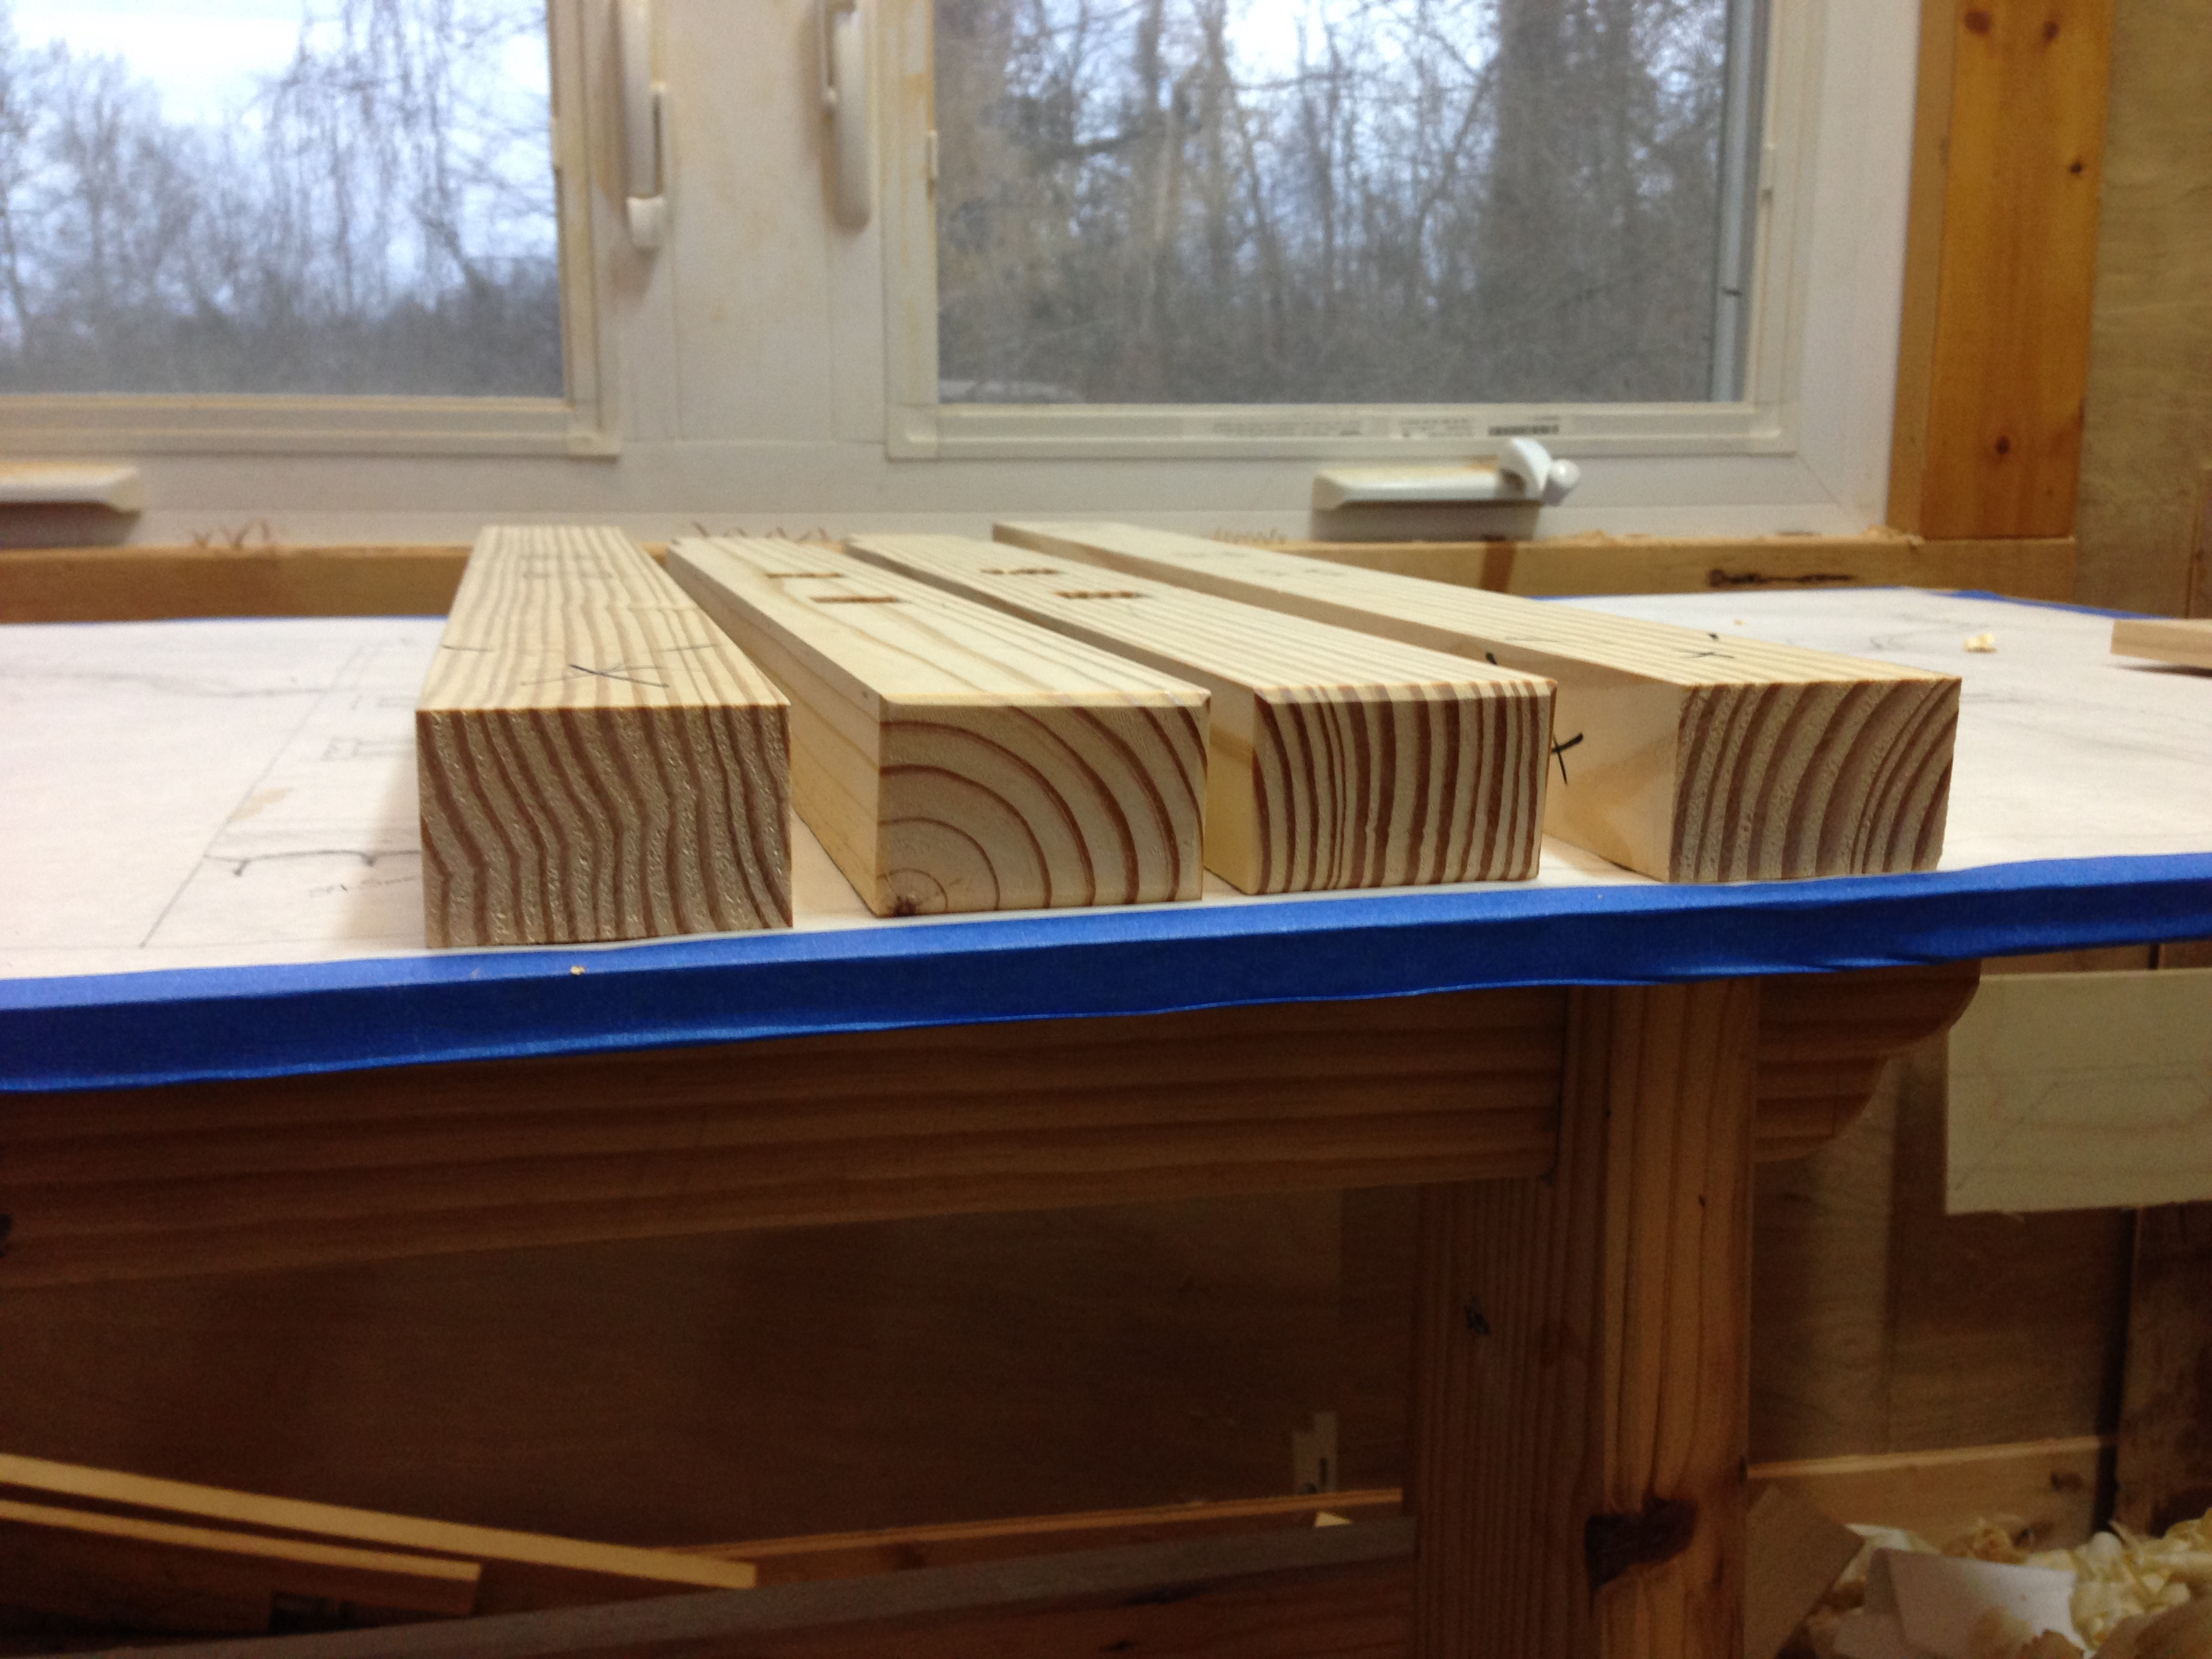
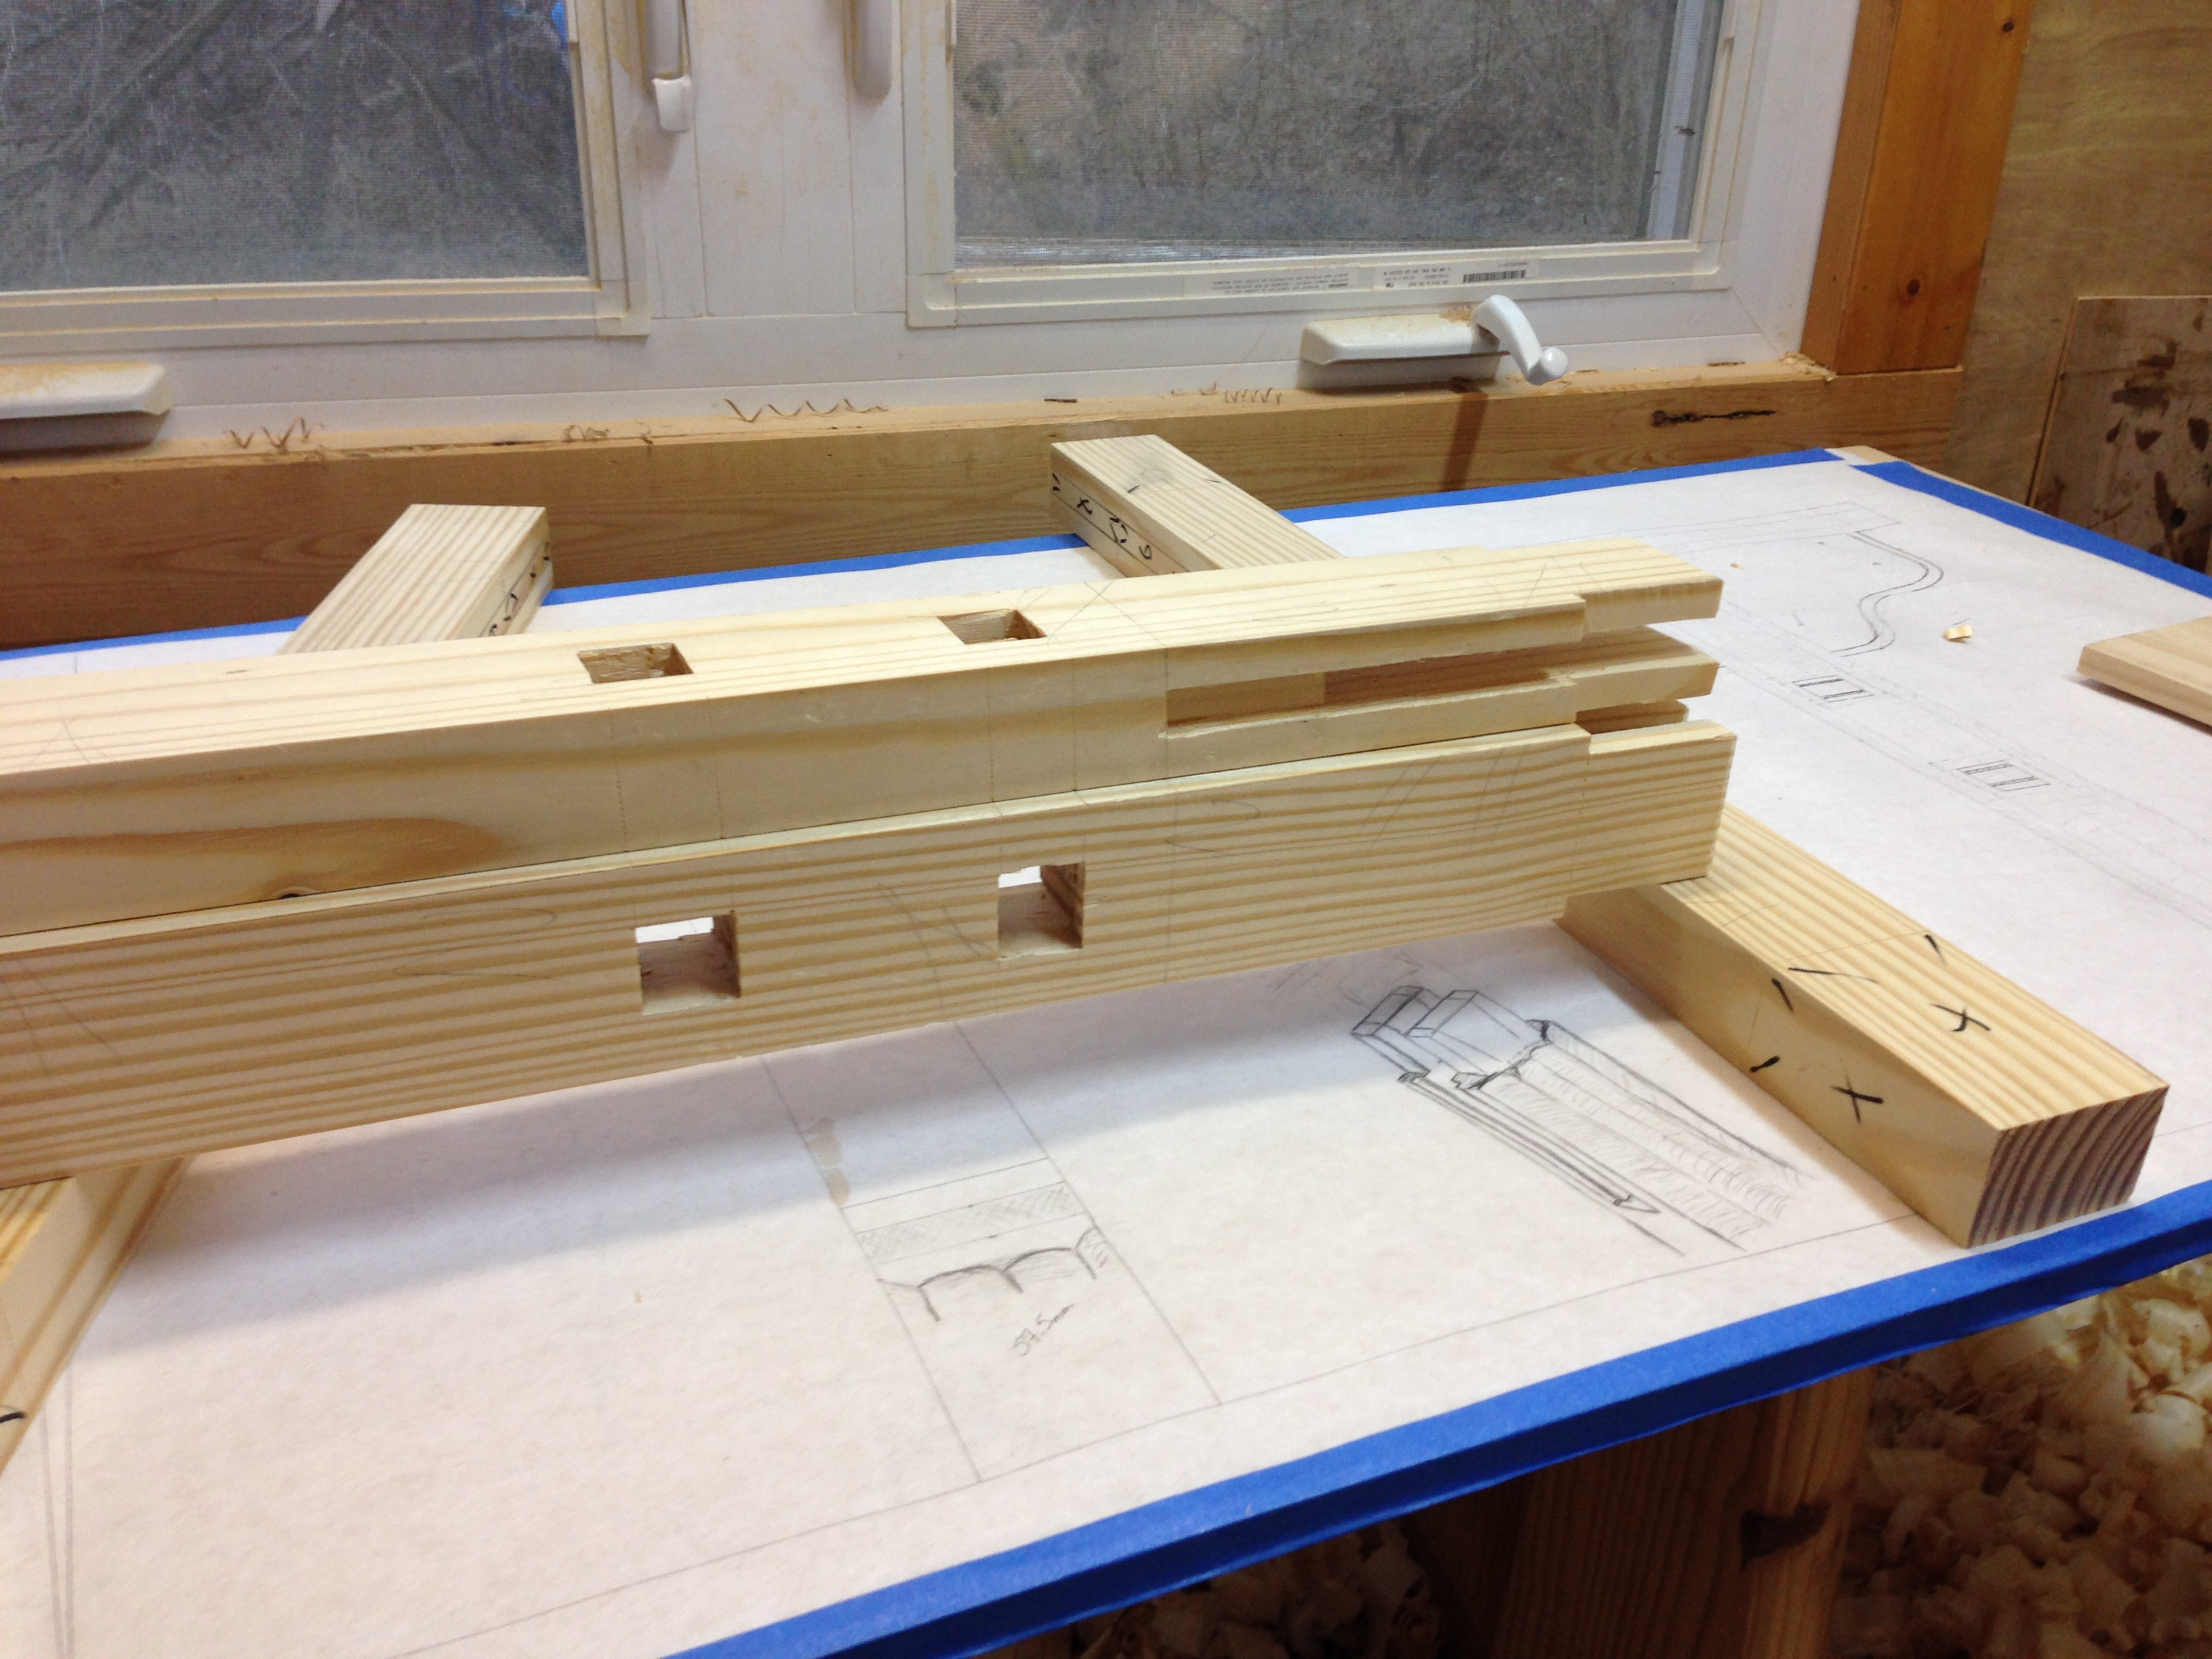
The leg joinery laid out and ready for cutting.
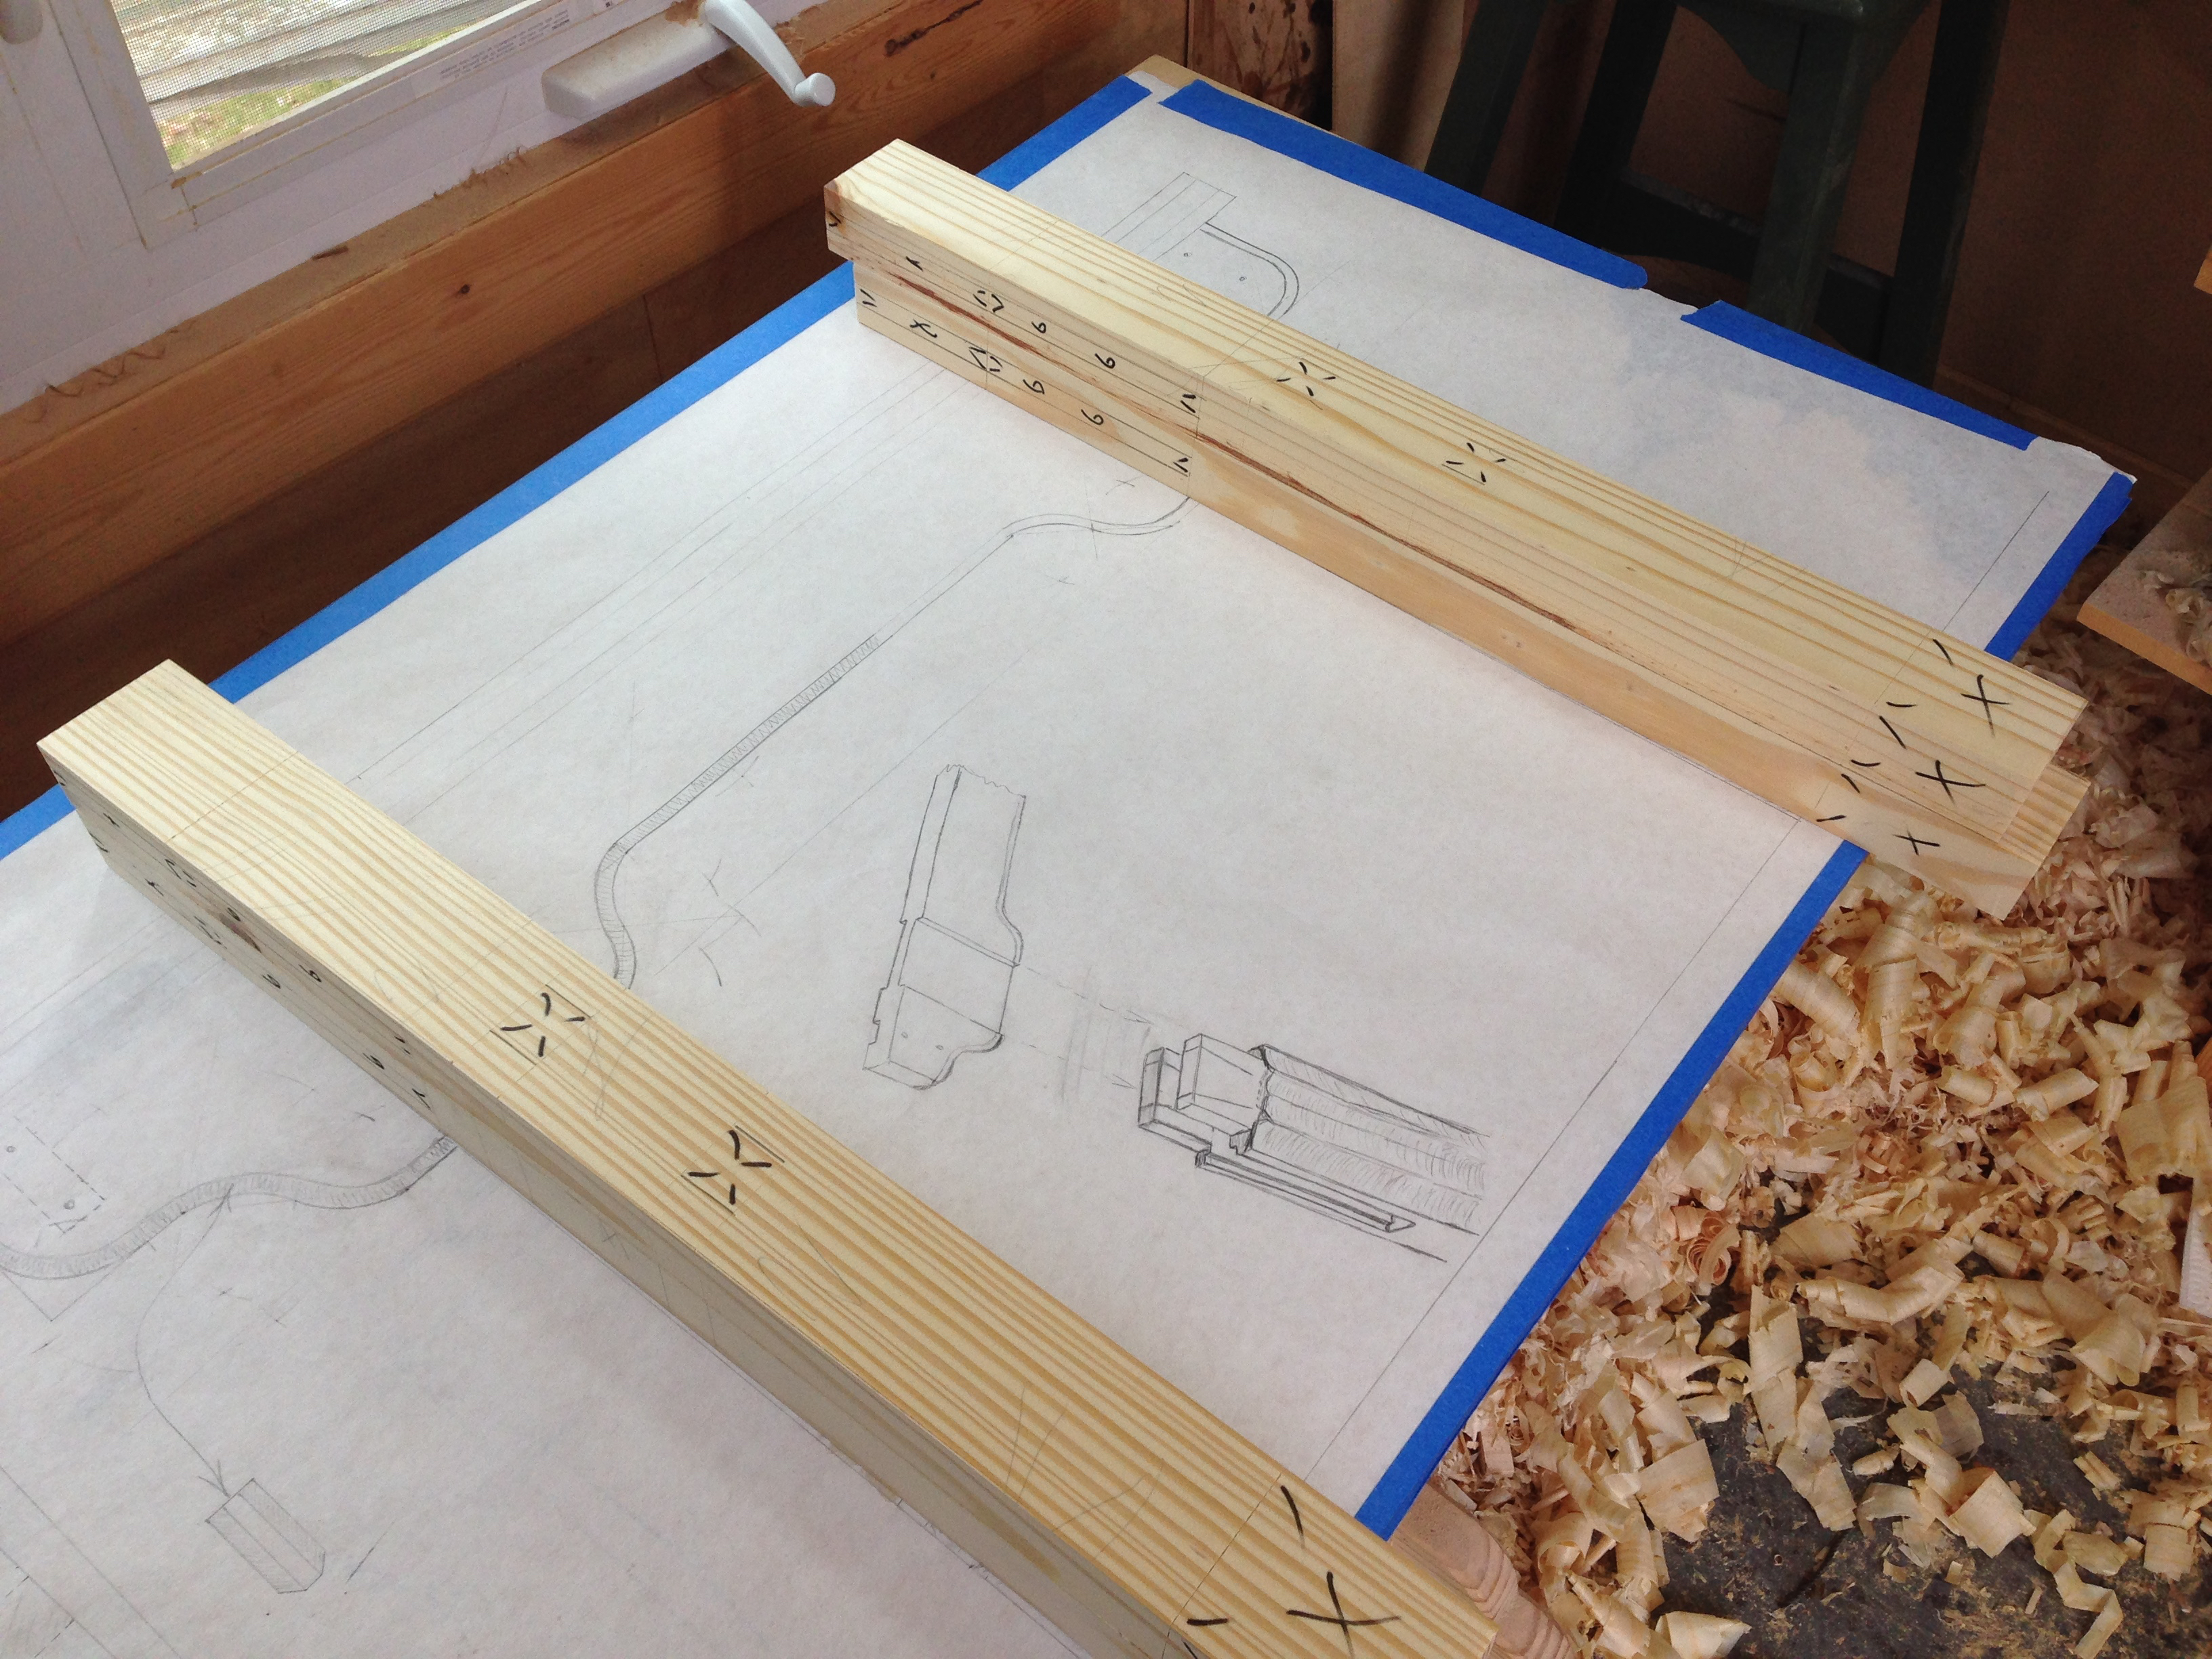
Two legs with all joinery cut.
I need to put together a formal layout drawing for this project. I need to do the same for the Mini Tansu too, now that I think about it. I’m getting behind in my drawing chores. How much I can accomplish this week will be dependent on weather and work. At the very least I should be able to get some drawing done.
Greg Merritt

Very cool. I’ve been geeking out over some Chinese peasant stools recently. So much character in some of the country (i.e., not Ming) pieces. Your drawing always impresses me.
Thank you.
Something like these stools? http://p2.la-img.com/1400/35284/14549316_1_x.jpg
That would be a fun build. Lots of possibilities.
Greg
check this one out – http://store.antiquesforliving.com/nsmold3st.html
I love it because someone decided to add stretchers to a 10″ stool that is already incredibly thick, but didn’t stop there and had to make a three way lap joint. I’ve seen more than a few of these, so the idea doesn’t seem that uncommon. I’ve been digging up pics of some that I like, need to get them in one place.
I like that one. Sort of a belt and suspenders approach. I like these types of pieces that are overbuilt and rely on joinery only to hold them together.
belts and suspenders…hahahahah
Do a search for chinese barber stool. I think this may be my next project.
Whoa. Those are awesome. The bastard offspring of a stool and a dresser.
Looks very cool. I’m still wrapping my head around how it all goes together, so looking forward to the next posts.
Thanks Wesley. I’m working on some drawings that hopefully will clear up the saddle joint arrangement.
Greg
Sweet! The joinery going on in that last photo looks awesome. The drawings look great too.
Thanks Jeff. Every project starts with a full sized drawing. I can’t imagine starting a project without it. Makes everything much easier. The joinery is actually much simpler to cut than it looks.
Greg
I cannot make out all the details of your plans, but I think that the tenons atop the legs are supposed to extend through the top. I’ve seen some variations in which only one tenon does so. I am looking forward to your completed project and assessment.
Hello. I have a double tenon on each leg that will extend thru the seat. Each tenon will receive two wedges. I have only seen photos of these type benches and worked out the joinery with my best guess. Time will tell, but so far so good.
Greg
New to your blog, but glad I found it. Excited to see how this build plays out, never seen this style of bench before.
I’m happy that you like the blog. I hadn’t seen this style of bench either until a few months ago. This is a new design for me and I’m excited to see how it works out too.
Greg
I like the layout system you used. No mistaking where the holes are supposed to be. (second to last pic)
Thanks Ralph.
I start and stop so many times during a project, sometimes days between shop time, that I needed a system that helped me keep track of the joinery. So far this system works pretty well. I can quickly tell at a glance what should be cut and also how deep.
Greg
Greg,
Not sure if you have seen this article from FWW a few years ago regarding a Ming Dynasty table but the joinery might be similar http://www.finewoodworking.com/how-to/article/ming-masterpiece-joint-by-joint.aspx
Alex
Hi Alex. Thank you for the link. I have not seen that article. Unfortunately a membership is required to access it. I’ve been on the fence about getting a Fine Woodworking subscription, maybe I’ll pull the trigger and do it.
Greg
It’s very short so probably not worth the entire subscription however the online only subscription does give you access to all of their old articles so its not a bad deal.
I love the shop drawings! We may be in the minority, but drawing up designs by hand is one of my favorite parts about starting a woodworking project. Most of the construction lumber in my area is Fir, which I guess isn’t awful. There sometimes is SYP (depending on where you go) but mostly that is used for pressure treated lumber. Will this be a stained or painted project?
Bill
I can’t imagine building a project without first doing full-scale shop drawings of at least a portion of the piece. I have found so many errors and possible problems by doing shop drawings first. Once the drawings are done, I can pull and later check dimensions directly from the drawings.
The SPF lumber isn’t too bad. I’ve used it on several projects. But I’ll pick SYP when I have a project like this one.
The finishing plan right now is to add a few coats of BLO. Then go over the entire thing with the pollisoir and wax. This should give it a worn-in look.
Greg
Pingback: Chinese peasant stools | greenhorn workshop