
 Fabricating the parts for the sliding lid was just more of the same that I’ve already done in the build so far. Starting with the lid panel itself. The first step was to measure the exact distance between the end caps. Then add an additional 1″(26mm) to this distance to find the true length of the lid panel.
The lid panel, like the bottom, needs to be thicknessed down from 3/4″ to 1/2″. Same again as with the bottom panel. Dress one face, gauge for desired thickness, heavy bevel on the outside side and plane away the waste.
Lid panel down to thickness.

I marked the width of the lid panel directly from the box. Ripped off the bulk of the waste and planed away the rest. How tightly or loosely you fit the panel to the box is a bit of educated guess. I keep a hygrometer on the shop wall to give me an idea of humidity in the shop. A dry shop calls for a looser fit. Since chances are that as the humidity increase the panel will swell slightly. It’s a judgment call really.
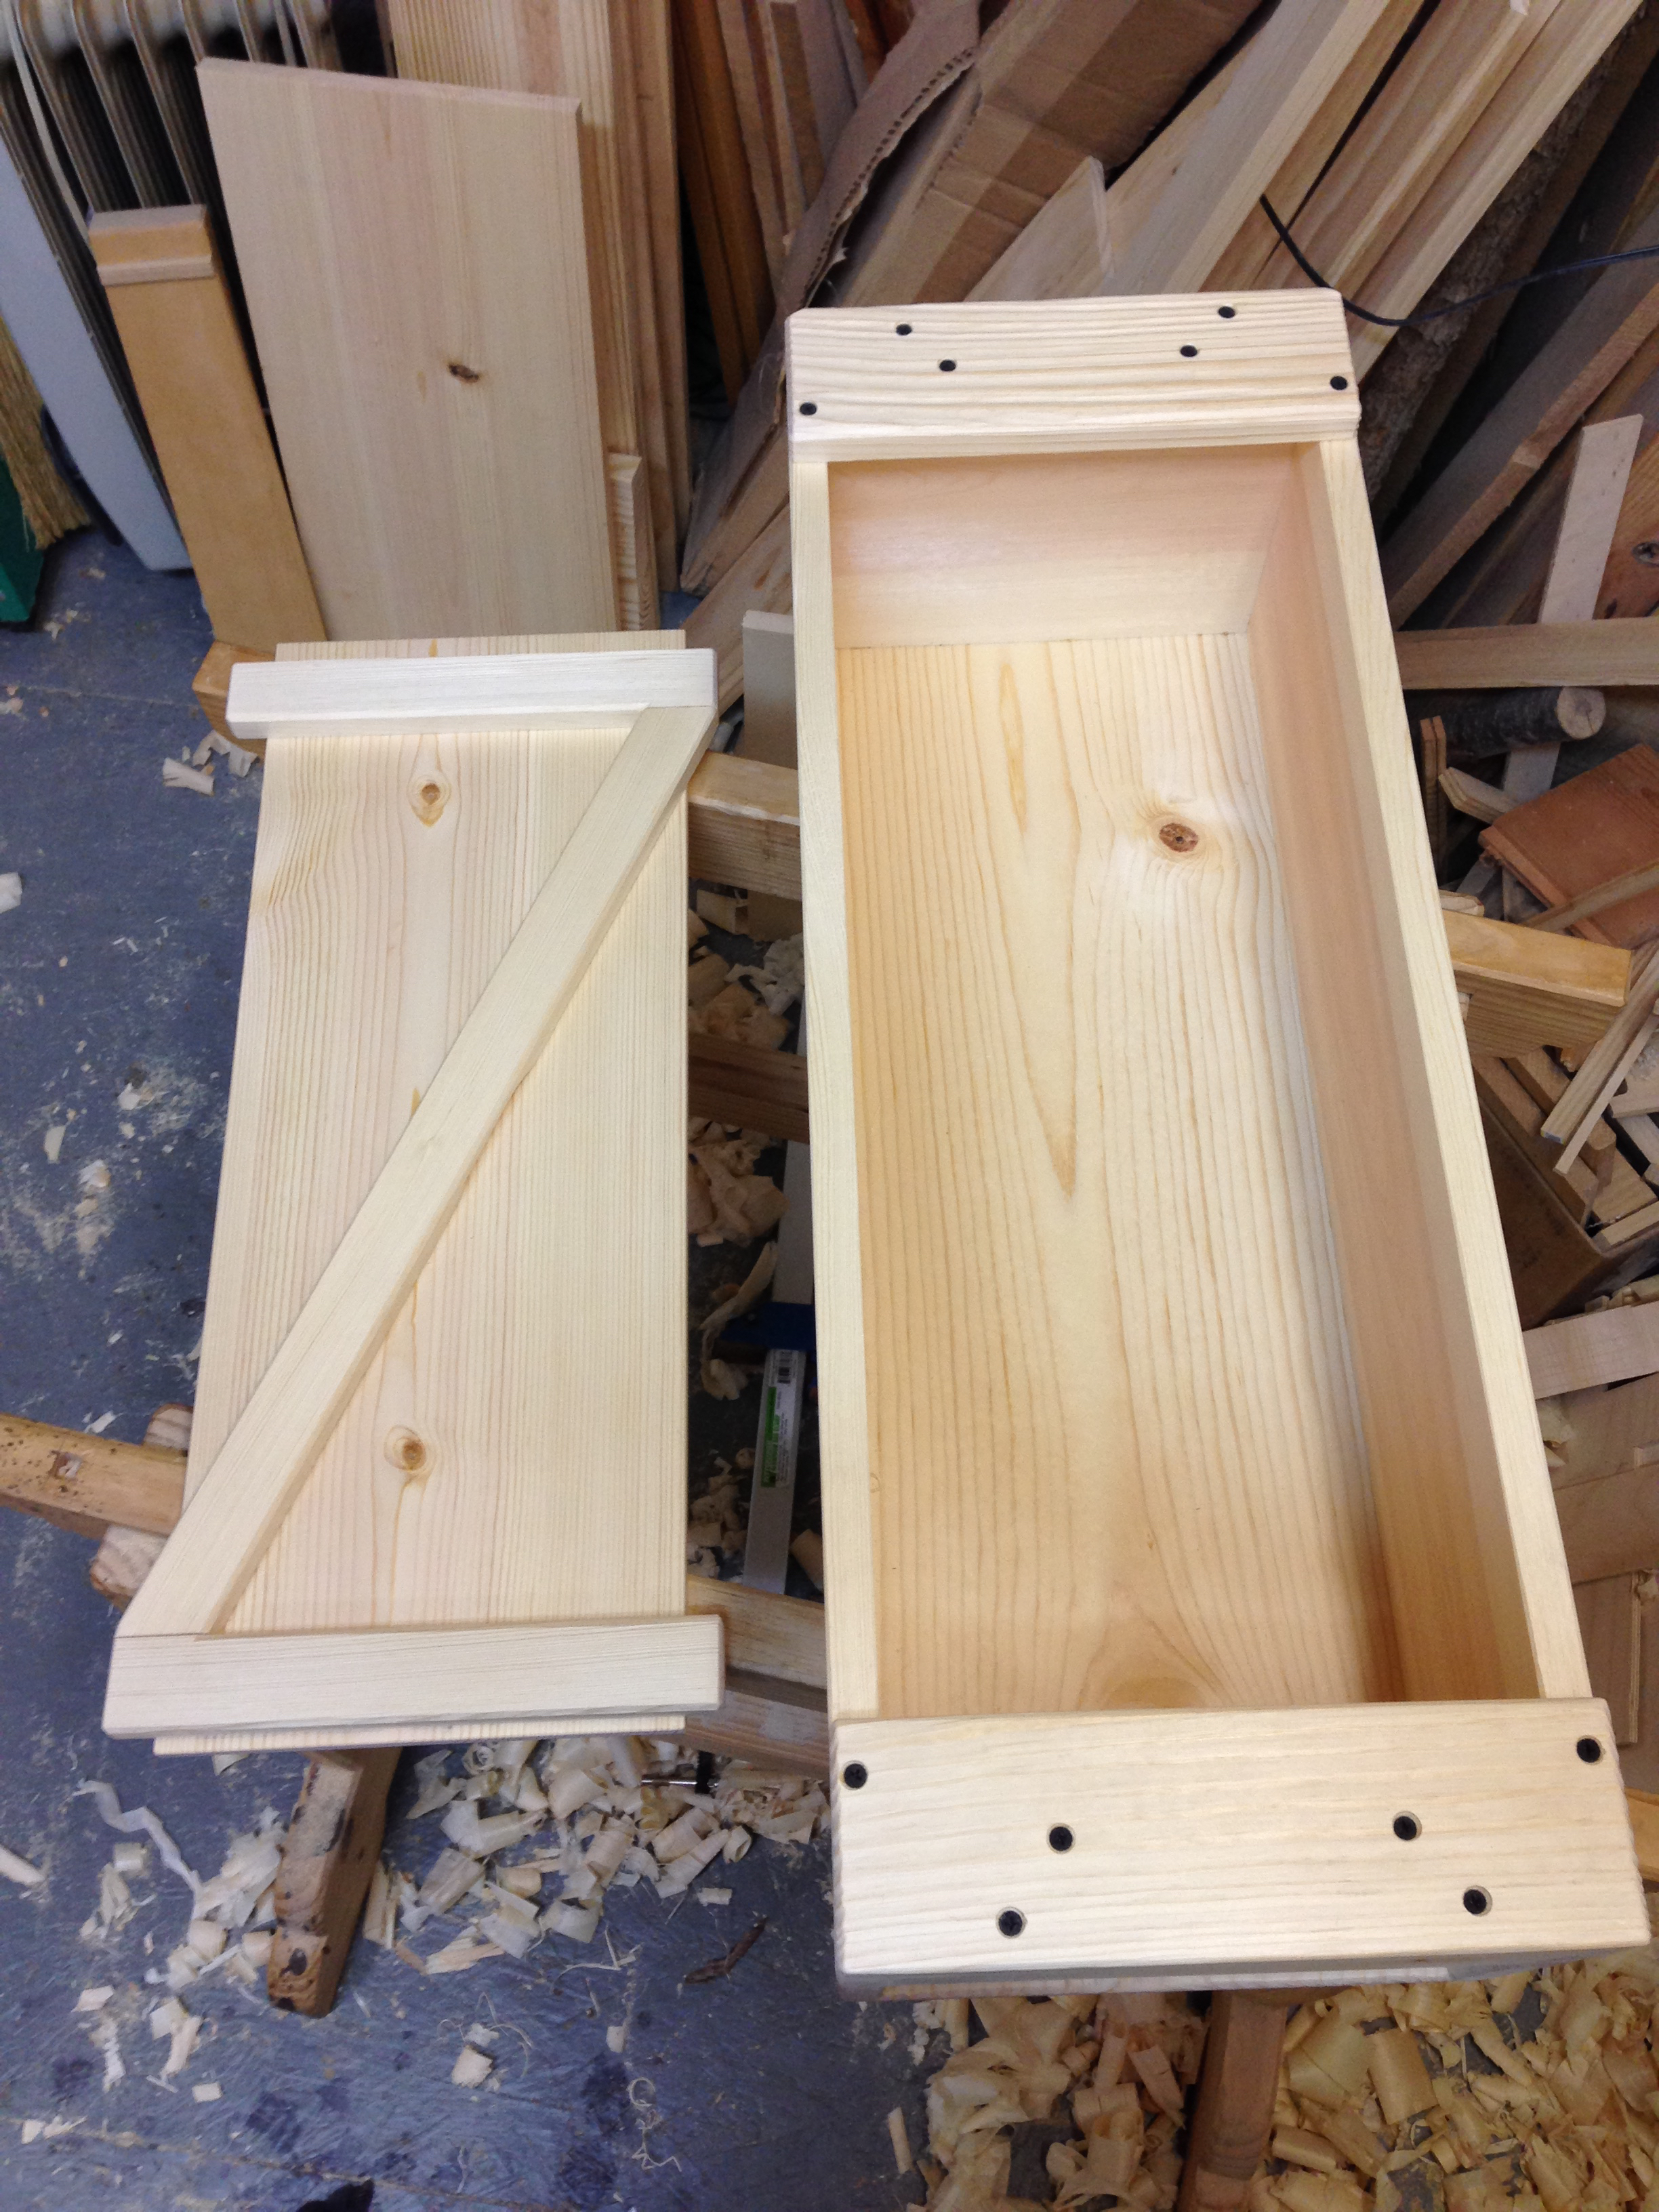
Three parts remain. These are the lid battens and I culled them from the offcuts from the side panels.

First I dressed an edge then planed them to the width indicated on my full-size drawing. I then squared an end on the shooting board and marked the exact length directly from the box. Just as with the end caps and handles. Now for the tricky diagonal batten.
The easiest way I know to size the diagonal batten is to mark it directly from the lid. In order to do this I first needed to dry fit the short battens. One short batten is installed 1″(26mm) from the end of the lid panel. The other batten is installed 1/4″(6mm) from the opposite end of the lid panel. Once the short battens are installed, the diagonal batten can be laid in place and marked for cutting.
All of the battens are secured with 1″ screws up thru the bottom of the lid panel and into the batten. Just as with all others, pilot holes and countersink. One note. Install these small screws with a screwdriver. It will be far too easy to strip them out with the brace.

To install the lid int the box simply tilt the longer offset end of the lid down under an end cap, lay the lid down and slide the shorter offset end under the opposite end cap. Since the end caps and the battens are actually setting at the same level the lid is a tight friction fit. In fact it takes a fair amount of pressure to open it. The lid is quite secure when it’s closed.

Longer offset end of the lid down under an end cap.
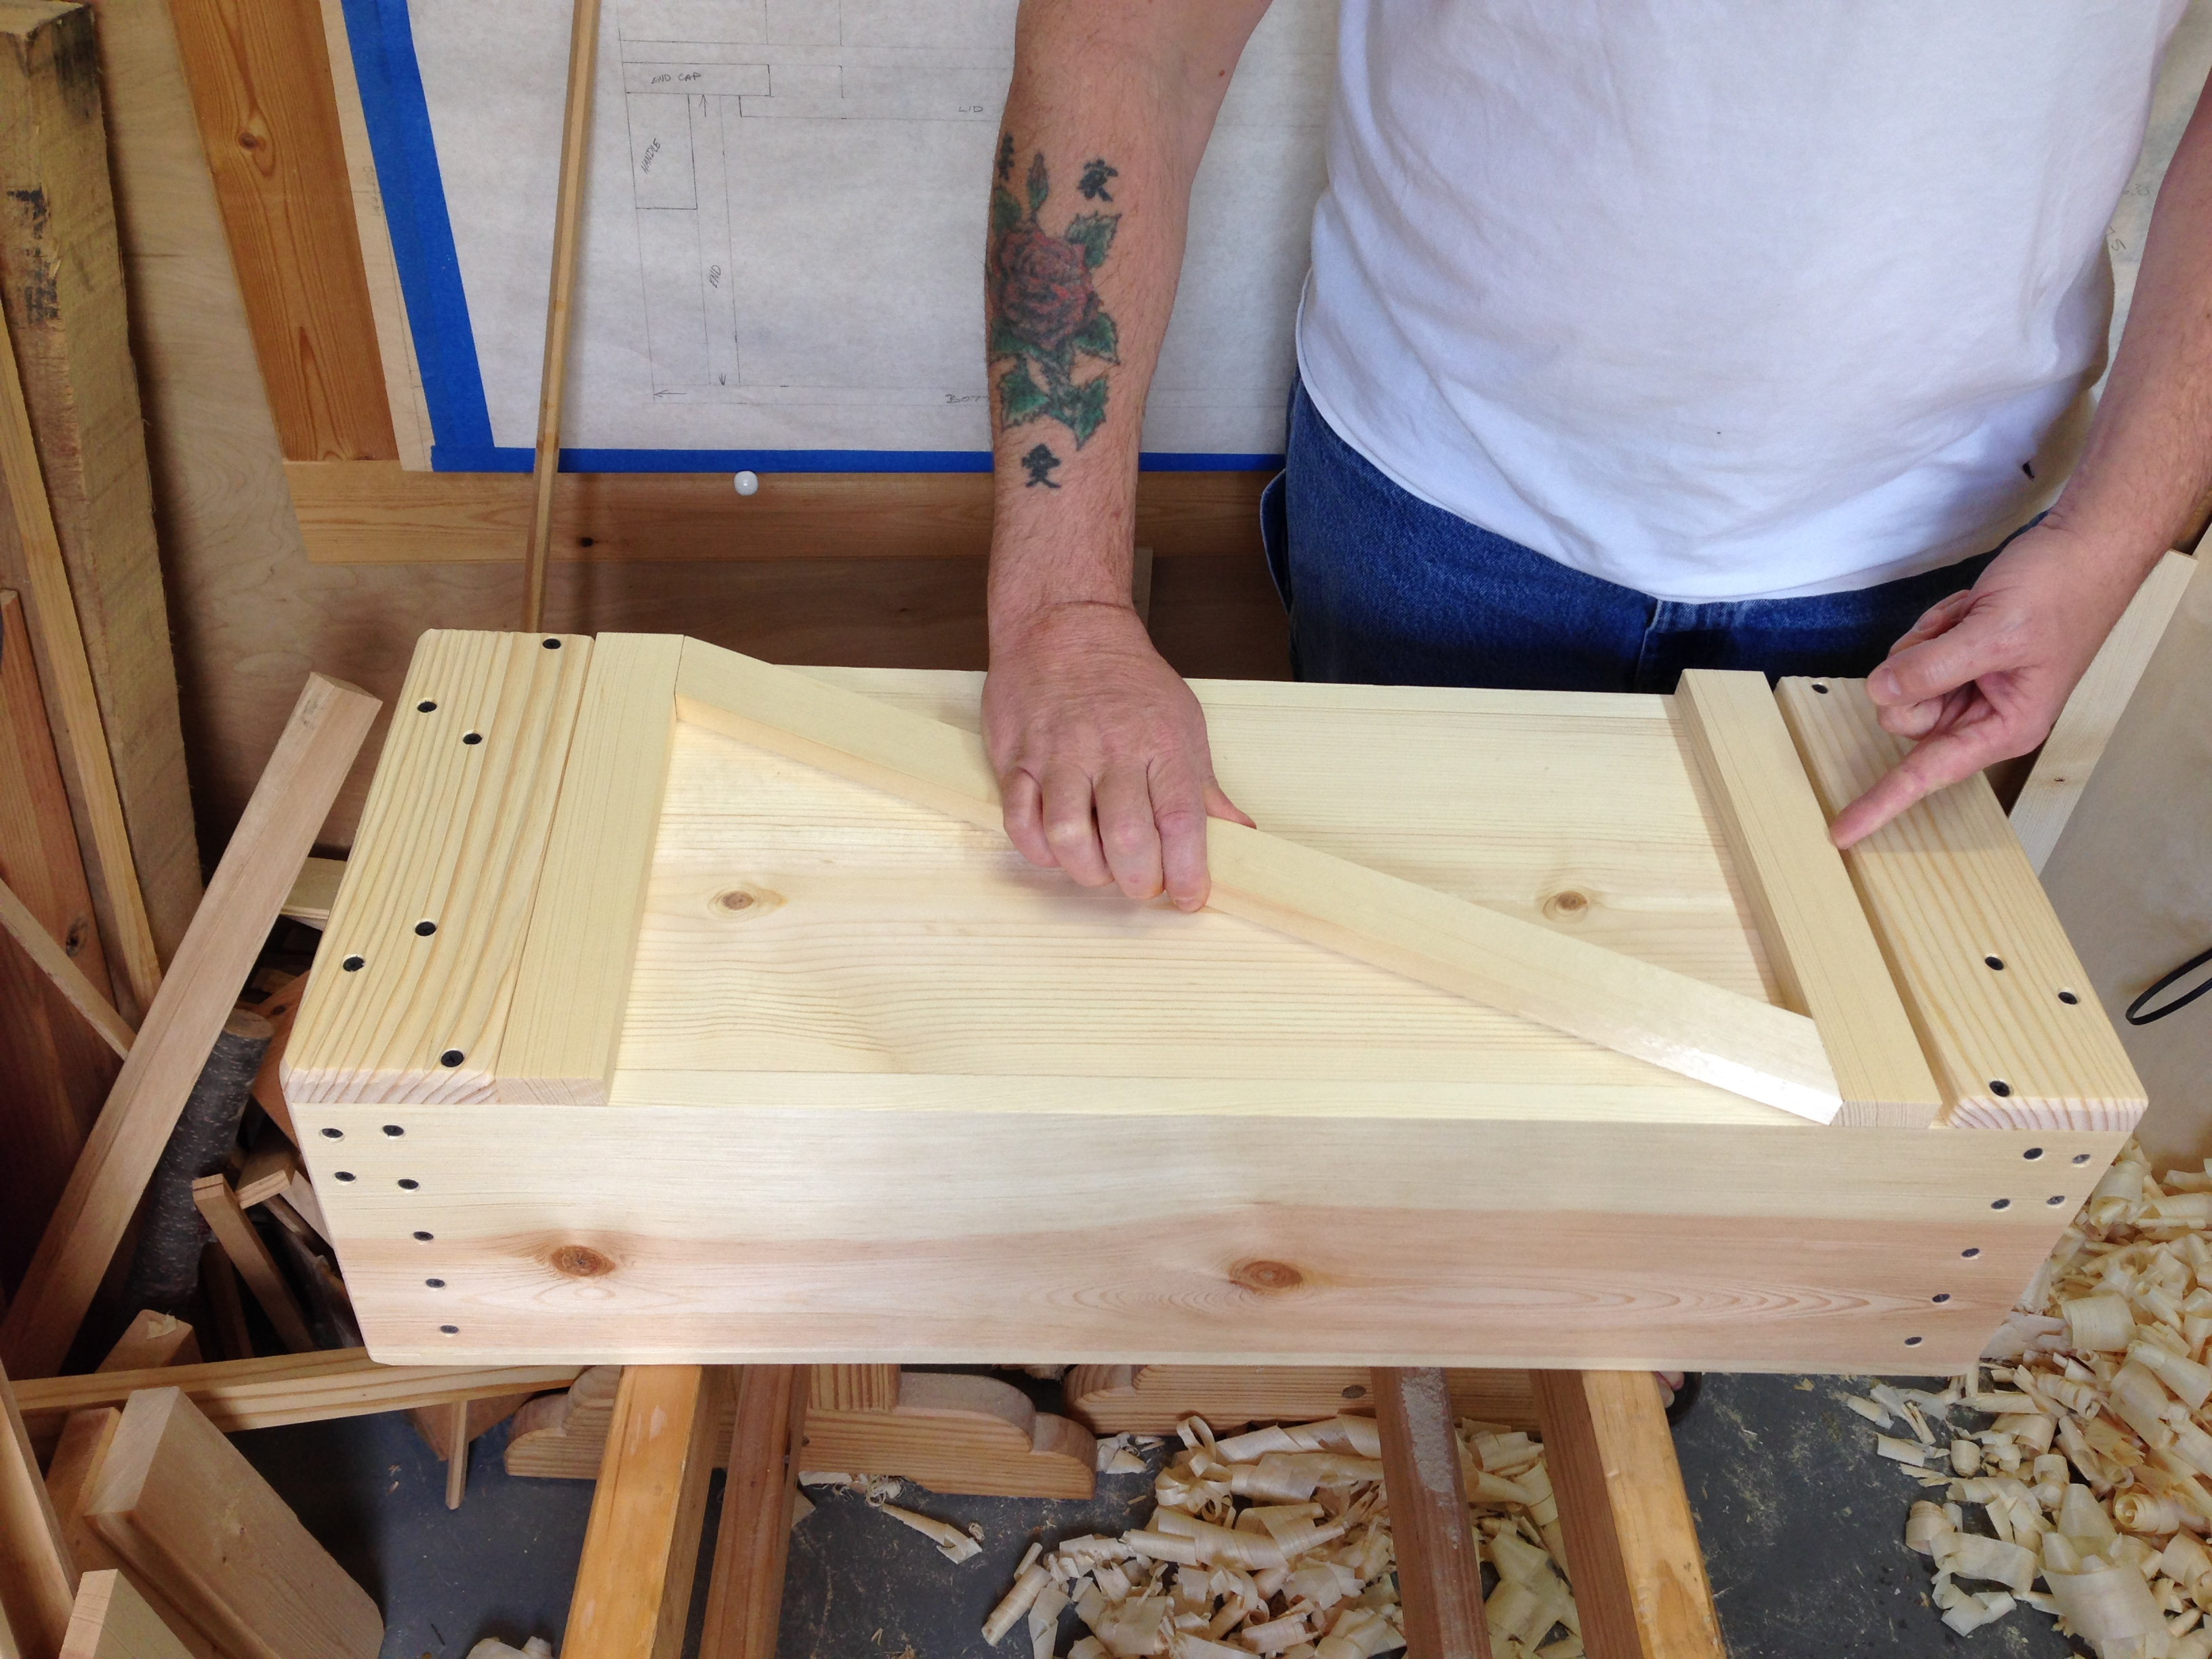
Lay the lid down. Note the gap I’m pointing at with my left hand.

Slide the shorter offset end under the opposite end cap. Note that the gap is now gone.
All that remained was to disassemble the lid, break the edges of the lid panel and battens and reassemble the lid with the addition of glue. While I had the lid apart I also added a small recess in the middle and of each side of the diagonal brace. This will make the lid easier to grip.


I also eased the top edges of the sides that define the box opening. To do this I just chamfer the corners with a sharp chisel.

That’s it. For all intent and purpose the toolbox is complete. For a standard toolbox I would add a coat or two of BLO to the outside just to help keep it clean and add a modicum of protection.


Since I’m using this toolbox to practice the uzukuri technique, I’ll be going a little father for experimentation purposes. I’ll cover that in the series posts on the uzukuri itself. All-in-all this is a project that can be completed in just a few hours or an easy weekend. Of course you can drag it out much longer by taking photos, writing about it and using it to practice a new surfacing technique. 😉
There will be one additional post on this toolbox. I plan on doing a little weight and packing trials and see what the numbers work out to be. I’ll also discuss some of the design elements that make this toolbox a solid and ergonomic design.

Pingback: Japanese Toolbox-Progress 3 | GREG MERRITT – BY MY OWN HANDS
Great job Greg! Just finished making one myself a couple of weeks ago. Great storage space.
Rusty
It’s a simple, fun and quick build. These boxes are very handy and can be made to suit the needs at hand.
“as the nudity increase the panel will swell slightly”
Did Chris Schwarz write this blog entry?
LOL…spell check got me on that one. Took a blue turn for sure.
Corrections have been quickly applied so as to keep the “PG” rating alive.
Assumed it was some sort of “self correction” – I hate that on my phone. I really like the finish created by the burnishing.
I also was wondering about the square holes on the top of your trestles….
Regards,
Mike
Before I built my workbench I used a beam on top of the trestles as a makeshift workbench. I had installed square pegs in the bottom of the beam that would seat into the square holes on the trestles. It worked OK to keep the beam in place. I really need to remake these trestles. They are a little too wide for my needs.
Nice box!
Thank you! It was a lot of fun to build.
Pingback: Japanese Toolbox-Progress 5-Complete | GREG MERRITT – BY MY OWN HANDS