The design drawings are complete and I believe that I have all of the joinery elements worked out. As I said in Part 1, the joinery is fairly simple. Consisting primarily of dados and finger joints.
The overall proportional layout.
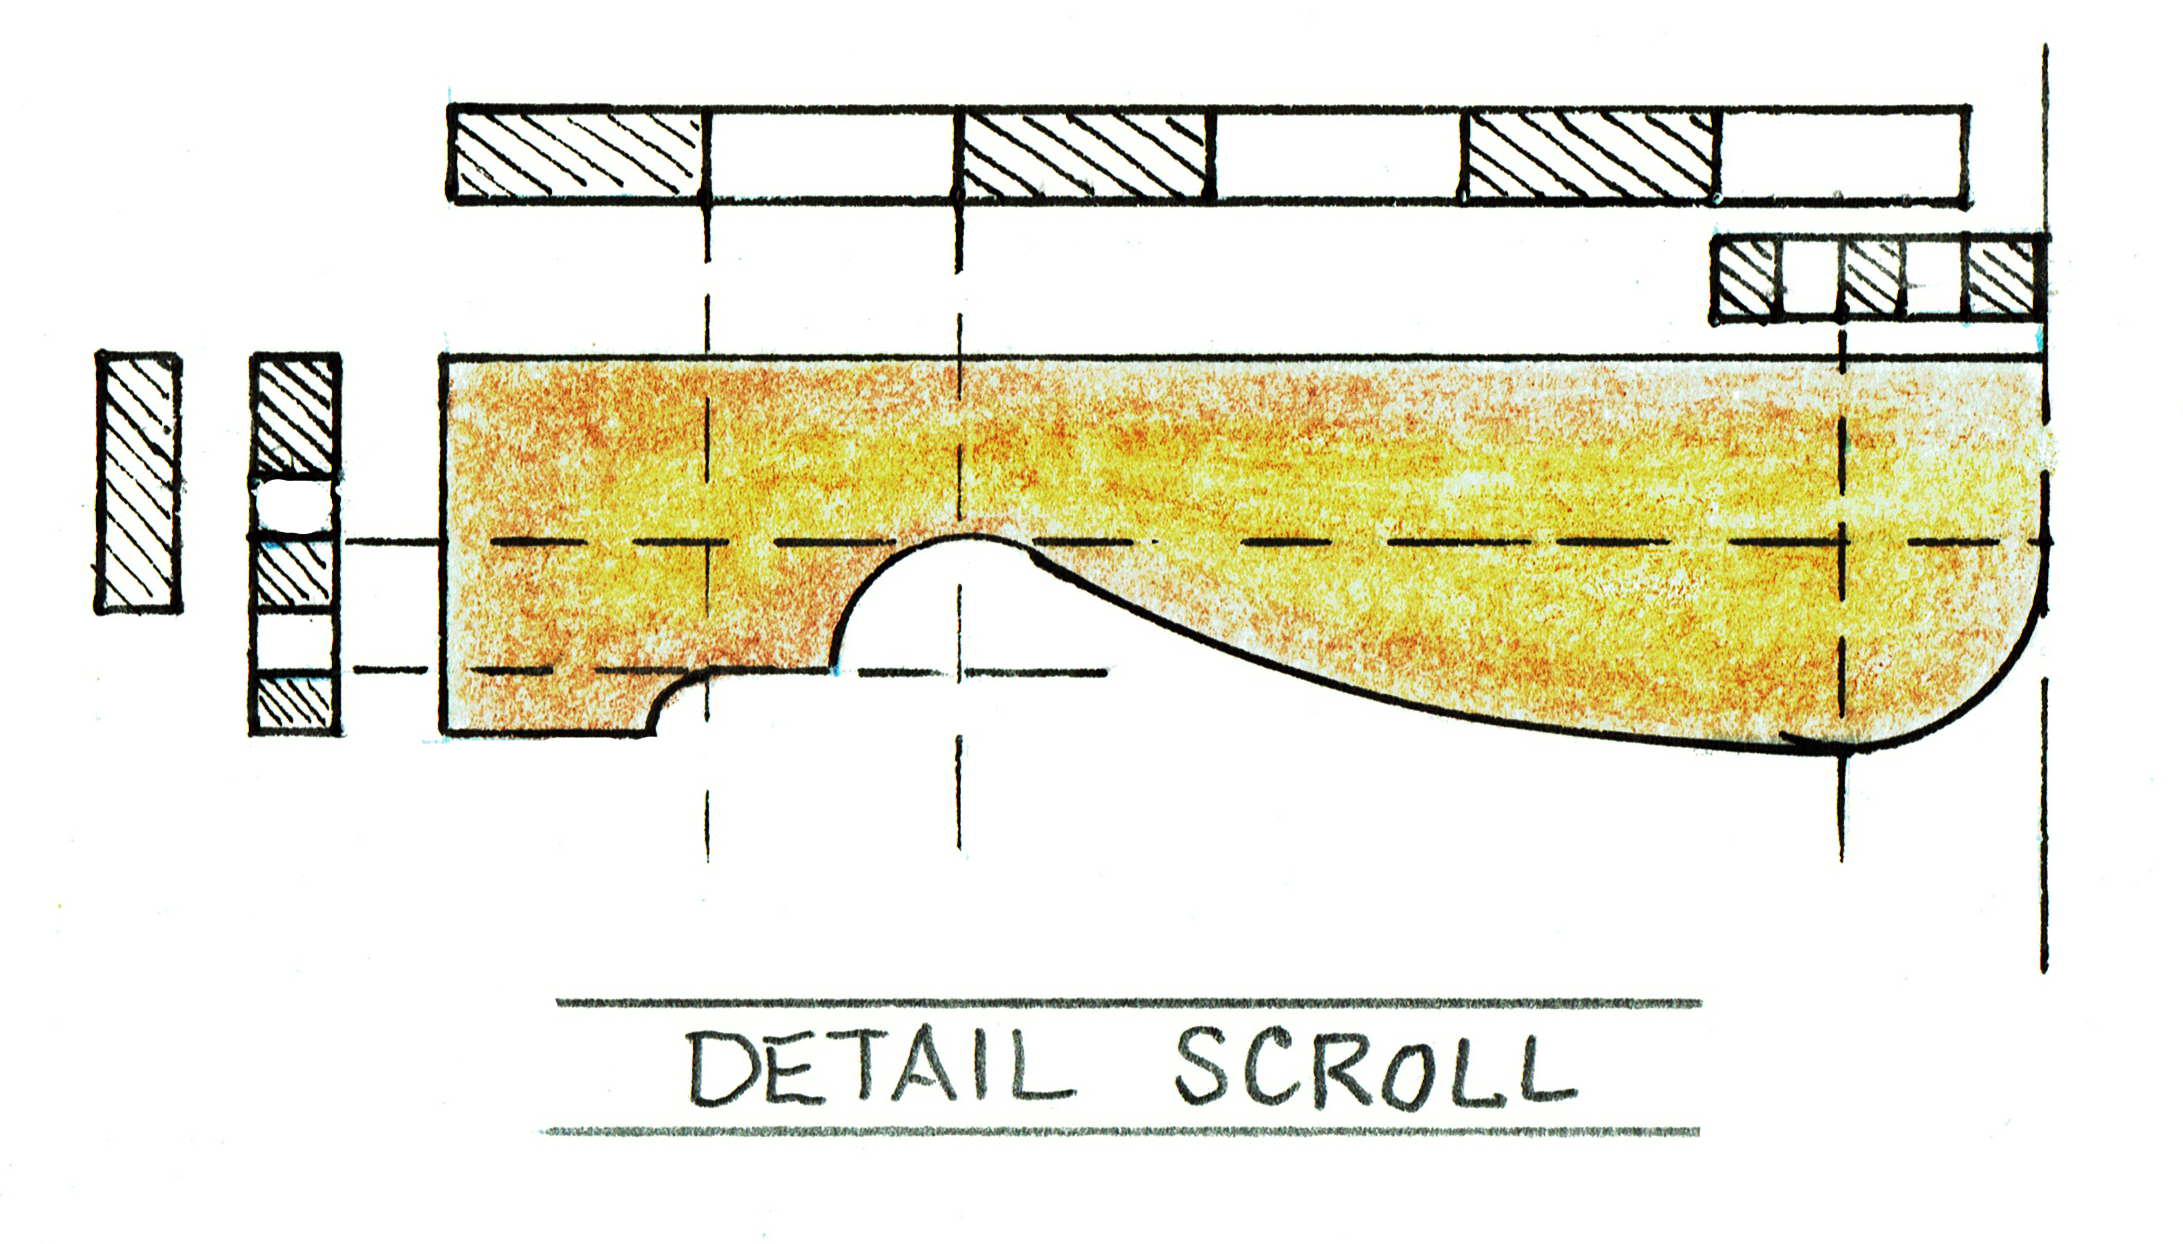
Detail sheet showing the arrangement of dados and finger joints on the end pieces.

 The basic box is consists of a top panel joined to the ends with a (5) part finger joint that will be pinned with bamboo pegs. The bottom is joined to the ends with a (3) part finger joint with a slight modification. The front and rear portions of the finger joint rest in a shallow dado with only the center “finger” lapping the full thickness of the end panel. This center finger also creates the cutout that forms the feet on the ends. The bottom panel is tucked behind a simple skirt board that is lapped and pinned to the ends and glued to the edge of the bottom panel.
The center horizontal board that separates the large bottom drawer from the drawer bank above it, is installed in a stopped dado. This dado will intersect the vertical dado that retains the removable sliding panel.
The back will be made up of two or three panels. It will overlap the end panels and tuck under a rebate on the top panel. Glue and pegs will secure it into place. I’ll either ship lap the panel joints or spline them. I’m leaning towards ship lap at this point. Plywood is another option but the solid wood panels will have a better aesthetic. Especial since the edges will be exposed and this box will be seen from all angles as a matter of course.
 The removable sliding panel consists of three parts. A main board, a decorative appliqué, and the top trim piece. The appliqué will simply be glued in place since the grain of it and the main board are running horizontally. There is evidence that this appliqué was pinned in place on the antique and I’m not entirely sure as to why. My guess is they were a backup to glue failure. Rice or hide glue would have been the choices for glue on the antique. Since both are subject to failure in high humidity, pegs would have ensured the pieces remained together. At any rate, I may end up adding a few bamboo pegs as well, for the same reason. The top trim piece will be glued and pegged in place.
The two pieces that form the upper drawer bank will be joined and installed in stopped dados. The stopped dado will prevent the dado from showing on the front of the assembly. This is not just cosmetic, it also serves to lock the pieces in place. With the back panels of the box installed the divider pieces will be prevented from moving to the rear and stopped dado prevents them from moving forward.
The drawers will be my normal construction. Lapped and pinned dovetails at the front and pinned finger joints at the rear. The installation of the drawer bottom I’m still undecided on. I’ll either install it in a groove or rebate it into the front then glue and peg it directly to the bottom of the assembly. How the drawers are made is inconsequential. They just need to be sturdy and function as intended.
I’m just about ready to start cutting wood for this project. All that is left is to create the full-scale shop drawing and a trip to the big box store for the lumber. Tomorrow should see the first cuts being made.
Below are pdf versions of the layout drawings.
Hillbilly_Hobby_Tansu-000-sht1of2

You have a great eye for designs. This is a neat little box. Looking forward to the build!
-jamie
Thanks Jamie! I getting excited to start this one too.
Pingback: HB Hobby Tansu #1-Part 3 | GREG MERRITT – BY MY OWN HANDS