
 The week came and went with almost no time in the shop. One evening I did manage to sneak in about 45min. Just long enough to cut and fit the front skirt board. I also had to make a cross-town trip to pick up a new bottle of glue. So today I was itching to get out in the shop and start the case assembly.
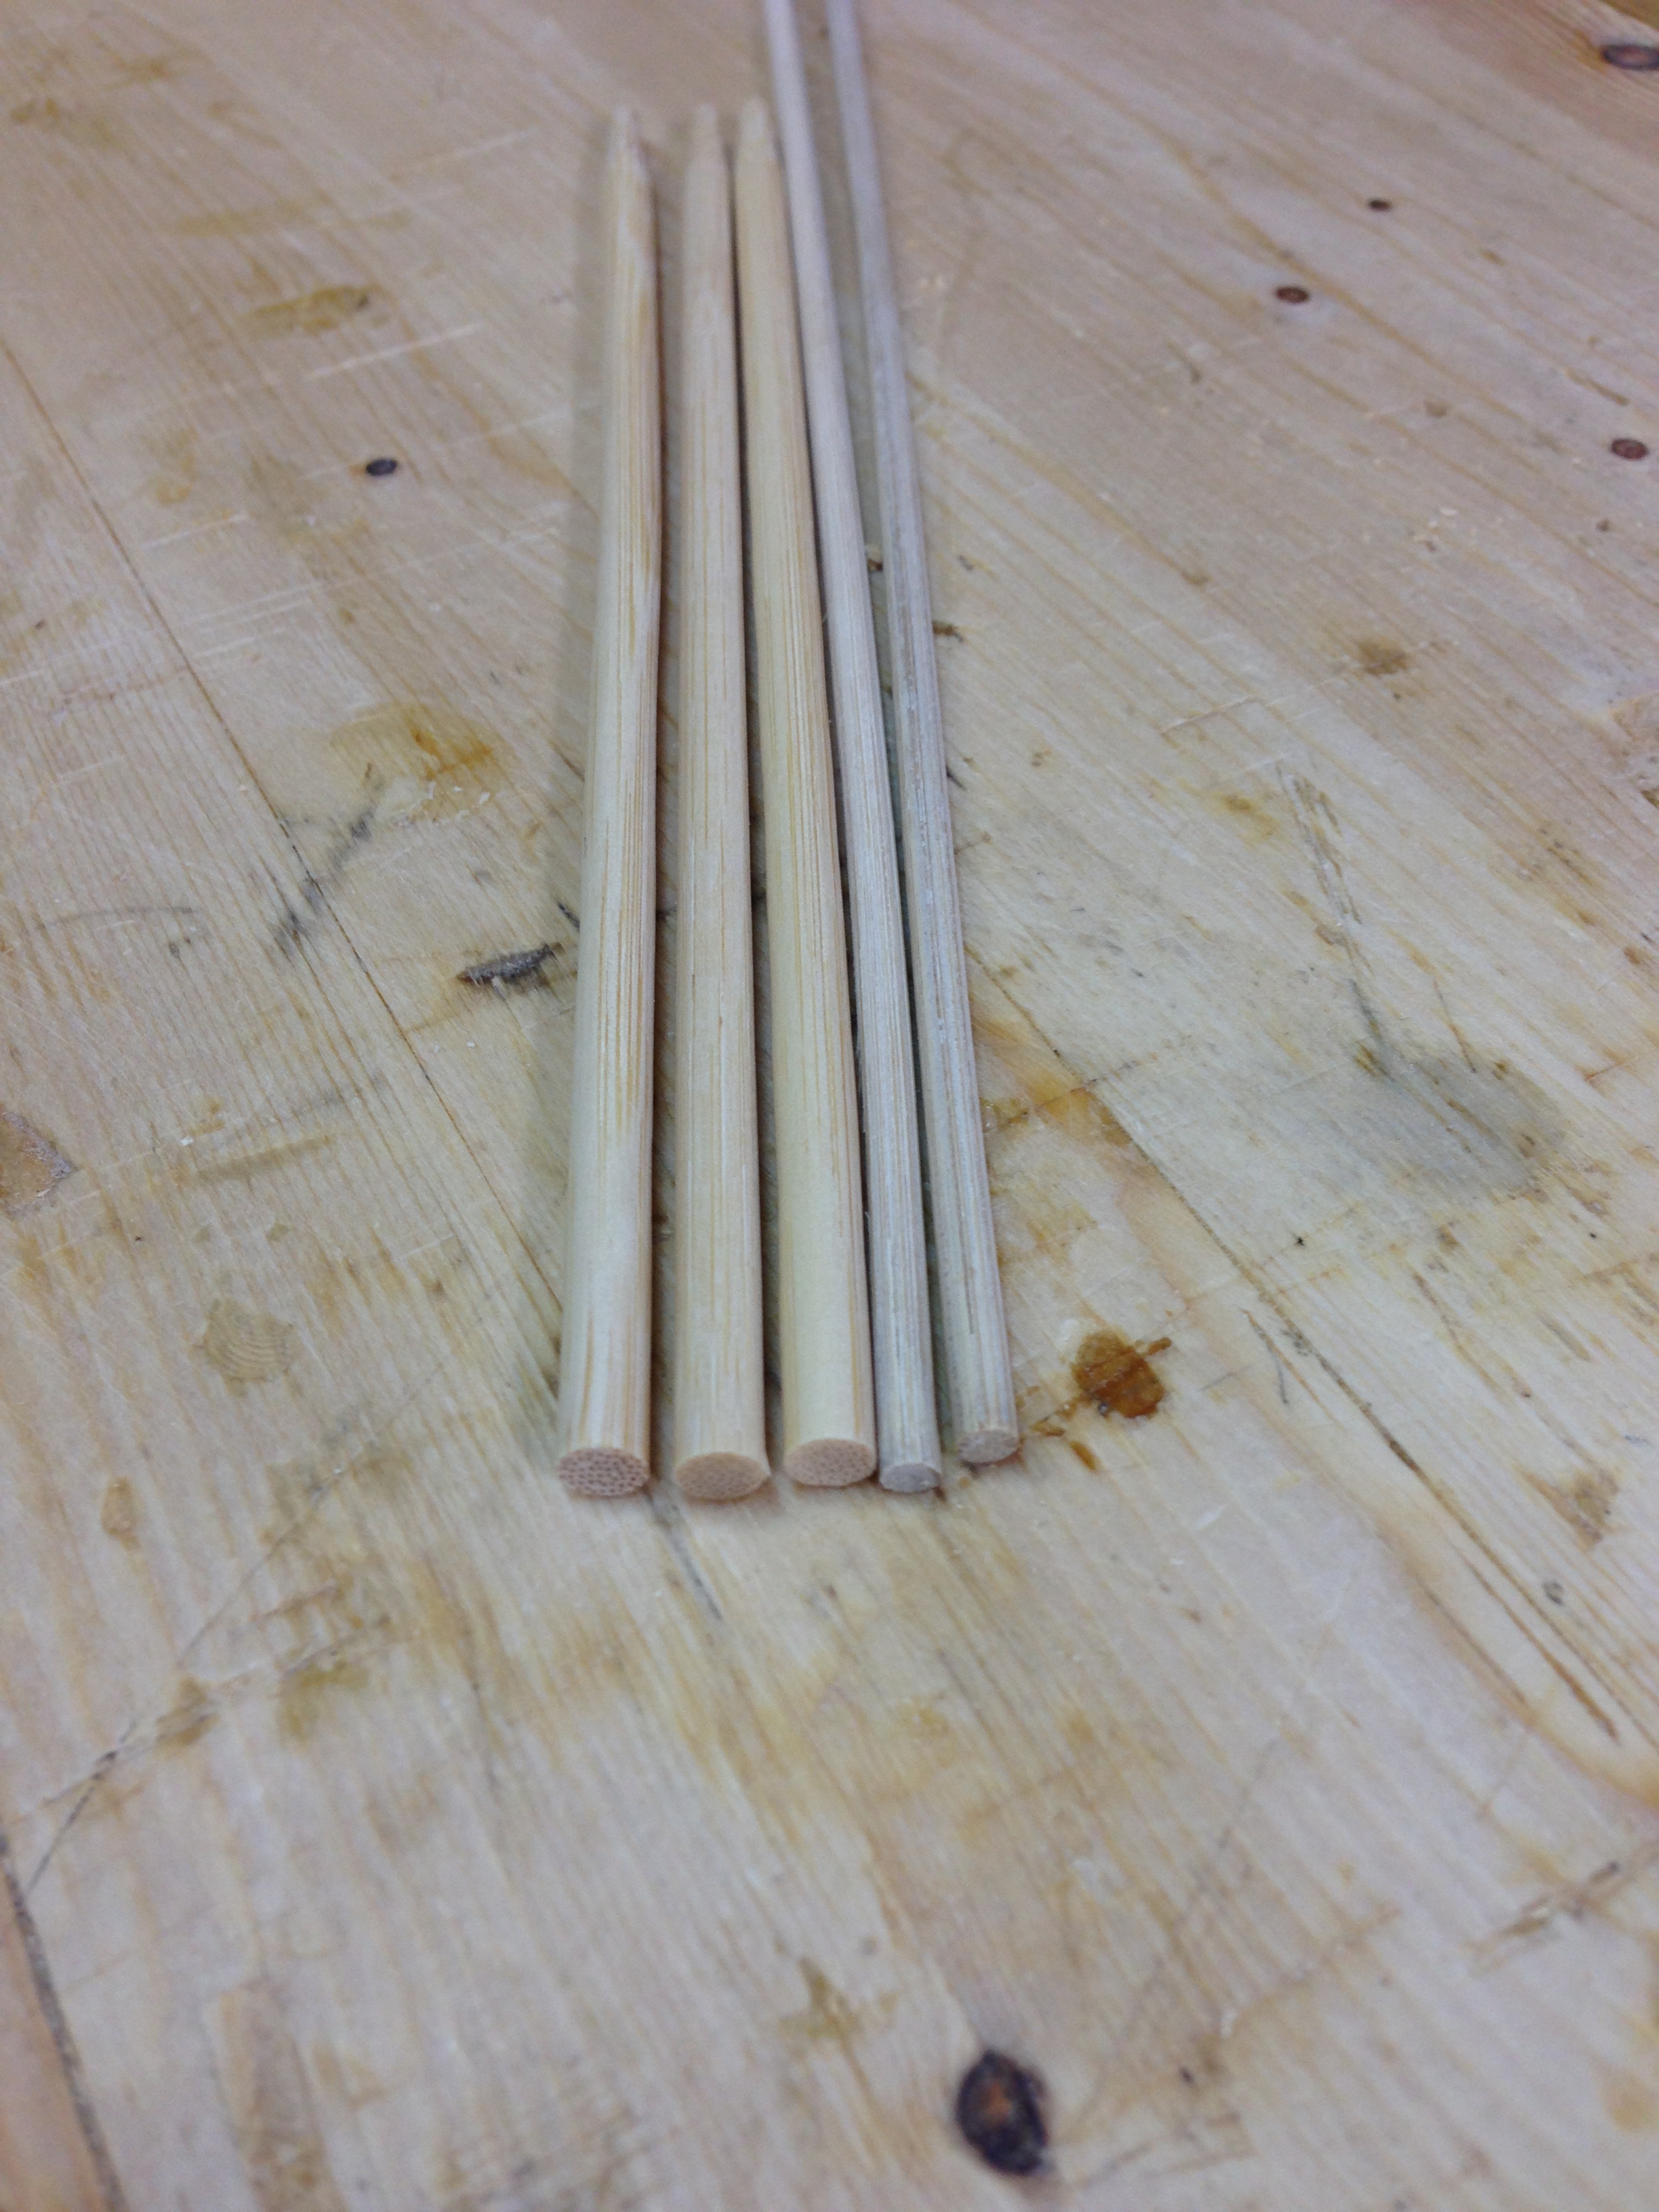
All of the joints in this project are designed to be glued and then pegged with bamboo pegs. Nothing new for me. Towards the end of my last HB Tansu build, I ran out of the bamboo skewers that I use for making my pegs. The new package that I picked up from W*M were just a little thinner than what I had before. Fine for assembling drawers and such, but far too wimpy for this case assembly. A quick internet search and I found some more substantial bamboo pegs on Amazon and ordered a package. These are 3mm thick and very consistent in size. These will be plenty stout.
I’m also trying out a different liquid hide glue. Woodcraft had two bottles of my usual Titebond liquid hide glue on the shelf. Both were set to expire in less than five months. The Old Brown glue on the shelf was much fresher and that is what a drug home.
The Old Brown is, as is oft reported, somewhat thick at room temperature. So I did what everyone else does and put the bottle in a mug of hot water.
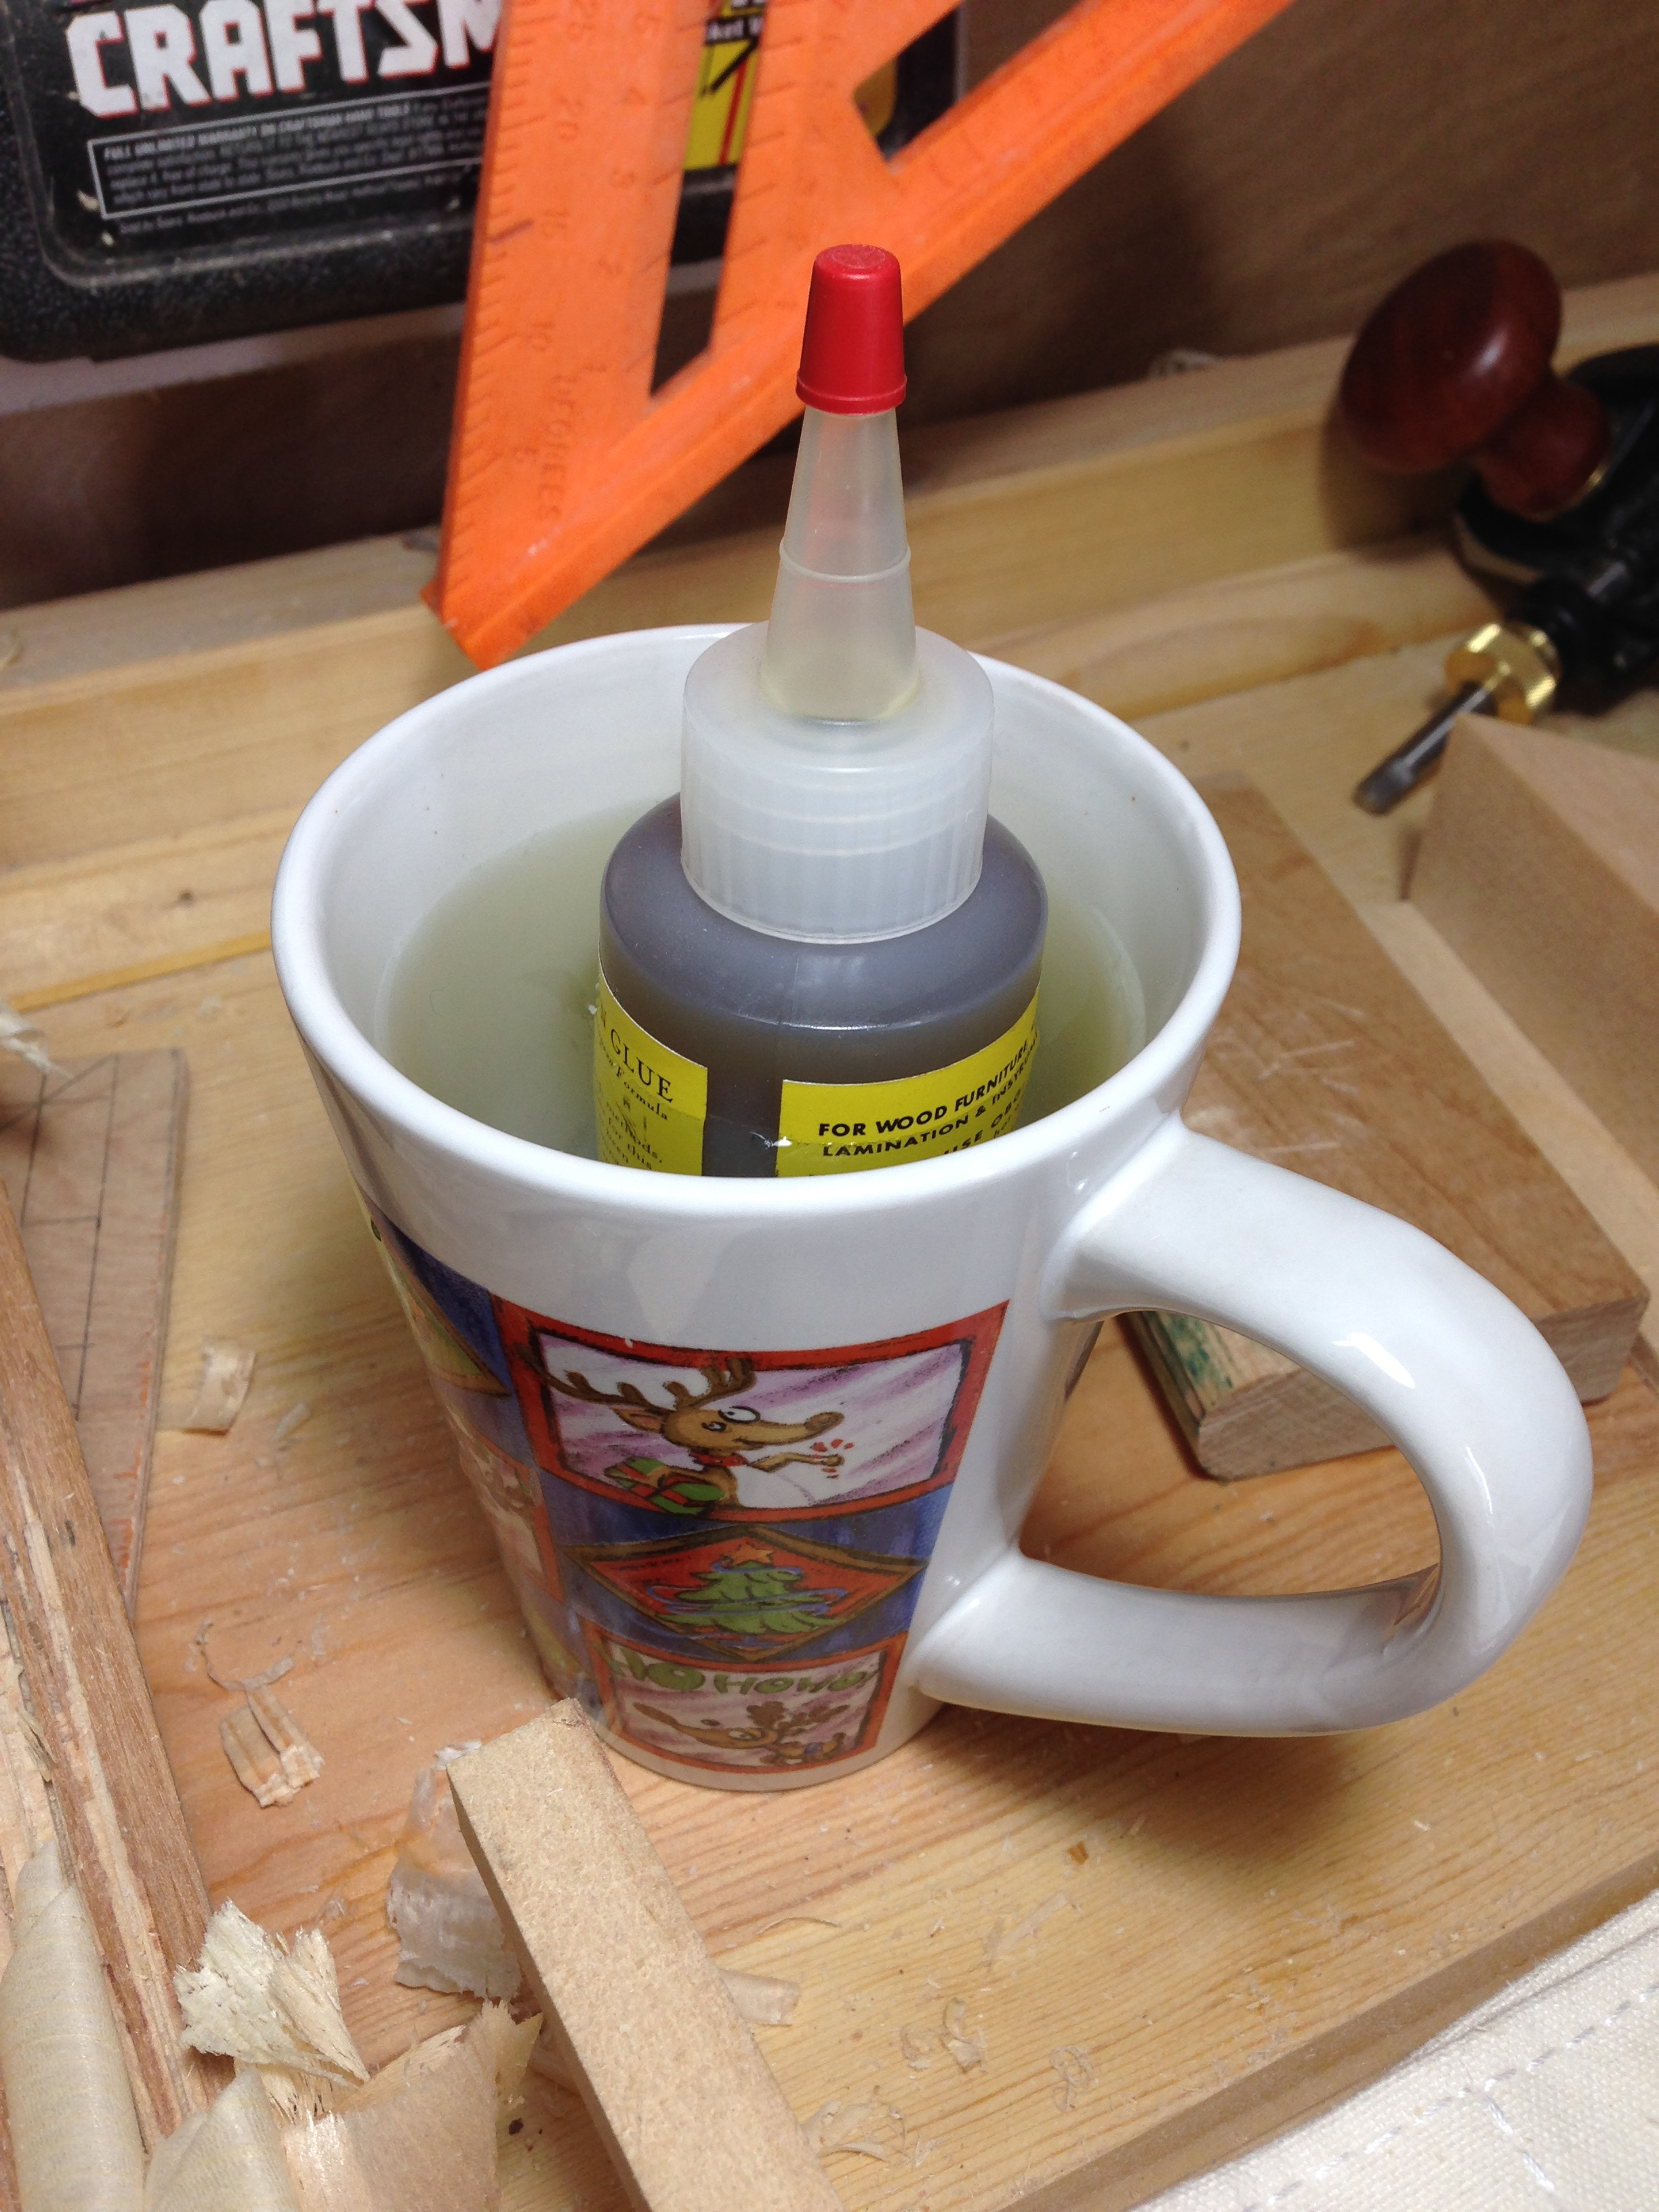
In use, the Old Brown isn’t any different from the Titebond version. All reports that I have read say that the bonding strength is on par with the Titebond. One advantage that is reported, is that the Old Brown has a quicker tack. I would have to use the two side by side to confirm that though. I do feel that the Old Brown cleans up a little easier than the Titebond though. I always have a damp rag at the ready to wipe off any squeeze out or to clean up drips. It might be the extra heat from the water bath, but the Old Brown wipes up easier than what I have been experiencing with the Titebond version. So far I see no significant difference between the two products. I’ll save final conclusions until the completion of this project.
On with the assembly.
The first order of business was to assemble the internal dividers. This may be a little overkill, but I knew it would make the overall assembly go a little smoother if I was able to install these as a single unit. So a little glue, clamp and peg action had the dividers ready to install. I purposely cut the case dados for these slightly loose. Not sloppy, but loose enough so that I could slide the entire divider assembly into the case from the rear.
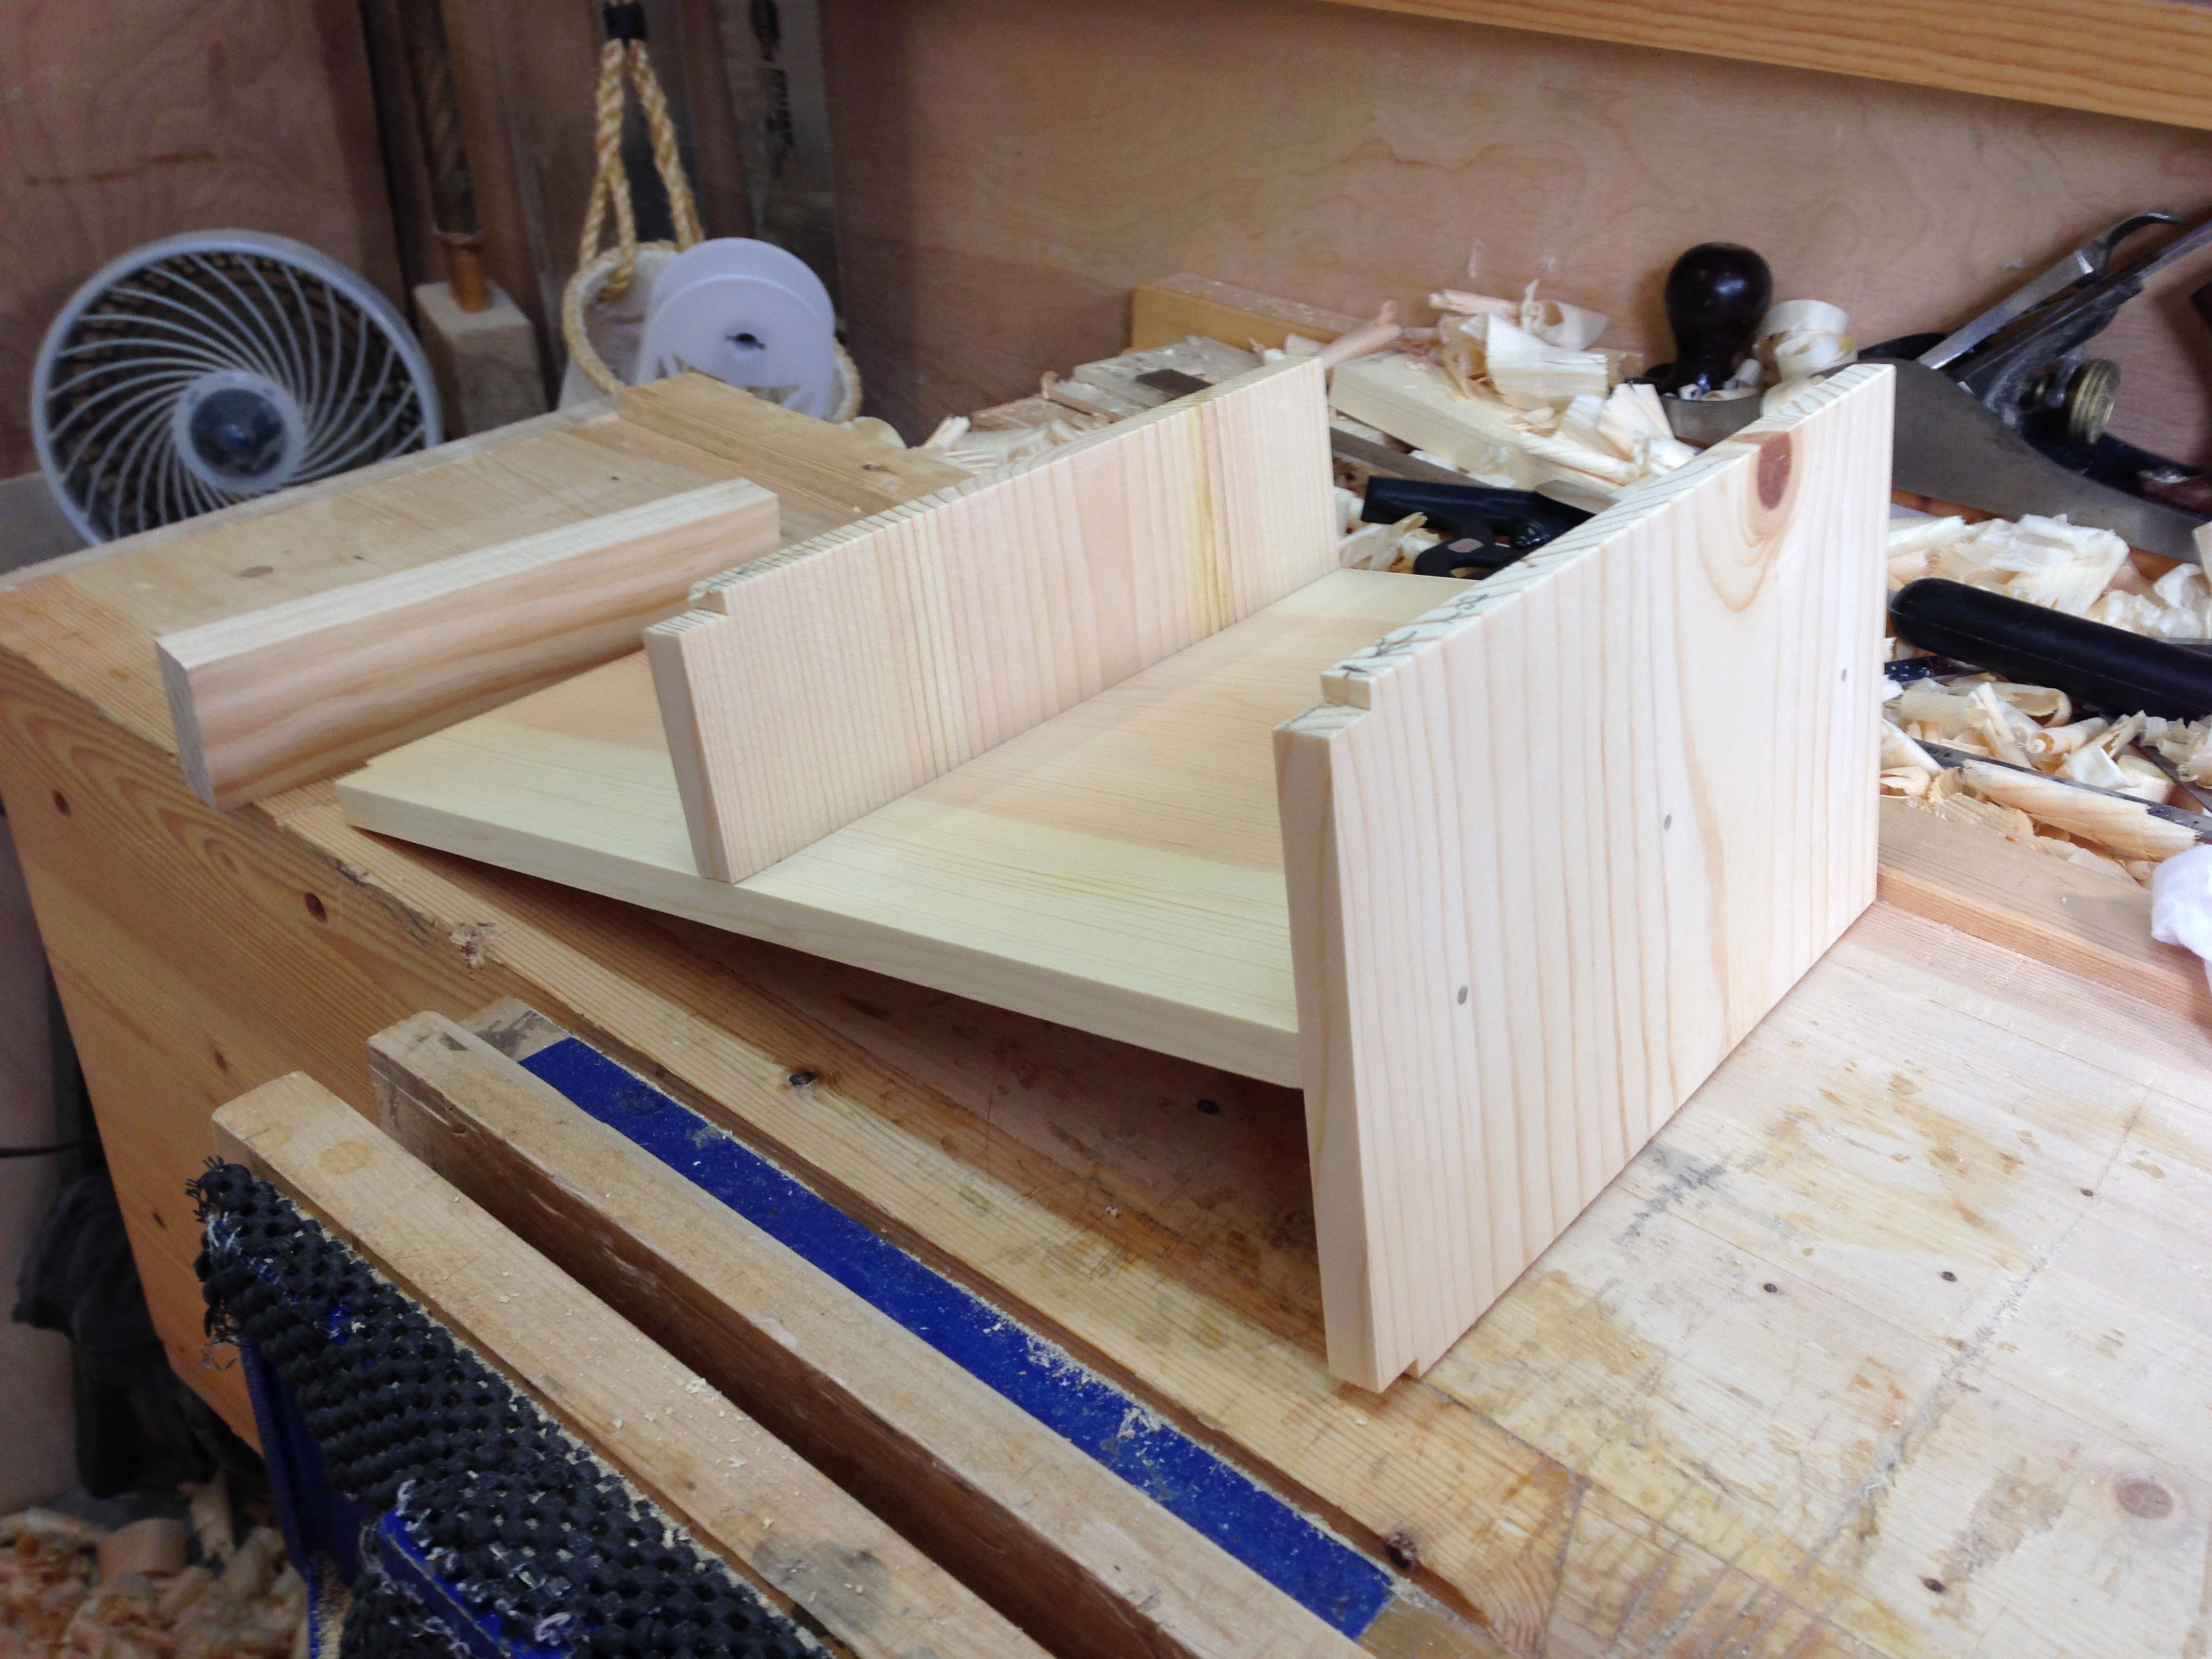
Next I began glueing and assembling the actual case. My goal at this stage was to glue, assemble and clamp only. I wanted the glue to set up a little before I started adding pegs. If all of the pieces were dead flat I would have just begun pegging away. All of the exterior case pieces have a slight cup across their width. It’s easily clamped out and I wanted the glue to set and hold the pieces in place. Why? Because I have to remove the clamps to install the pegs. That’s why.
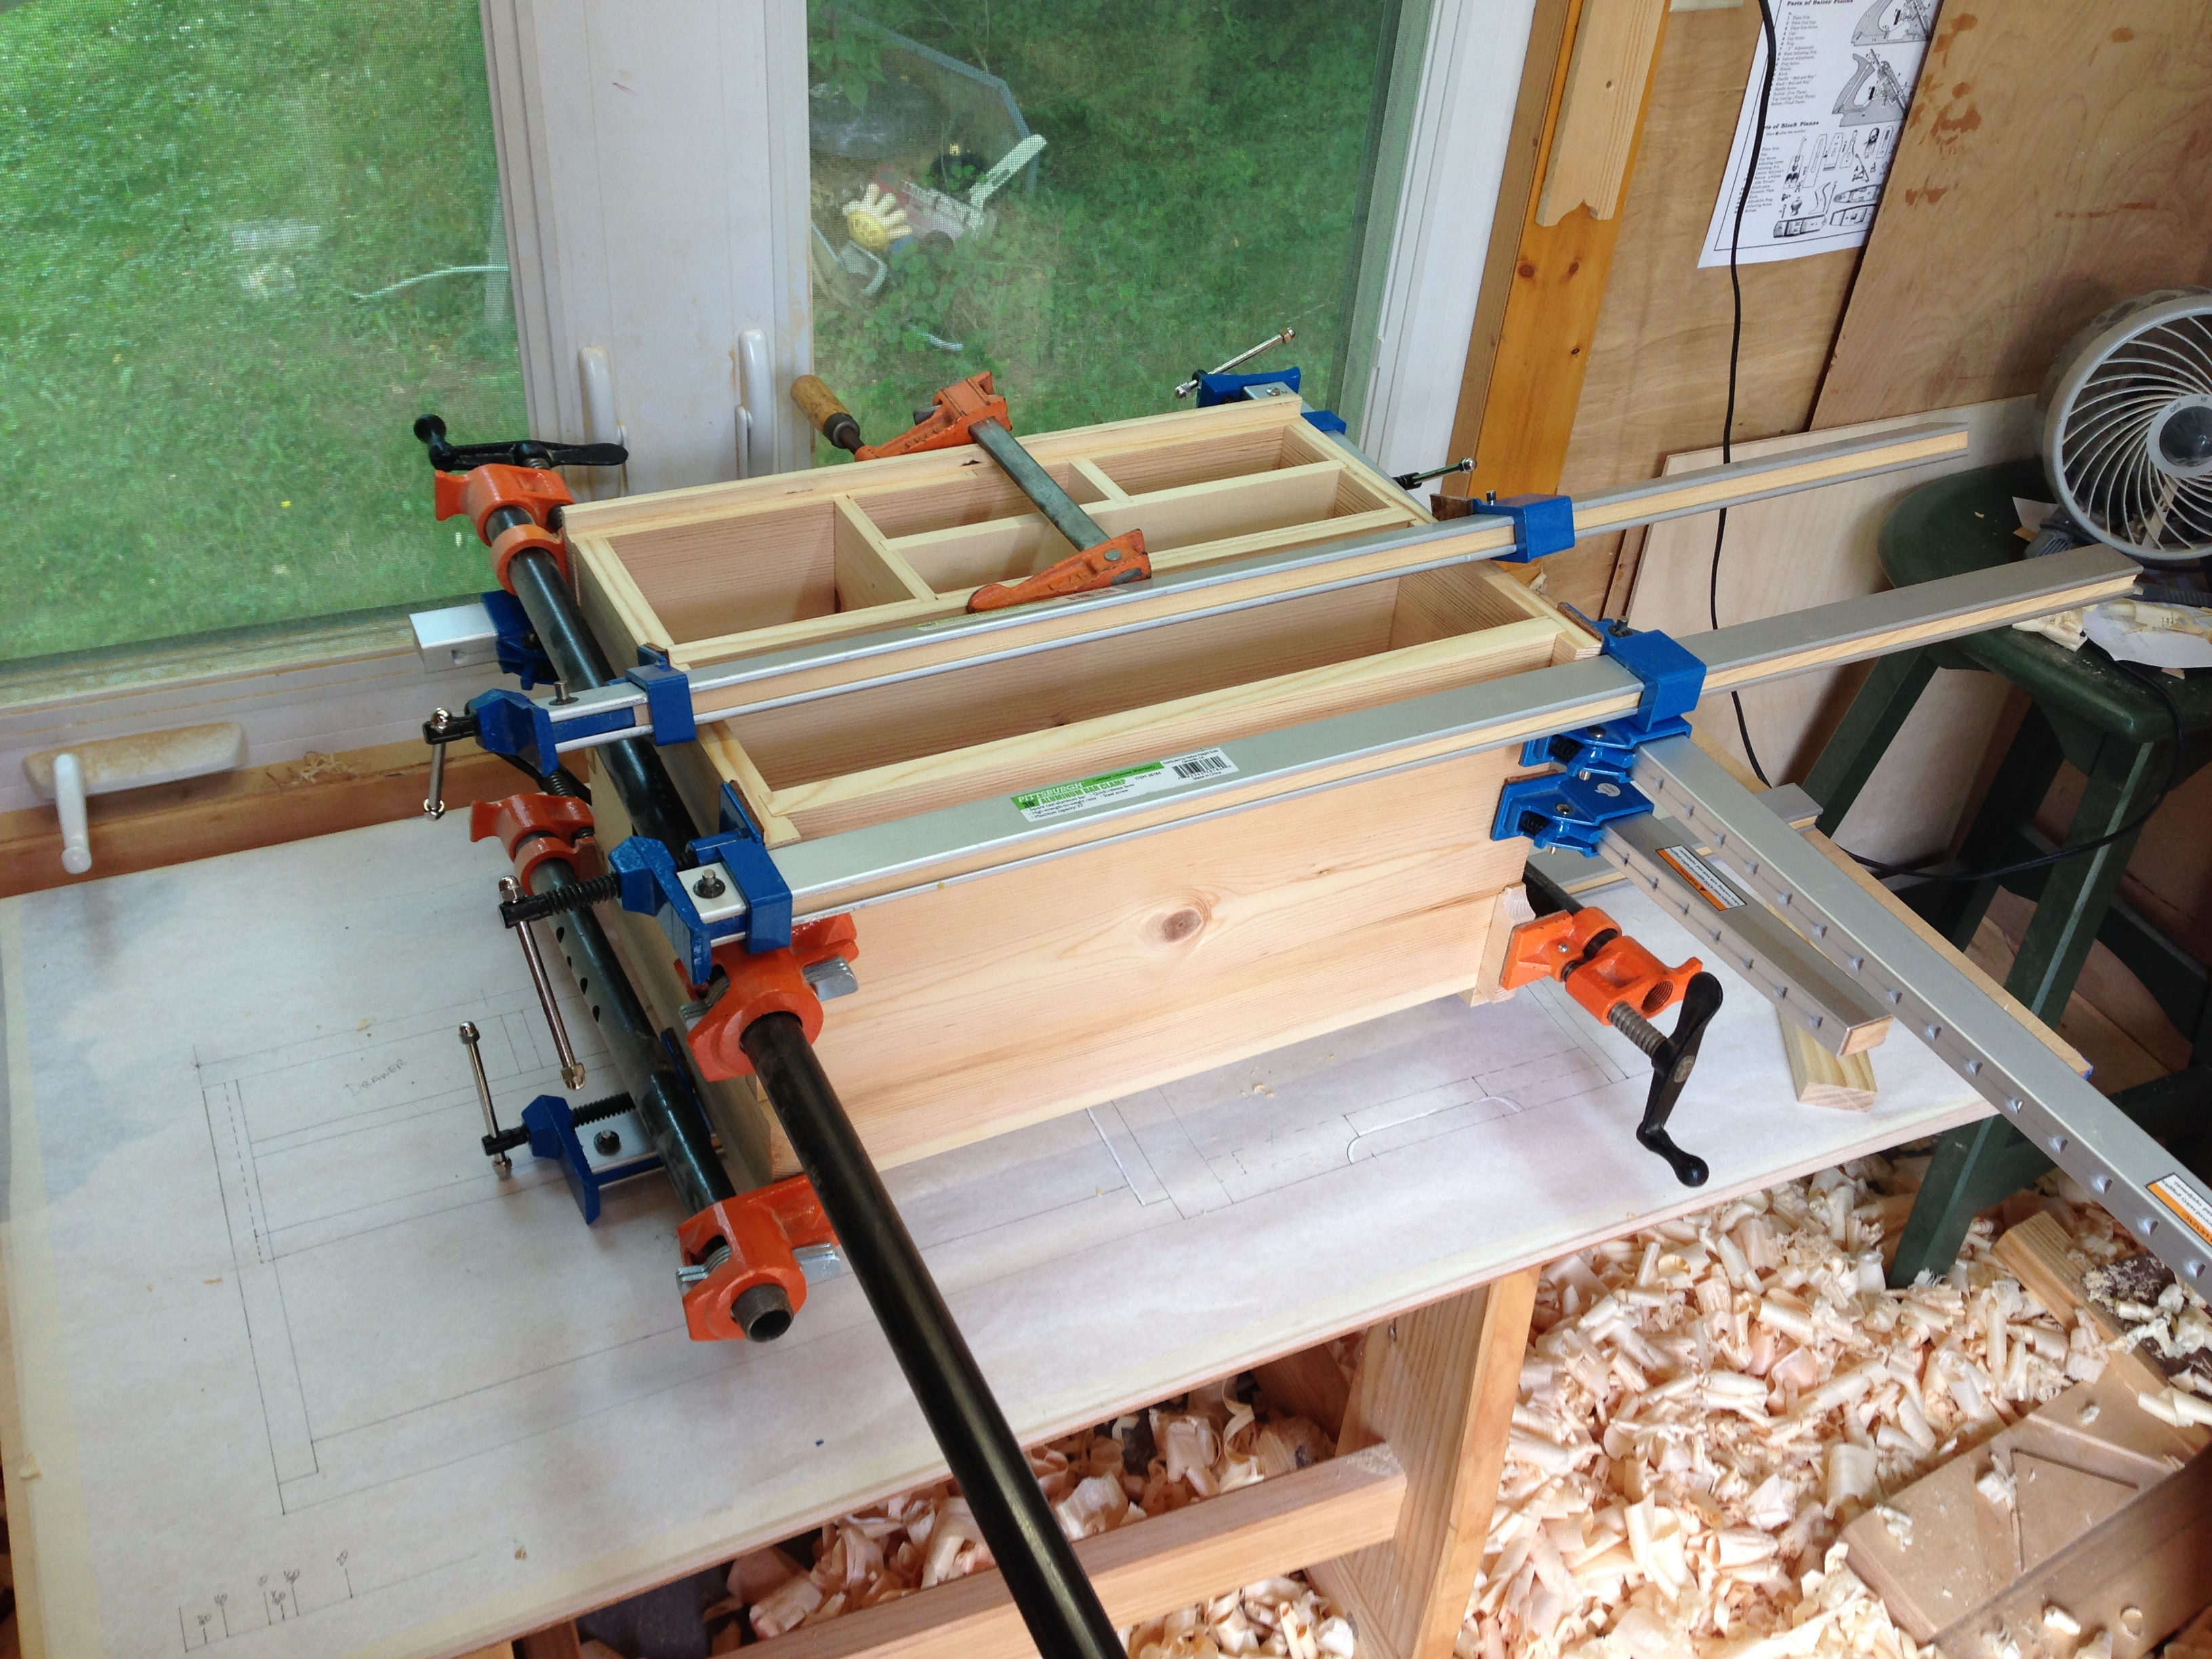
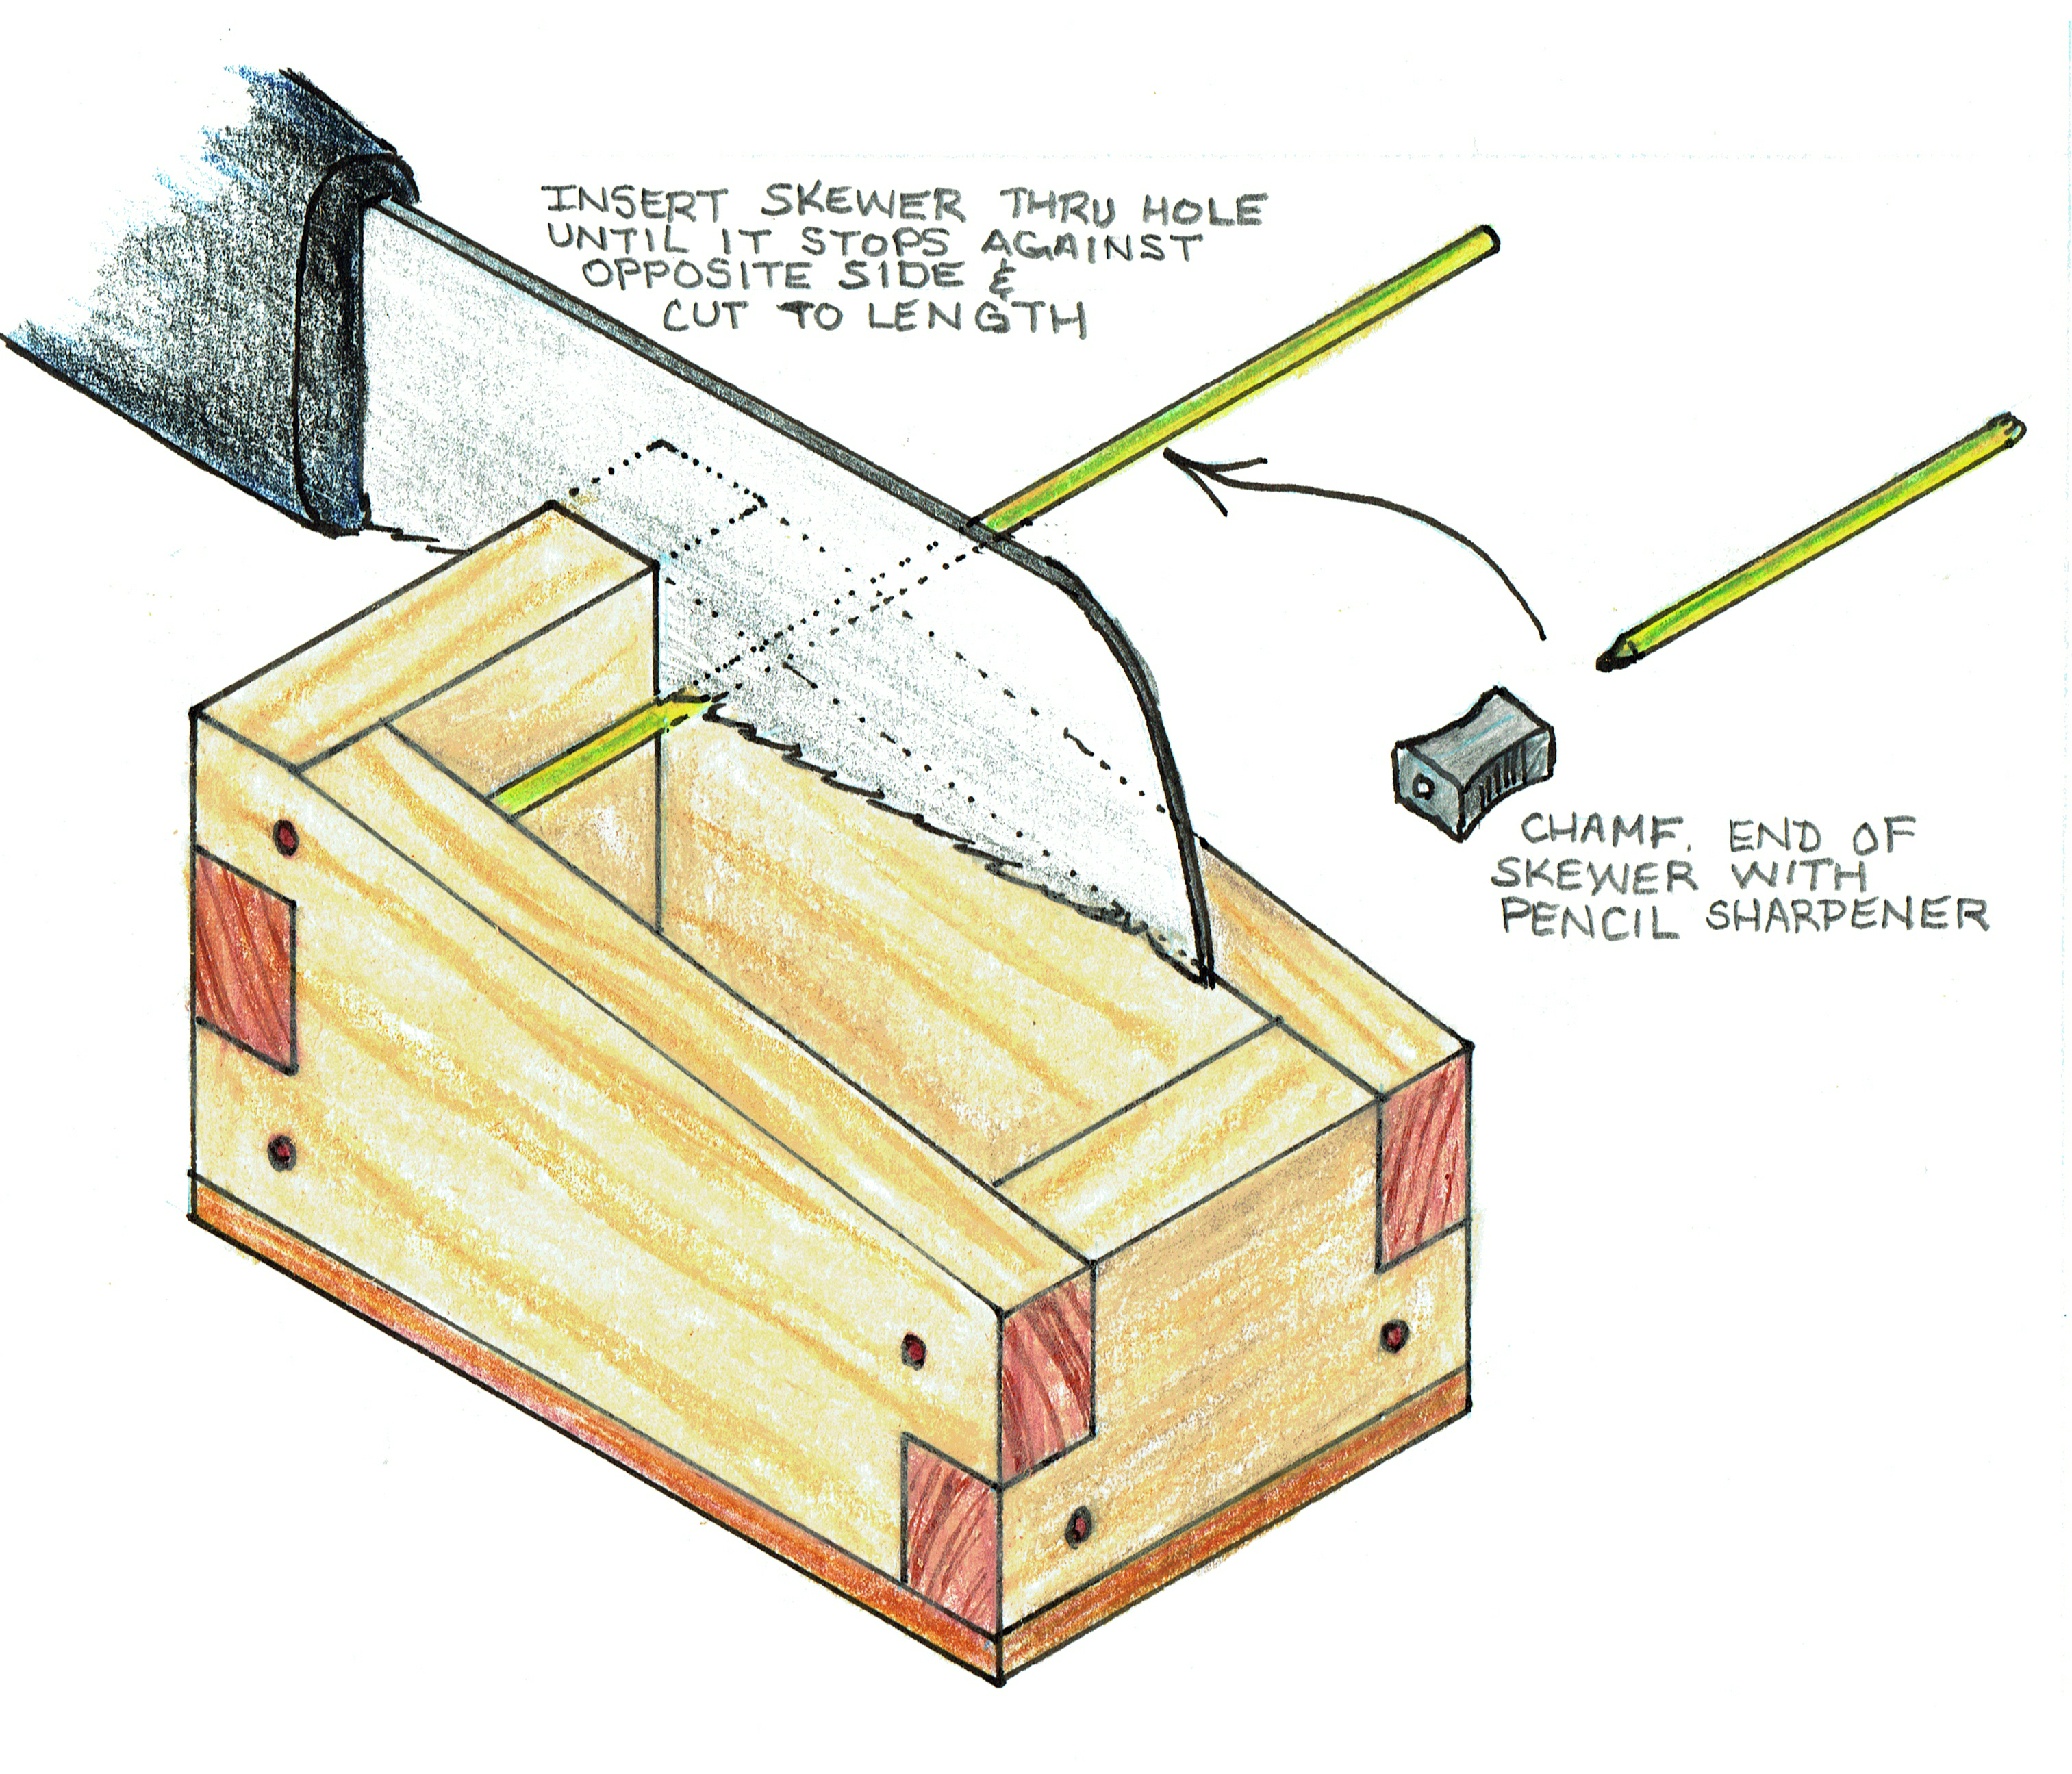 I let the assembly set in the clamps for about an hour while I took a break and cut the bamboo skewers into pegs. The new skewers are much thicker than the ones I normally use and I had to modify the Bamboo Peg Cutting Machine to accommodate the increased thickness. All I needed to do was to enlarge the inlet hole and I was back in business.
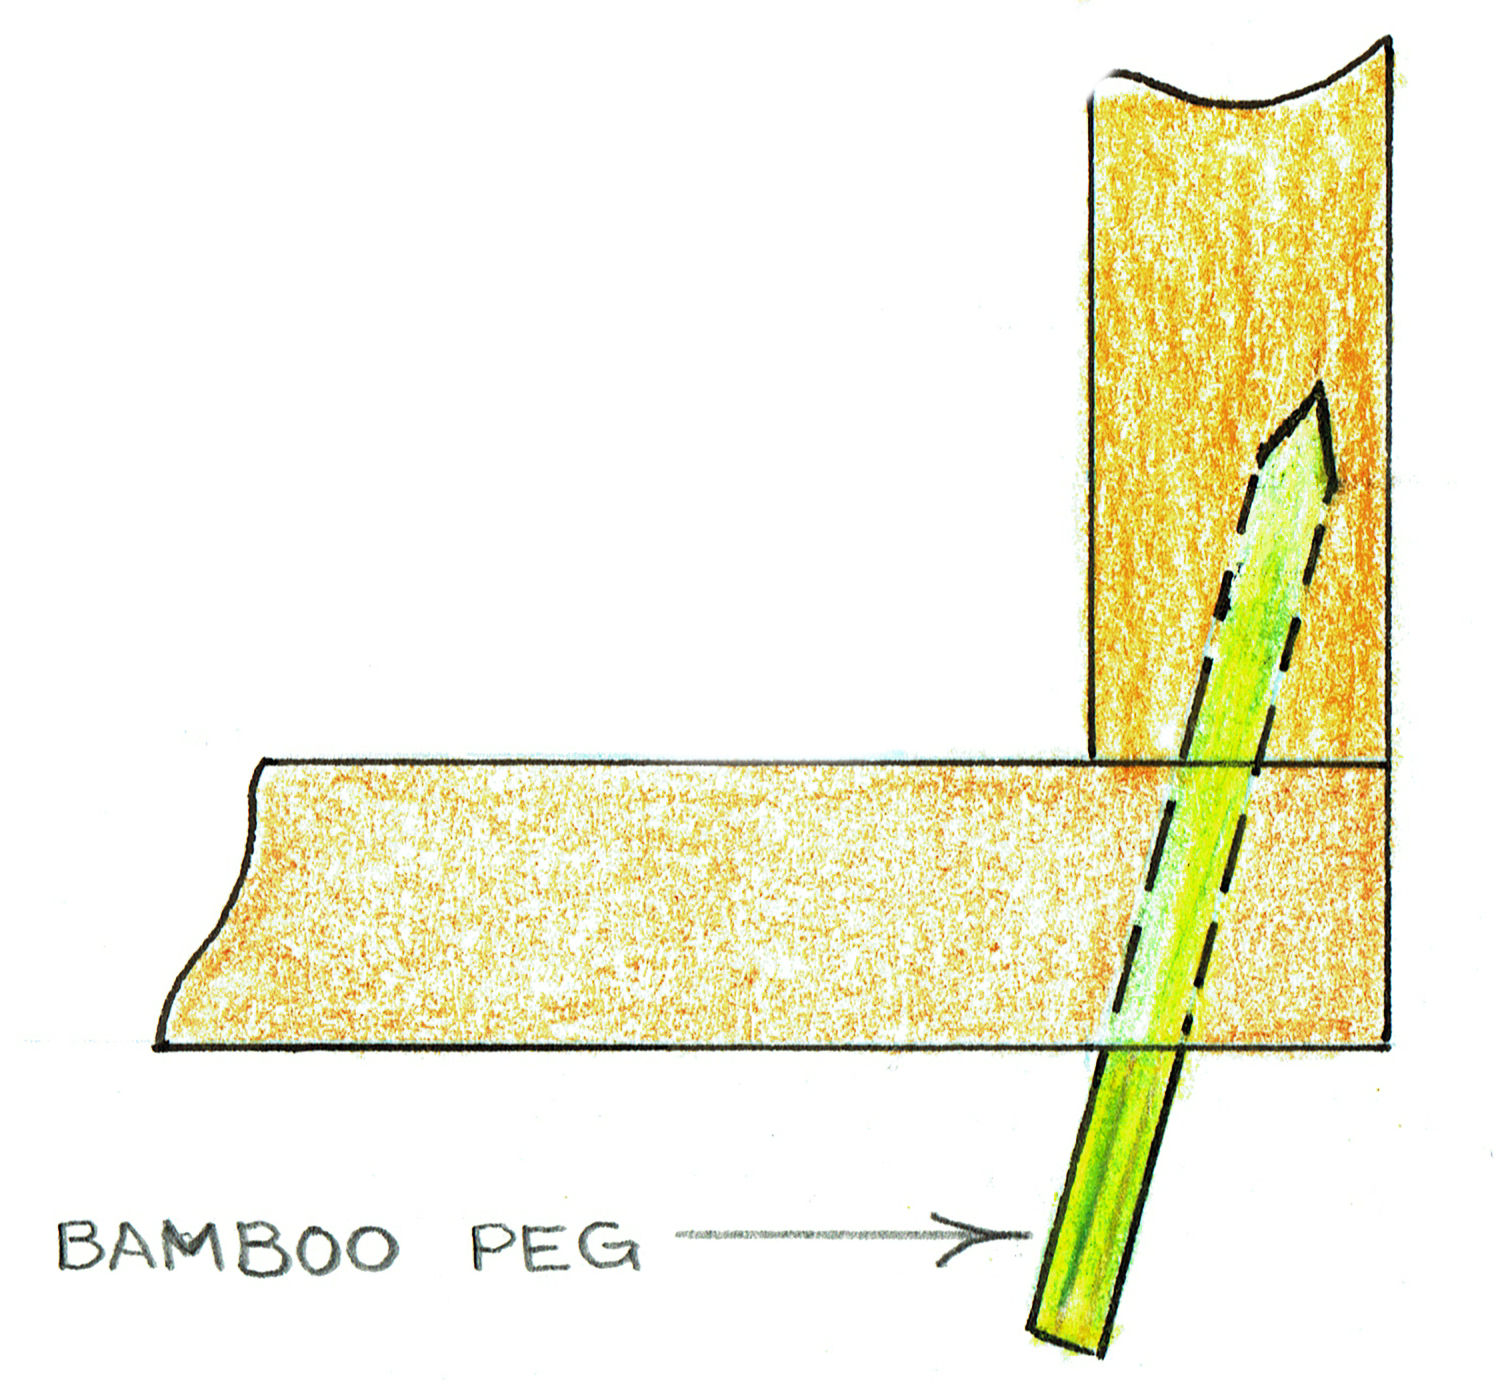 With the pegs ready to go it was just a matter of moving a clamp, drill a hole then pound in a peg. The glue did its job and held things in place long enough for me to install the pegs. An hour or so later I had all of the case pegs installed.
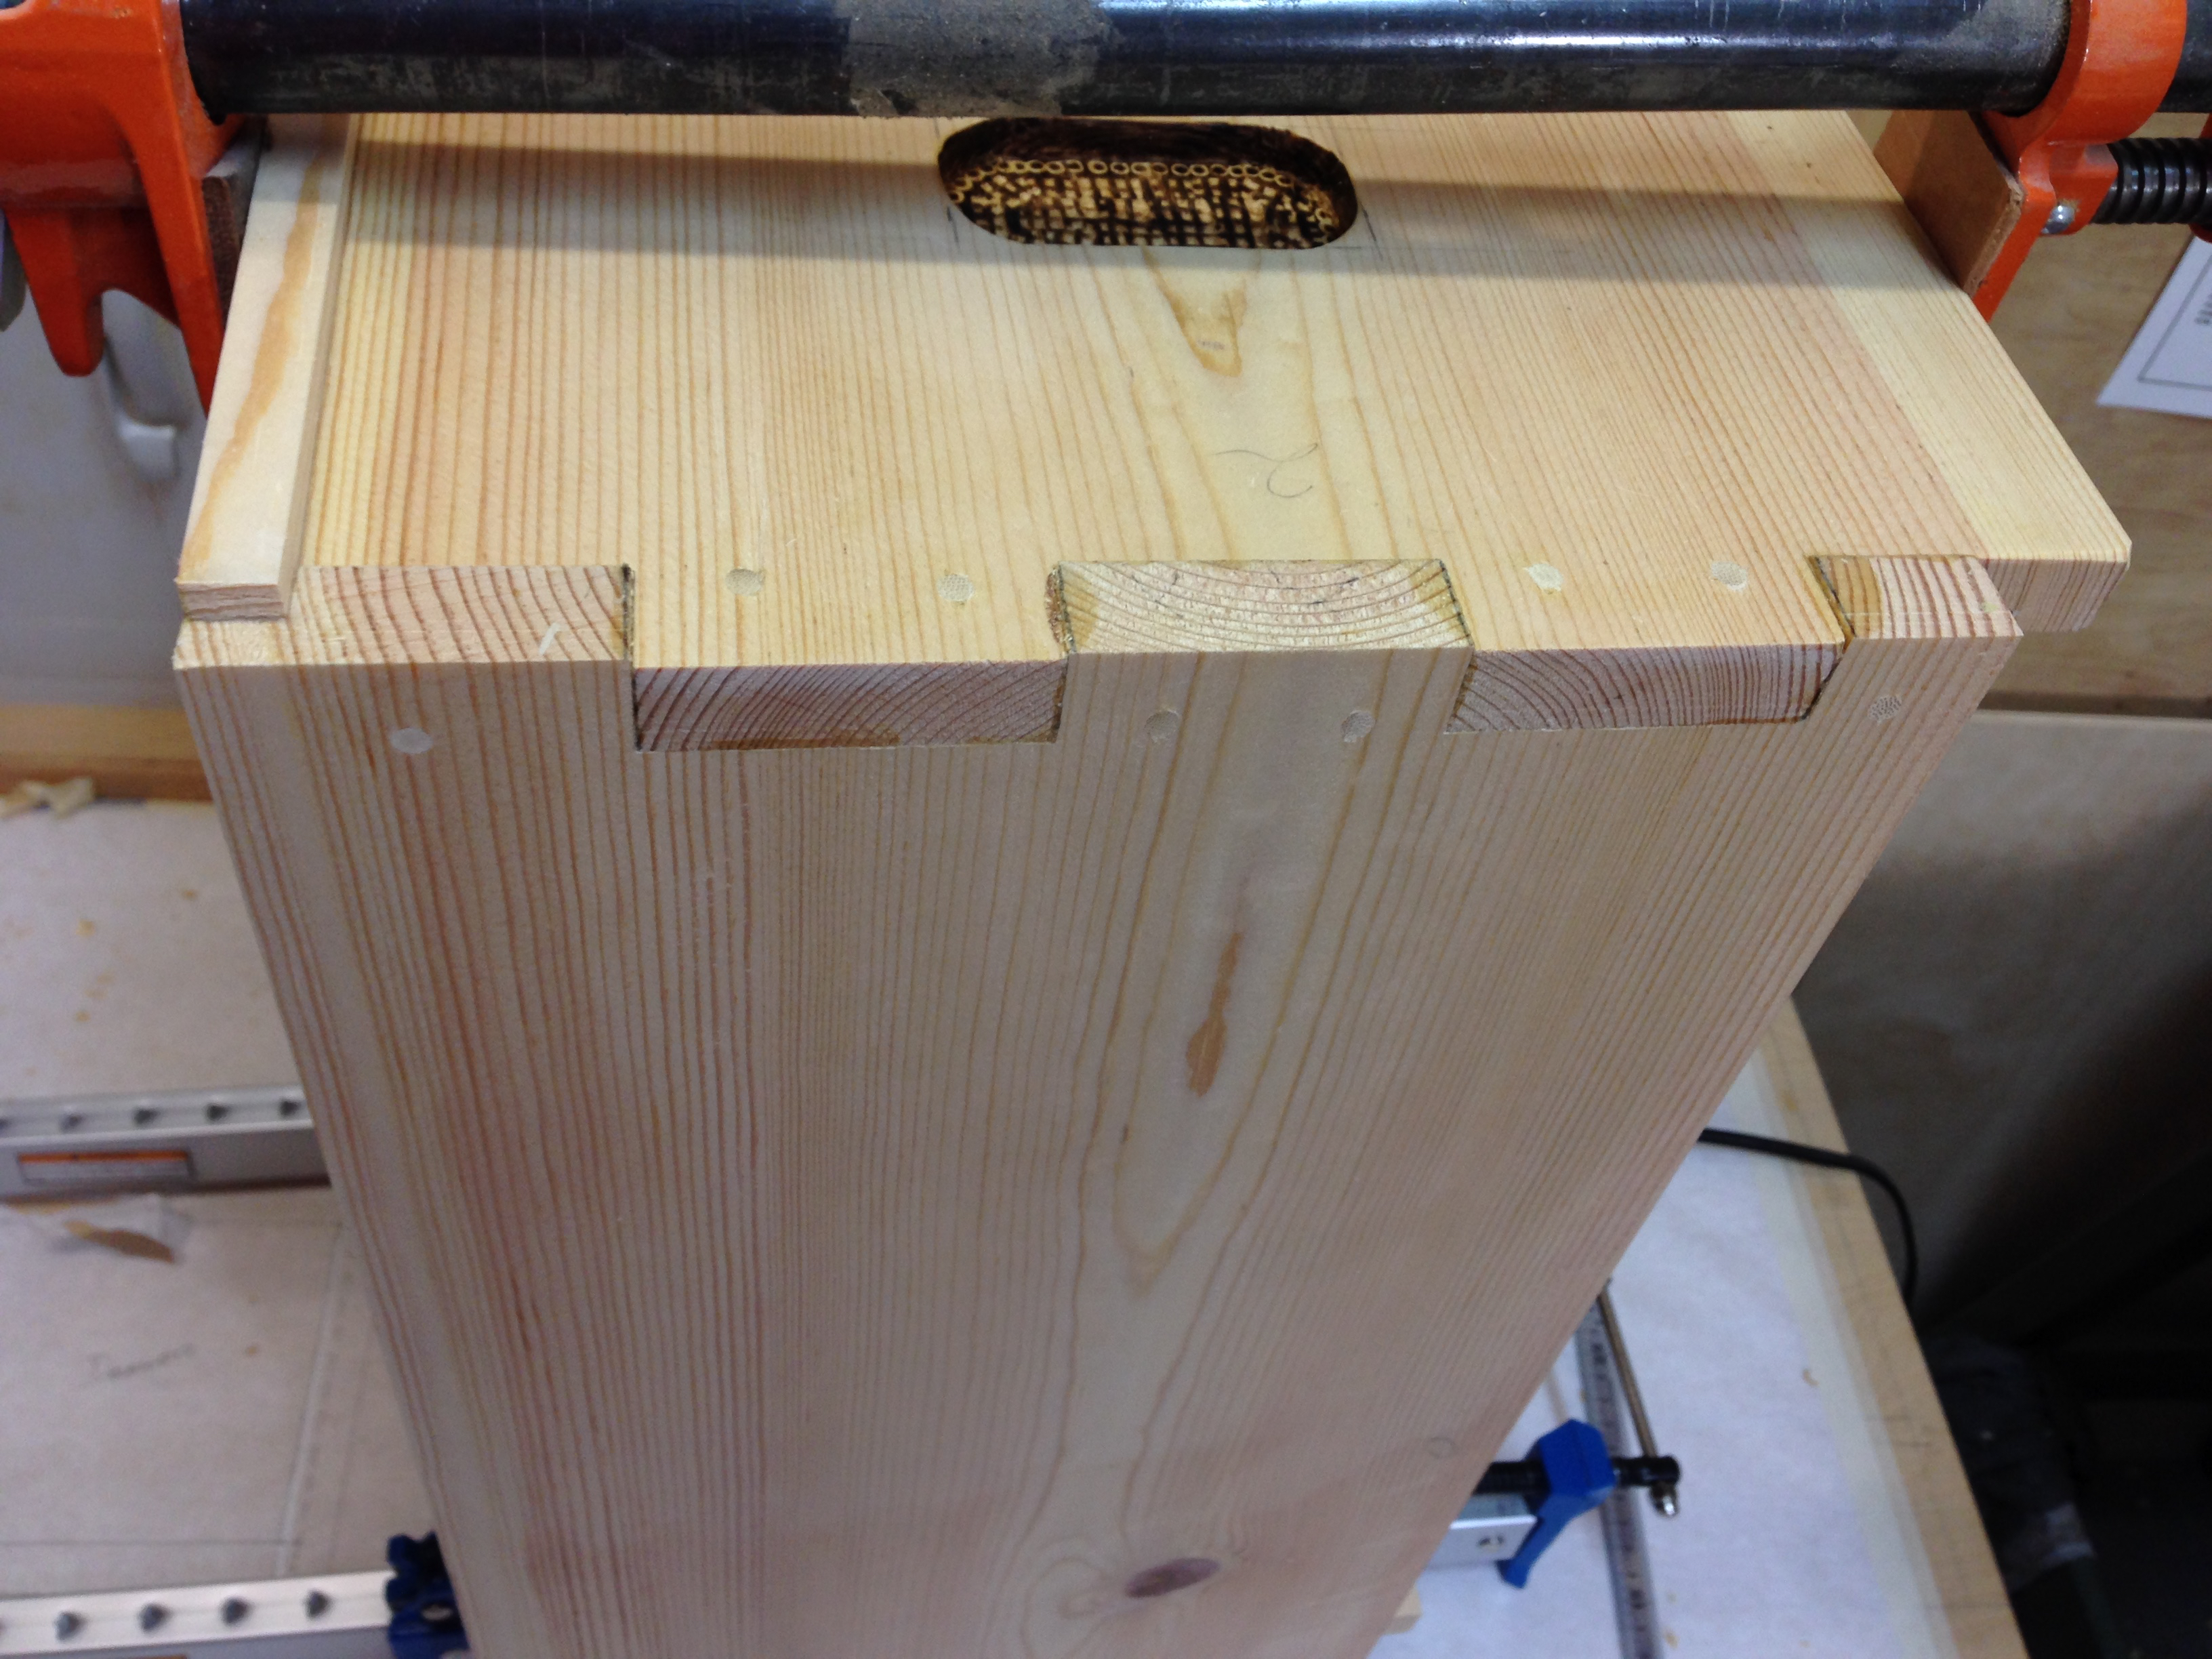
The front skirt was next. Glue was applied to all of the mating surfaces. Since the back is still open it was easy to clamp the skirt in place. I then pegged it in place with the smaller bamboo pegs.
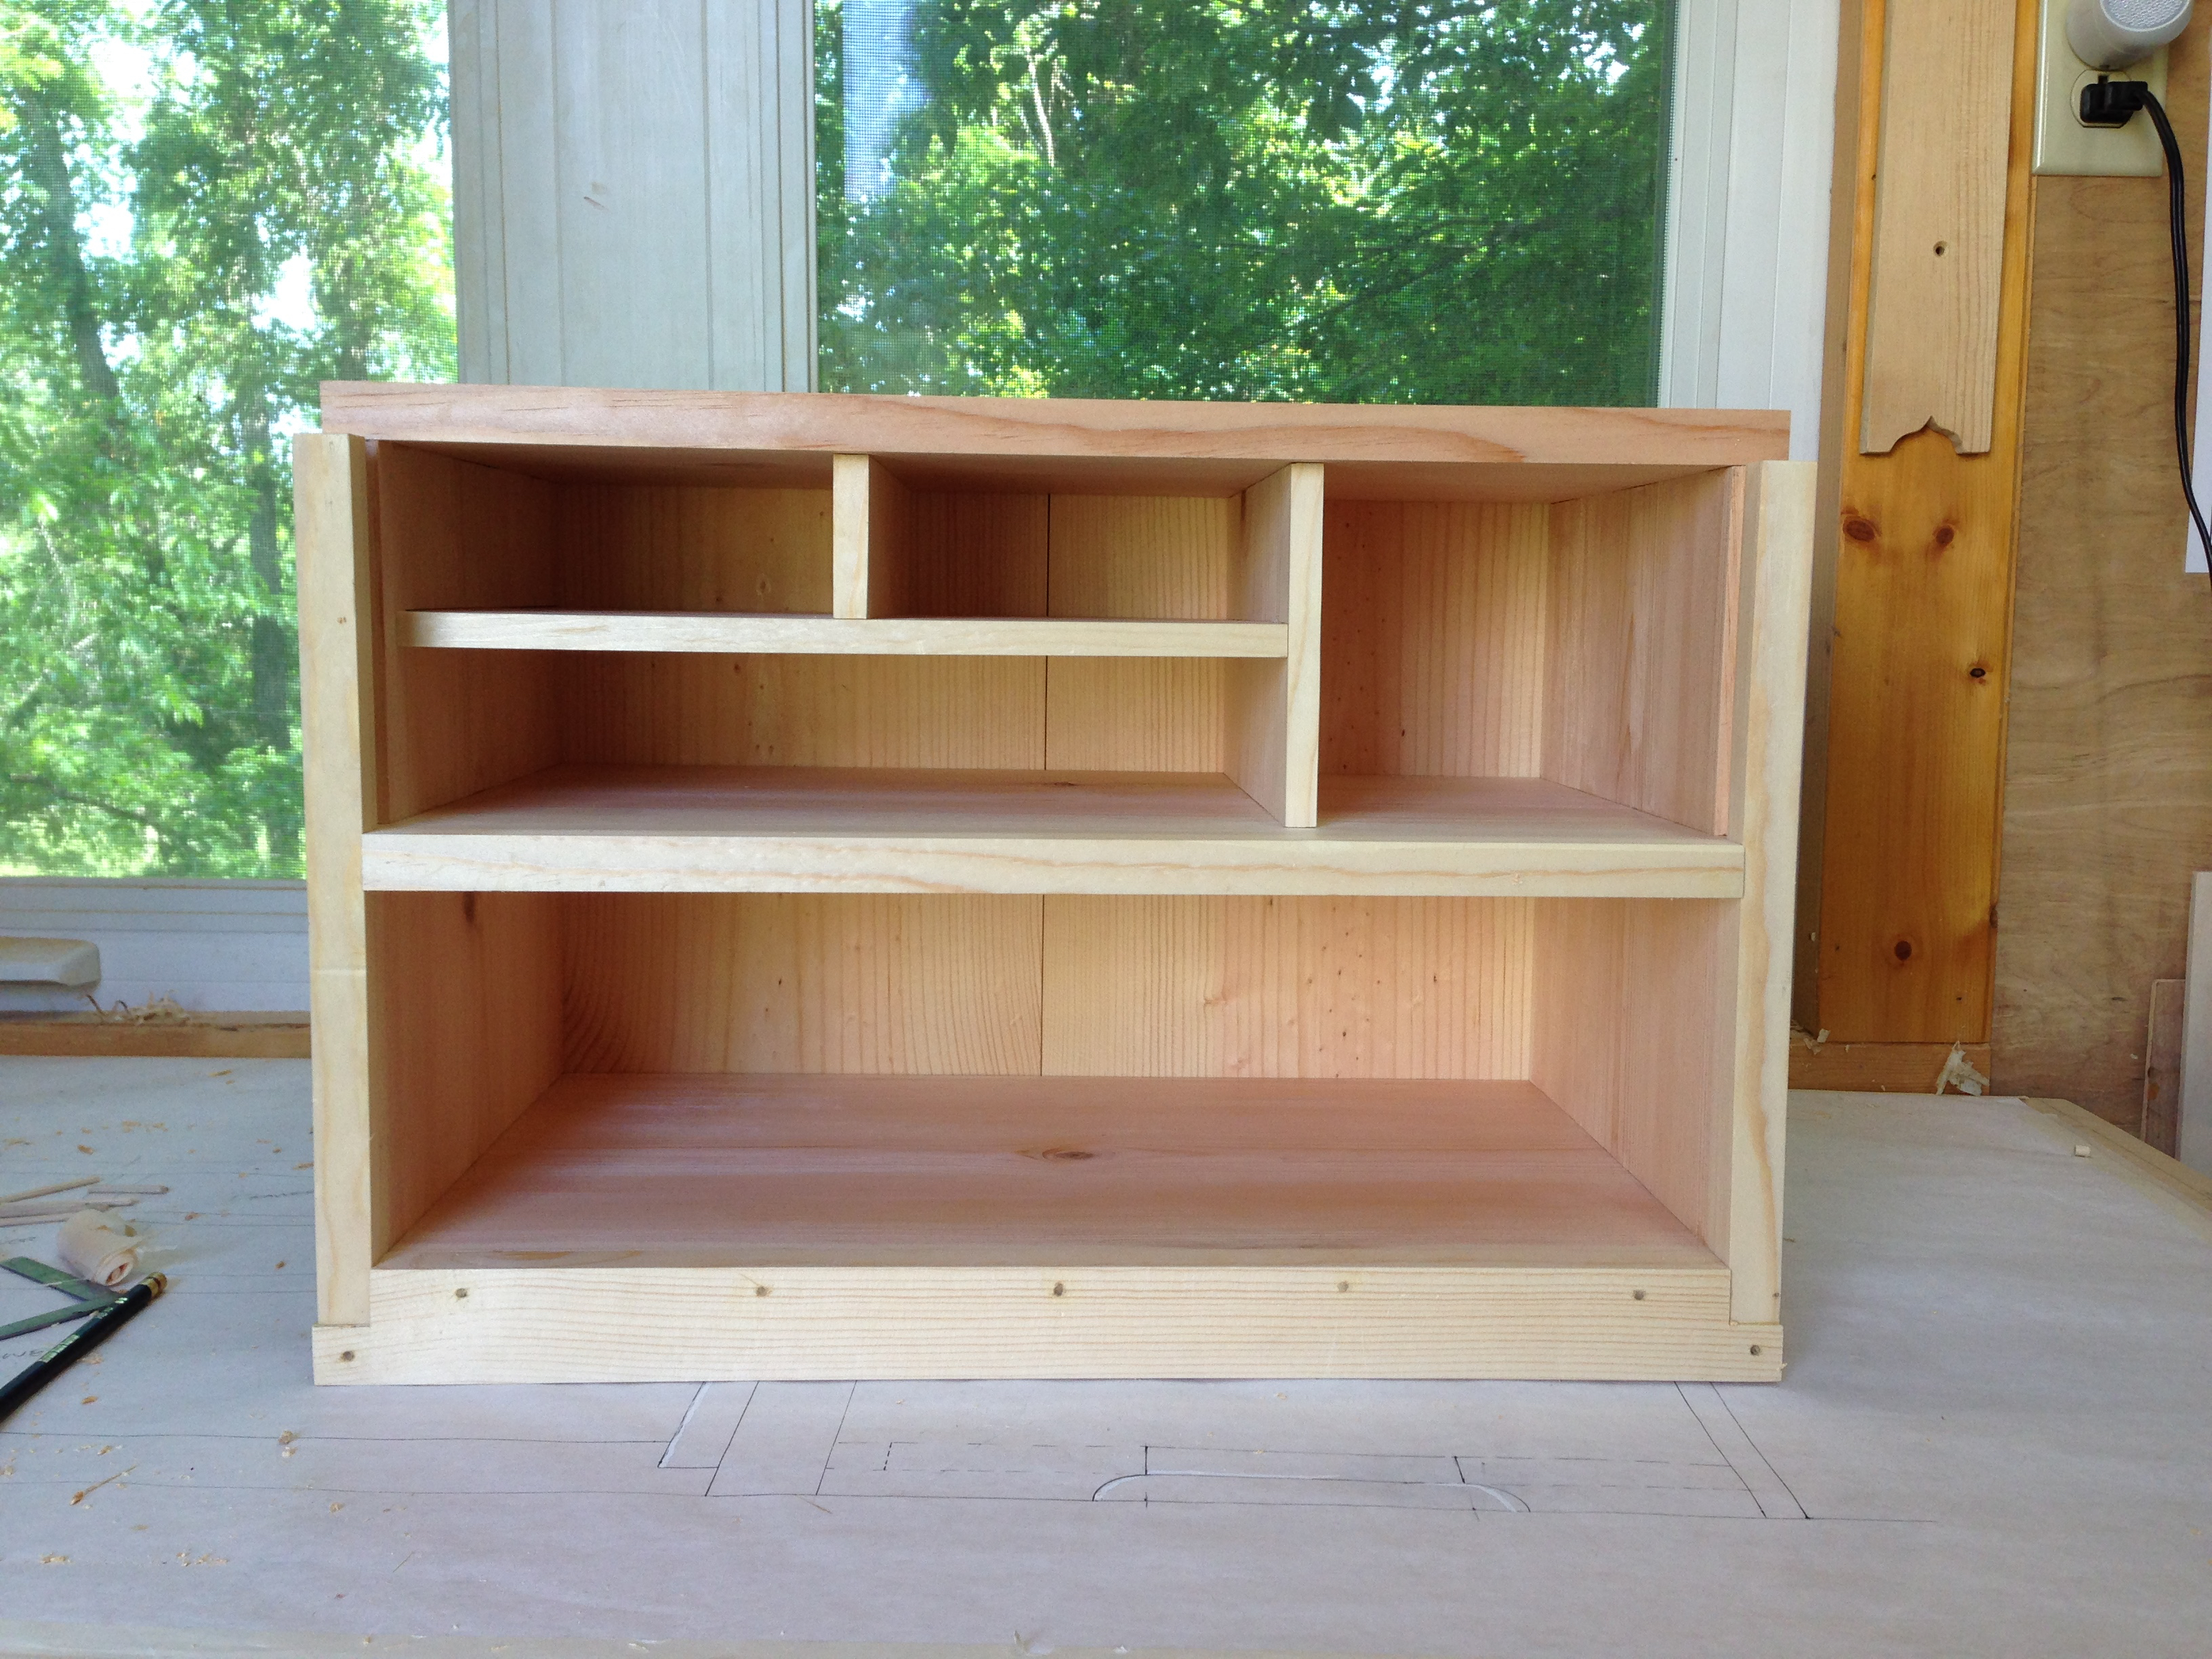
A quick check for square found the assembly 2mm out across the diagonals. So I applied a clamp across the diagonal and brought it into square. Then I installed the back panels. Not a lot of glue involved here. I want it to be able to move. So the only glue was along the long grain where the panels meet the case ends. The humidity in the shop was pretty high, around 65%. So I installed the panels tight to each other at the center ship-lapped seam. I pegged the panels in place with the smaller bamboo pegs.
The assembled case from the front. The camera on my phone makes the sides look bowed in. Trust me they are not. When I first saw this photo I panicked. Ran out to the shop and double checked. Damn camera just about gave me a heart attack!
From the rear.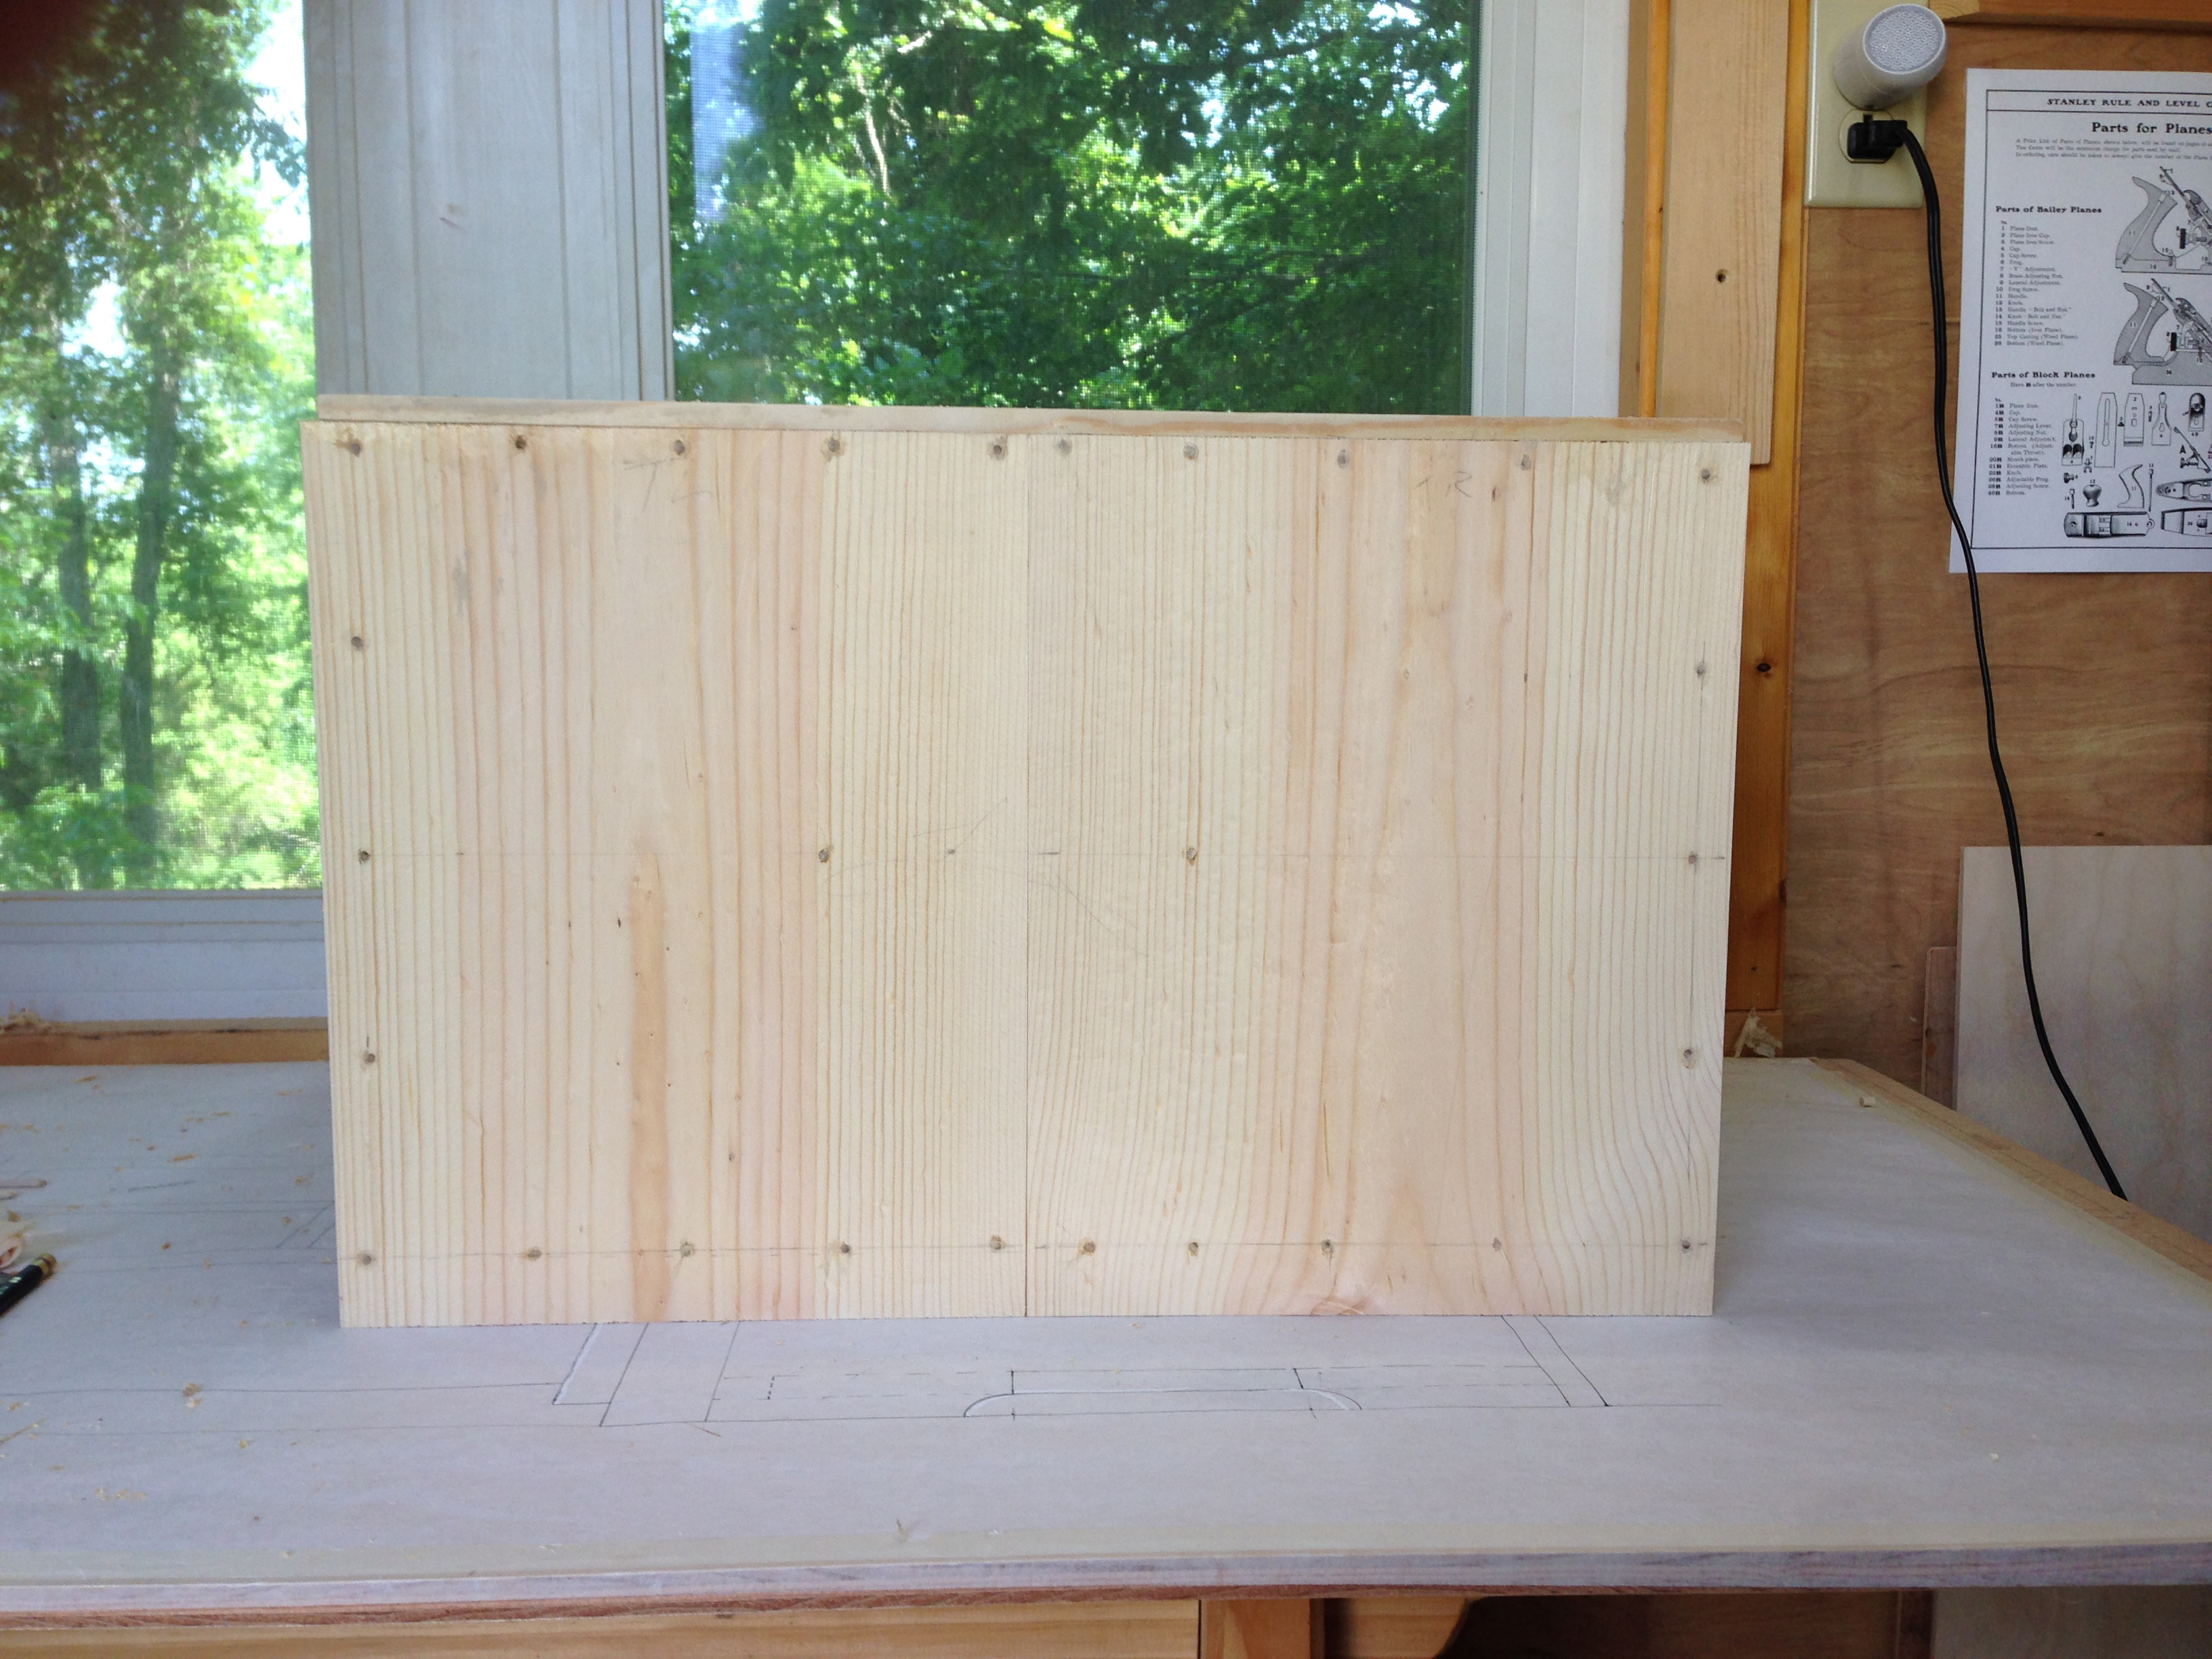
Tomorrow I’ll sharpen my plane irons and begin cleaning up and leveling all the surfaces. Drawers are just around the corner.
Greg Merritt

Looks awesome. I use a damp rag to clean up squeeze out too, but some of the experts say not to do that. The thinking is some diluted glue will enter pores of wood. I did a glue-up last night and thought about changing my techique. What do you think?
It depends on the glue.
I wouldn’t wipe PVA glue. It will drive into the pores and cause problems with finishing. Most notably when staining. Stain will not penetrate PVA glue and the result is splotching.
Hide glue, even when dry, can be cleaned off with a warm damp cloth. Hide glue is also stainable. So it’s highly unlikely that any remaining residue will cause any issues with finishing.
Never tried hide glue. I’ll have to check it out.
Does the rag have to be damp? I understand why we wipe away excess glue, but wonder why we use a damp rag to do it? Or is it that the rag is more pliable, therefore comfortable, when damp? Might just require a different kind of rag? Just asking…
No, but it makes it easier to remove the hide glue since hide glue is water based. I’ve used a dry rag and even shavings off the floor to wipe up glue.
Pingback: HB Hobby Tansu #1-Part 7 | GREG MERRITT – BY MY OWN HANDS
Pingback: HB Hobby Tansu #1-Part 9 | GREG MERRITT – BY MY OWN HANDS