
 I’m calling it done!
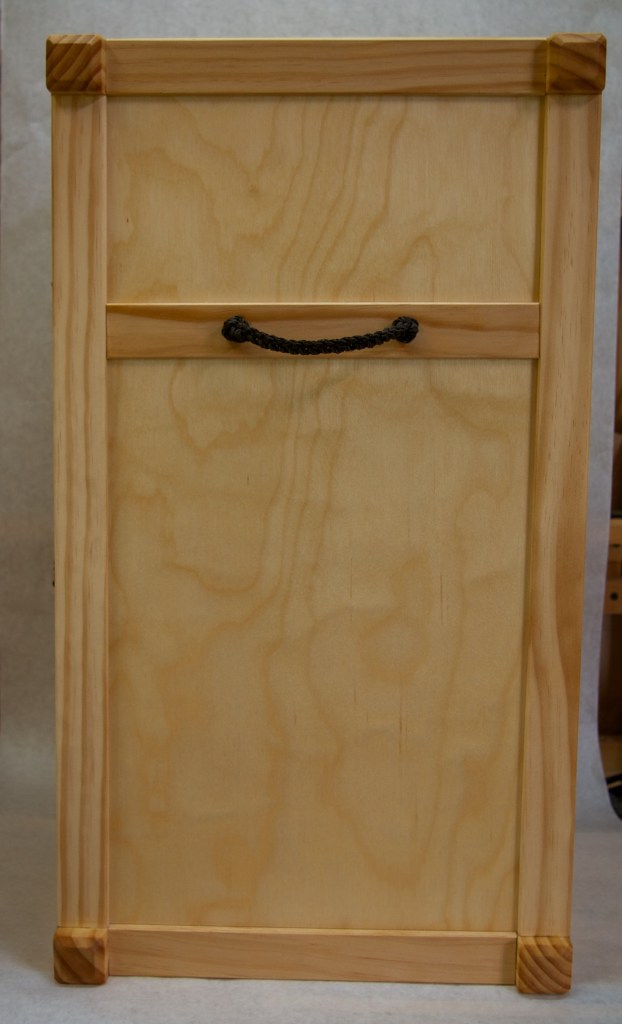
Over the last several days I have been adding the finishing touches to Hillbilly Tansu #3. Primarily, the actual finish. I used several coats of Tried & True Original which is a mixture of polymerised linseed oil and beeswax. I’ll add additional coats over the coarse of the next year or so. I know that sounds like a lot of work, but I like the way the finish looks as well as the non-toxic nature of the finish in both the raw and the cured state. How many finishes do you use that you would let a five year old help you to apply? Once the finish had dried I buffed the entire tansu with synthetic steel wool and a soft cotton cloth.
This project had a few experiments/challenges involved in it. Early on in the planning stages I knew that I wanted to incorporate walnut for some of the drawer fronts. I also knew that this would become an exercise in high contrast between the walnut, pine and the birch ply.
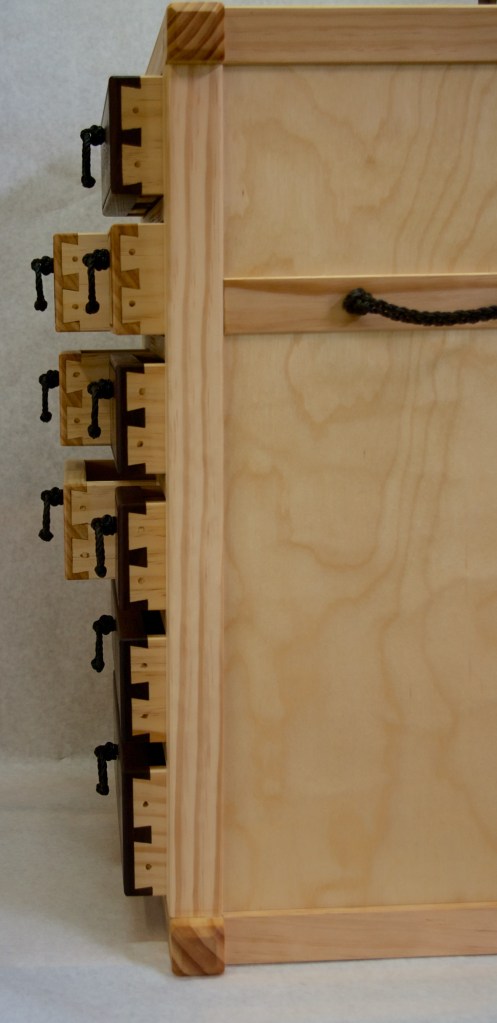
 In a previous tansu I used cherry for the outer frame with pine and birch for the remainder. These woods compliment each other with red and orange tones throughout. The walnut with the pine and birch however, would quite literally create a contrast of black and white. Although there is a slight orange undertone. This meant that placement of the walnut and thus pattern would be of paramount importance. There were several approaches that I could have taken. I could have simply grouped the walnut together and created a block of walnut and pine drawers. I don’t believe that would have created much visual interest though. What I chose to do was two-fold. I used the walnut to anchor the drawer bank at both the top and the bottom. I used two walnut drawers at the bottom to add visual weight to the piece. The remaining walnut drawers were arranged to strengthen the asymmetric pattern of the remaining drawers. The entire look of the tansu would be different if I had chosen a different arrangement.
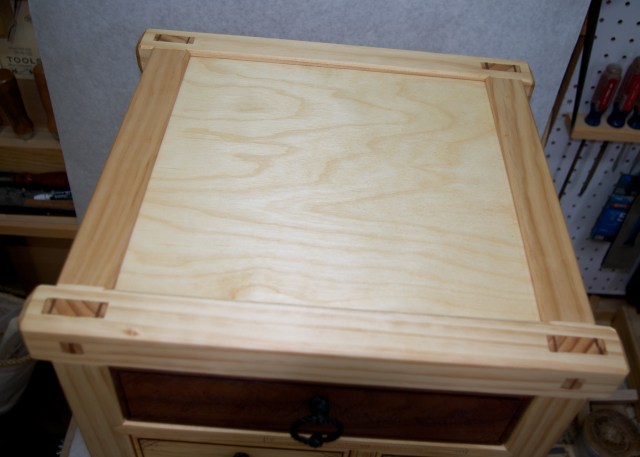
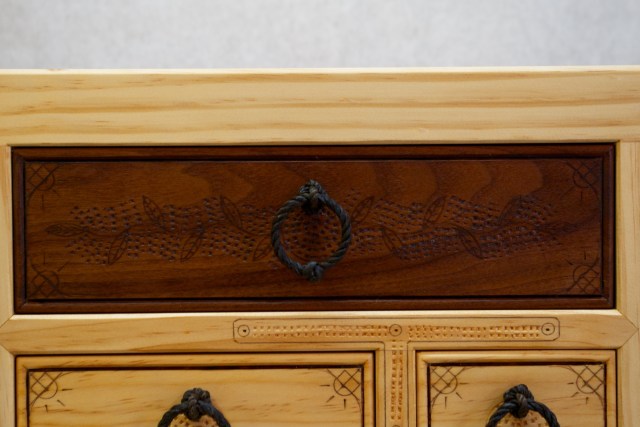
Another challenge the walnut presented was with the decorative elements. I knew that my Hillbilly Inlay would not show up very well on the walnut and thus would be very subtle. So I needed to keep the pattern for the inlay work subdued so the it would not become overpowering on the pine drawer fronts. The wood burning shadow line detail that I added to the perimeter bead worked out well in both the walnut and the pine.
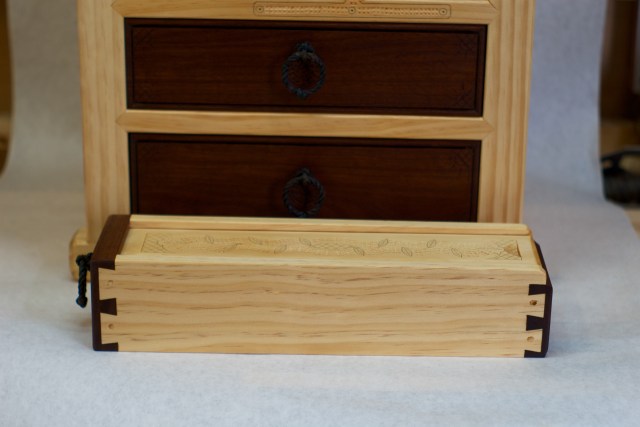
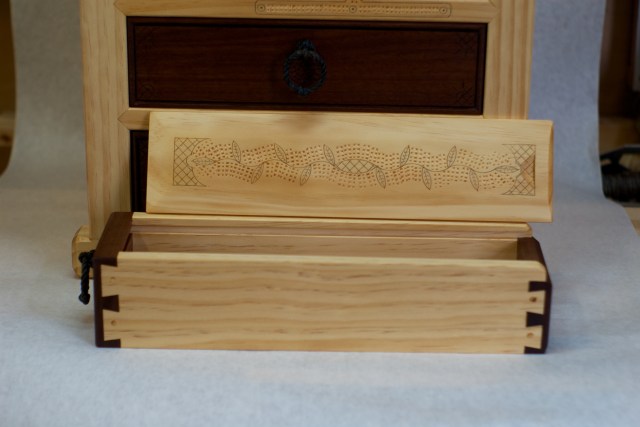
I used a new drawer pull design on this tansu. Obviously based on an iron ring pull. I made these by laying up grommets in #120 tarred nylon, made solid with CA glue, and attaching them to the drawers with lanyard knots tied in #72 tarred nylon. I then added an area of texture with a home-made punch directly behind the ring. I did this knowing that this area be subject to wear every time the pull is grasped. So the texture should serve to camouflage any cosmetic issue down the road. I extended this texture, along with a stylized walnut leaf pattern, on the uppermost drawer front and on the lid of the sliding box/drawer. I further tied in the texture element with the decorative element on the drawer dividers.
I’m quite happy with the way that this tansu turned out. Both in design and execution. There are errors of course. 99% of which only a wood worker would notice. Still, I see them. I also know that is part of being a woodworker.
My son will be taking procession later today once he clears an area for its installation in his room. I hope that it will become one of his treasured possessions and that he will keep it with him as he travels though life.
On with the dog and pony:


Part 19 Greg Merritt

Bravo Greg!
That is spectacular, well done. I have enjoyed following your progress and look forward to whatever is next.
Jonathan
Thank you Jonathan! I’m glad to hear that you are enjoying what I’m posting and will be sticking around for whatever lunacy I come up with next. 😉
That is just an outstanding piece, simply amazing work.
Thank you Andrew. These tansu are always a labor of love.
Very impressive Greg!
Your son will be able to boast of having a truly original piece of furniture. No knock’offs for this kid! Your design aesthetic is very distinctive and so non-traditional that people will be constantly asking “where’d that come from?” As different as it is from what we are used to, I like it very much.
It’s very beautifully done. Just WOW!
Thanks Bob! “Distinctive”, I like that description. I have to admit that it is always a little scary to post some of the things that I build. It’s humbling to know that others find my designs pleasing.
I’m speechless. All I can say is WOW.
What you have achieved is priceless art. Your son should be very proud.
Thank you so much. “Priceless” may be a bit of an overstatement, but I’ll take it. 😉
The boy is quite happy and has been bragging to his friends about it. Now that is priceless.
Bound to remain priceless… Excellent shots of the corner detail, the never again-to-come-undone drawer fronts, and great contrast on the fronts. Truly one of a kind, and the pull out drawer with lid is awesome. That sir is a job well done.
Thanks Brian. I got lucky with the corner detail shot. I’m still struggling with photography, but I keep plugging away at it. If I can find the time I may have to break down and take a class sometime.
A truly original and very clever design; synthesizing craft, culture, and utility. Should last for generations. Well done. If you could put a scale in the photos, it would make this a bit easier for the rest of us to copy?
Thanks Michael! “synthesizing craft, culture, and utility”…that would make a damn fine tag line.
I’ll do you one better. At the beginning of each project I post a proportional layout drawing. It’s the same one I use to build the actual project. I like proportional layout because you can alter the scale by changing just one base dimension. All the rest can be worked out with a pair of dividers. Here is the link to the drawing for this project:
Pingback: HB Tansu #3-Progress 19 | GREG MERRITT – BY MY OWN HANDS
I am gob-smacked! You have a rare talent for craftsmanship and design.
Thanks so much. I really appreciate the kind words.
Looks great! Nice construction and the pulls turned out really well. It’s been fun watching the build.
Thank you. I struggled with the pulls but I’m happy with the way they turned out. The CA glue turned them rock hard and they still swing free o their mounts.
Wow, it looks awesome. I like the way you applied the kolrosing in just the right places. Very pleasing to the eye!
Thanks…sometimes get lucky. 😉
Awesome as always. I like the drawer lid, made me think you should add some hidden compartments to the next one.
Thanks Alex. I keep looking at adding some hidden compartments. I think that would be a fun and challenging addition at some point.
Reblogged this on Paleotool's Weblog and commented:
Wow! For calling this a “hillbilly” project this sure shows a high level of skill and craftsmanship. Maybe it’s graduated up to “hillwilliam” status now?
LOL…that’s funny stuff right there. Thank you for the compliment and the support.
The finished project looks fantastic , the photographs really shows all of the fine detail and the design and craftsmanship that has gone into it . That paid for commission can surely not be far away now.
Thanks for keeping up your informative web site which I enjoy very much, looking forward to your next project.
Thanks David! Glad to hear that you are still enjoying watching me wander far off the beaten path.
I really haven’t pursued the commission route. There are a few circumstances that have me in a state of limbo currently. It would be great though to have someone want to buy something I’ve made. Not so much for the money, but the validation.
Pingback: HB Hobby Tansu #1-Part 8 | GREG MERRITT – BY MY OWN HANDS