
I thought a few photos may be useful for those of you who are trying to learn to tie the lanyard knot. I do not show the loop being passed through an object here but you will obviously need to first pass your twine through your object (fid) before beginning your lanyard knot. Once you do so that object will be on the back side of your hand while tying the lanyard knot. So hope this proves useful…

Pass twine up between your fingers from the back side of your hand.

Begin the lanyard knot.
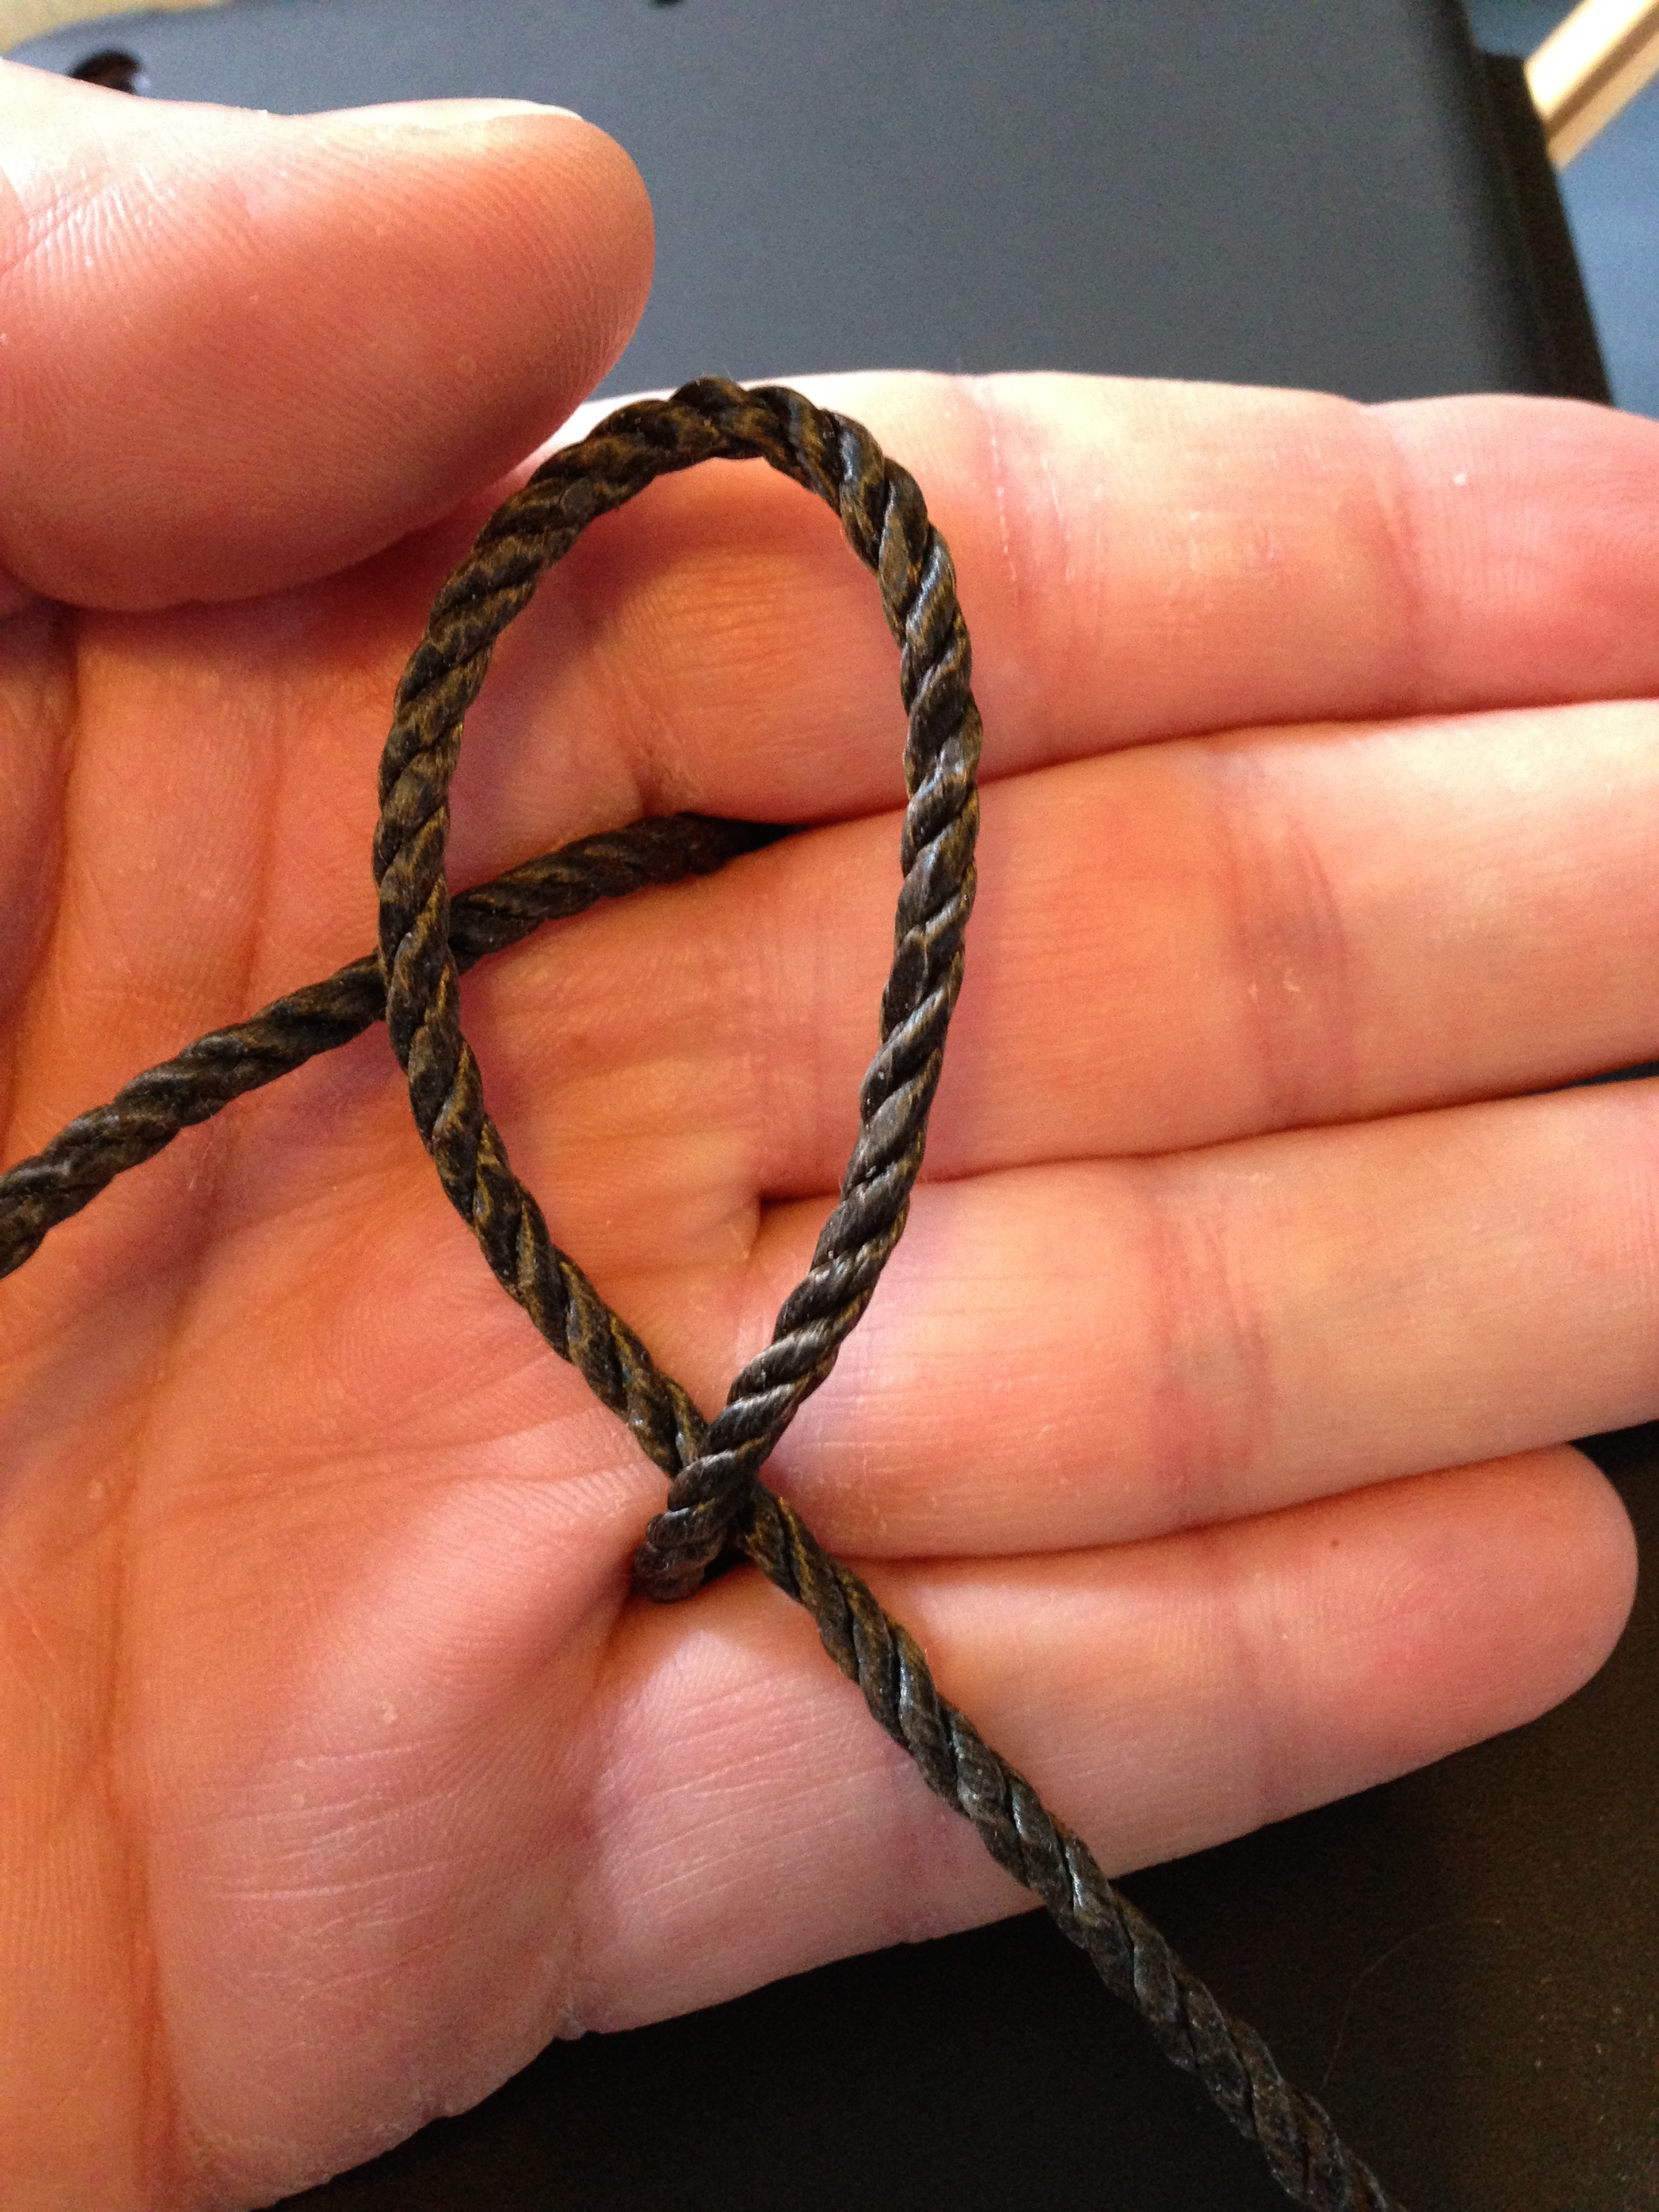
Start with the lower strand and form a loop.

Pass the upper strand under the tail of the first strand.

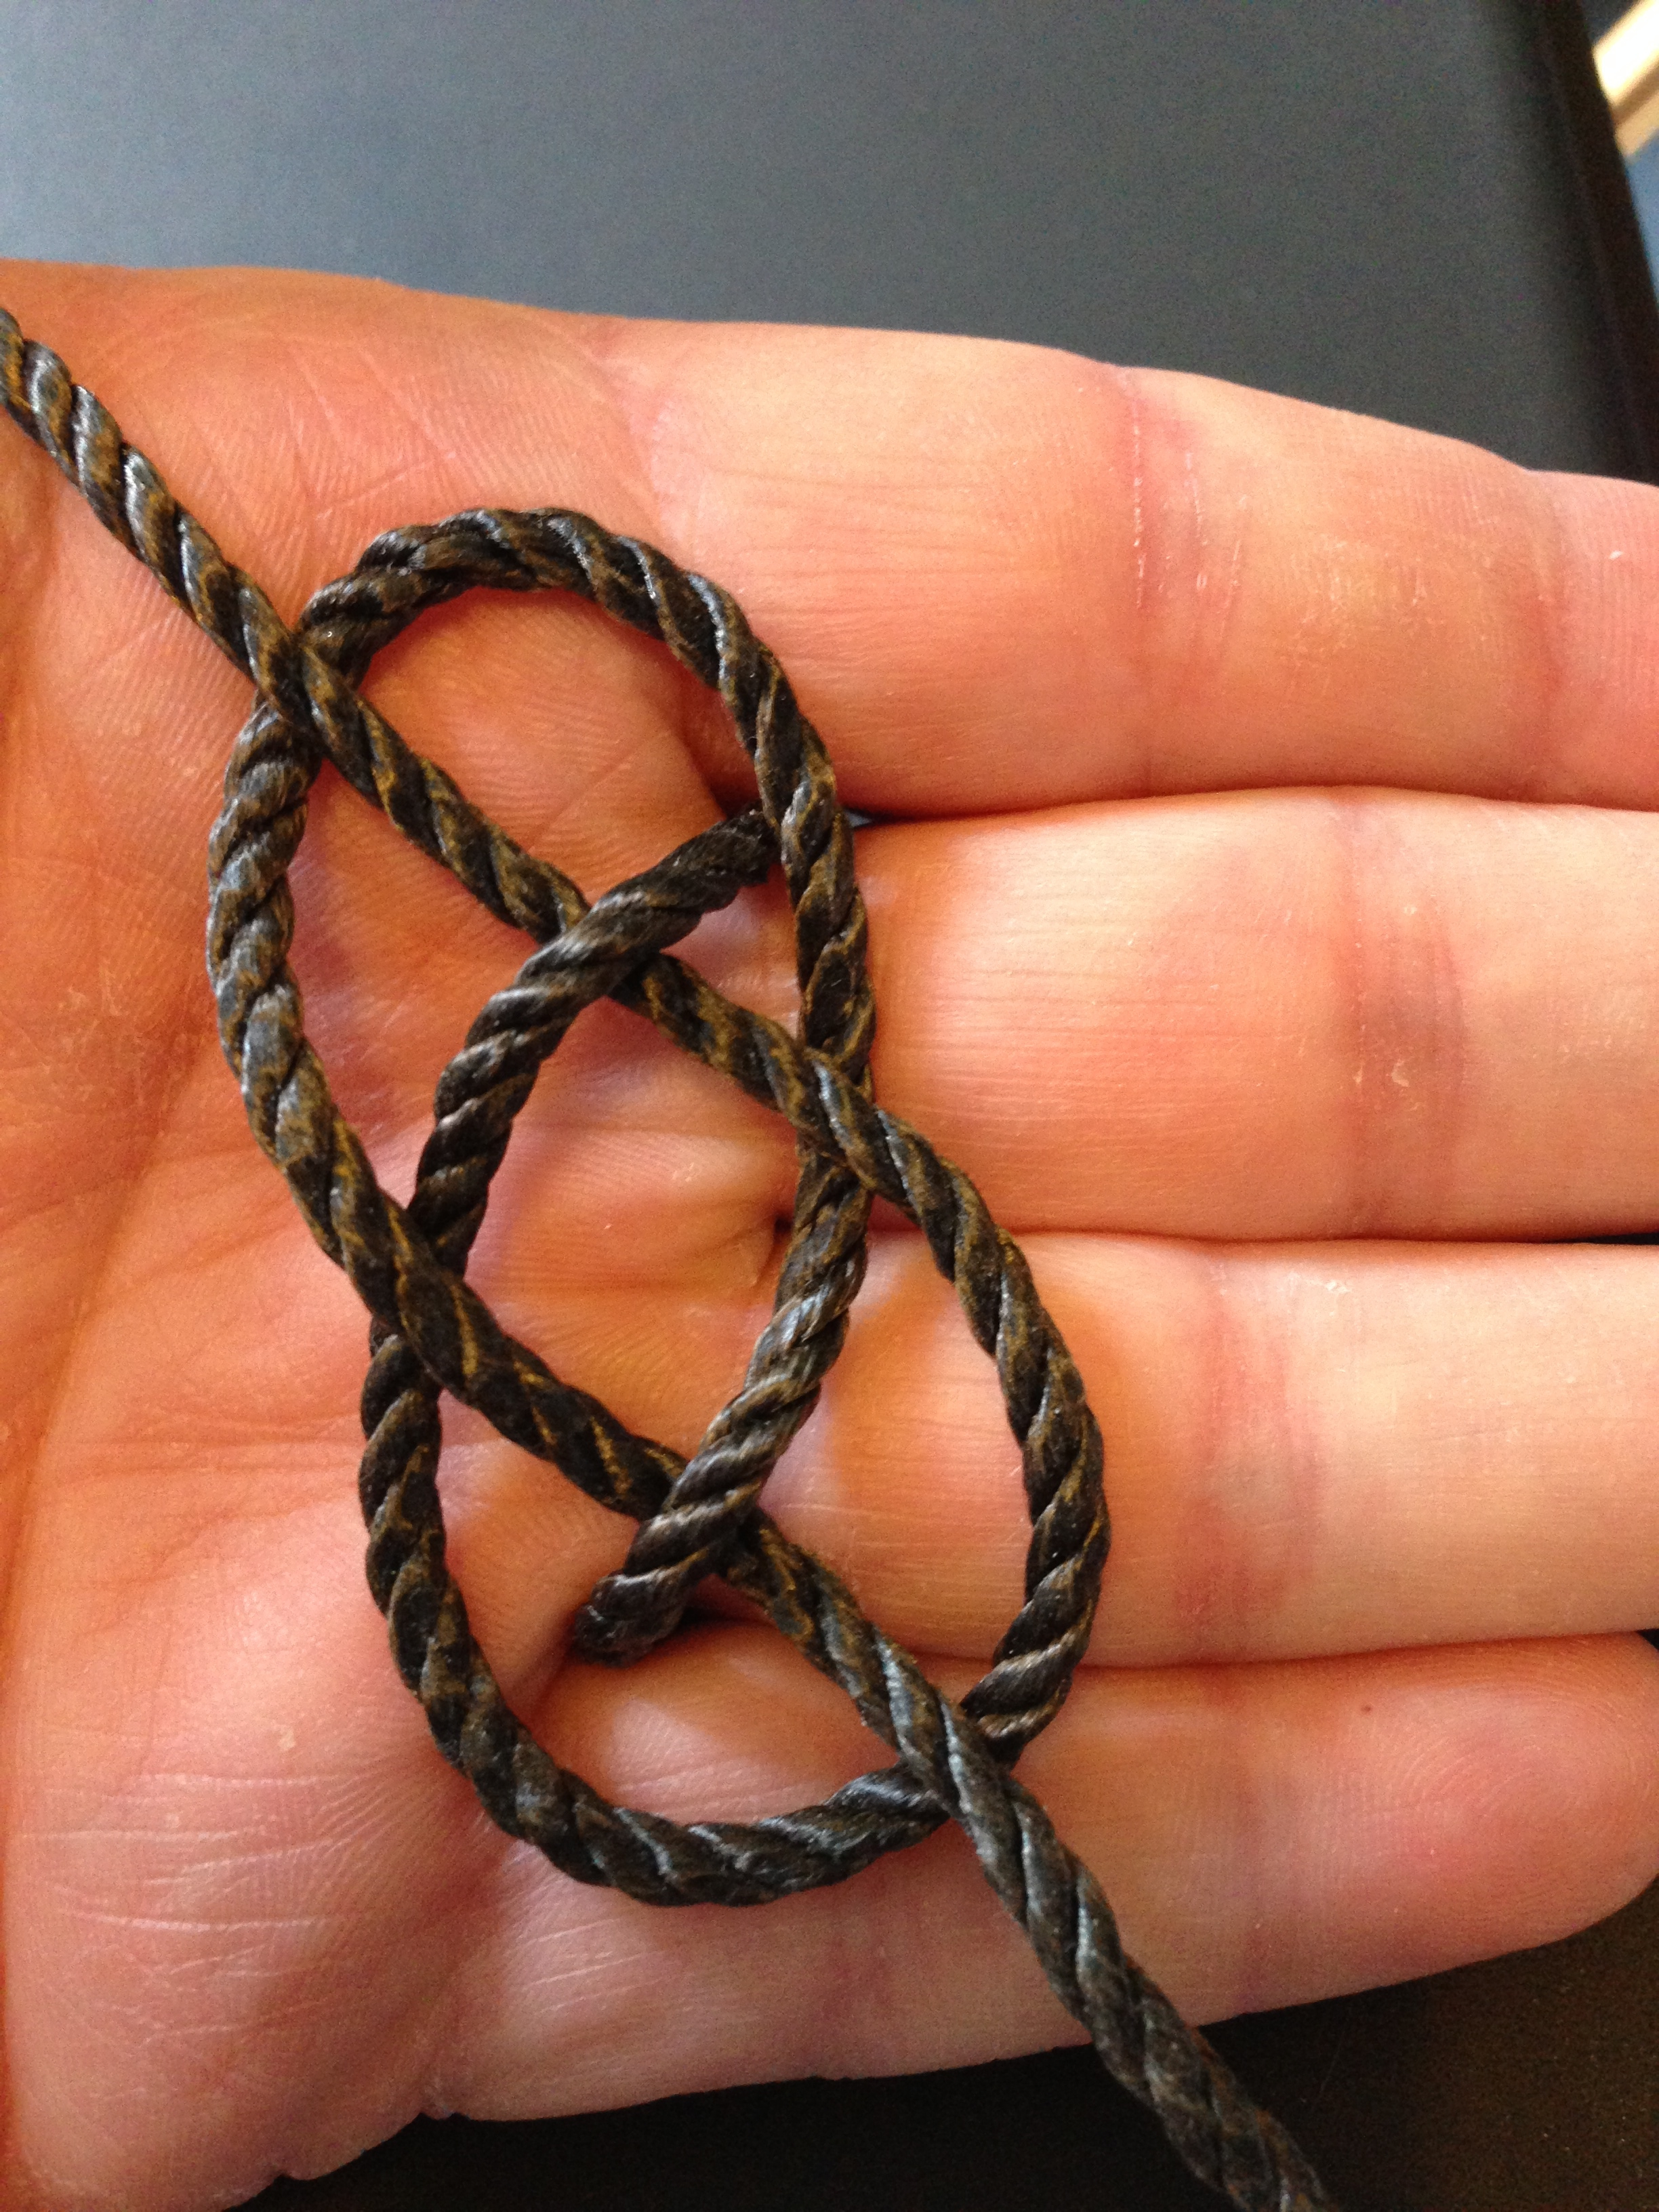
Continue by weaving the strand over-under-over.

Take the lower working end, bring it up and then down under three strands and out through the middle of the knot. Be sure you pass to the left of the top strand coming up between your fingers.

Take the upper working end, bring it down and then under three strands and out through the middle of the knot. Be sure to pass to the right of the lower strand that is coming up through you fingers.
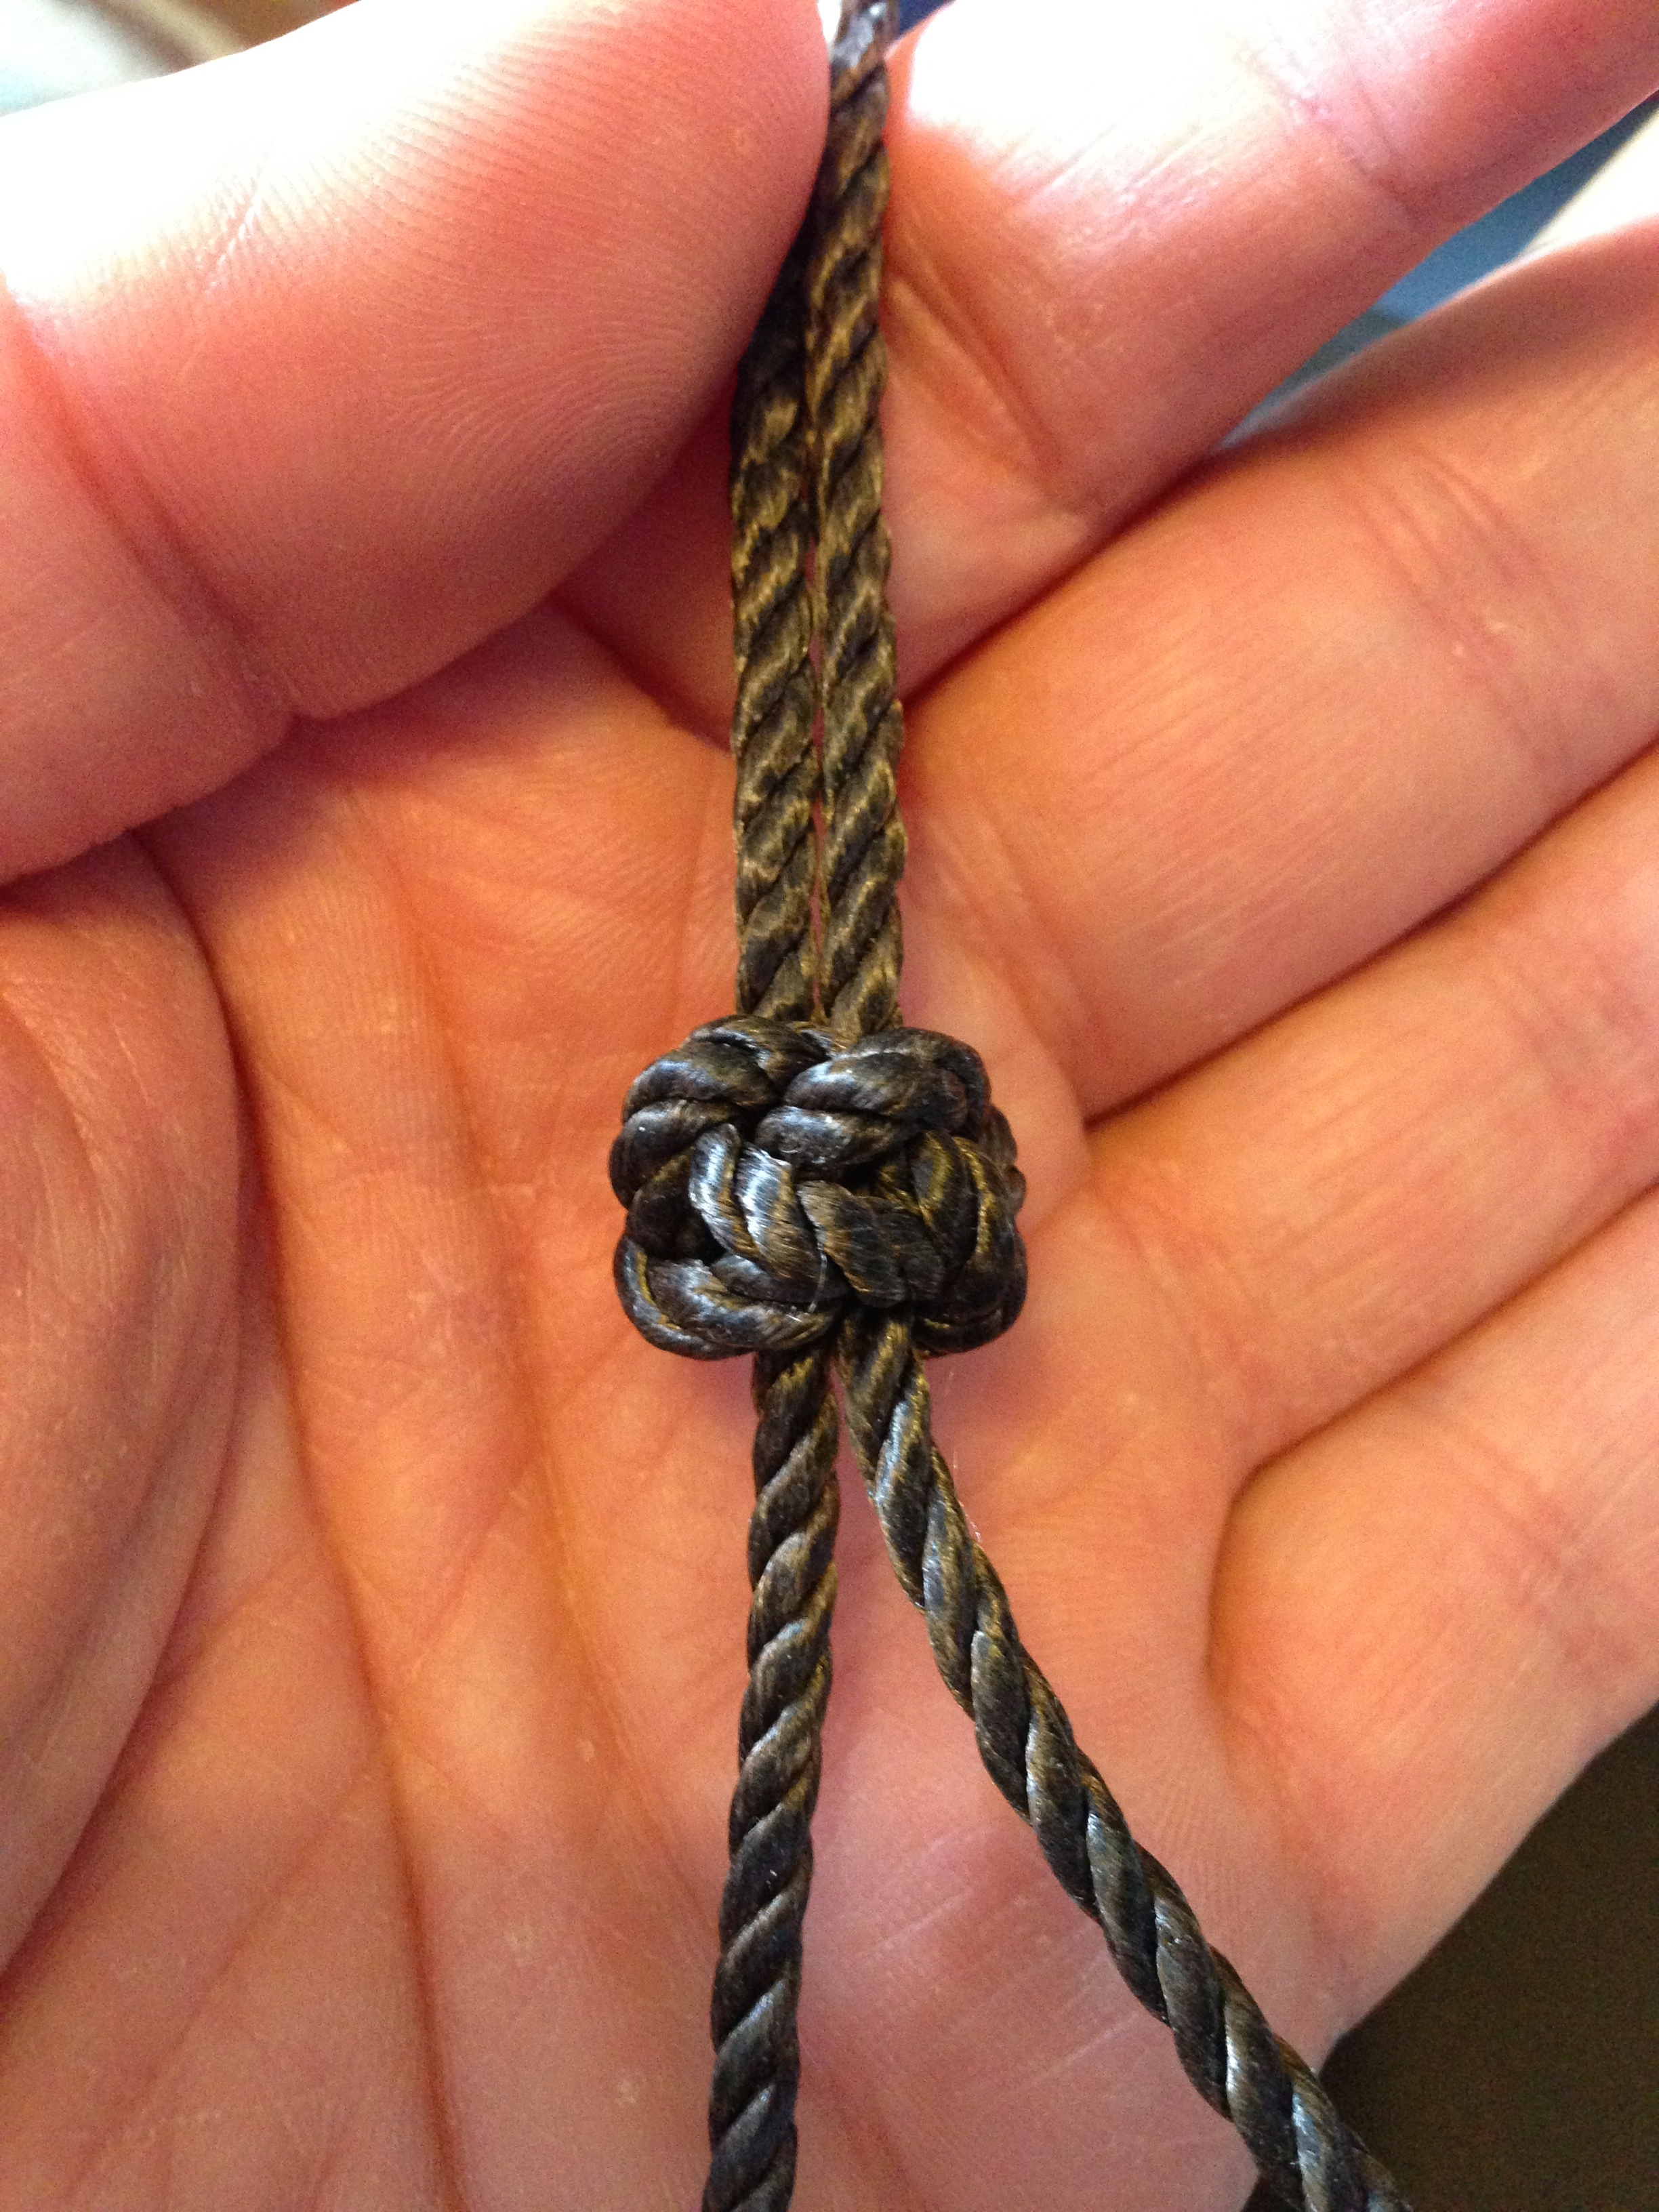
Slowly draw the knot taut. Take your time and work out the slack a little at a time. Once taut you can adjust the size of the loop by working slack in or out of the knot.

Pingback: HB Tansu #3-Progress 20-Complete | GREG MERRITT – BY MY OWN HANDS
Pingback: HB Hobby Tansu #1-Part 15-Complete | GREG MERRITT – BY MY OWN HANDS
Pingback: Bookcase-Progress 10-Complete | GREG MERRITT – BY MY OWN HANDS
Pingback: Staked Side Table-Part 9-Complete | GREG MERRITT – BY MY OWN HANDS