
 My goal was to have a functioning lathe by the end of this weekend. As progress was made over the past week I became confident that my goal would be met. Alas, the weekend has come to a close and finds me still short of a completed lathe. I’m really, really close though. So close that it was hard to put down the tools and shutdown the shop this evening. But it is better to stretch out the project by a few days than to make some silly mistake because I’m too tired. Anyway…
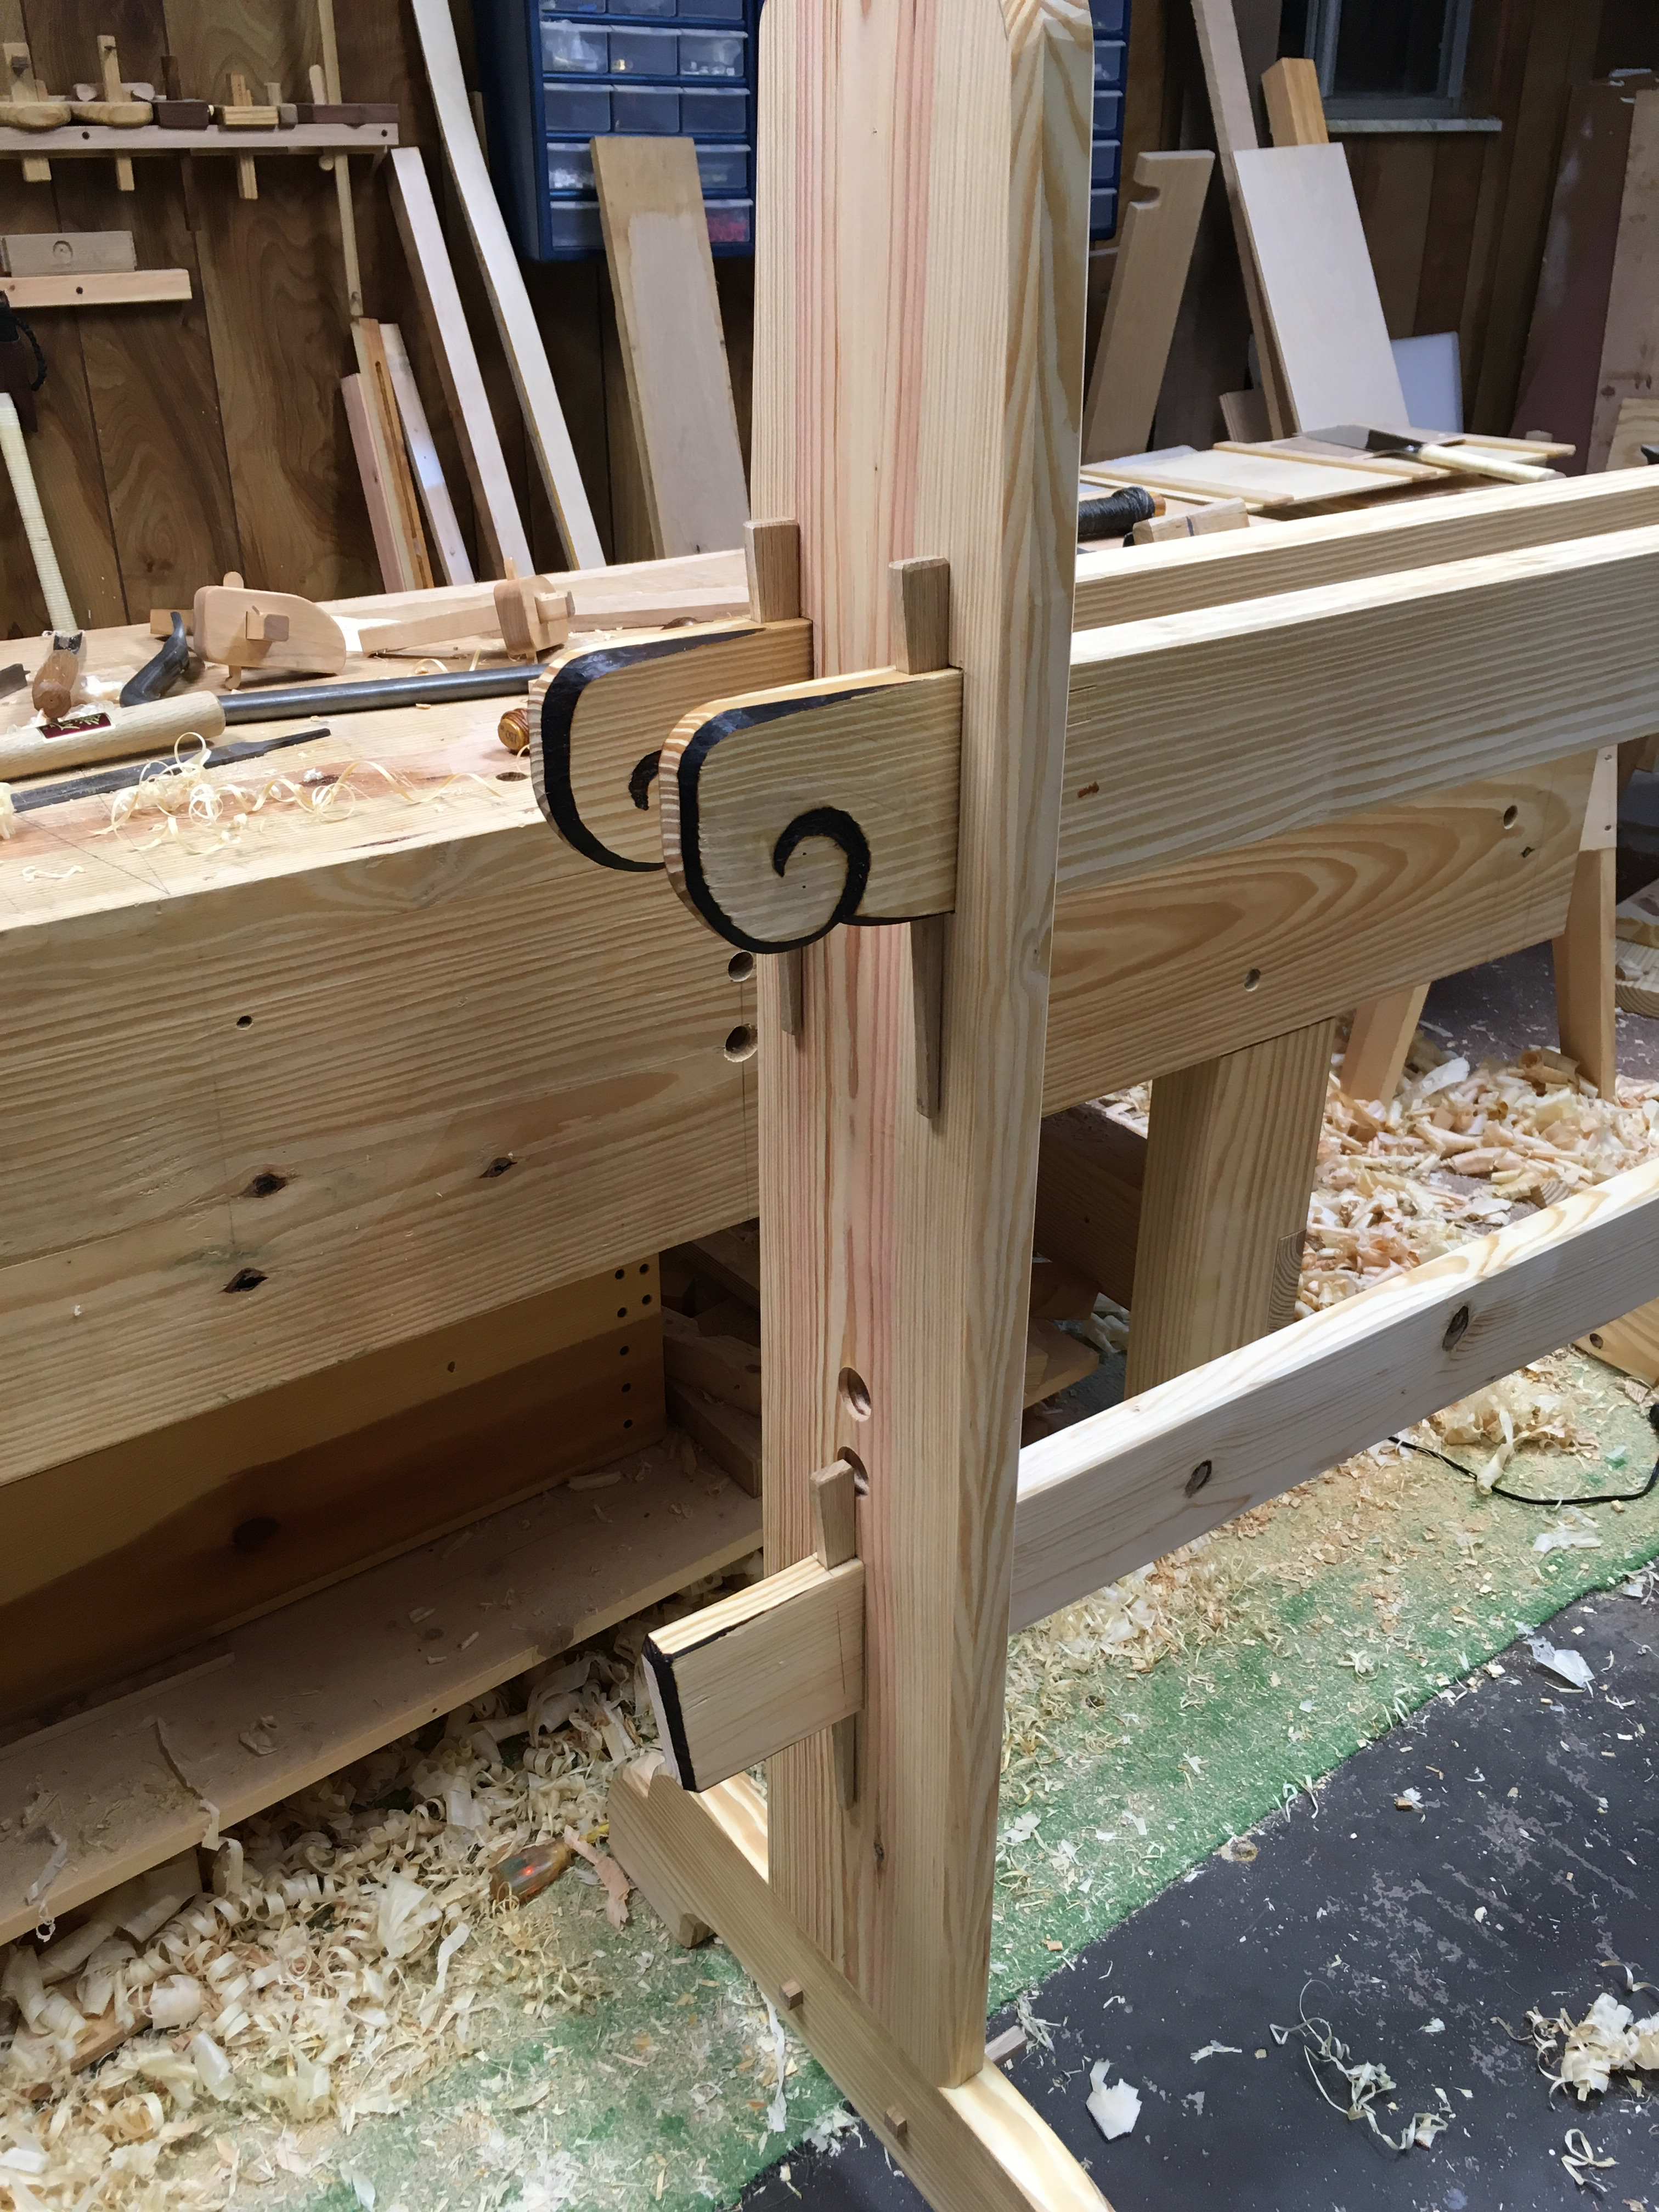
Most of the progress over the past week has been related to mortising for the wedges and adding “decorative” embellishments to the rail tenons. The mortises are straight forward. Simply chop thru and match the angle of the wedges. The decorative embellishment is completely unnecessary but I like to seize any opportunity to try out something new or to practice something. These are tusk tenons and the area after the wedge needs to be strong to resist the pressure of the seated wedge. So I needed to be careful as to how much material I removed. After several sketches I settled on two options. One for the upper rails and one for the lower rail.
The design I used for the upper rail rounded the two corners with the addition of a scroll. I created a template from card stock so that each layout was easy and quick. To cut the design, I sawed away as much waste as I could and then used a sharp chisel for the rest of the outer work. The scroll I incised with a gouge. Once the shaping was done I broke out the wood burner and went to work.

The lower rail received a simple angle cut. What angle? No idea. The leg of my square is 15mm wide, so 0mm to 15mm is the angle technically.
I will be installing 1MT (#1 Morse Taper) dead centers in this lathe. These are a little over 3″ long. When installed in the 1-1/2″ thick upright, just over half of the dead center will be unsupported. It would probably be fine, but the idea bothers me. To remedy this I laminated another piece of 1-1/2″ pine to the inside face of the upright. To keep this extra piece from looking out of place and clunky, I gave it a little shaping.

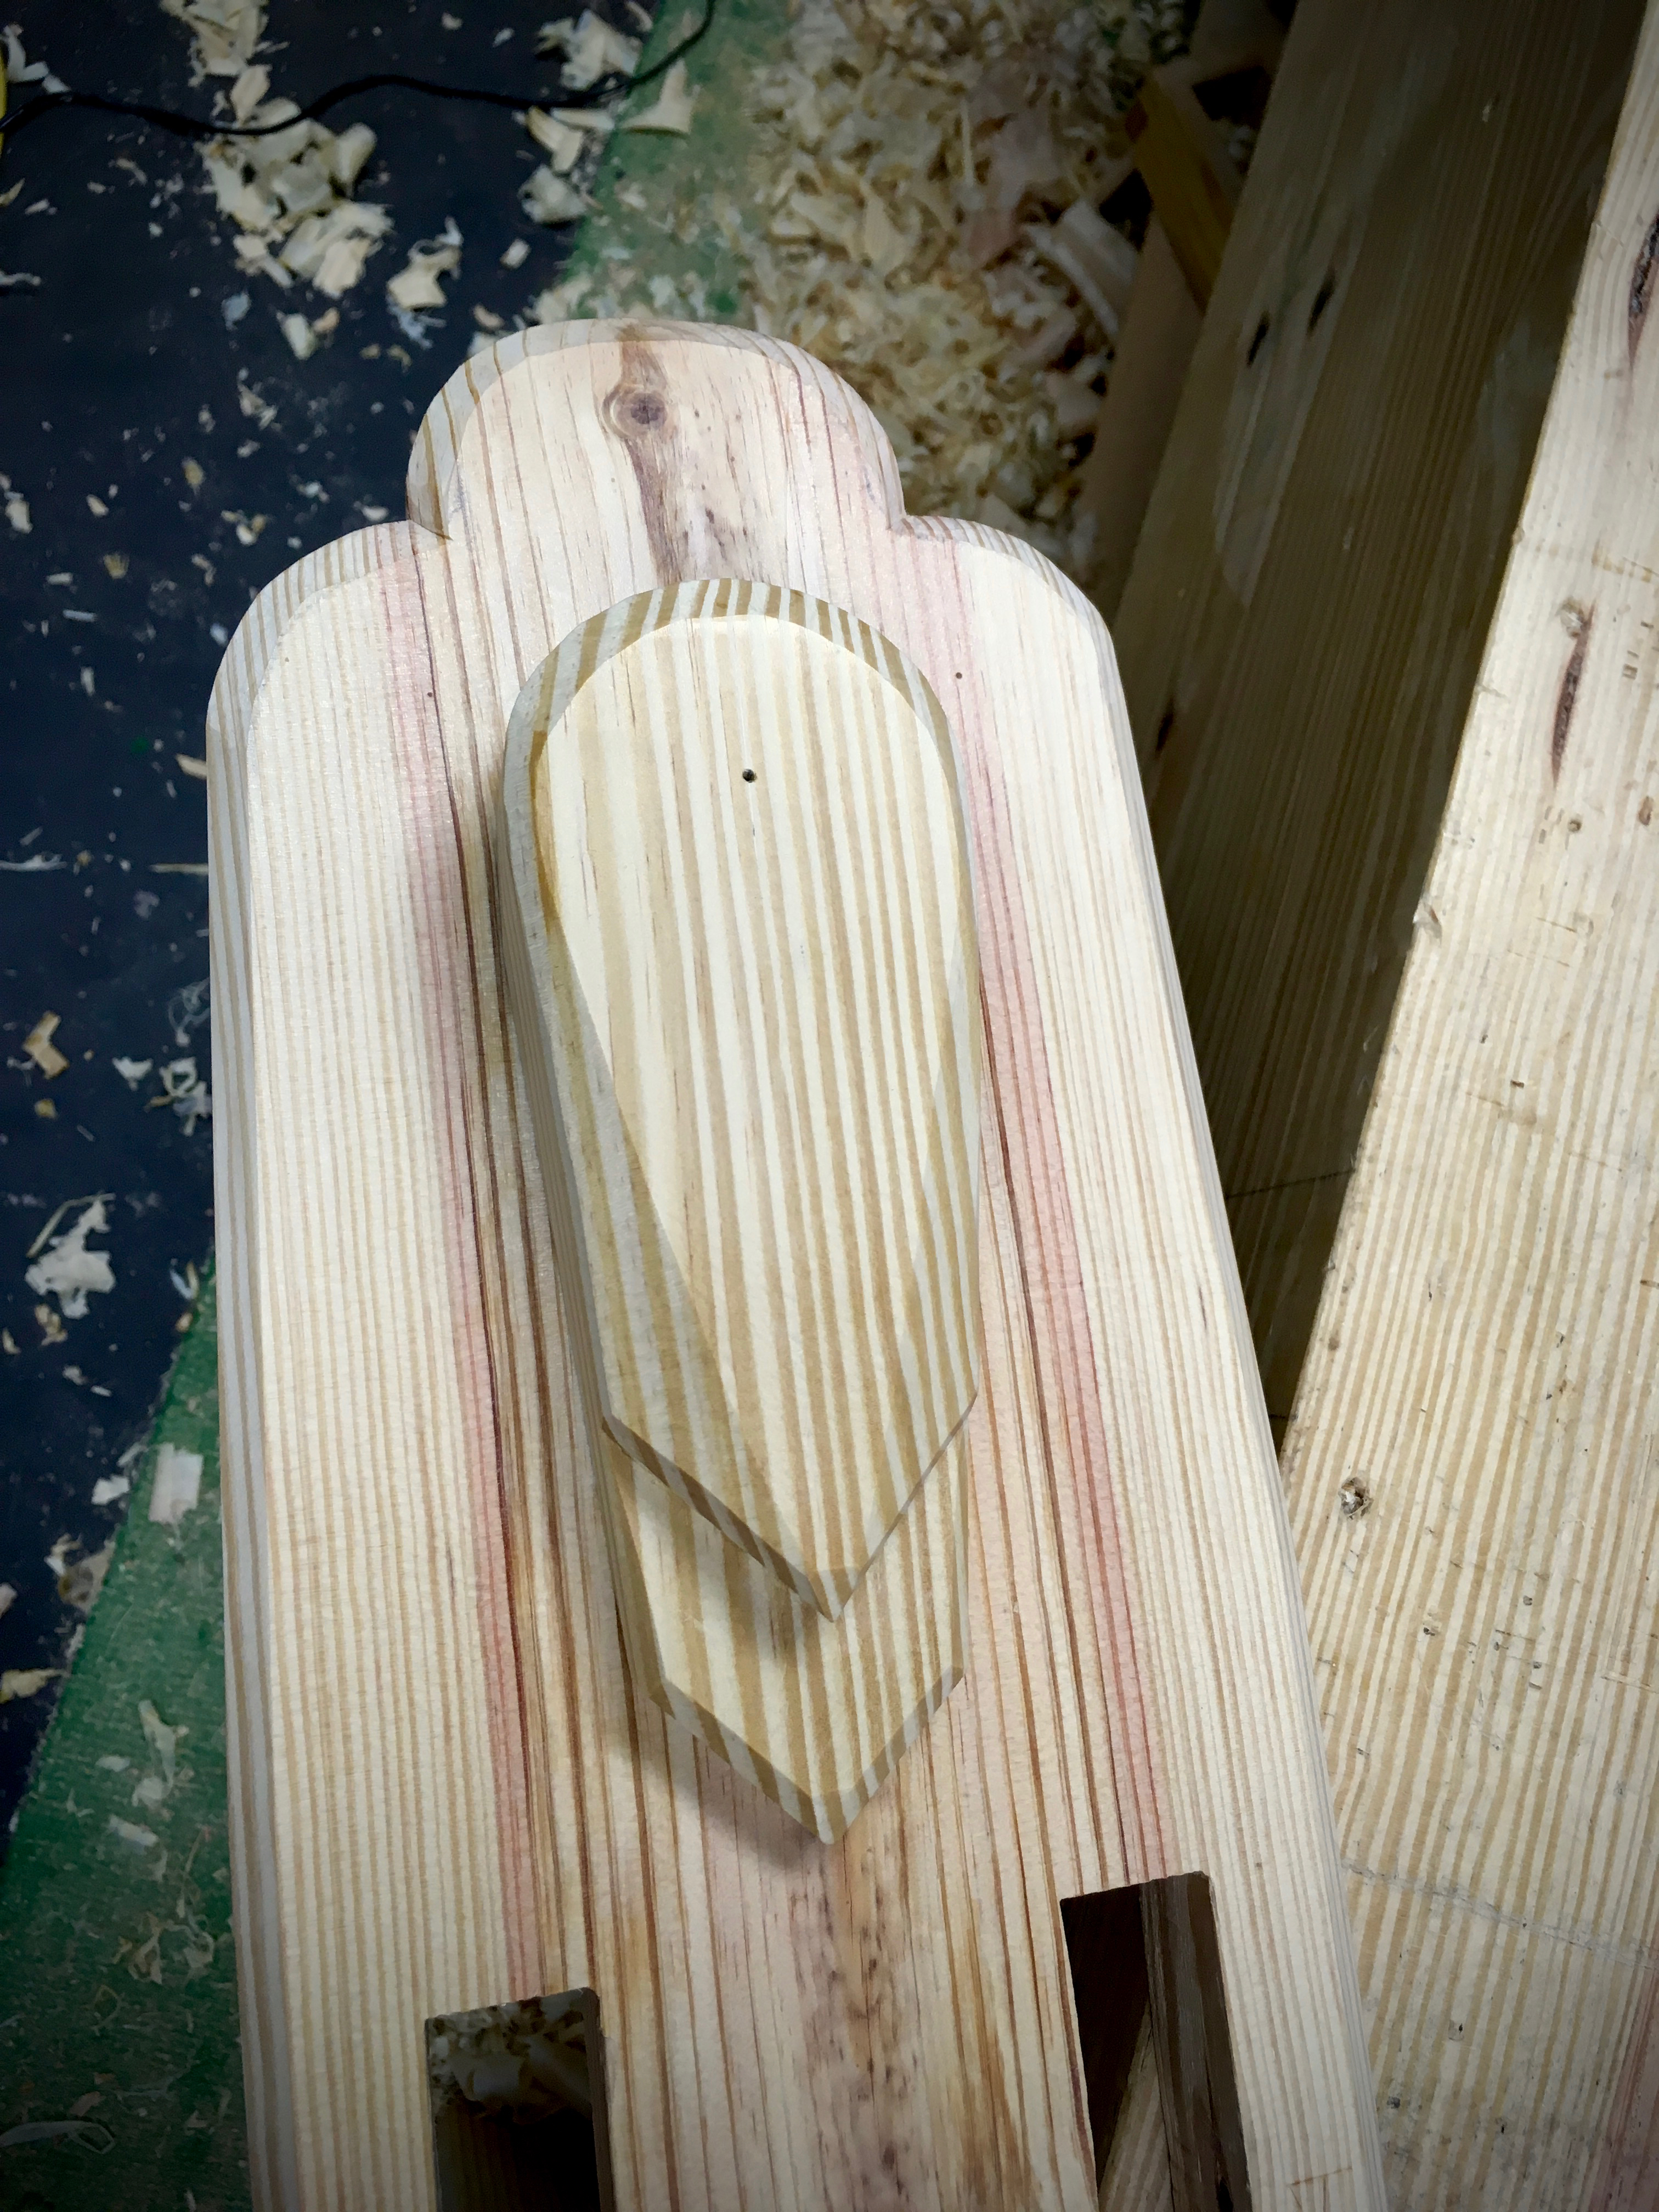
The next job I tackled was the puppet. The blank for which has been glued up and waiting patiently since this whole thing started. I shaped it to match the short upright. The lower portion of the puppet fits between the upper rails and hangs below them far enough to install a mortise and wedge. The wedge locks the puppet in the desired position along the rails. With the shaping out of the way, I laid out the mortise. To create the mortise I bored out the bulk of the waste and cleaned up with a chisel.


The next pieces that I fabricated were the spring poles. I have a few bits of white oak and searched thru them to find two pieces with straightest grain I could find. Then I ran them thru my old table saw to bring them to 1-1/4″ square. From there I went to the shaving horse and shaved them to octagonal with my drawknife. Then a little fine tuning with the spokeshave.

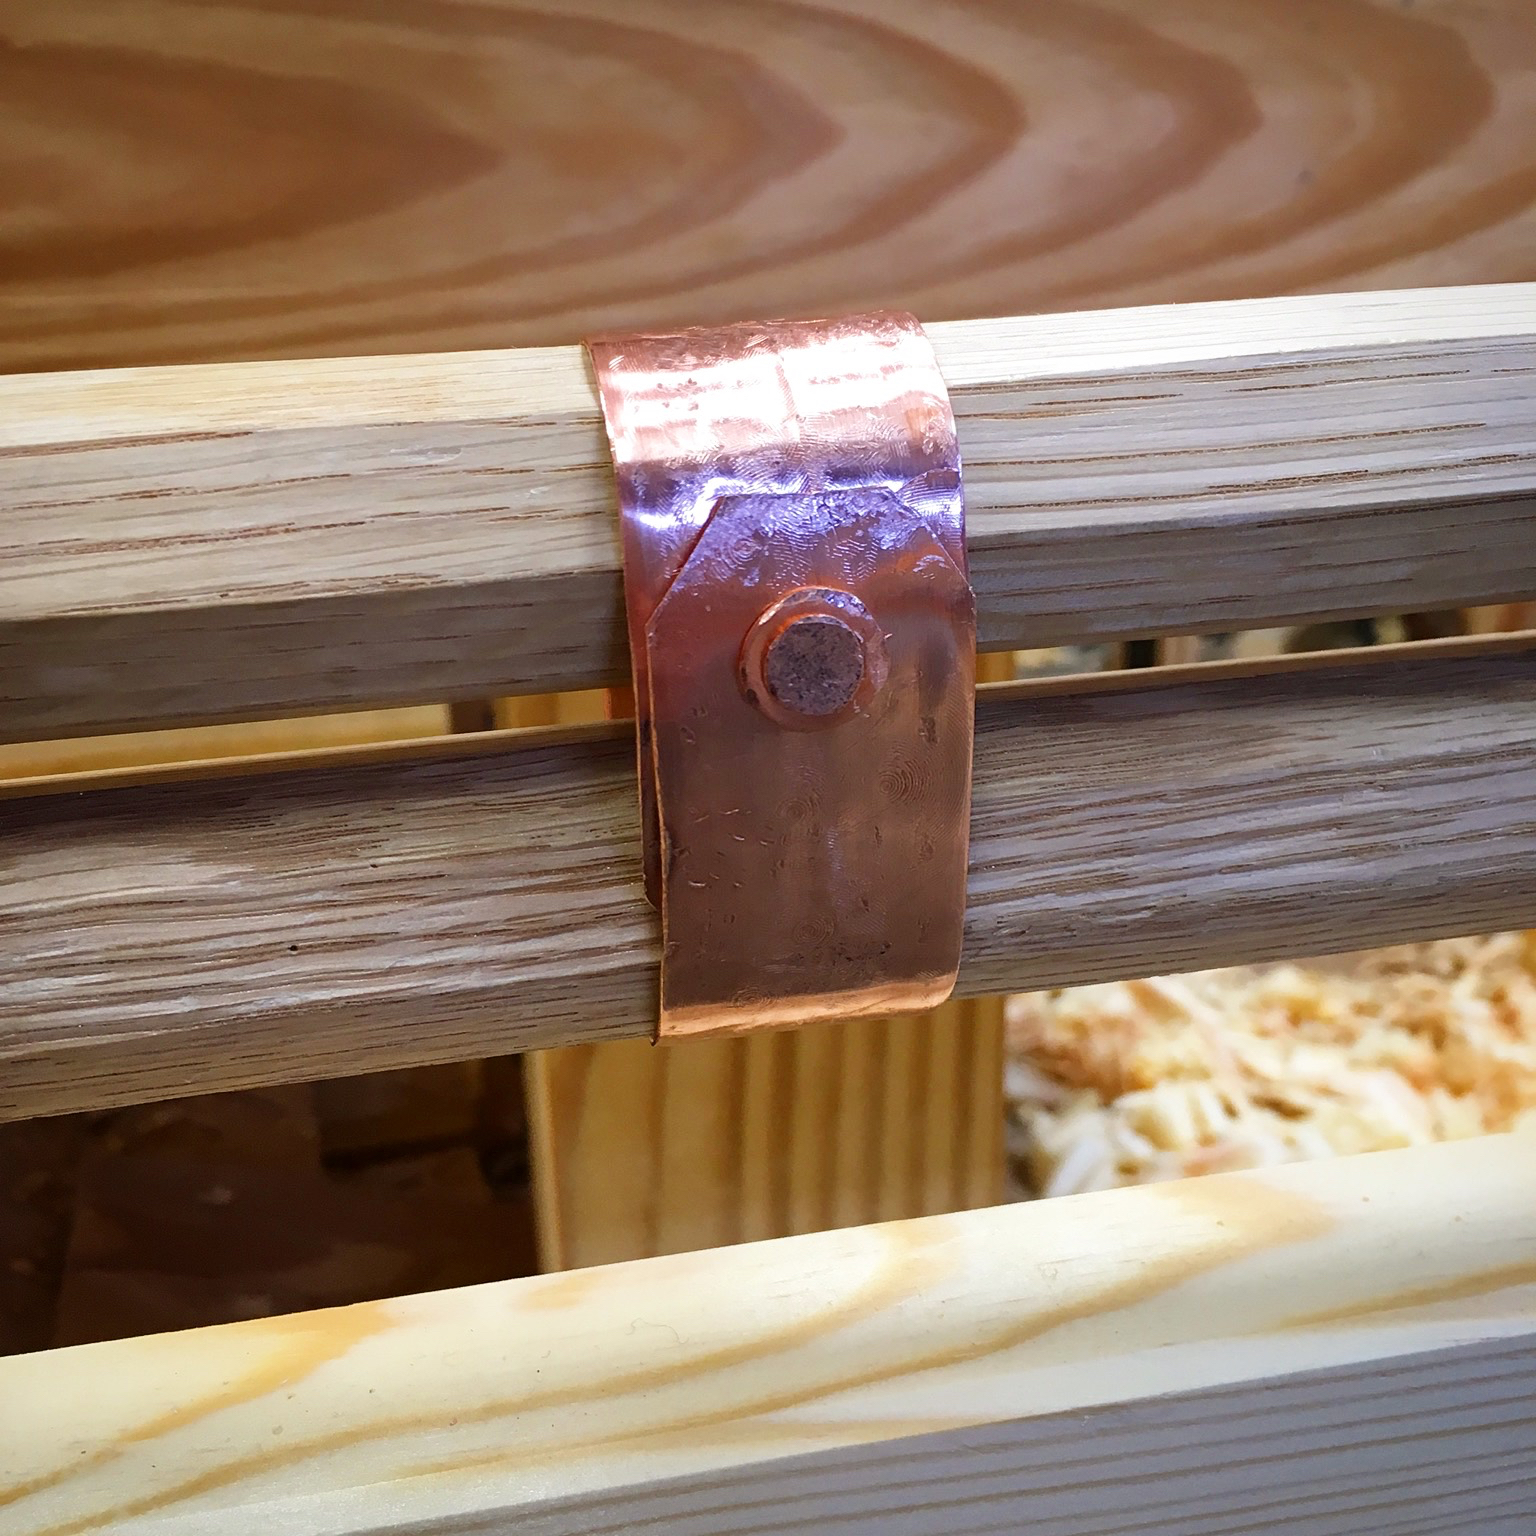
I then installed my fancy copper strap, that I made from a bit of pipe, and secured its ends with a rivet.
I began work on the tool rest today but, quite frankly, was to dang tired. Oh well, I’ll hit it hard again this coming week.


Pingback: Spring Pole Lathe-Part 3 | HILLBILLY DAIKU
Great progress, Greg. Keep up the good work.
Thanks Matt. I’ll keep plugging away until it’s done. I’m anxious to give it a try!
The design for this lathe is so basic that it lends itself to tweaks and mods. Underhill is and opensource generator. The hardware is clearly one area that requires the most headscratching and tinkering.
I want to see how you plan on mounting the #1 Morse tapers. I myself consider using reduction sleeves. I suspect that you will be annoyed when you discover that the amount of tooling is harder to find for the #1 than for #2.
I’m eager as you are to see further progress.
I checked before committing to the 1MT dead centers. Most modern lathes use 2MT, but after looking thru the options I didn’t see anything that I would need to use on this lathe.
I’ll be using a stepped hole to mount the centers. I’ll start with 7/16″ and then finish with 3/8″ drill bits. That, combined with the compression rate of this pine, should hold the centers just fine.
You should change the title for this project… fro “Spring Pole Lathe…” to “Extra Fancy Spring Pole Lathe…” 😀 😀
Carry on, carry on….!
LOL…never pass up an opportunity to practice or try new things. It wont be too fancy, but it will have a little bit of style. 😉
Coming along nicely. It looks good next to your bench.
Thanks…it matches the bench a little too well. It makes taking photos a nightmare. I may have to stain the bench sometime soon so my projects wont blend so well with the bench.
You should post a short video of the lathe in action after the finishing touches!
If I ever get this thing done, I plan to do a video tour. I’ll also do an action shot of me failing miserably at trying to use it. 🙂
Does Underhill make any recommendation about the wood specie choice for the spring pole?
This question induced me to look at bow making:
https://en.wikipedia.org/wiki/Longbow
Although the pole is roundish, it seems orientation of grow rings is also to be taken into account.
Sylvain
Underhill makes specific mention of ash, oak, hickory, even pine. He also makes a statement to look for local species that are typically used in bow making (ie. osage orange, yew). He makes no mention of grain orientation though. However, it seems prudent to orient the growth rings perpendicular to the direction of bend.
In this design the critical factor is continuous grain, more than species. Due to the mechanical advantage of the pivot arm and the double pole spring arrangement, the spring pole movement is only 6″-8″. So neither spring pole actually needs to bend very far. How far each pole bends will depend upon the location of the connecting ring.
If a less than ideal species is used for the spring poles the lathe will work. Most likely the spring poles will develop a “set” over time and the action of the lathe will be dampened.
Thank you for your answer.
It will be a nice lathe.
Sylvain
Pingback: Spring Pole Lathe-Part 5-Complete | HILLBILLY DAIKU
Say … how did you join the two pieces of your tool rest? I can’t really see the joint you used in the photos. I tried dovetailing mine without much success…
Half lap joint secured with two screws. Has held up just fine.