
 Like most things in hand work, no amount of reading or watching of videos can teach you to turn wood on a lathe. At some point you have to start putting tool to wood. Only then can your hand and mind begin to build the connections that are need to actually use a lathe efficiently. I don’t know about you, but there is only so much random turning I can as practice before it becomes boring and thus less conducive to learning. I need to have something at stake. I need to have the risk of failure or the lure of success in order to fully engage in the process.
Knowing that I would be teaching myself to use the lathe I started looking for lathe projects that would help me along the way. Magazine articles and videos are great, but without actual interaction you are still on your own. So I searched for projects that would progressively challenge my burgeoning skills. Abject failure sucks and can be discouraging, especially when your on your own. Therefore, the beginning projects needed low risk of failure and a high probability of success. One other wrinkle is that I wanted projects that would be useful. This brings me to my first project, the Garden Dibber.
The Garden Dibber is essentially a fancy sharpened stick of a known length with additional indicating marks of distance. It can be used to establish the spacing of plantings and also create a hole for planting at the desired depth. According to some sources the history of the dibber traces back to Roman times.
The Garden Dibber is a great beginner project. It requires roughing out, tapering, incising lines at exact locations. The surface needs to be smoothed and the handle portion can made simple or as complex as you want. None of the steps are critical to its function (a graduated pointy stick), so risk of failure is low.
I started by roughly shaping a billet octagonal at the shavehorse with my drawknife. I could also have done the same at the workbench with a plane. You can turn square stock directly on the pole lathe, but the sharp corners are hard on the drive cord.

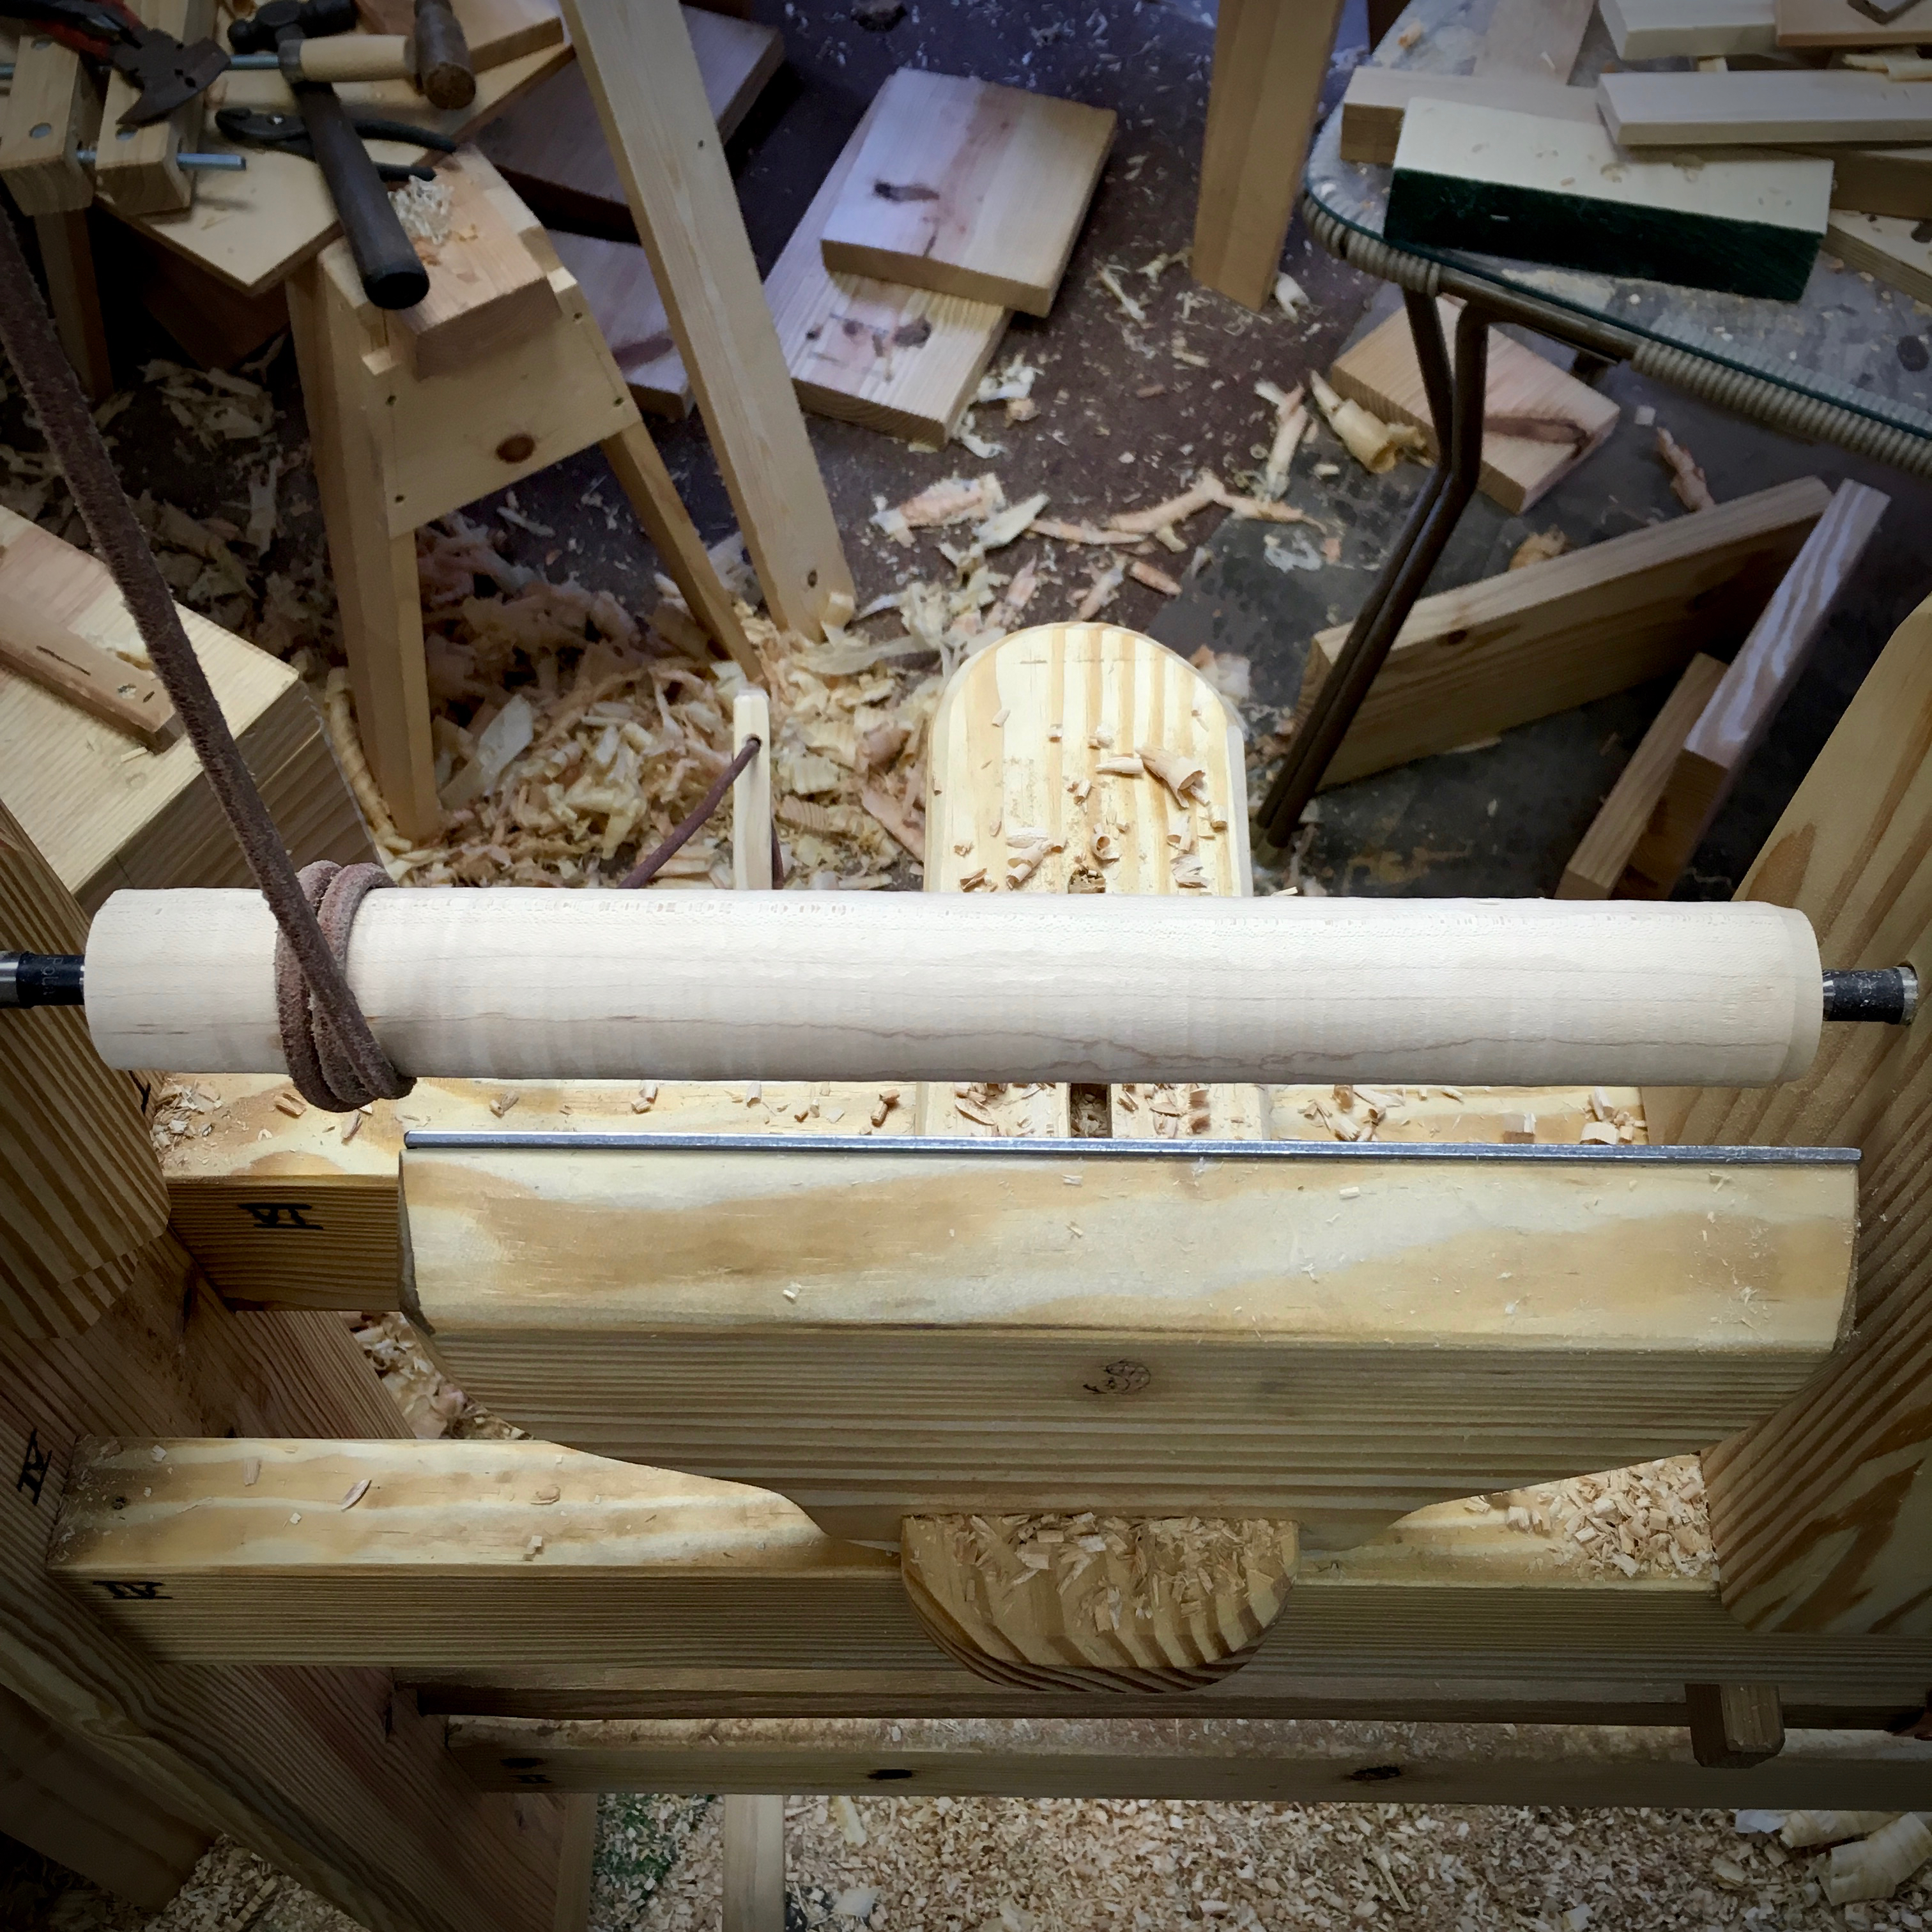
One of the quirks of this lathe is that the drive cord wants to run at the end of the workpiece only. I can move it slightly over by angling the treadle, but it is much more efficient to simple flip the workpiece end for end to work the entire length. I could also use a longer blank and designate one end to be the pulley. I have done this, but it generates a waste piece. Since I’m frugal, I’ll use a smaller blank and flip it. Anyway, here is the blank roughed round.
Next, a little layout to delineate the overall length, the handle and where to start the taper.

After the taper is turned, I laid out the 1″ graduations.
REVISED 04/20/17 The drawing above is representative of the traditional shape for planting seeds and such with a strong taper to a sharpish point. The taper can be varied to suit. I’m making this and other dibbers with a more gradual taper. Most people I know who have gardens don’t plant from seed. They use starter plants and thus need a large hole.

The lines were cut in with a skew chisel.
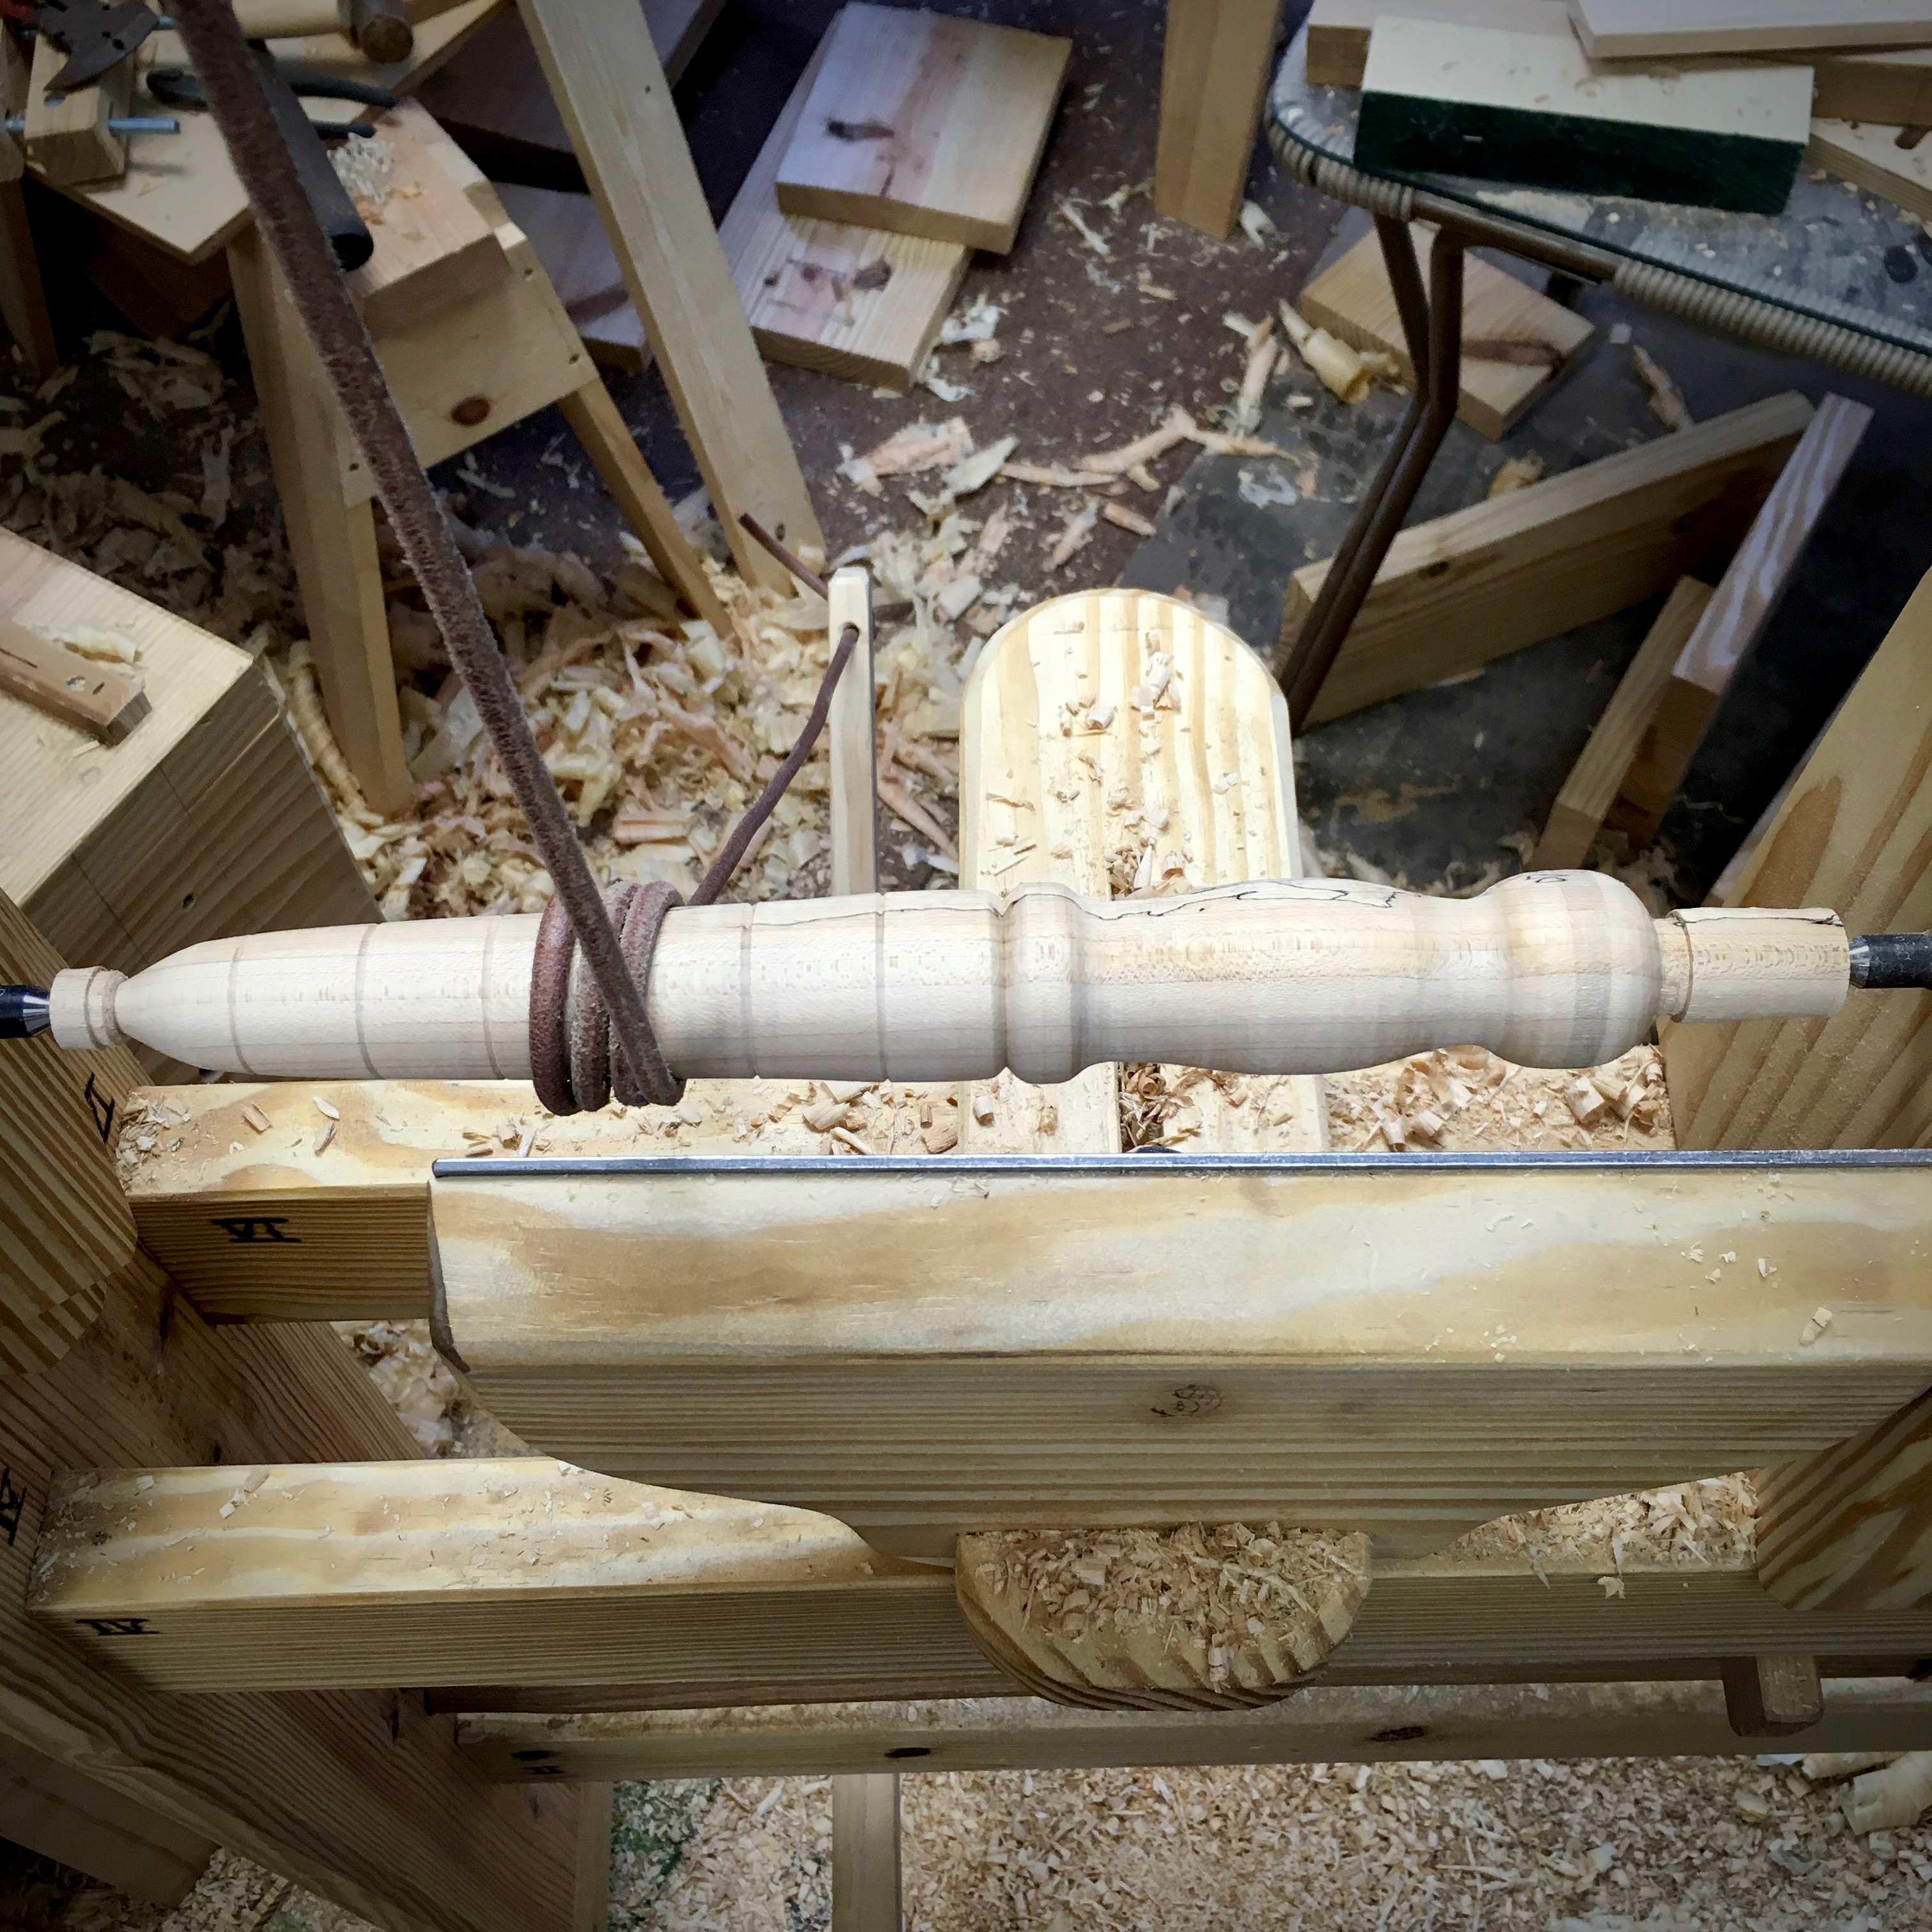
Then I flipped the workpiece and shaped the handle.
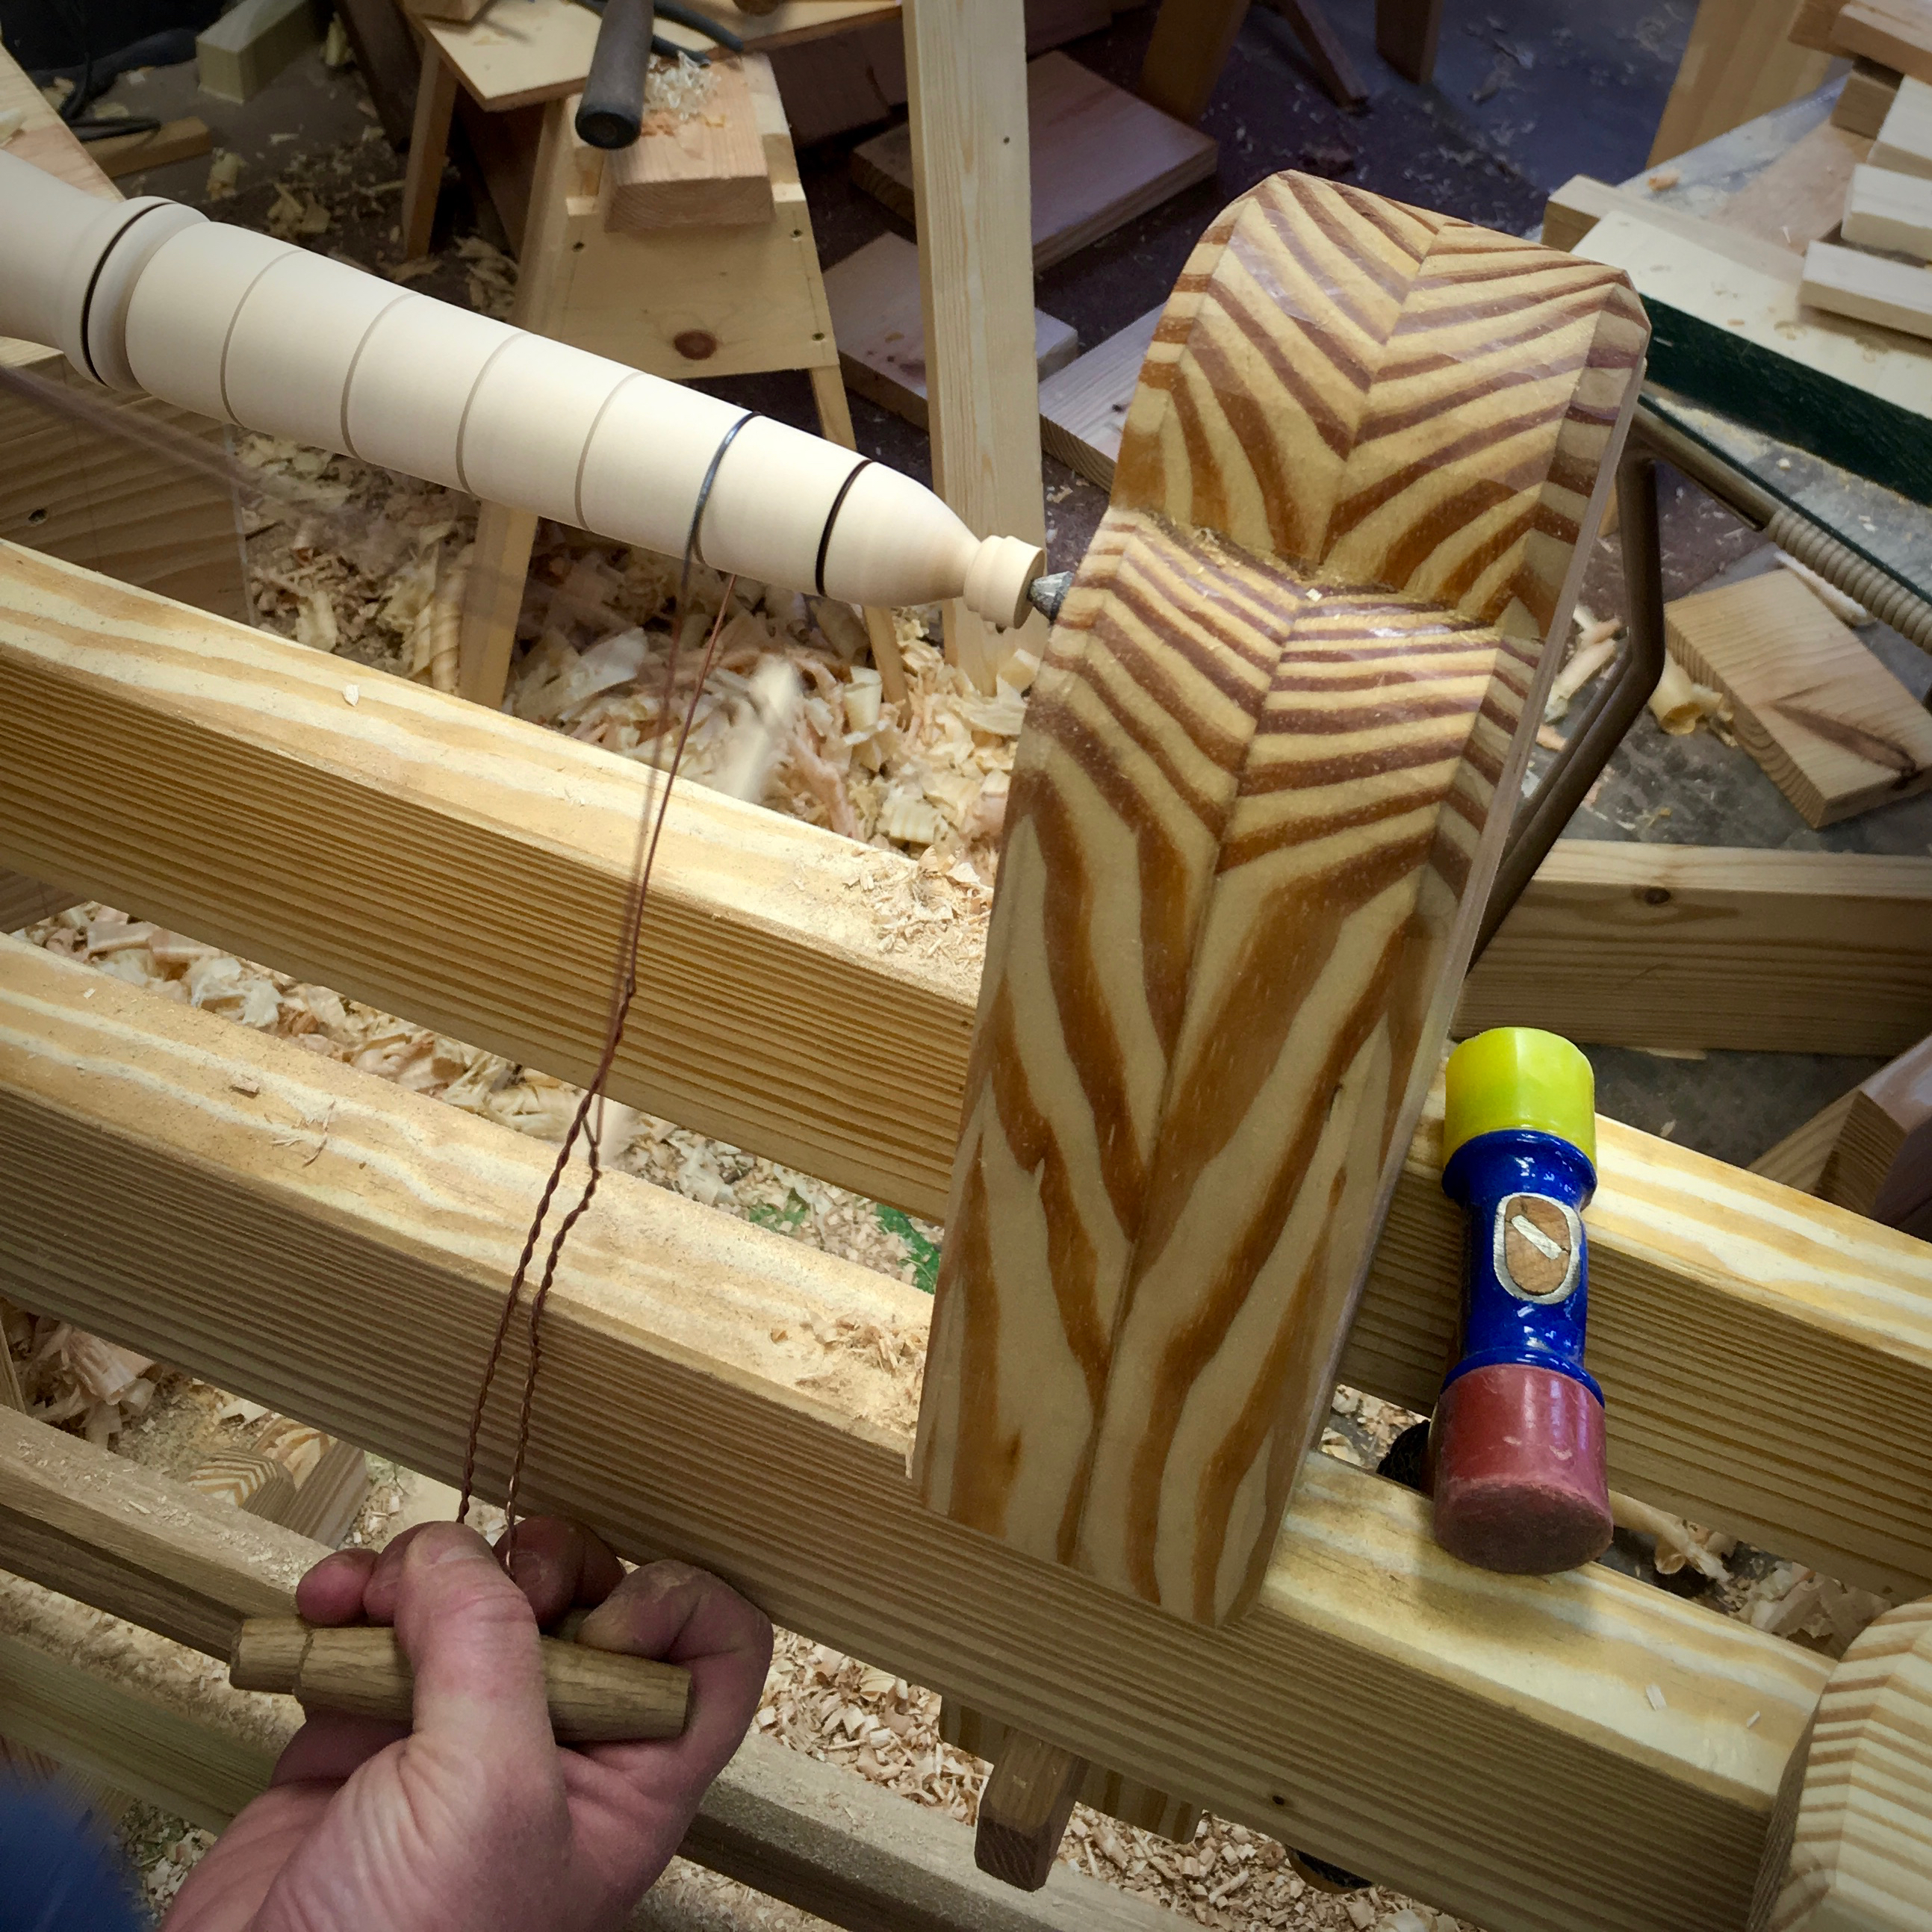
I used a piece of MIG welding wire with toggle handles installed on it to burn (it’s not a Hillbilly Daiku project without wood burning) in the lines that I had incised with the skew. Pressure and friction does the trick.
The lathe work is done. All that is remains is to saw off the waste and shape the ends with chisel, file and sandpaper.

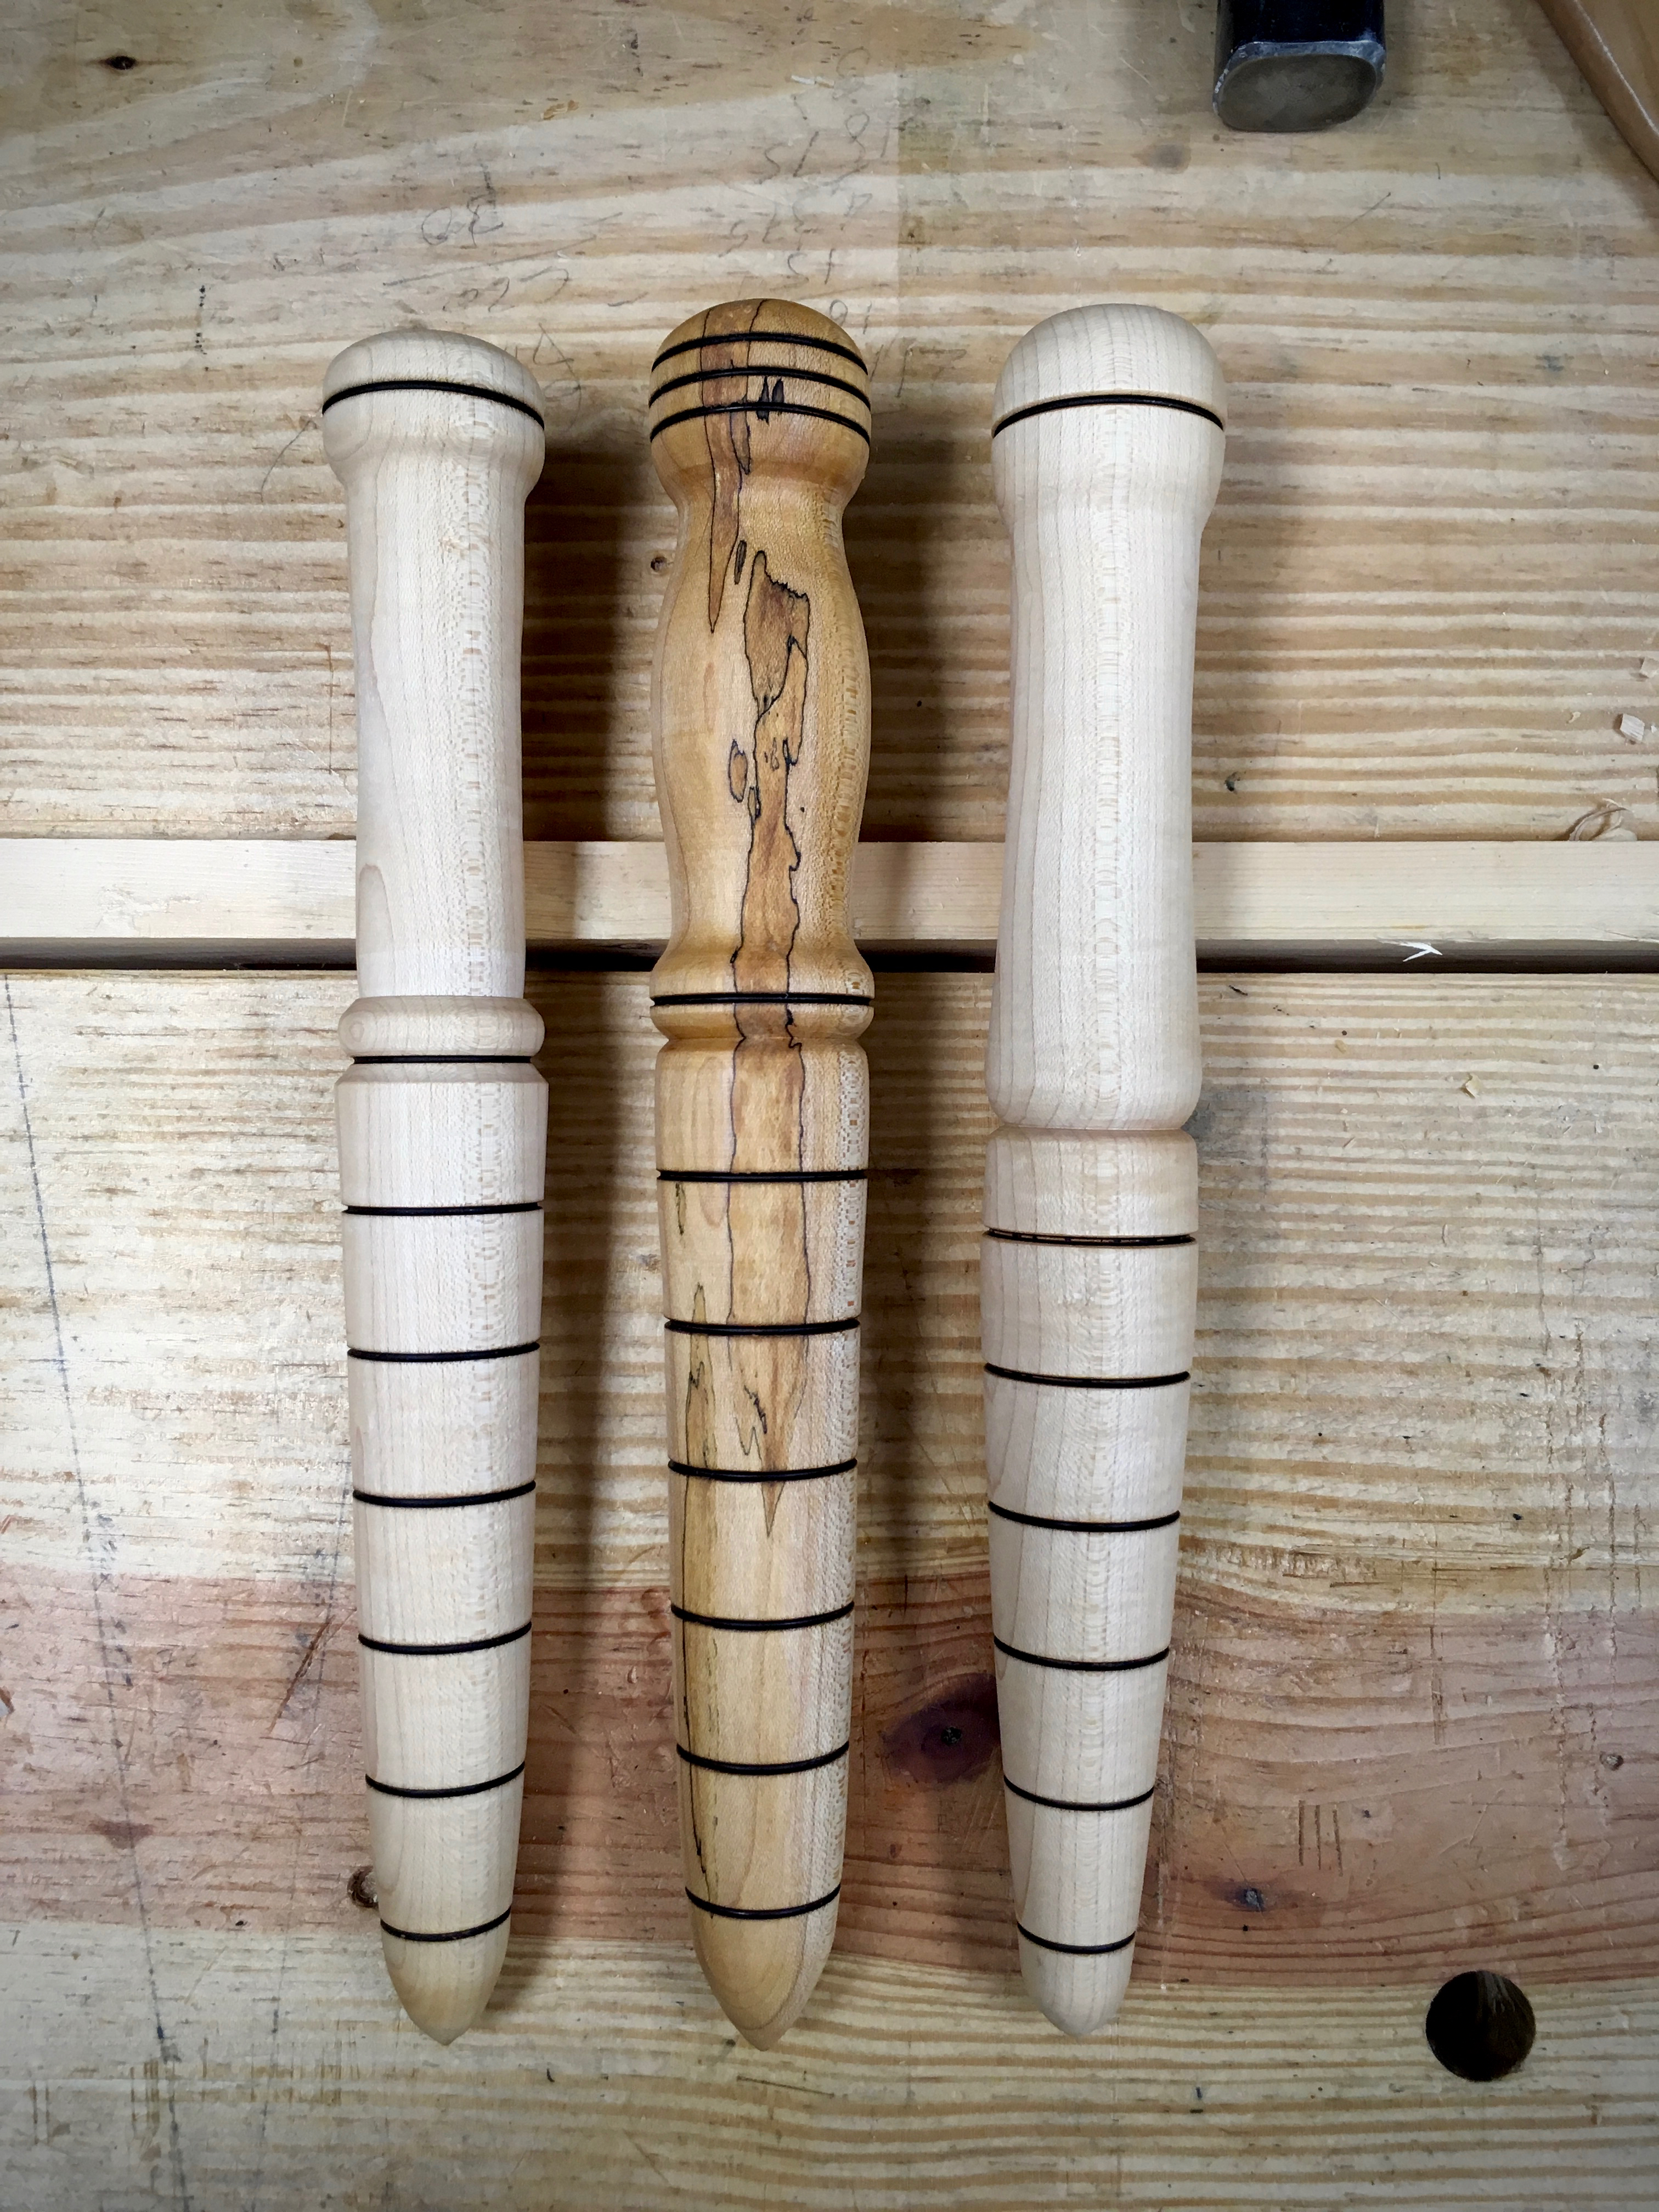
I wiped on a coat of BLO and called it done. This was my third (middle) attempt at this project. My first try is on the left and the second run is on the right. I can see some improvement and I’m becoming more comfortable with the tools.
I think the Garden Dibber was a good first project on the lathe. Heck, I can see cranking these out every now and again for practice and gift giving. It’s a relaxing way to spend an hour in the shop and there is almost no way to fail.
Greg Merritt

I like that spalted wood the only thing your missing is some nice finish on it, I know it will get used but still. I’ve never heard of a garden dibber before, I’ve been actually wanting to make a vegetable garden and this tool will come in handy. It’s now part of my long to do list.
Hey, what’s wrong with BLO? I was raised wiping BLO on all outside tools.
I hadn’t heard of a garden dibber either until I began hunting for beginner lathe projects. Once I knew what it was, it seemed a handy little thing to have around. It is a simple little project, but I have to start somewhere. Glad you may get some use out of it too.
I must of missed that part where you applied BLO, it just looks too matt actually like you put nothing on. Try burnishing a few coats on. But the timber suck up most of it though unless you don’t plan on using your lathe for a week just leave it on for a few days and then put some more coats on. It looks better when you apply it on the lathe as the friction heat really builds up and you get a really nice sheen.
So… fancy blog post for ‘management project’… lol
Keeping the manager happy is the secret for an happier life!!! 😀 😀
LOL…that is a big part of it for sure. 🙂
Just curious about how this has progressed. Most dibbers I have seen have a more tapered profile than yours has turned out (sorry for the pun). Your drawing showed that, but the finished article is more parallel and bullet shaped. Was this deliberate? The old gardening books speak of them whittled from a broken spade handle.
I edited the blog to explain my use of a shallow taper. In short, the taper can be altered to suit the need. If you are planting a lot of seeds, then a taper as shown in the drawing is what you want. If you are mostly planting established plants and bulbs, then a gradual taper and the larger hole it creates will be a bettter choice.
An internet search will show these things made in a multitude of ways. My goal was a simple lathe project that would generate a useful item.
I see on Instagram that you have make a driving drum (I don’t know how it is called). You might possibly make it short if shaped like a sailboat winch drum. If you look at pictures, you will see that the two conical section are highly polished while the center cylindrical section is generally lightly roughened. I have not experimented this, so if you whish, first experiment on a piece on the work side of the lathe before modifying the drive side.
Sylvain
Thanks for the suggestion Sylvain. I’m working on a post that will discuss my drive mandrel. I made the spool specifically to minimize the drive cord rubbing against itself. I also wanted to avoid any chance of the drive cord crossing over itself.
Then, I guess the cord is completely to the right when the threadle is down and completely to the left when the threadle is up. It is using some of the lathe length but then you can take it out if you need the full length for a table leg. My suggestion was not so good. Of course on a boat you can not have a drum long enough to brace a few sheet meters that way.
Sylvain
Your suggestion would be spot on for most spring pole lathes. On this lathe the addition of the overhead pivot arm complicates things. It swings in an arc along the length of the workpiece. This makes the drive cord travel left to right about 3″. I’ll only be using this drive center for short pieces and pieces that have awkward shapes that prevent using the drive cord on them directly. So the loss of usable length is a minor issue.
It’s nice work Greg. I like the shape and proportions.
Thanks man. Just putting it out there.