
 With the legs at the ready, I moved on to tackle the seats. The seats are from a construction grade SYP 2×12. When working with construction lumber, you have to really plan ahead and possibly get a little creative in order to end up with something decent. I’m not opposed to having knots in my projects, but the trick is to keep those knots out of the joinery areas. After a little trial and error I hade four usable slabs and a decent piece that may end up as a bench.
Layout is pretty simple and went quickly for all four seats.

As I mentioned in my last post, I’ve opted for cylindrical 1″ tenons on these stools in lieu of the tapered tenons that I have been using. Why? First, I simply want to try this method to evaluate the difference. Second, when building the table trestles I found that the addition of the stretcher can cause the tapered tenons to be difficult to seat if any outward pressure is introduced by the stretcher.
The process for drilling the holes is the same regardless if they are cylindrical or tapered. So I set a bevel gauge to my resultant angles and drilled the required holes for installing the legs.
With the legs installed, I set a pair of large dividers and marked the locations for the stretchers from the underside of the seat.

I then drilled each of the stretcher mortises with a spade bit and a backer board to keep the spelching at a minimum. I’m making these as through mortises and will wedge all of the joints.
Next up was the front stretchers which meant a little lathe work.

Then the center stretchers and more lathe work.

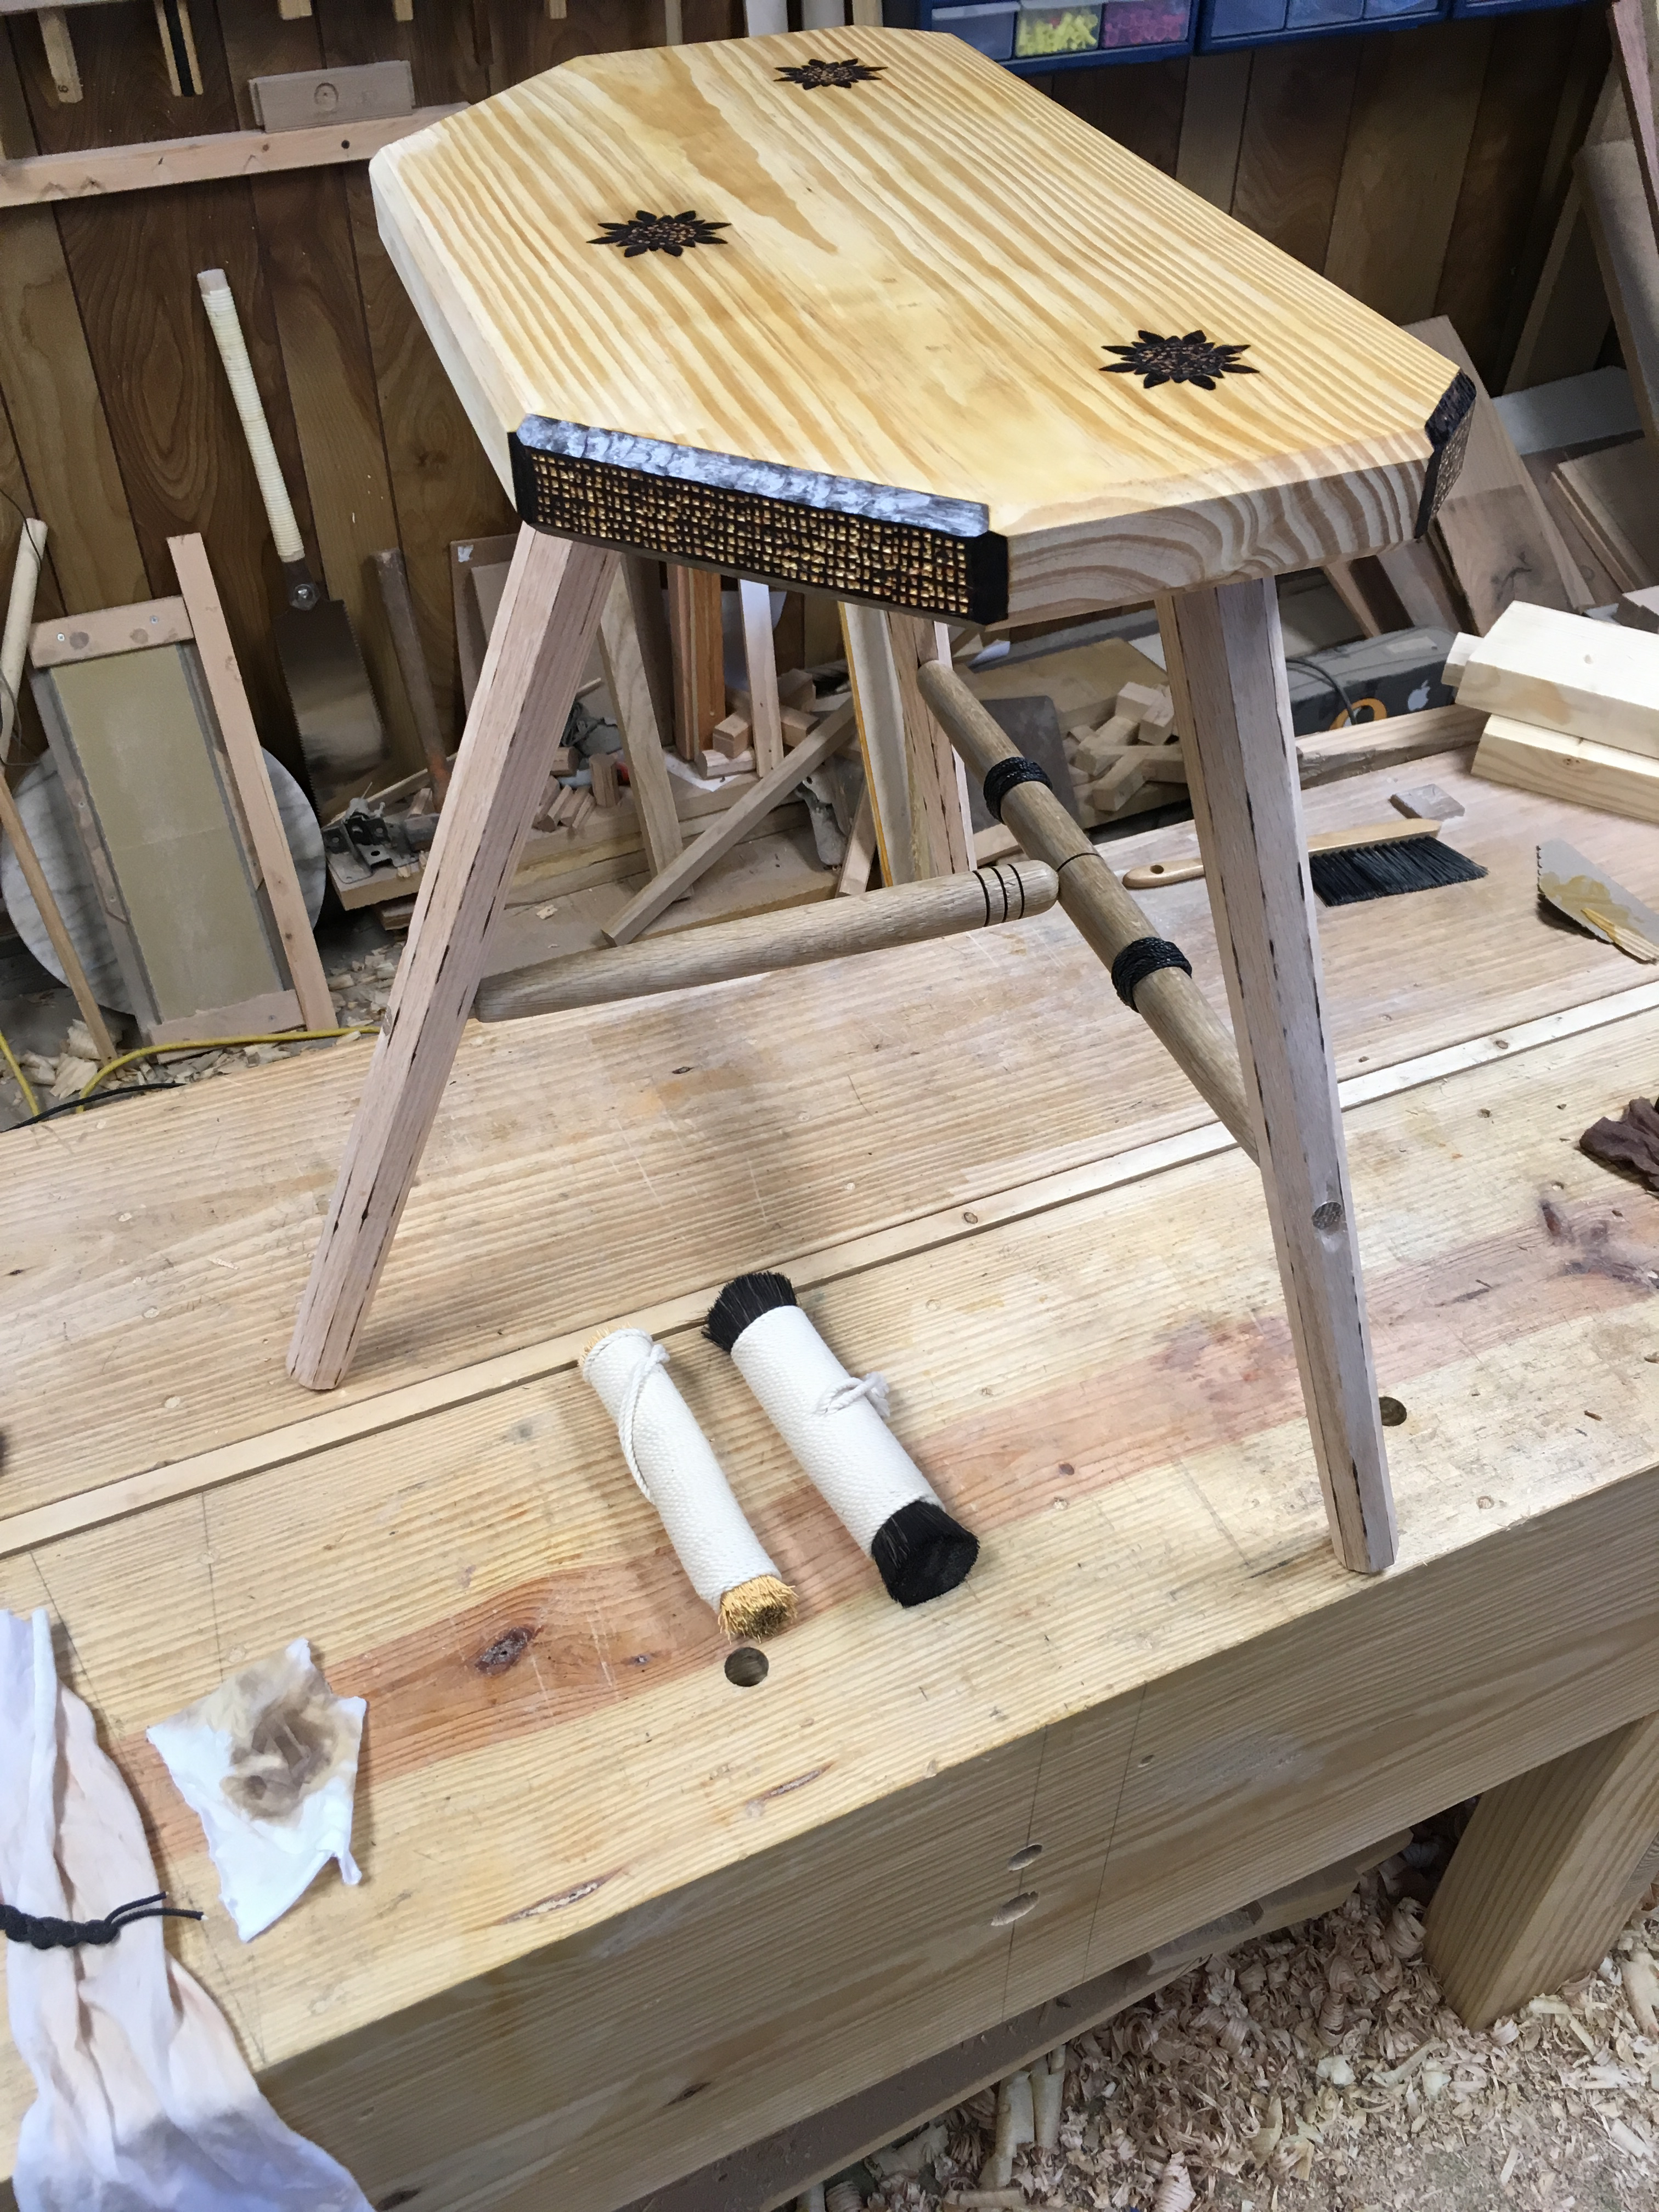
Soon enough I had all of the joinery for the four stools completed. Note that I added Turks head knots to the front stretchers.
Now I could turn my attention back to the seats and begin their shaping. The shape is pretty basic. A rectangle with the corners clipped. All of the edges will receive a heavy chamfer just as I did with the recent table tops. The idea is that these stools should look like they belong with the tables. They don’t necessarily need to match exactly, but have the same general flavor.
Seats are shaped.
All that is left is assembly and to add my “decorative” embellishments. So I assembled the first stool (glue and wedges), stamped in some texture on the clipped corners and went at it with the wood burner. Finally, the seat received the uzukuri treatment.
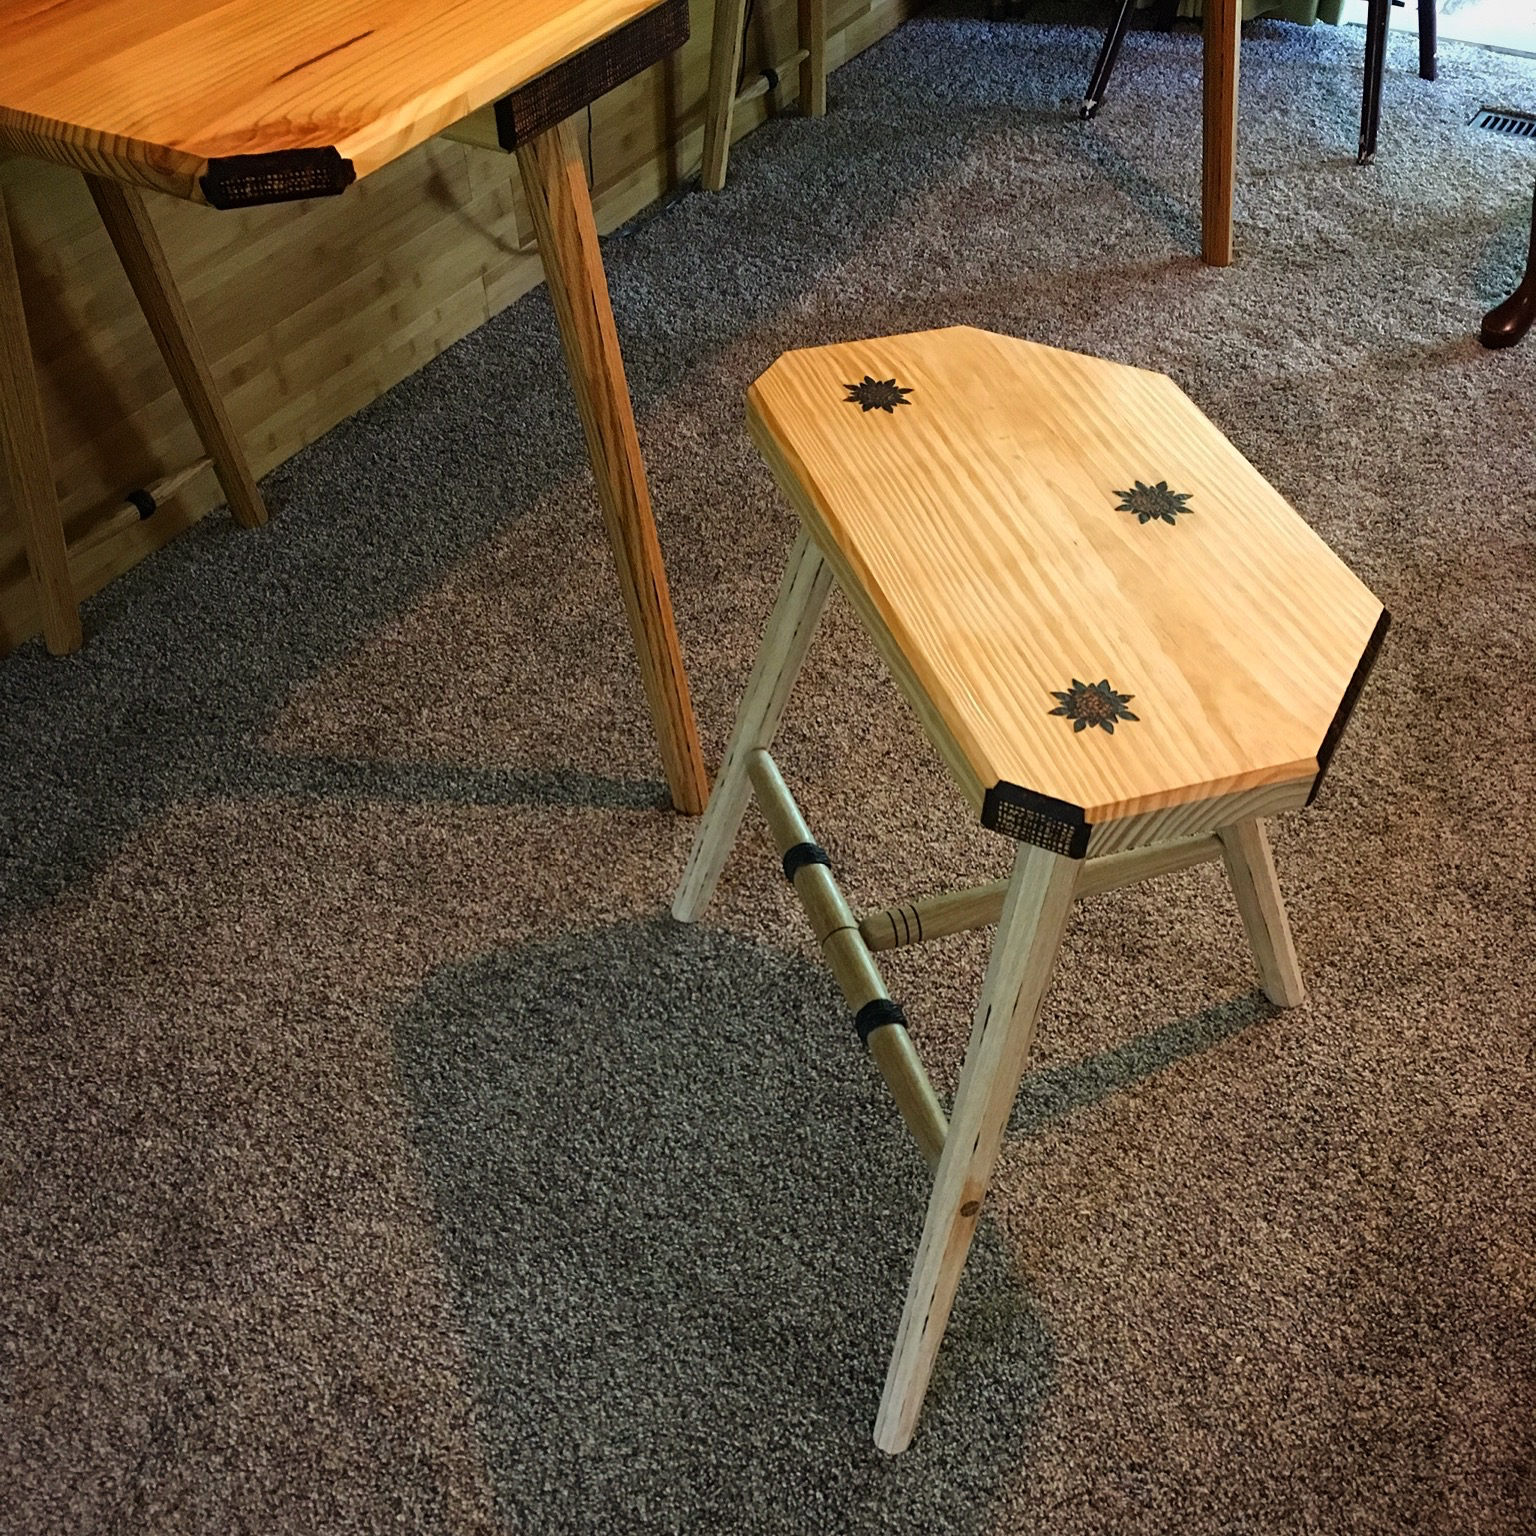
Here is the unfinished stool next to one of the tables. Note the color difference that the oils finish imparts.
 Well, three more to go and then I’ll trim them all for height and start slathering them with oil.
Part 1 Greg Merritt

Pingback: Welsh Staked Stools-Part 1 | HILLBILLY DAIKU
Wow, great progress. So how was the glue-up – seems like trying to get stretchers in place while pounding the legs into their holes can be tough.
The glue up was pretty easy. I installed the stretchers in the legs first. There is enough flex in the undercarriage to just get the legs started into the seat. Then it was just a matter of knocking everything home with the mallet. The last few blows took a good bit of force, but everything seated just fine.
Very nice, you’re giving your pole lathe quite the workout!
Ha, I’m really liking the lathe. Wish I would have built it years ago!
They look fantastic. Nice work.
One thing that I like better about tapered tenons is their adjustability. I only made one stool with round tenons, and the four legs were all pointing different directions. I had to file the mortices and add a bunch of wedges to get the legs straight. How did you get yours to all look so perfect?
Thanks Brian.
I found that I have a knack for drilling angled holes freehand. The reamer is where I get into trouble. I’m really liking this cylindrical method. By far the easiest assemblies Ive done. Practically no deviation in the leg angles.
Like Matt, I was wondering about glue up on these. Did you loose fit the stretchers in the three legs and work the legs into the seat all at once, a little at a time, or did the legs have enough play that before being run home and wedged that you could splay the legs out to get the stretchers in place?
Hey Derek. See my response to Matt.
Pingback: Welsh Staked Stool-Part 3-Complete | HILLBILLY DAIKU