
 Another productive weekend of working in the shop is in the books. Admittedly I did steal a few minutes in the shop after work just about everyday of the past week. That little bit set me up for quite a lot of progress this weekend. I fitted the front bearers. These went pretty well and the only fussy bit was the bird beak detail. All of the joints fit straight off the saw, save one. That one joint only required a quick shaving with the chisel and then it drove home.

The birds beak detail looks far more complicated than it actually is. Joe McGlynn asked about how I would do this detail the other day and I’ll reiterate my response. The trick is having the right tool. I have a small Japanese miter square that is designed for just this sort of detail layout. The foot/base of the square is mitered to match the blade. So all you have to do is knife the shoulder lines, place your knife in the line, slide the square up to the knife and mark the 45deg line. 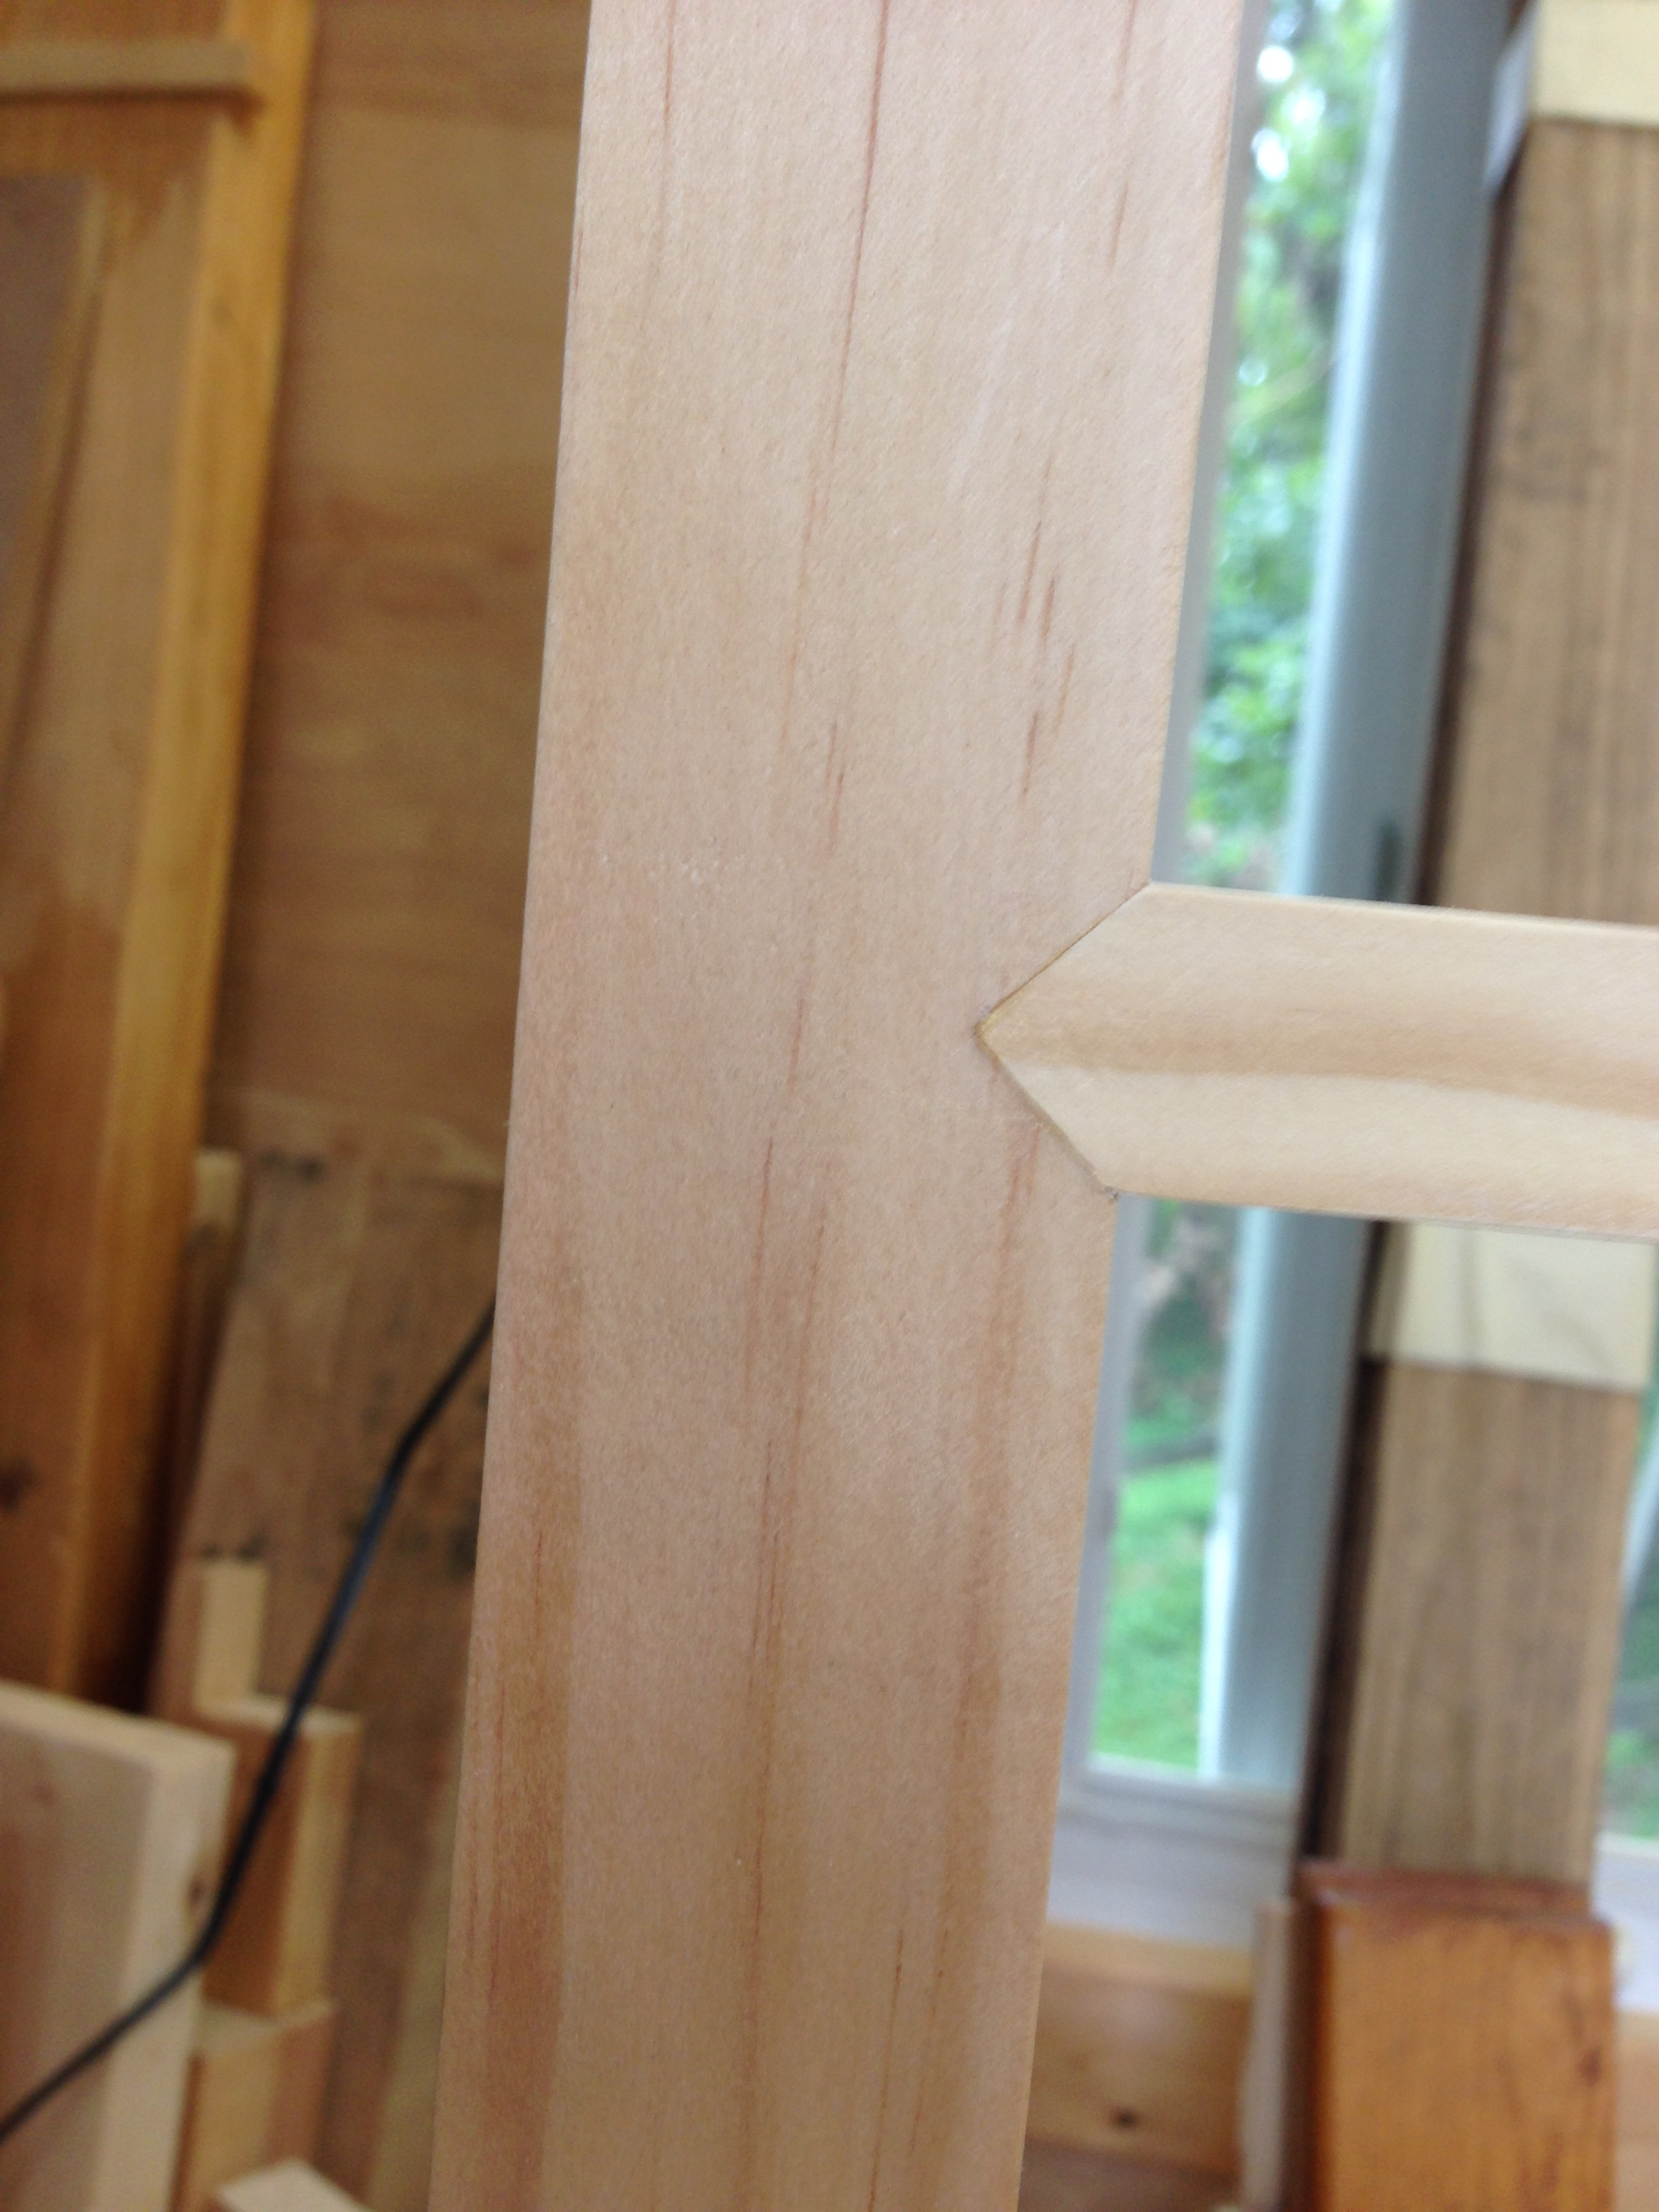 Flip and repeat for the opposite side. Then its just a matter of cutting in the waste. I cut all six of these and only had to fuss with one of them, that was just to square up the shoulder wall.
With the front frame dry fitted, I moved onto fitting the side rails and the handle rails. These were straight forward and the only bit that created a challenge was the stepped tenon. Still not too bad and progress moved along at a pretty good clip.
With the front and rear frames fitted, dry assembled and the disassembled it hit me. HOW THE HELL AM I GOING TO GET ALL THESE PARTS GLUED TOGETHER BEFORE THE GLUE SETS UP? After poking around on the internet I came to the conclusion that liquid hide glue was the solution. I’ve been thinking of trying hide glue for a while now, just never pulled the trigger. A road trip to Woodcraft and I picked up a bottle of Titbond liquid hide glue, some applicator brushes and one small sheet of 6mm birch plywood. I wanted five but they only had the one. I’ll have to order the rest.
Once back home I sized and cut the panel for the rear frame. I also cut the wedges I would need. Glue-ups always make me a little nervous, but this one more than any other. Lots of parts and a glue I had never used before. Nothing left to do but jump in with both feet. I actually liked using the hide glue. Maybe its the color or the consistency, but I know its not the smell. The glue-up of the rear frame assembly went just fine. All of the parts slide together and the hide glue gave me plenty of assembly time. Not a single joint locked up on me. Something common with yellow glue. The hide glue actually lubricated all of the joints, making the assembly pretty easy. The only problem was that I looked like a five year old on his first day of using glue during craft time. I had glue all the way up to my elbows. Good thing hide glue washes off with water.
Today I did another dry assembly to verify that I hadn’t missed any possible errors in size or orientation of parts. Then I glued the front frame assembly together. This went much better. Almost no glue on myself this time. Once the front frame was in the clamps, I cut and fitted all of the side bearer pieces. The nice thing about the side bearers is that they are interchangeable. As long as the face side remains up, they can be installed in any location. This will make that part of the assembly a little easier. Other than a final cleanup of the front and rear frame assemblies, I’m dead in the water until I get my hands on some more birch plywood.
-
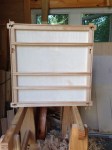
- Rear frame interior.
-

- Outside of rear frame assembly.
-
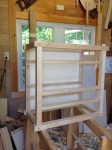
- Dry assembly for a double check.
-

- Front frame in the clamps.
-

- Bird’s beak detail.
Greg Merritt

Hi Greg coming along great , this would be a great project to do in a class making the cabinet and the special aids to manufacture You should rent bench space off Paul in Wales I am sure you could fill a class
Thanks David. It’s coming along pretty well so far.
Teaching a class on building this cabinet would be both terrifying and thrilling. However, I’m not so sure that I, or my little HB tansu, are anywhere near that level. One day I may allow myself to dream of such a thing though. Would’t that be something!?
Greg
That’s really coming together Gregg, looks good. I must say it’s an “under-appreciated” furniture style in the US now, maybe you’re on the bleeding edge of something. How do you plan to finish it? Oh, pleased to see your drawings preceeding the Shaker Bench project, nice touch.
Cheers
Thank you Randy.
I think that the style is often overlooked based upon what someone sees first and identifies as “tansu”. Tansu is a generic term that encompasses almost all Japanese cabinetry, from strictly utilitarian to the most fanciful and ornate. This makes it difficult for the non-Japanese speaking to differentiate what’s what. I’ve been reading and researching quite a bit on this style and still don’t have a clear understanding. At any rate, I doubt that my simple little cabinet will have much impact on launching a trend. 😉
Thanks also in regards to the drawings. Hope that you are finding them useful.
Greg