
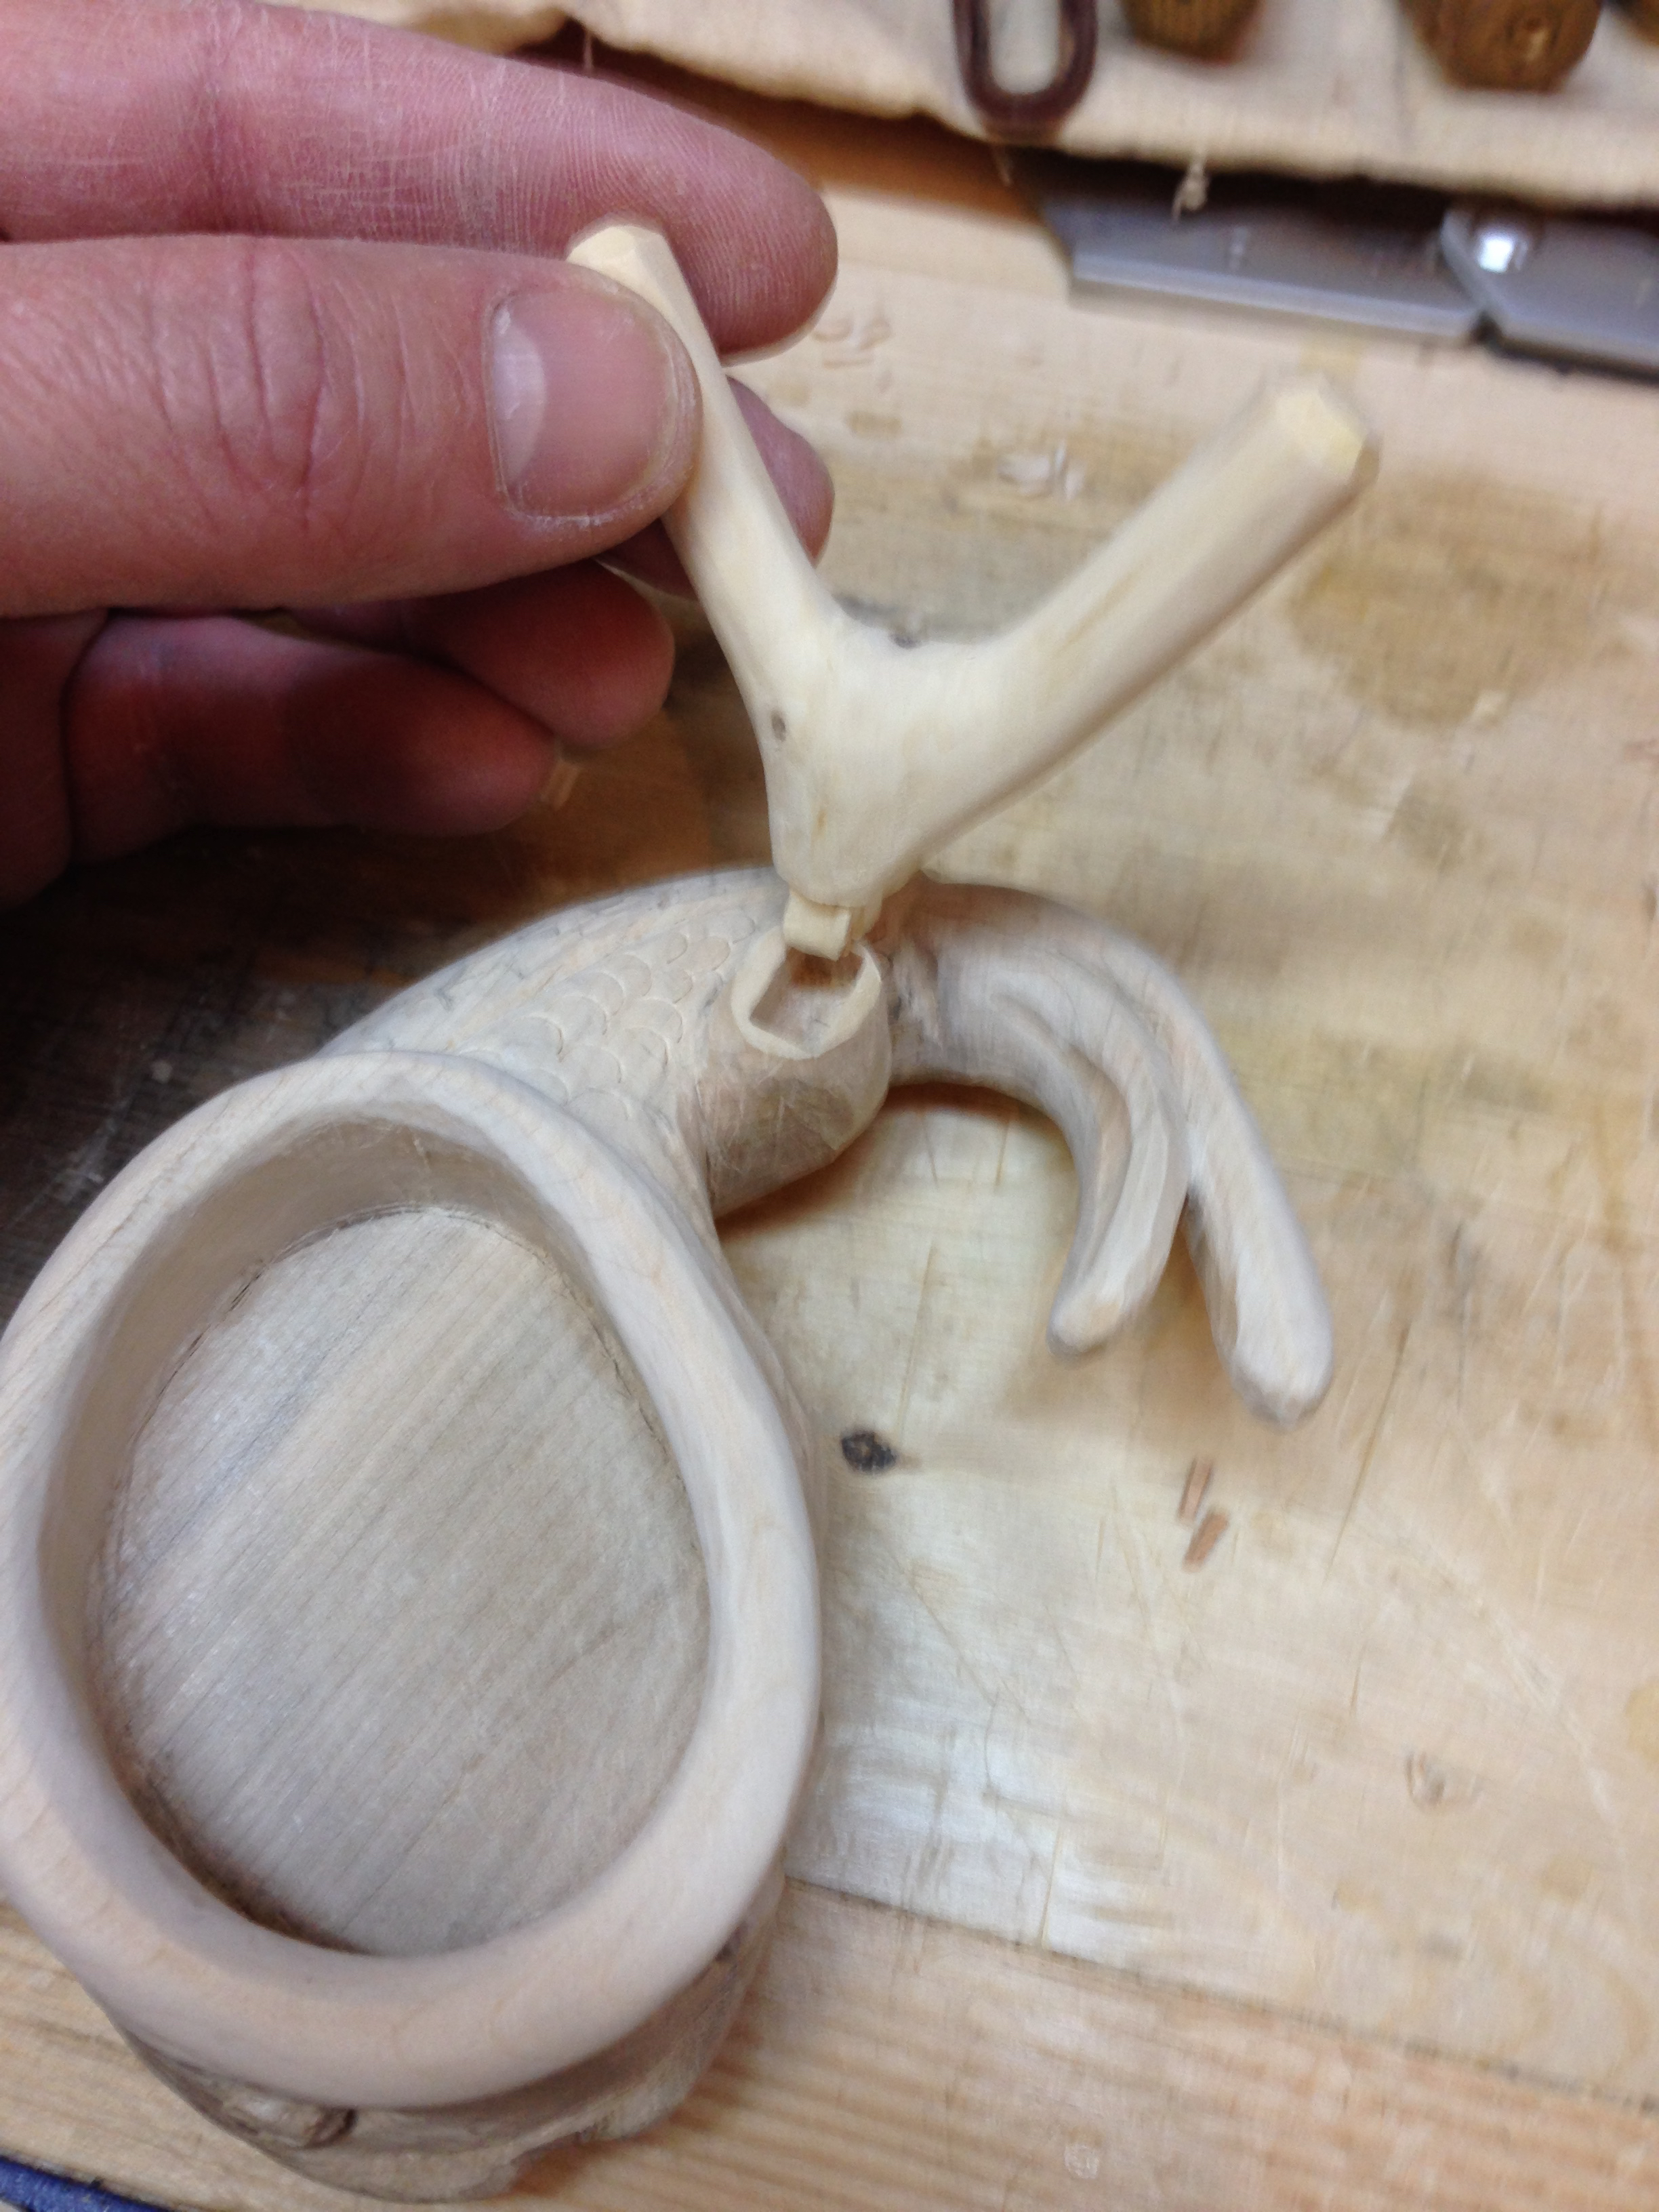
After a few hours of carving, actually let’s call it whittling because I wouldn’t call what I do carving, my sumitsubo is a little more refined. It may actually look like a koi fish! I would like to point out a couple of things. Any shape will work, use you imagination and have some fun with it. As long as you make a recess for the silk wadding, your golden. Everything after that is just for decoration and fun.
Anyway, my next step was to install the twig that will act as my sumisashi rest. Before I started shaping, I chopped a mortise in my block and fit a tenon on the end of the twig. I simply glued the twig in place with a little CA glue. Once the glue was set, I blended the joint the best I could and added some carving to further blend the two pieces together.
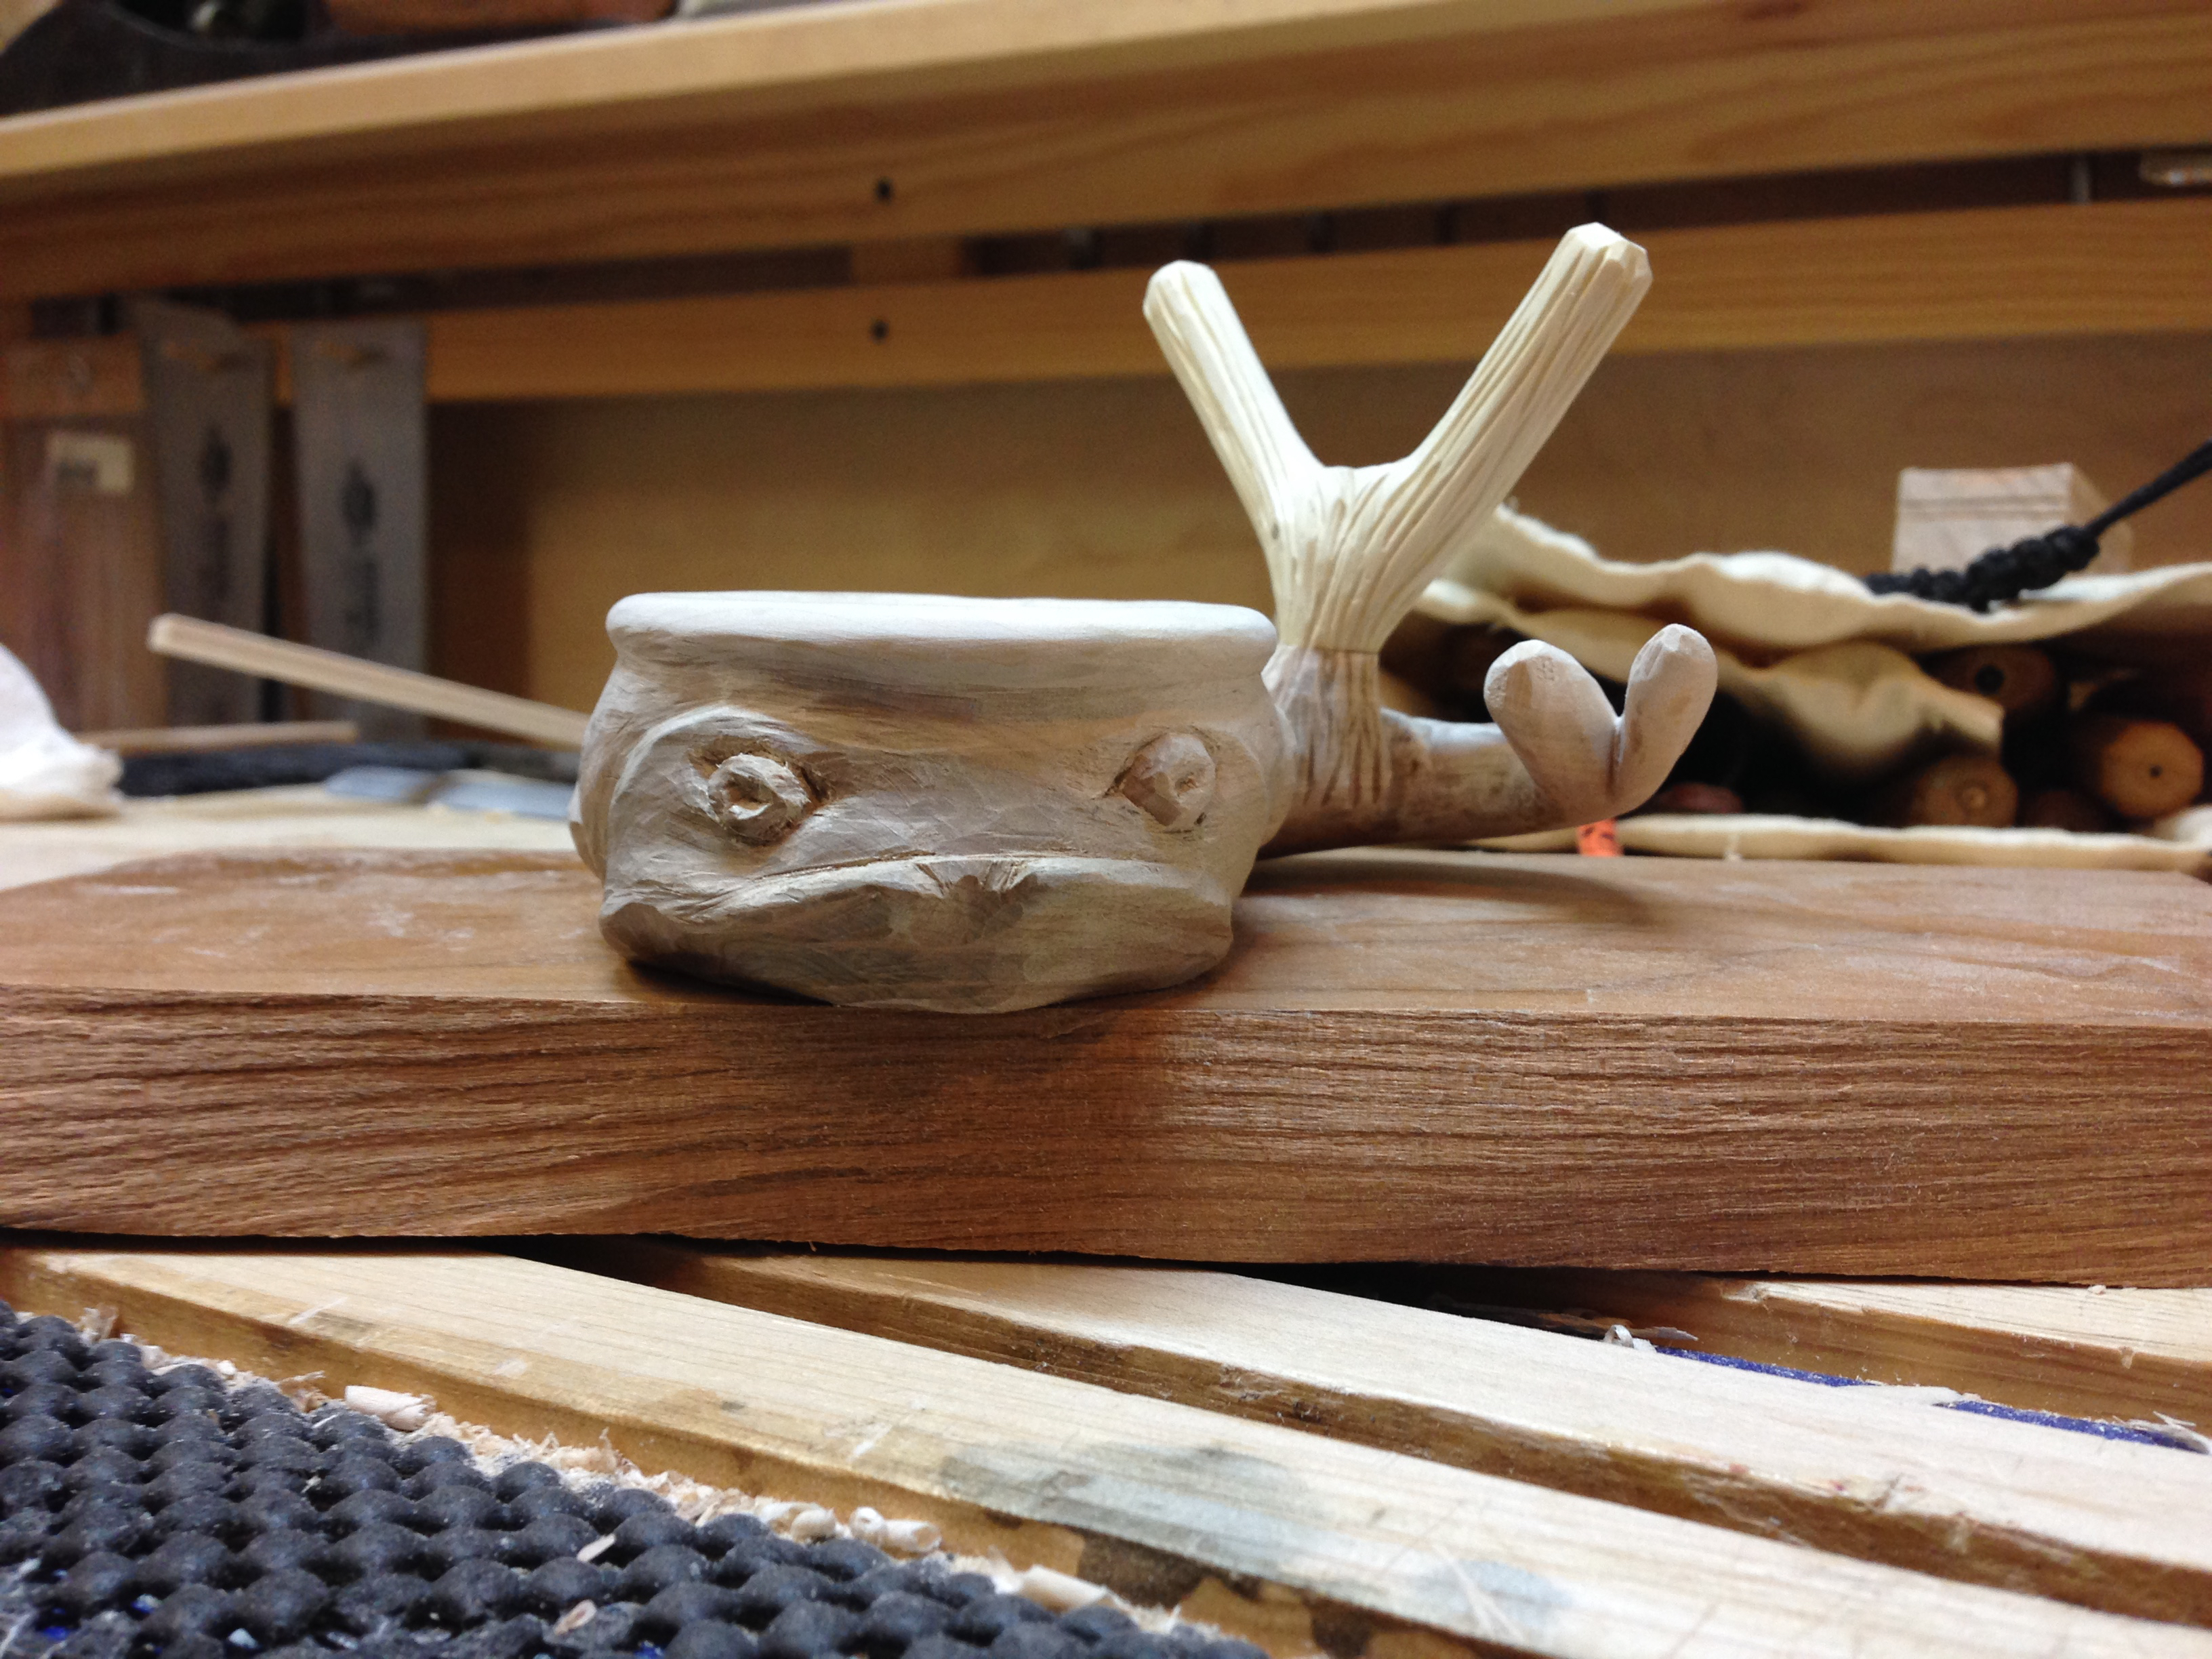
A little clean up and a light sanding to take care of any sharp bits or pieces that might snag on something later and cause a piece to chip out.

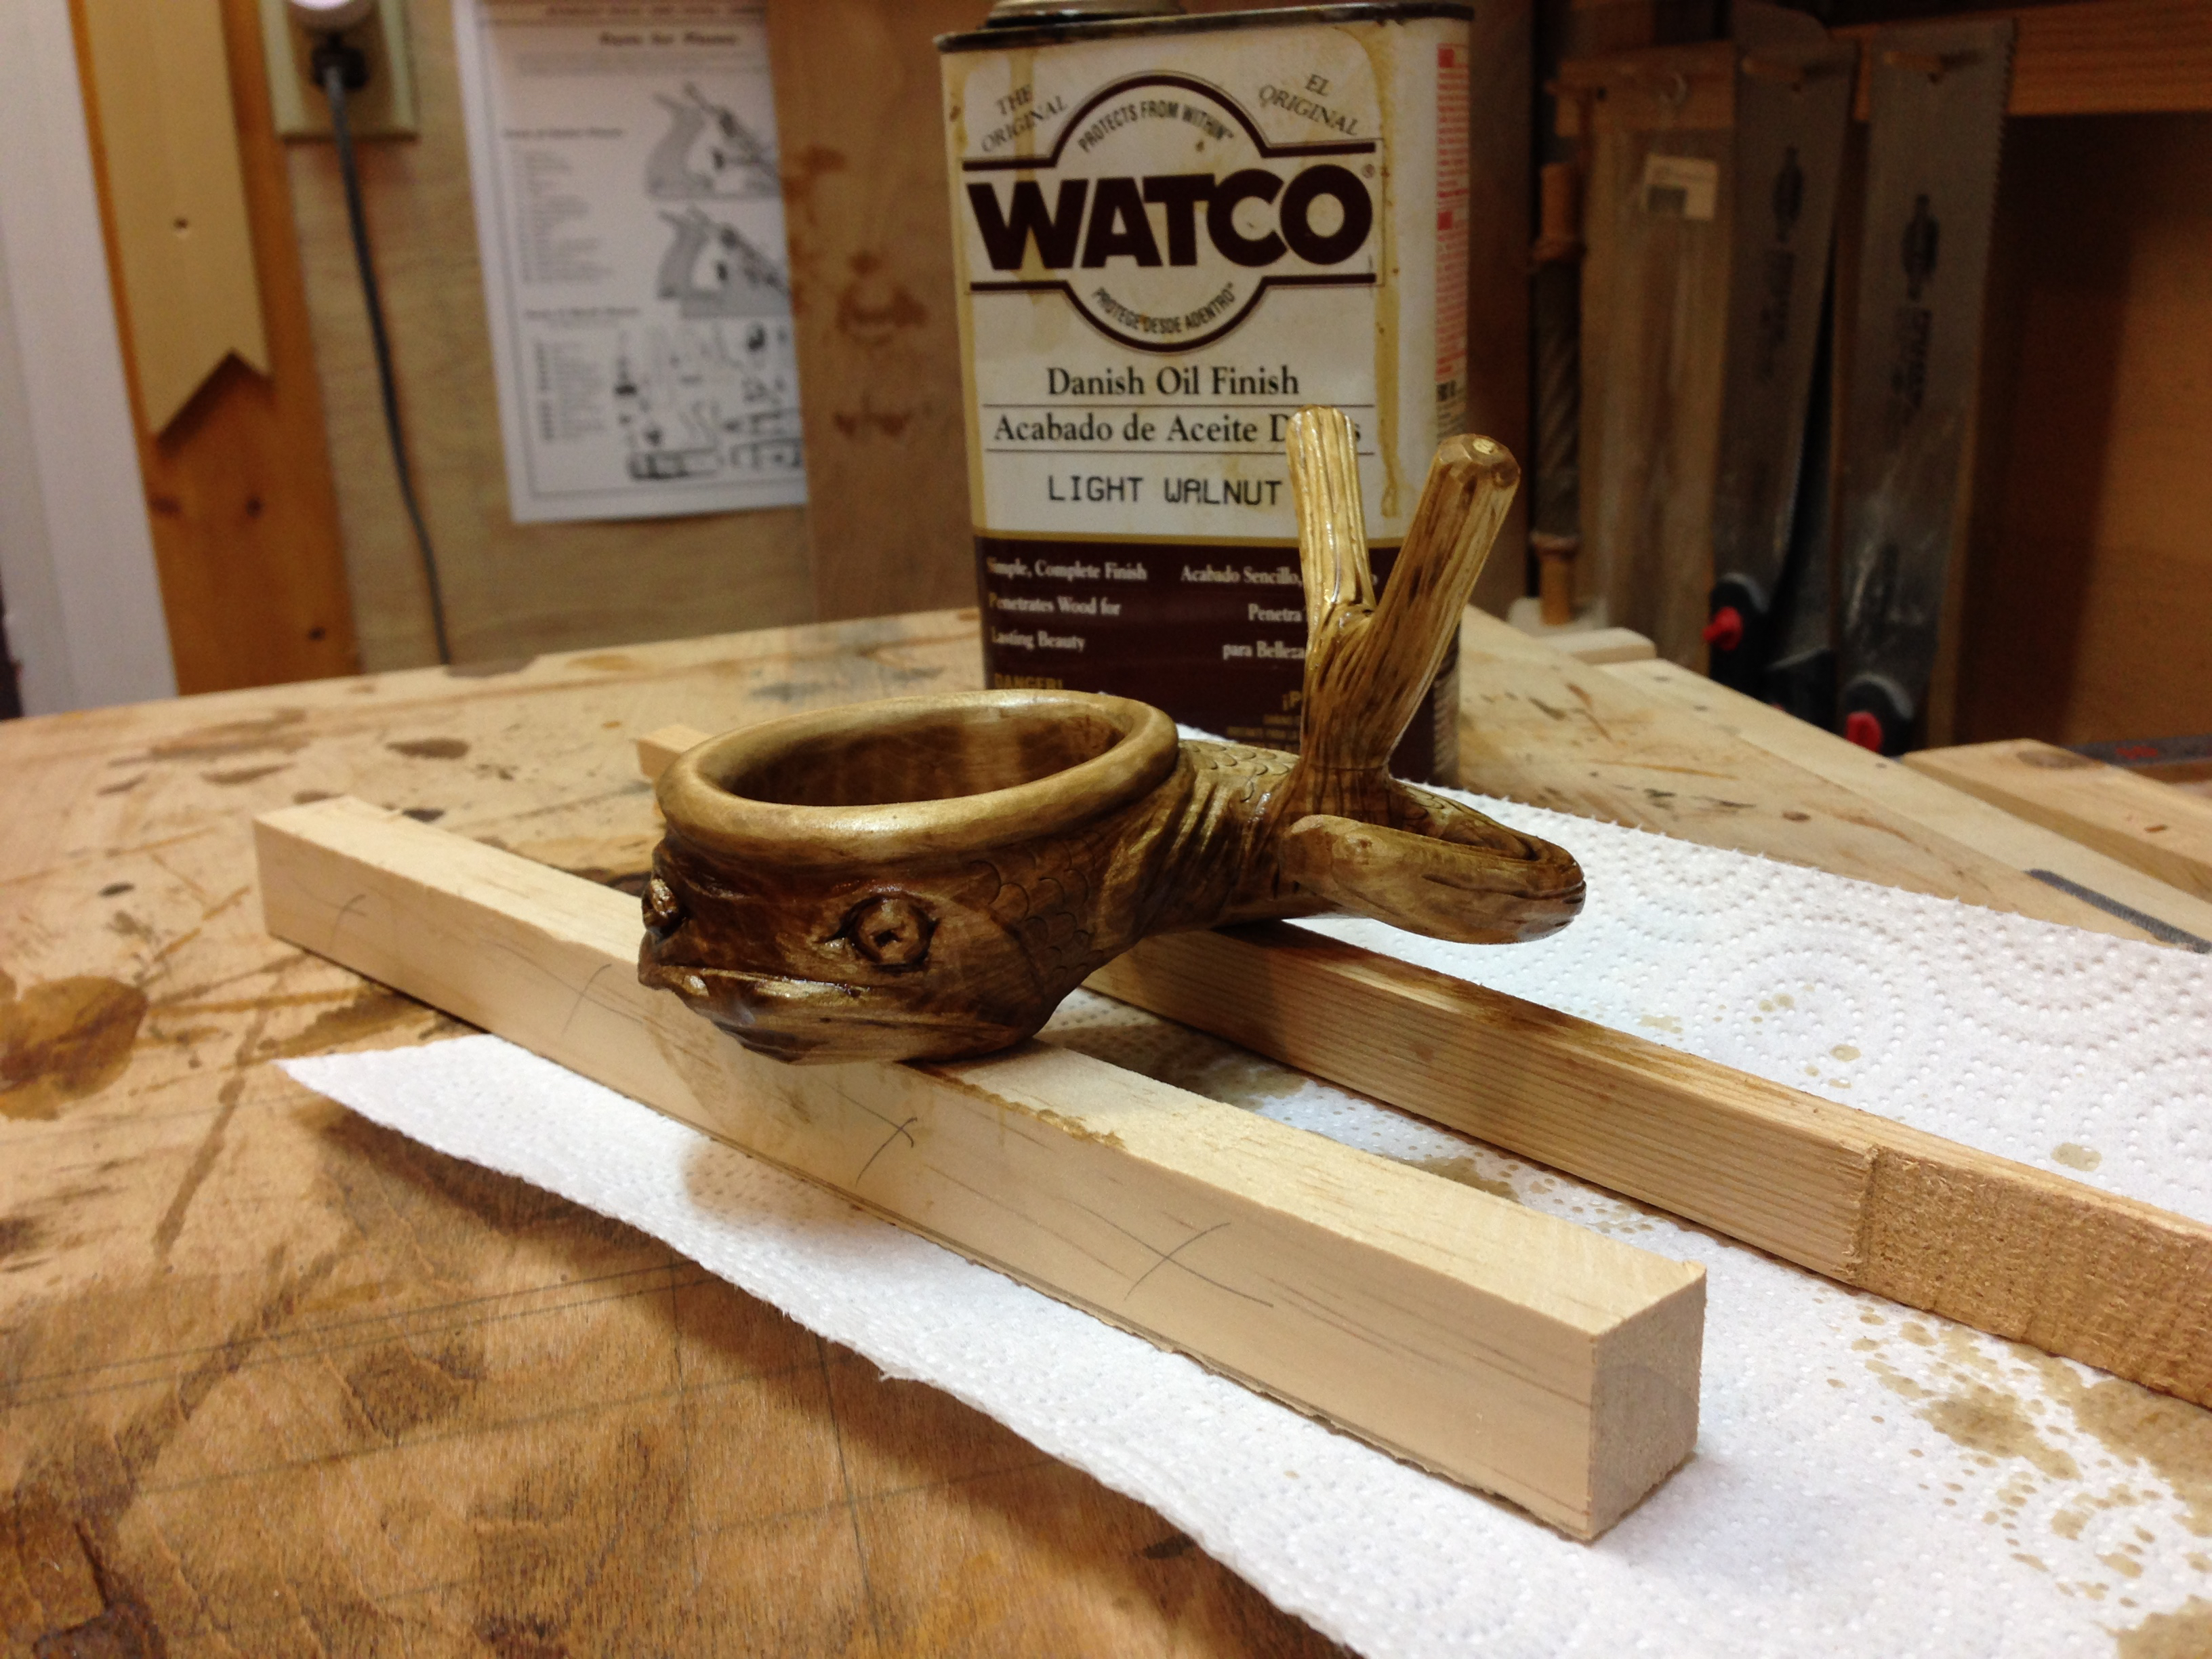
I wanted to add a bit of color. So I added a coat of Light Walnut Danish Oil. I’m pretty happy with it so far. Over the next few days I’ll add two or three coats of Tried and True Original finish. I should be able to call it done after that and it will be ready for a test run. My supplies should arrive in a couple of days and I should be able to post about the setup and show how the whole system works.

Greg Merritt

Hey, that came out pretty cool!
Thanks Joe. I’m having a lot of fun with this.
Greg
The danish oil made the details pop out. What a difference a little oil made.
Sometimes it’s a good thing. Sometimes…not so much. LOL The maple was just too white and needed a little color to bring out the detail.
Greg I really admire the design and detail you put in your work. I really, really admire that you just get it done.
Thanks Brian. I held off doing much of anything for a lot of years for a lot of different reasons. Now, I just go for it. It’s a lot more fun this way. As far as getting things done…once I start a project I steal every minute I can to work on it. Sometimes its just 15min, but it all adds up.
Greg
We have much our stuff in storage still, but i borrowed my brothers workmate to sart doing some Christmas stars, my wife crochets hats and scarves and so now i make buttons for her. I think we have agreed for the space that i am taking up in the little used dining nook……. Id be better off with my bench. Plus Ive really broken the already broken leg on the workmate…..soooooo….
Im just glad to be making stuff again regardless of scale, I just sanded and oiled 4 buttons last night….. So i agree, 15 minutes is still 15 minutes
I’m sure you’ll be glad to get your bench back to work. It’s great that your doing what you have to in order to keep making. You should post some pics of the buttons. I love those useful type projects.
Greg
I will try and get some decent shots. The detail in the sycamore pieces are really incredible.. Well to me anyway. I really dont think the wearers of the scarves / hats will give two hoots.