 So the boy has decided that the tansu has some utility and has requested that I build one for him. So I agreed. Since he will be moving out in a few short years I thought an ultra-portable option would be a good idea. So I sat down with my sketch book and scribbled a few options. I finally settled on a design that has the same height as the first two that I built but only half the width. I like the height that I have been using. Basically its side table height and works well beside a chair or bed. The width reduction will give this tansu a square footprint and will easily fit just about anywhere. The decreased width will make sliding doors impractical. So I came up with an asymmetrical drawer layout for this build.
I made a trip to the local Home Depot yesterday and purchased enough pine material to build the basic carcass. As per my usual, I’ll be using birch ply for the panels and will be ordering this from an online source. I have yet to decide on the drawer front material. I may play with species selection to accentuate the asymmetrical drawer layout.
The first order of business today was to create a full-scale shop drawing. I can’t emphasize enough how important I feel this to be. The drawing makes the layout and checking of parts so much easier.
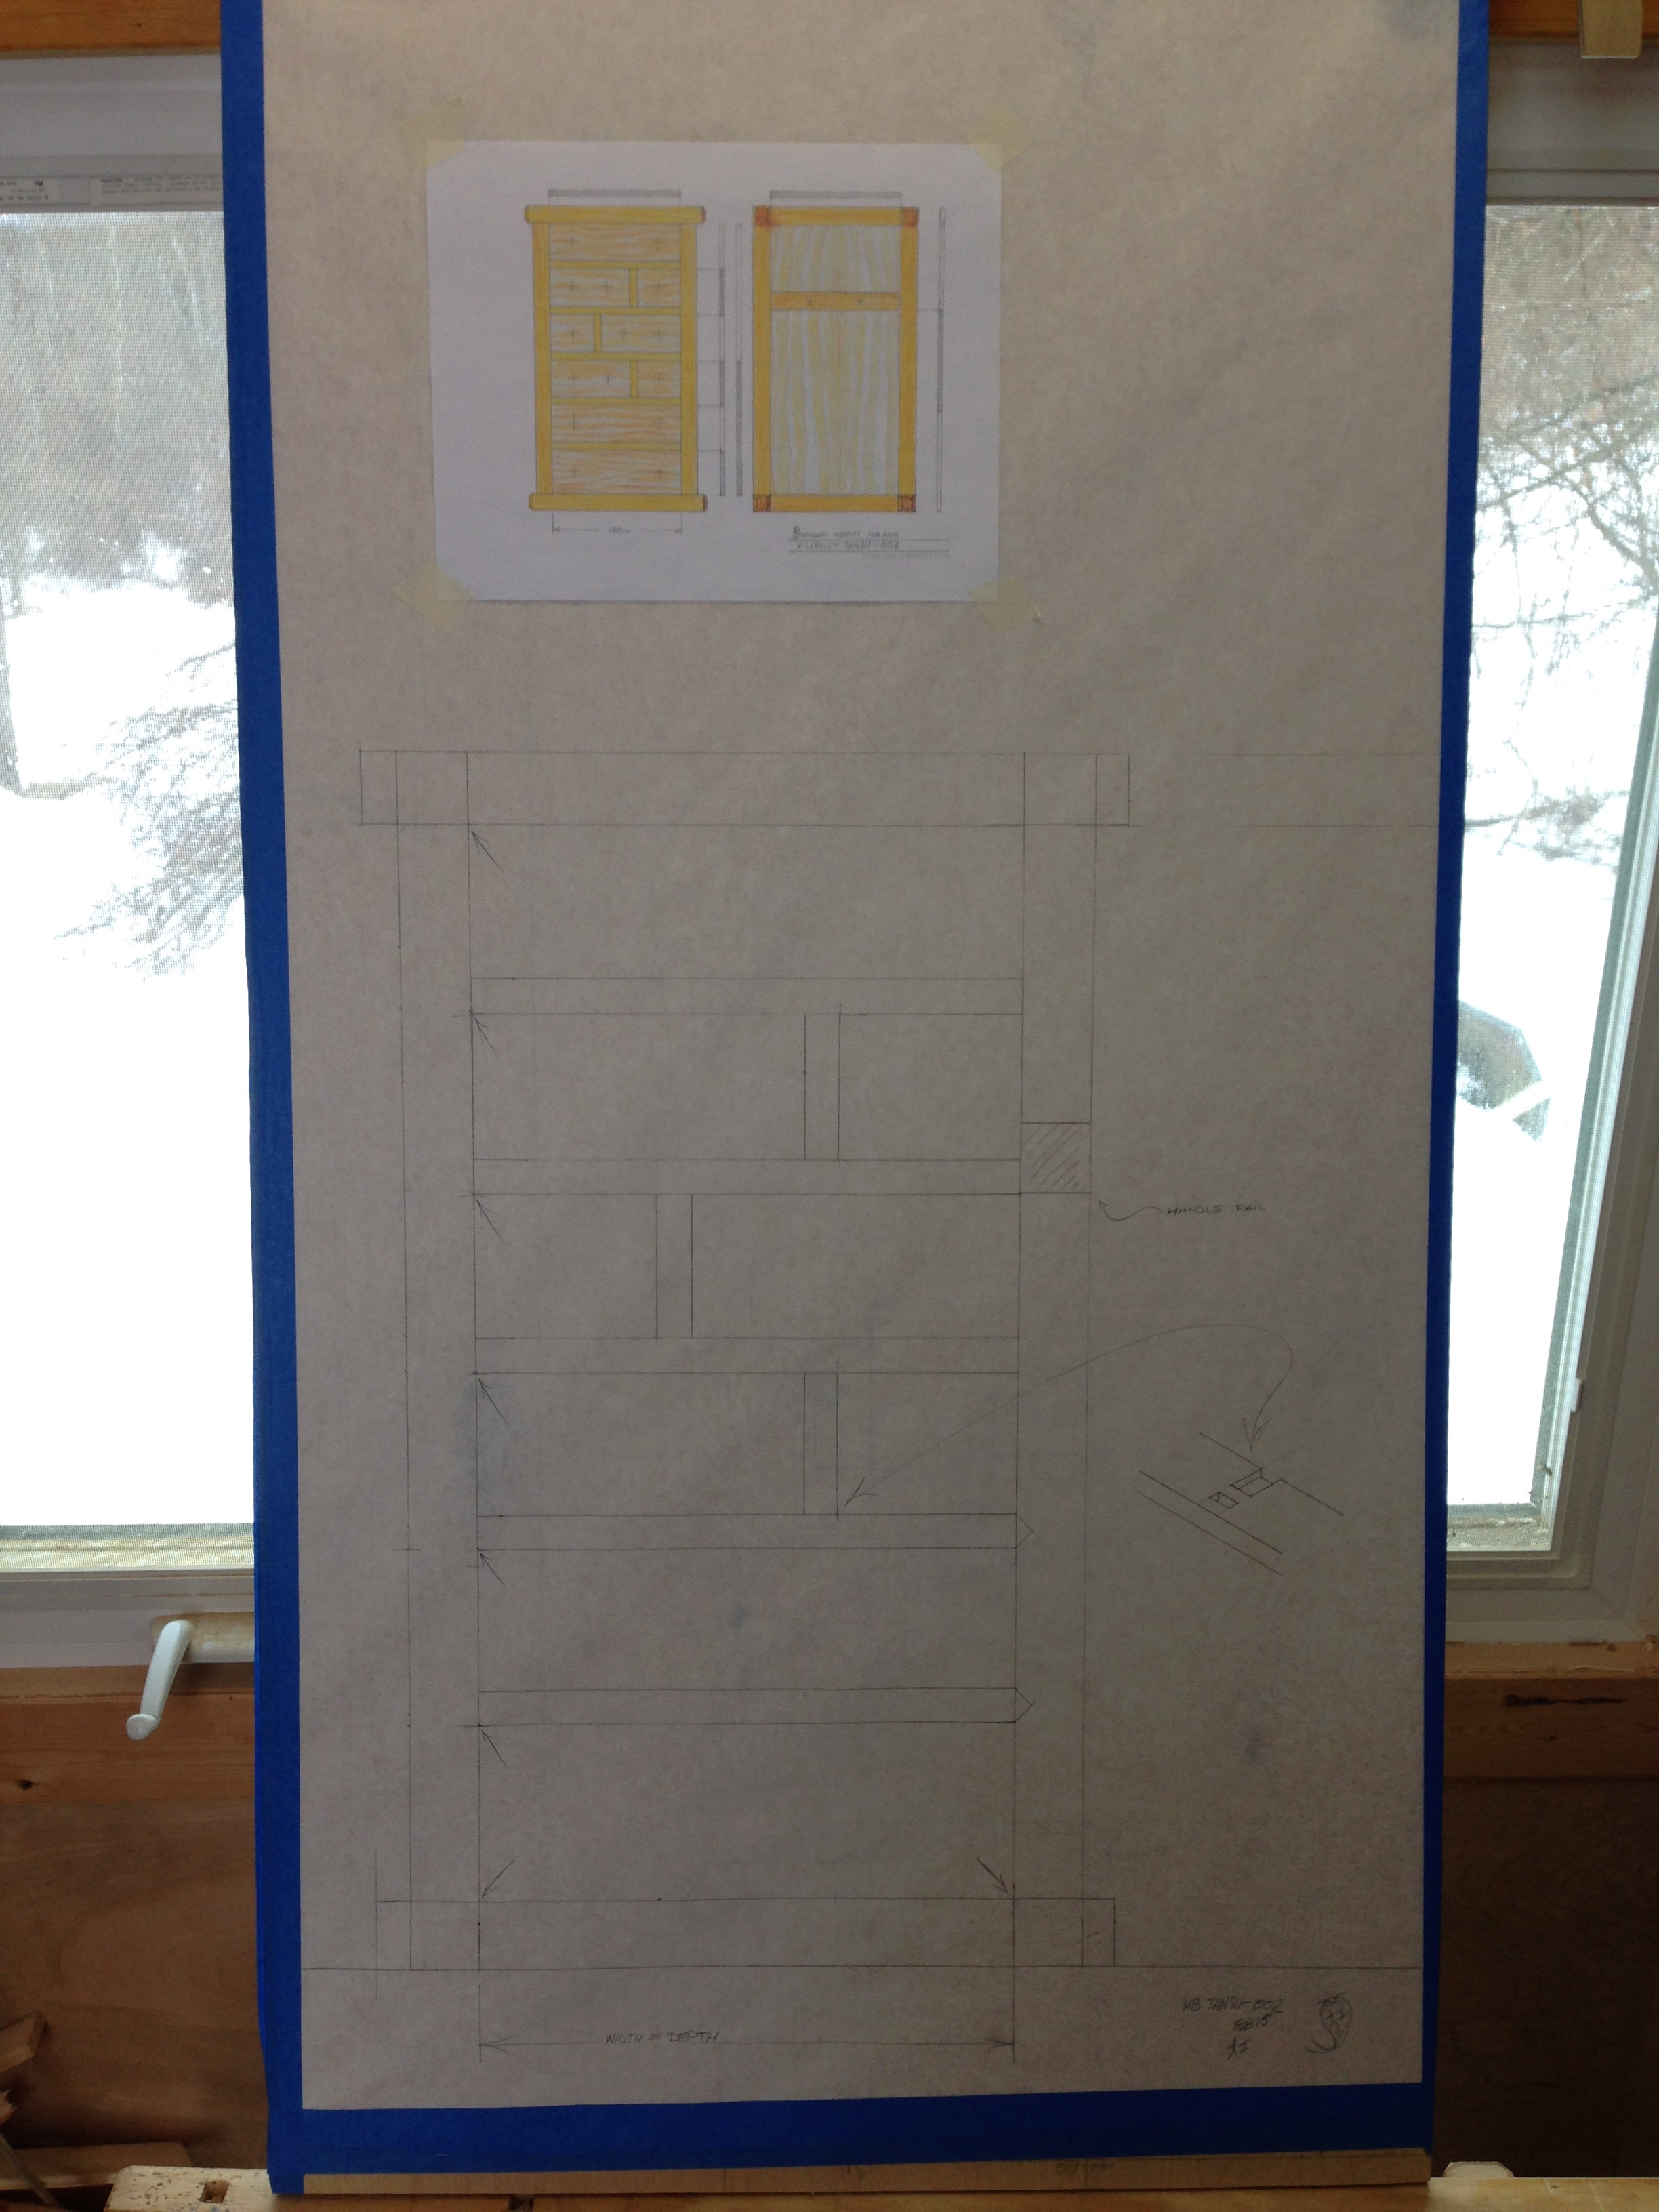
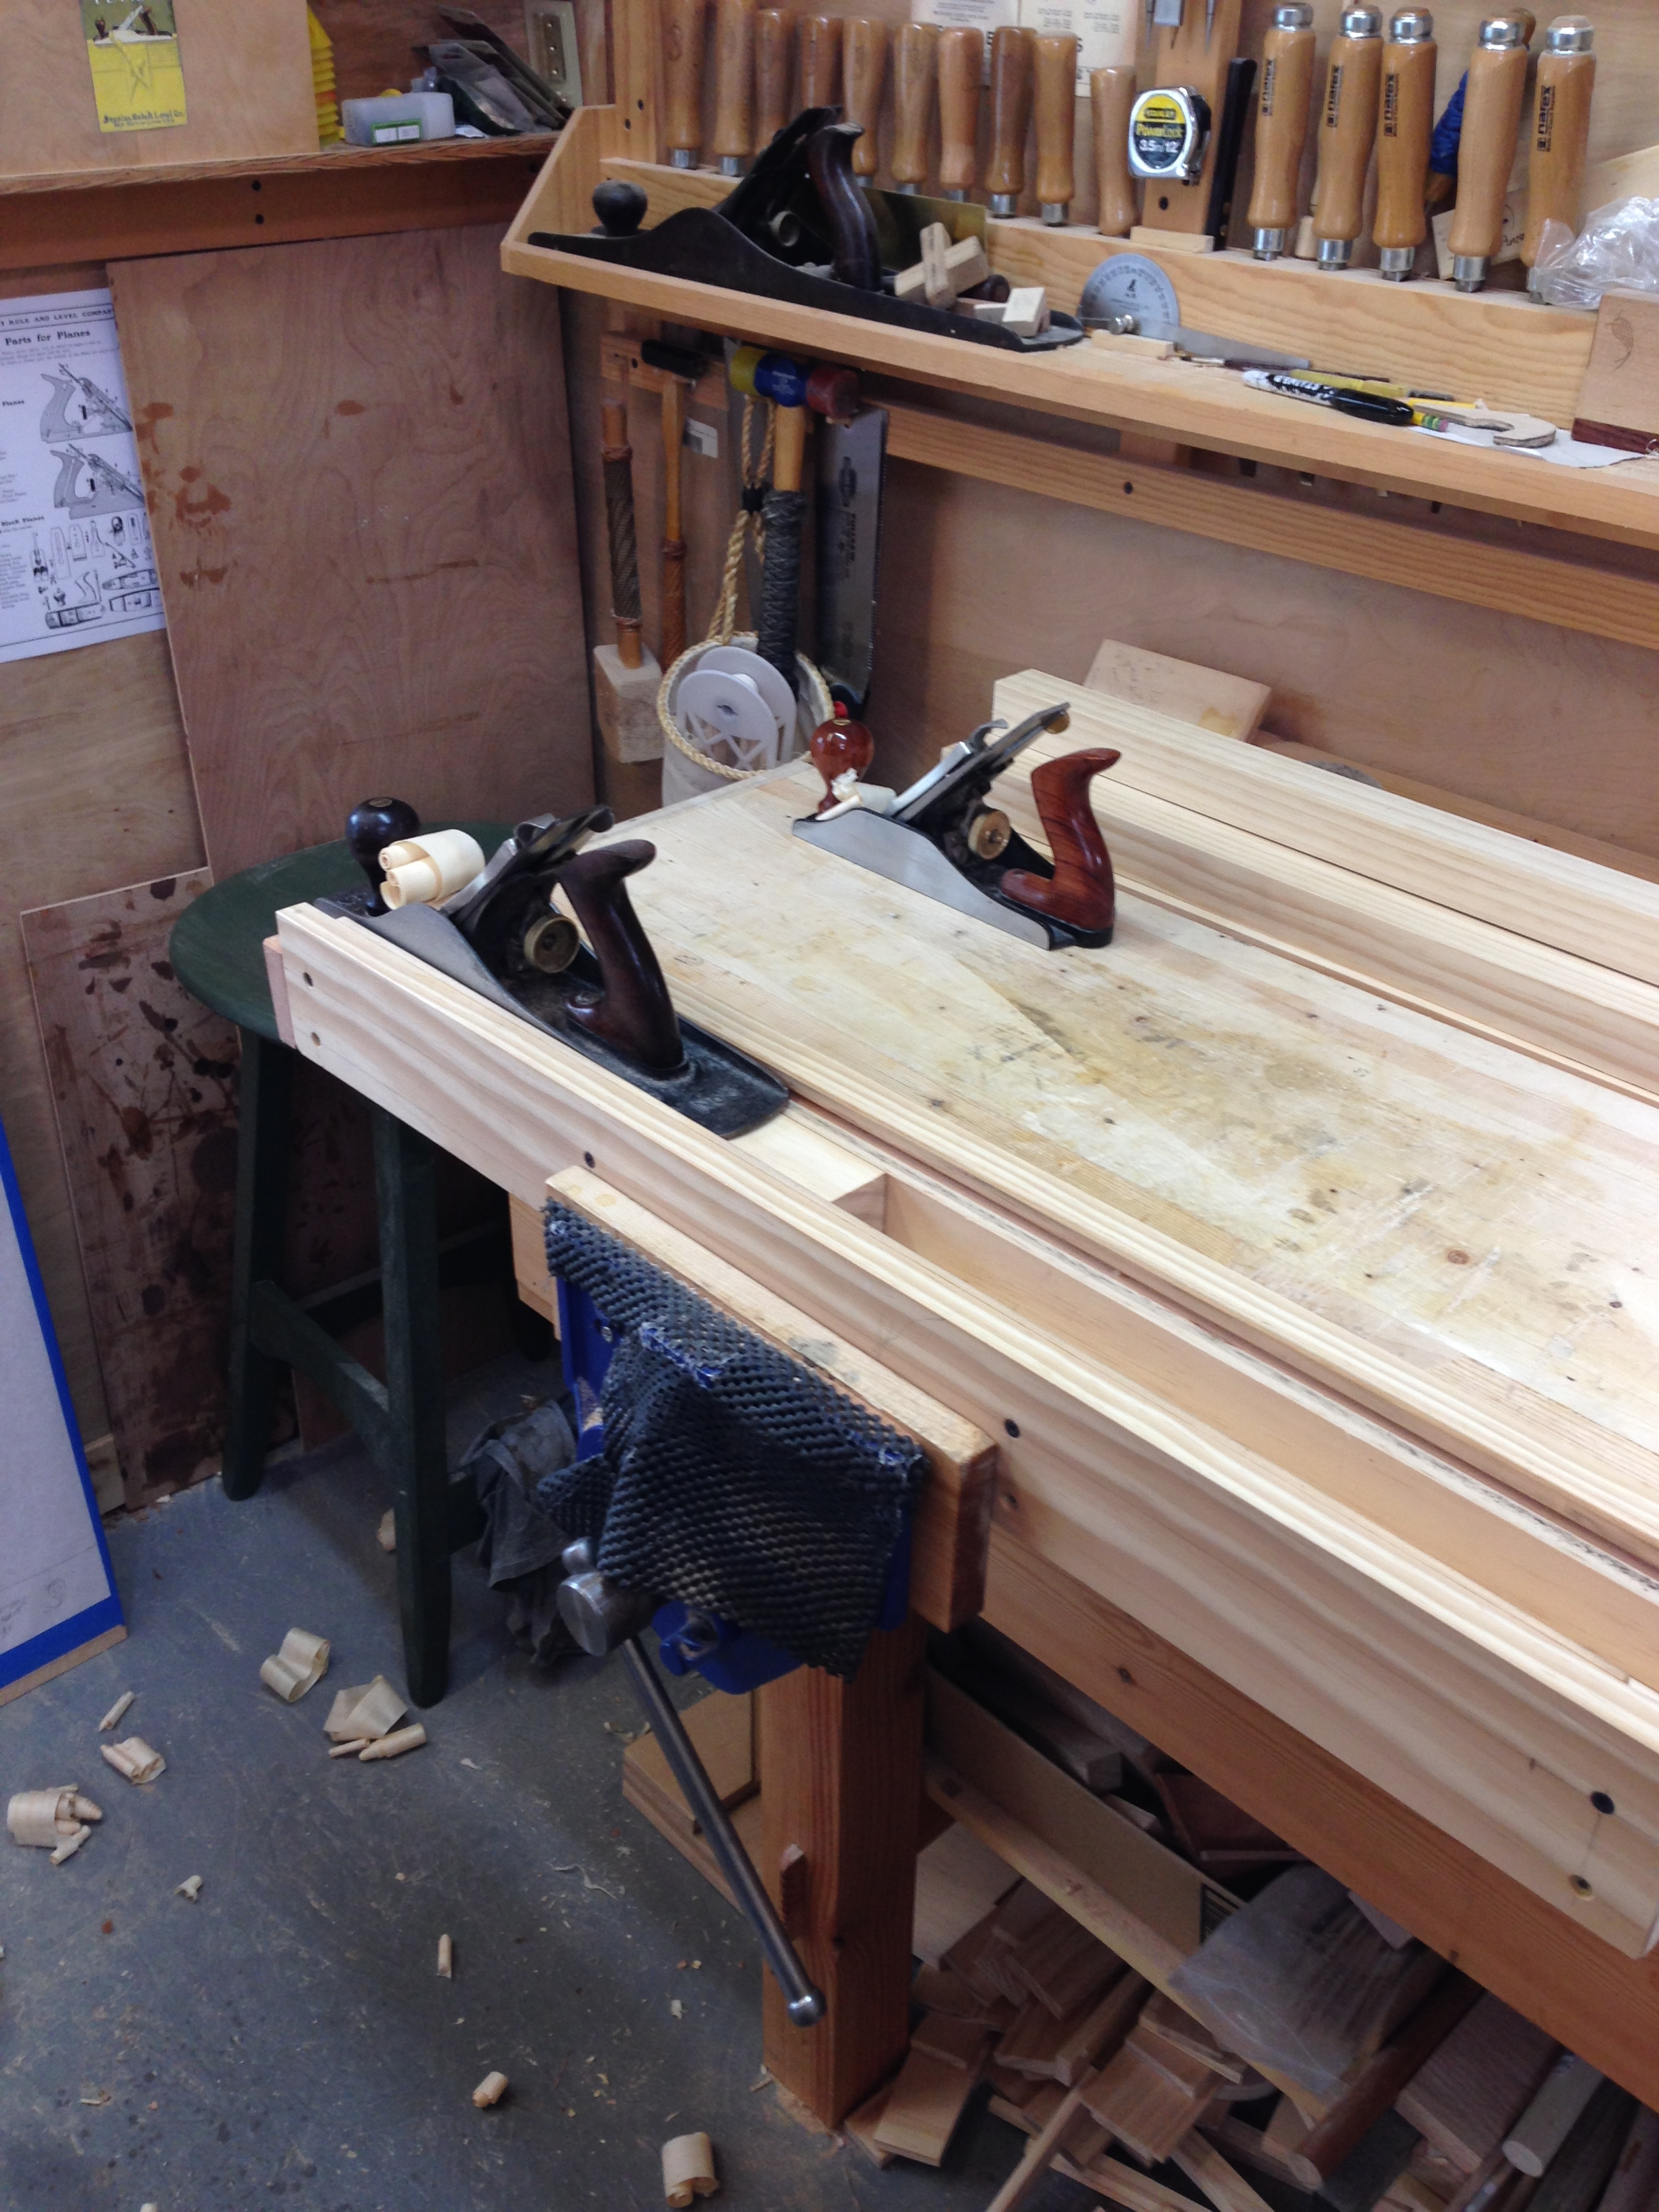
With the drawing done I turned my attention to processing the lumber for the frame. Pulling lengths of members directly from the drawing. Once all of the framing members were cut it was time to plane them all to a uniform width and thickness. These parts are square in cross section and I use a purpose built planing jig to ensure that they are identical. I place each piece into the jig and plane until the plane bottoms out on the jig and no more shavings can be produced. I also continually rotate each piece so that each face is planed. This step is well worth the effort. The uniformity makes the layout and subsequent fitting of the joinery much easier.
When building these tansu I start with the vertical corner posts. Using one as a master, I transferred the joinery locations directly from the shop drawing to the work piece.

I then clamped the remaining three posts to the master post and transferred the joinery locations. This ensures that all of the joinery lines up across the work pieces. If your new here I should tell you that I use a particular set of joints for building these tansu which you can review by following this link. Anyway, I also created a dedicated marking gauge for the marking of this joinery. So I then used that gauge to mark out the joinery and then used my sumi pot and sumisashi to mark all of the waste.

With the joinery layout completed on the posts I then plowed all of the required grooves in those pieces.


I still had enough shop time to chop and cut the joinery in one post. I’ll not cut the end tenons until after chopping the mortises in the cross rails.

Like normal, work and weather will dictate how much, if any, shop time I get this week. Worst case will be that I’ll have to wait until next weekend to further my progress on this HB Tansu.
Greg Merritt Part 2

Nice design. How do you like your plow plane? I saw a video of one in use today. Looked pretty satisfying.
Hi Jeff. That plane is a joy to use. I wrote a post about it a while back.
https://gregmerritt.wordpress.com/2014/08/06/my-groovy-secret-weapon/
Greg
Could you send me a link to that video?
It is just a small part of this 31:00 video. https://www.youtube.com/watch?v=yvhn-PAfEW4
Thanks for the link Jeff. The video shows a European style plow plane, mine is a completely different animal. The plane pictured above is a Japanese, fixed width/depth plow plane and is used on the pull stroke.
Greg it looks like your bamboo skewers are catching on http://www.popularwoodworking.com/woodworking-blogs/contributors-blog/tansu-bamboo-nail
Interesting…he talks about using them but does not show any of his applications. Nothing about them on his website either. Strange…
At least he’s promoting the idea. 🙂
Greg
I have a feeling its an upcoming project.
I see. A teaser for the upcoming webinar.
Thanks to your urgings i have am now a proud owner of a roll of kraft paper…..looking good as usual sir.
Awesome! Full-size shop drawings are a game changer IMHO. I’m actually sketching ideas for a few posts on basic drawing. Not sure too many will find it of interest, but at least it’ll be out there.
Greg
Pingback: HB Tansu #3-Progress 2 | GREG MERRITT – BY MY OWN HANDS