
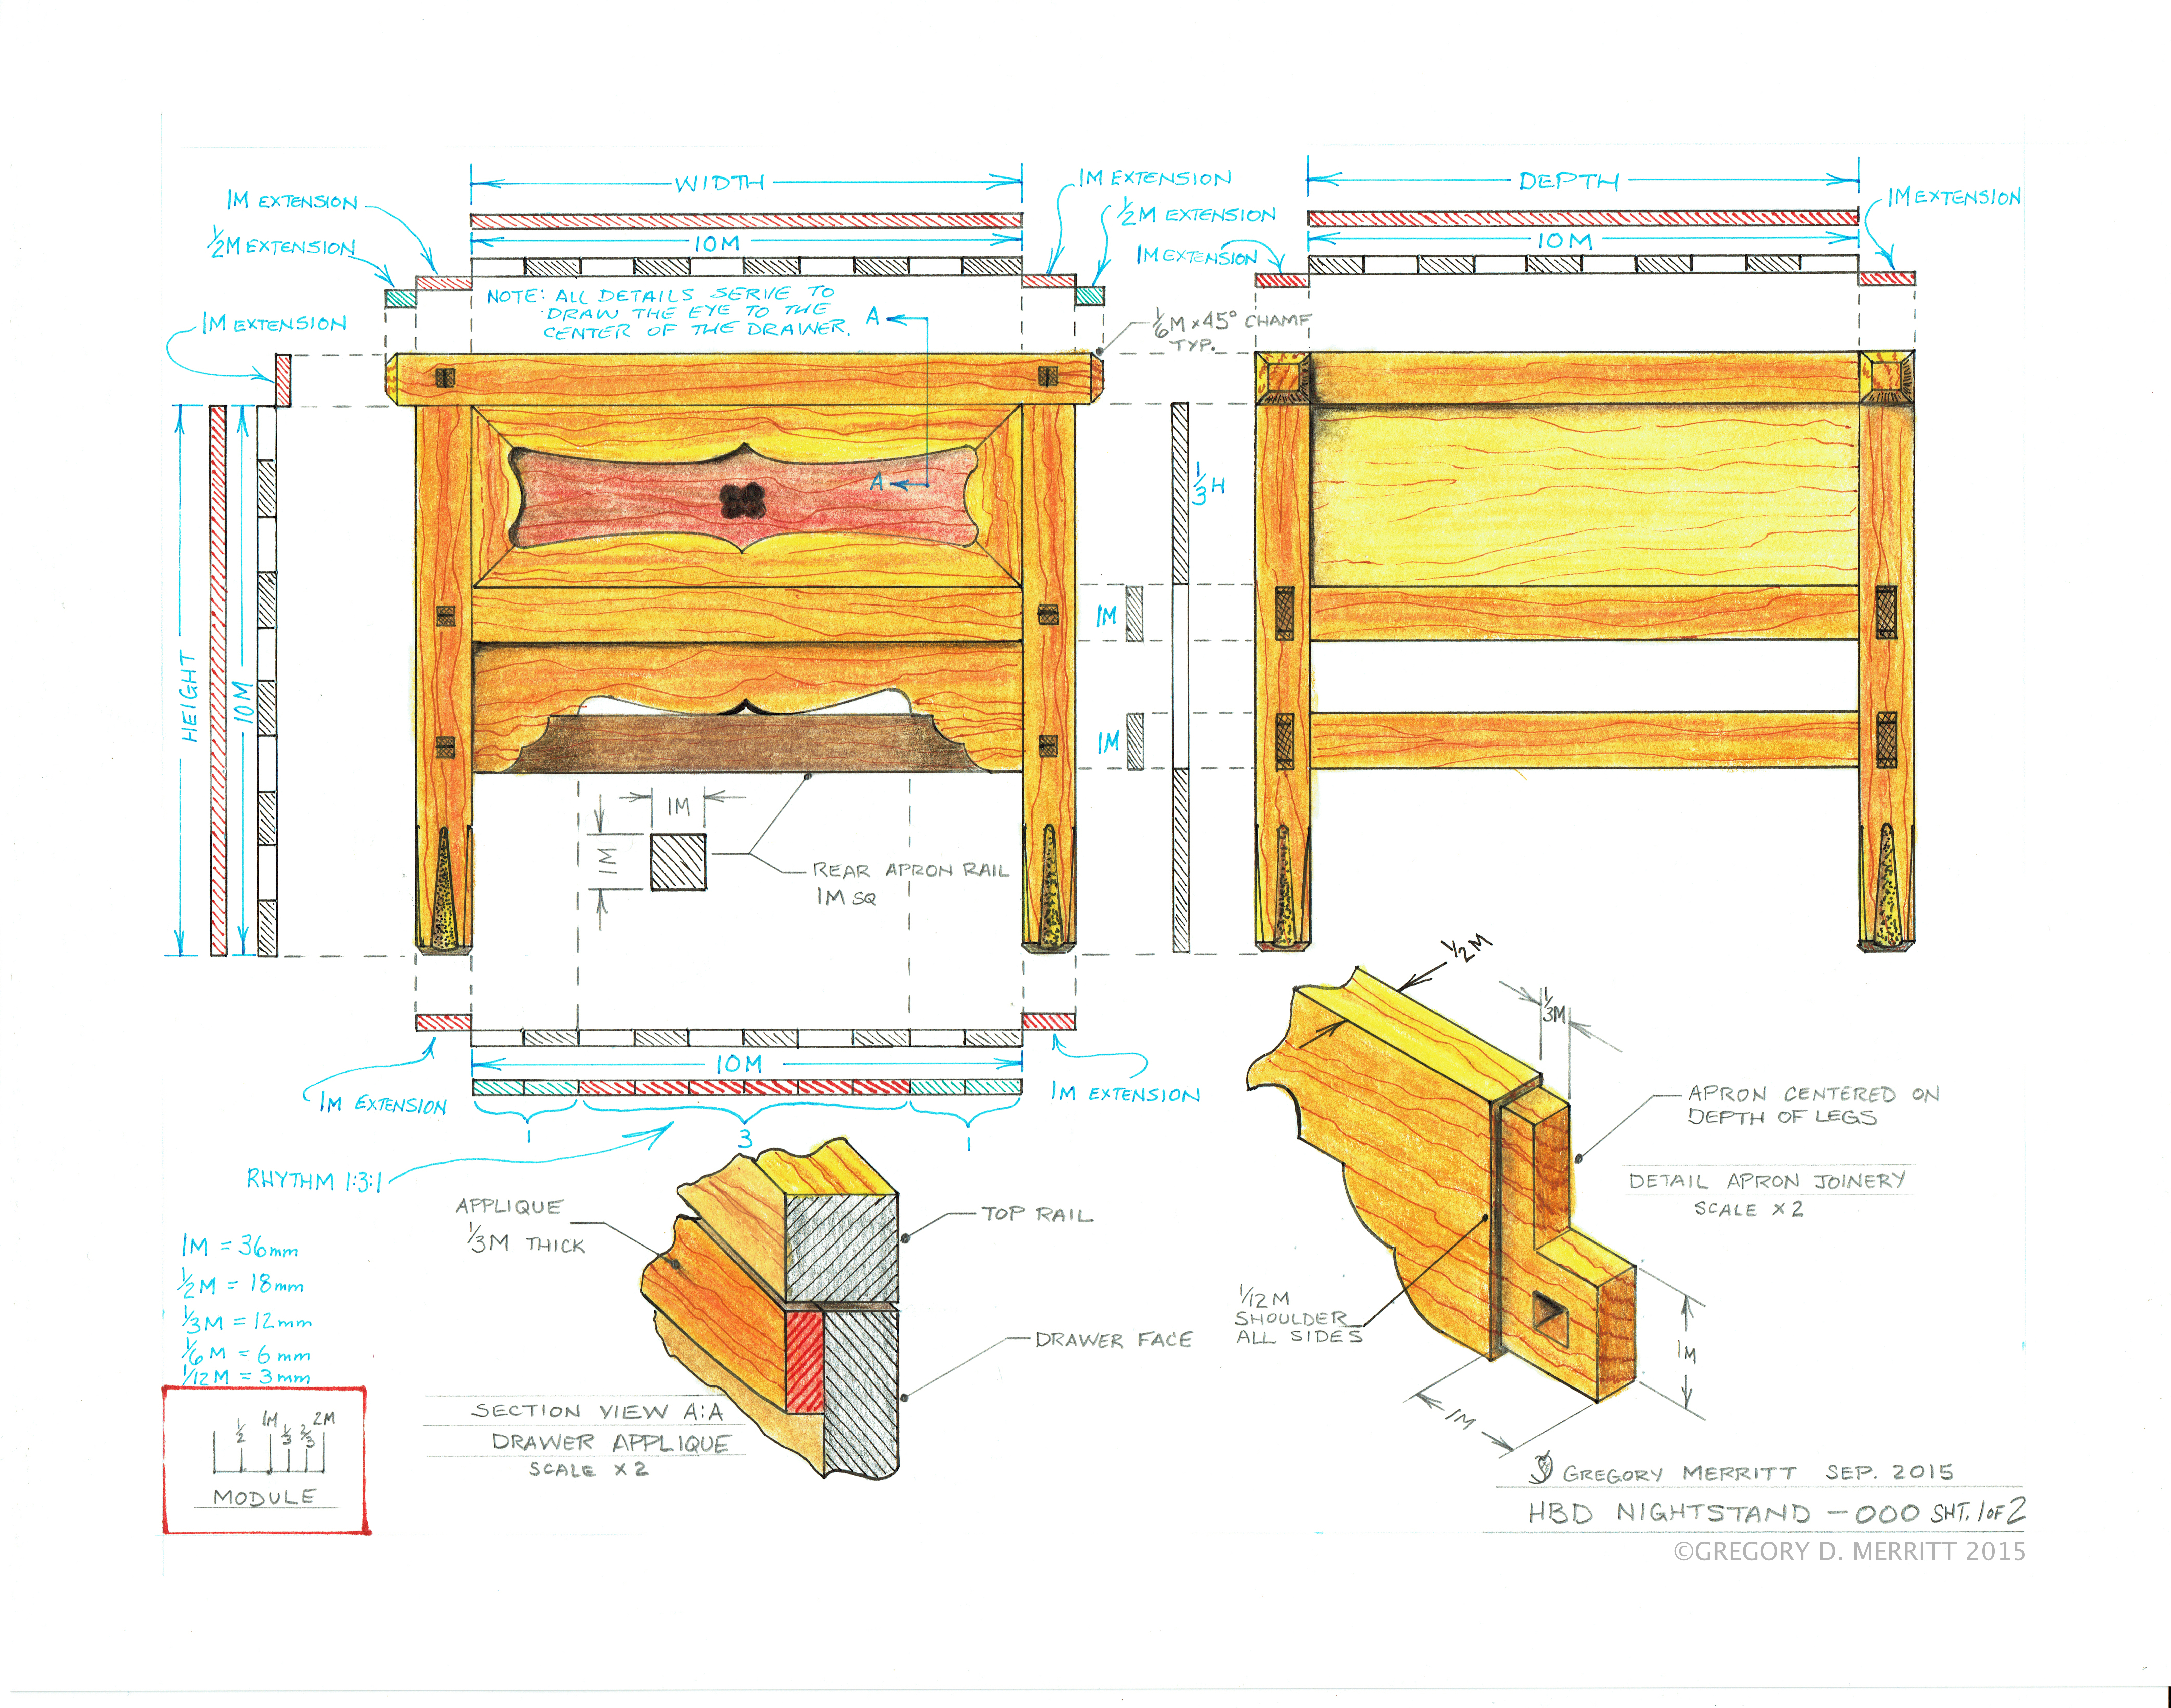
In my last post I finished up with a front elevation for the nightstand and a promised to explain how I arrived at the final decorative details. Before I go into that, I think I should move forward and show the establishment of the side elevation.
Again, like with the front elevation, I’m building the side elevation based upon a 1:1 ratio square. The means that the entire nightstand is built around a 1:1 cube.
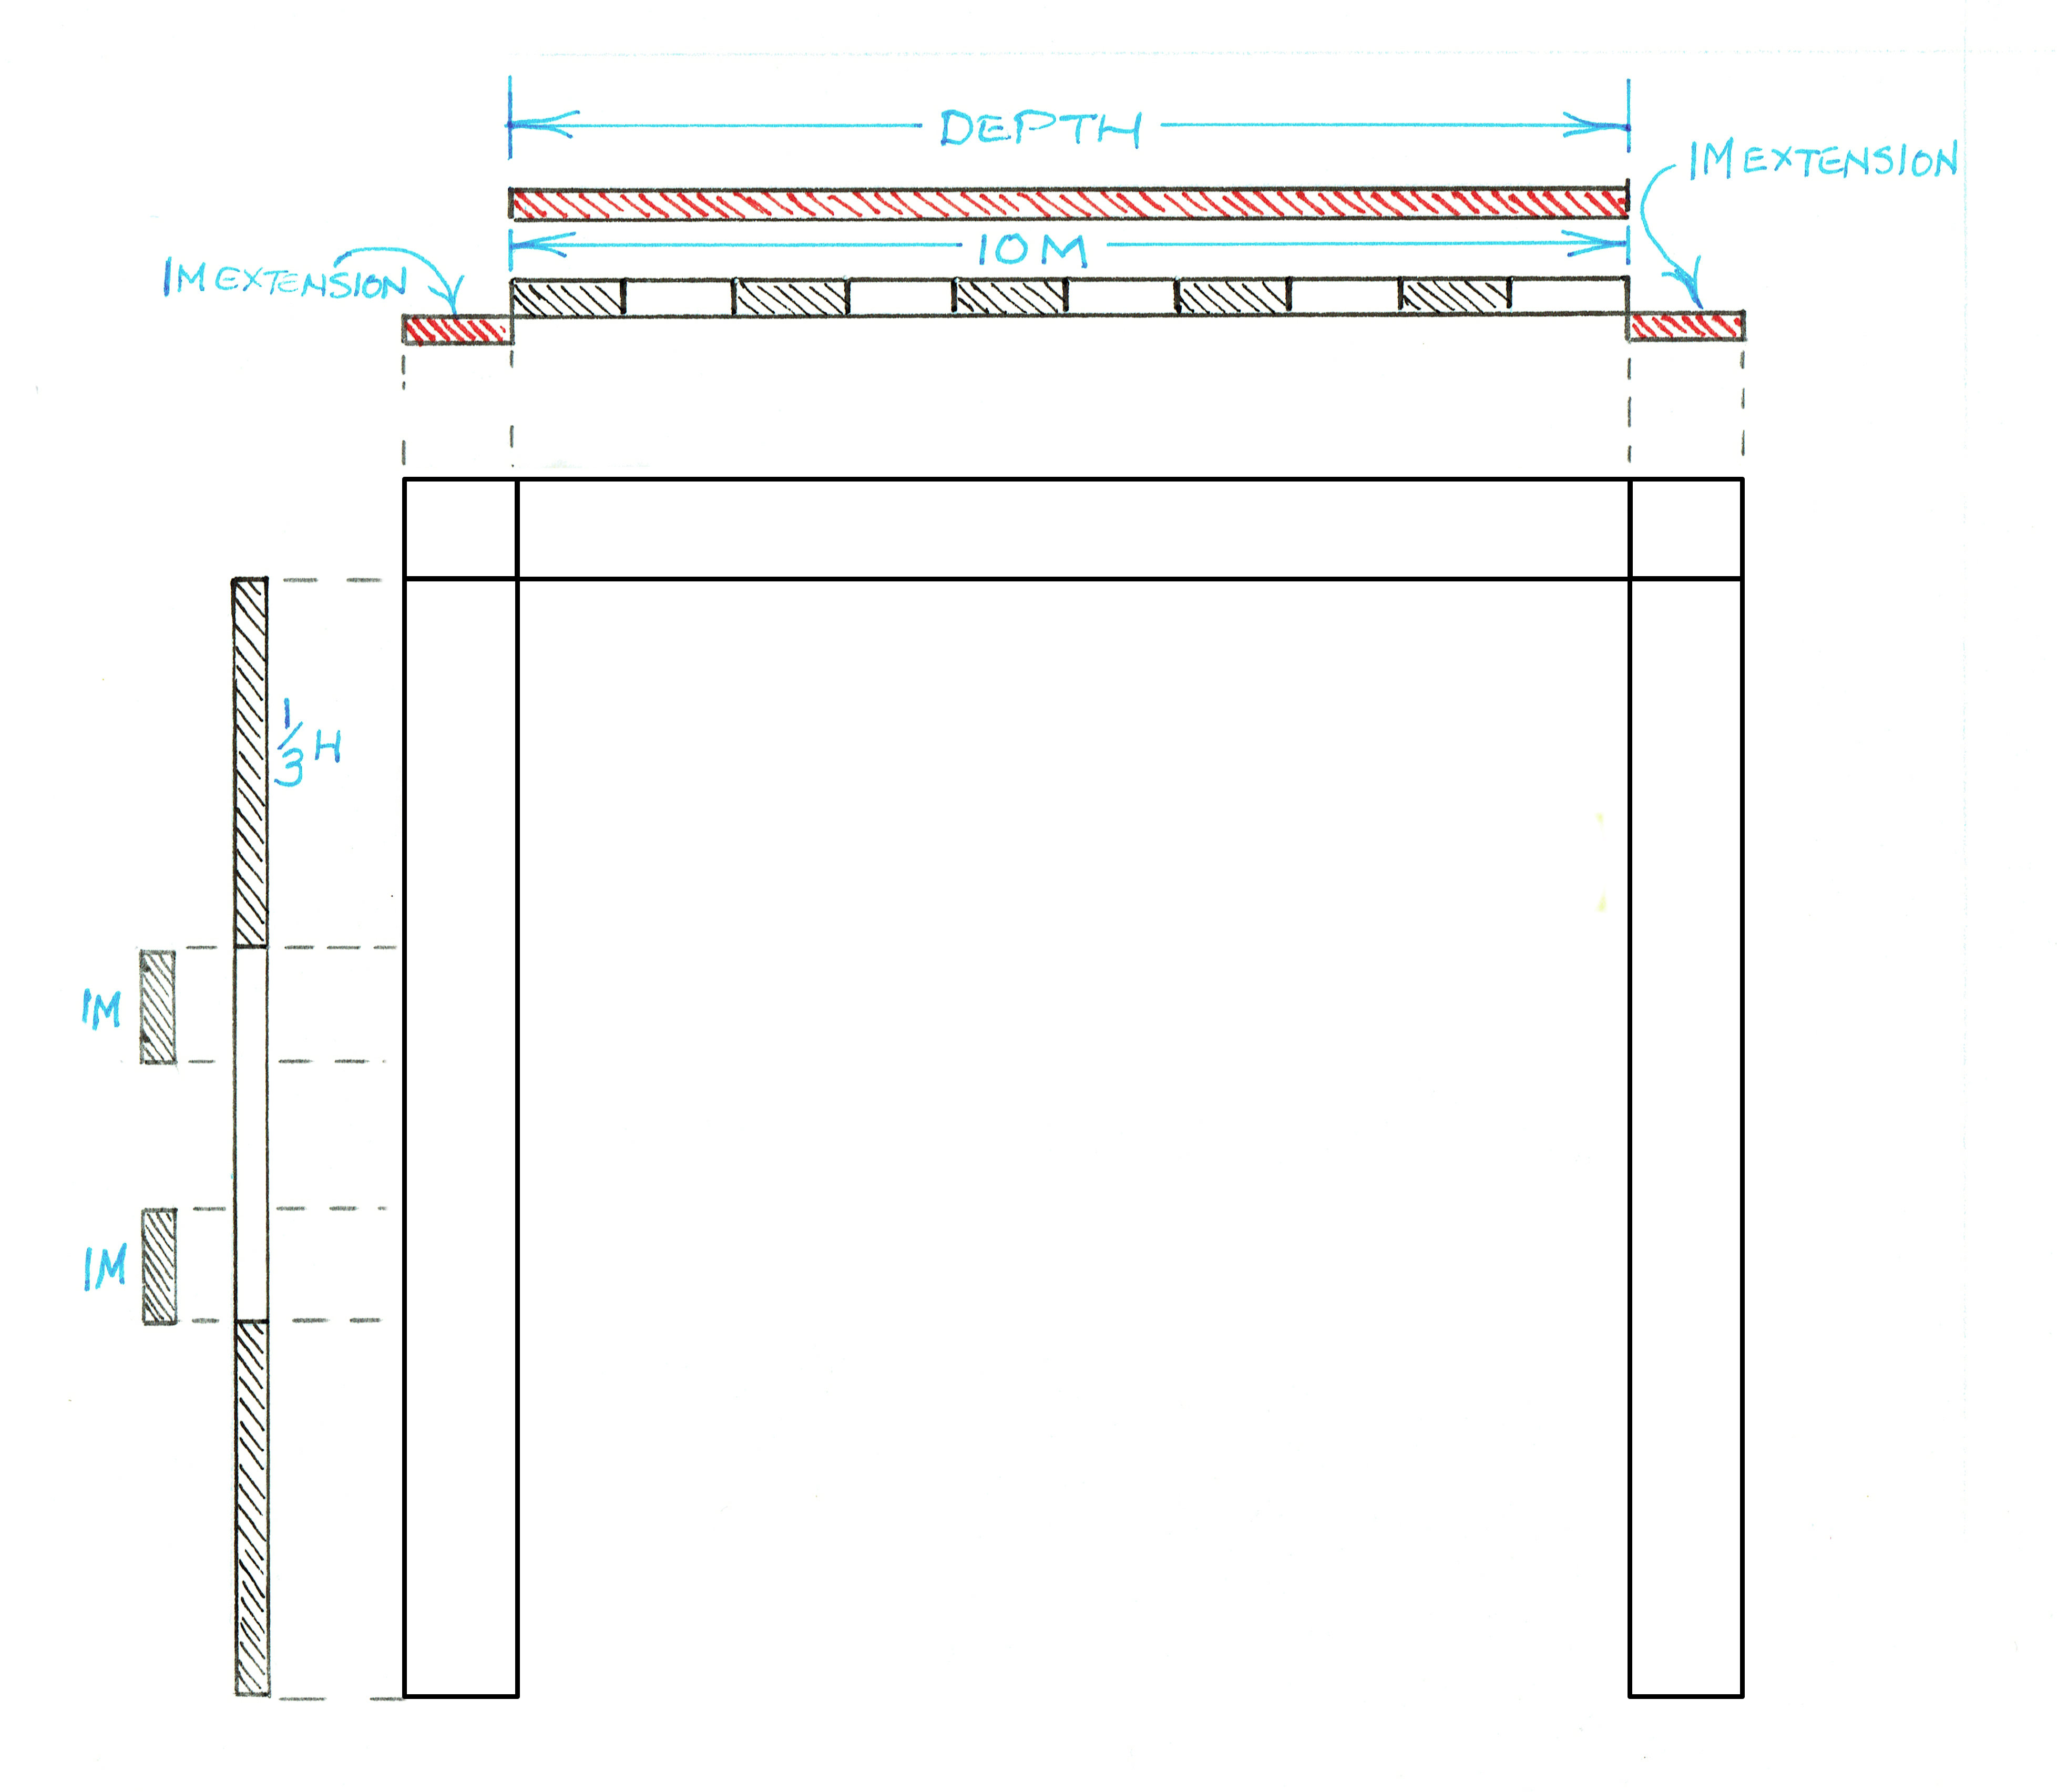
So beginning with a square.

Then establishing the top rail and the pulling the legs into the drawing.
Then pulling the 1/3H cues from the front elevation I can establish the side rail locations. As with the front elevation, locating the side rails is a matter of personal preference, artistic license or, as in my case, dictated by the intended joinery. I’ll be using the same joint as in the top corners. Just changing the orientation to accommodate the structure as well as the front apron.

Now I have a completed side elevation for the nightstand.
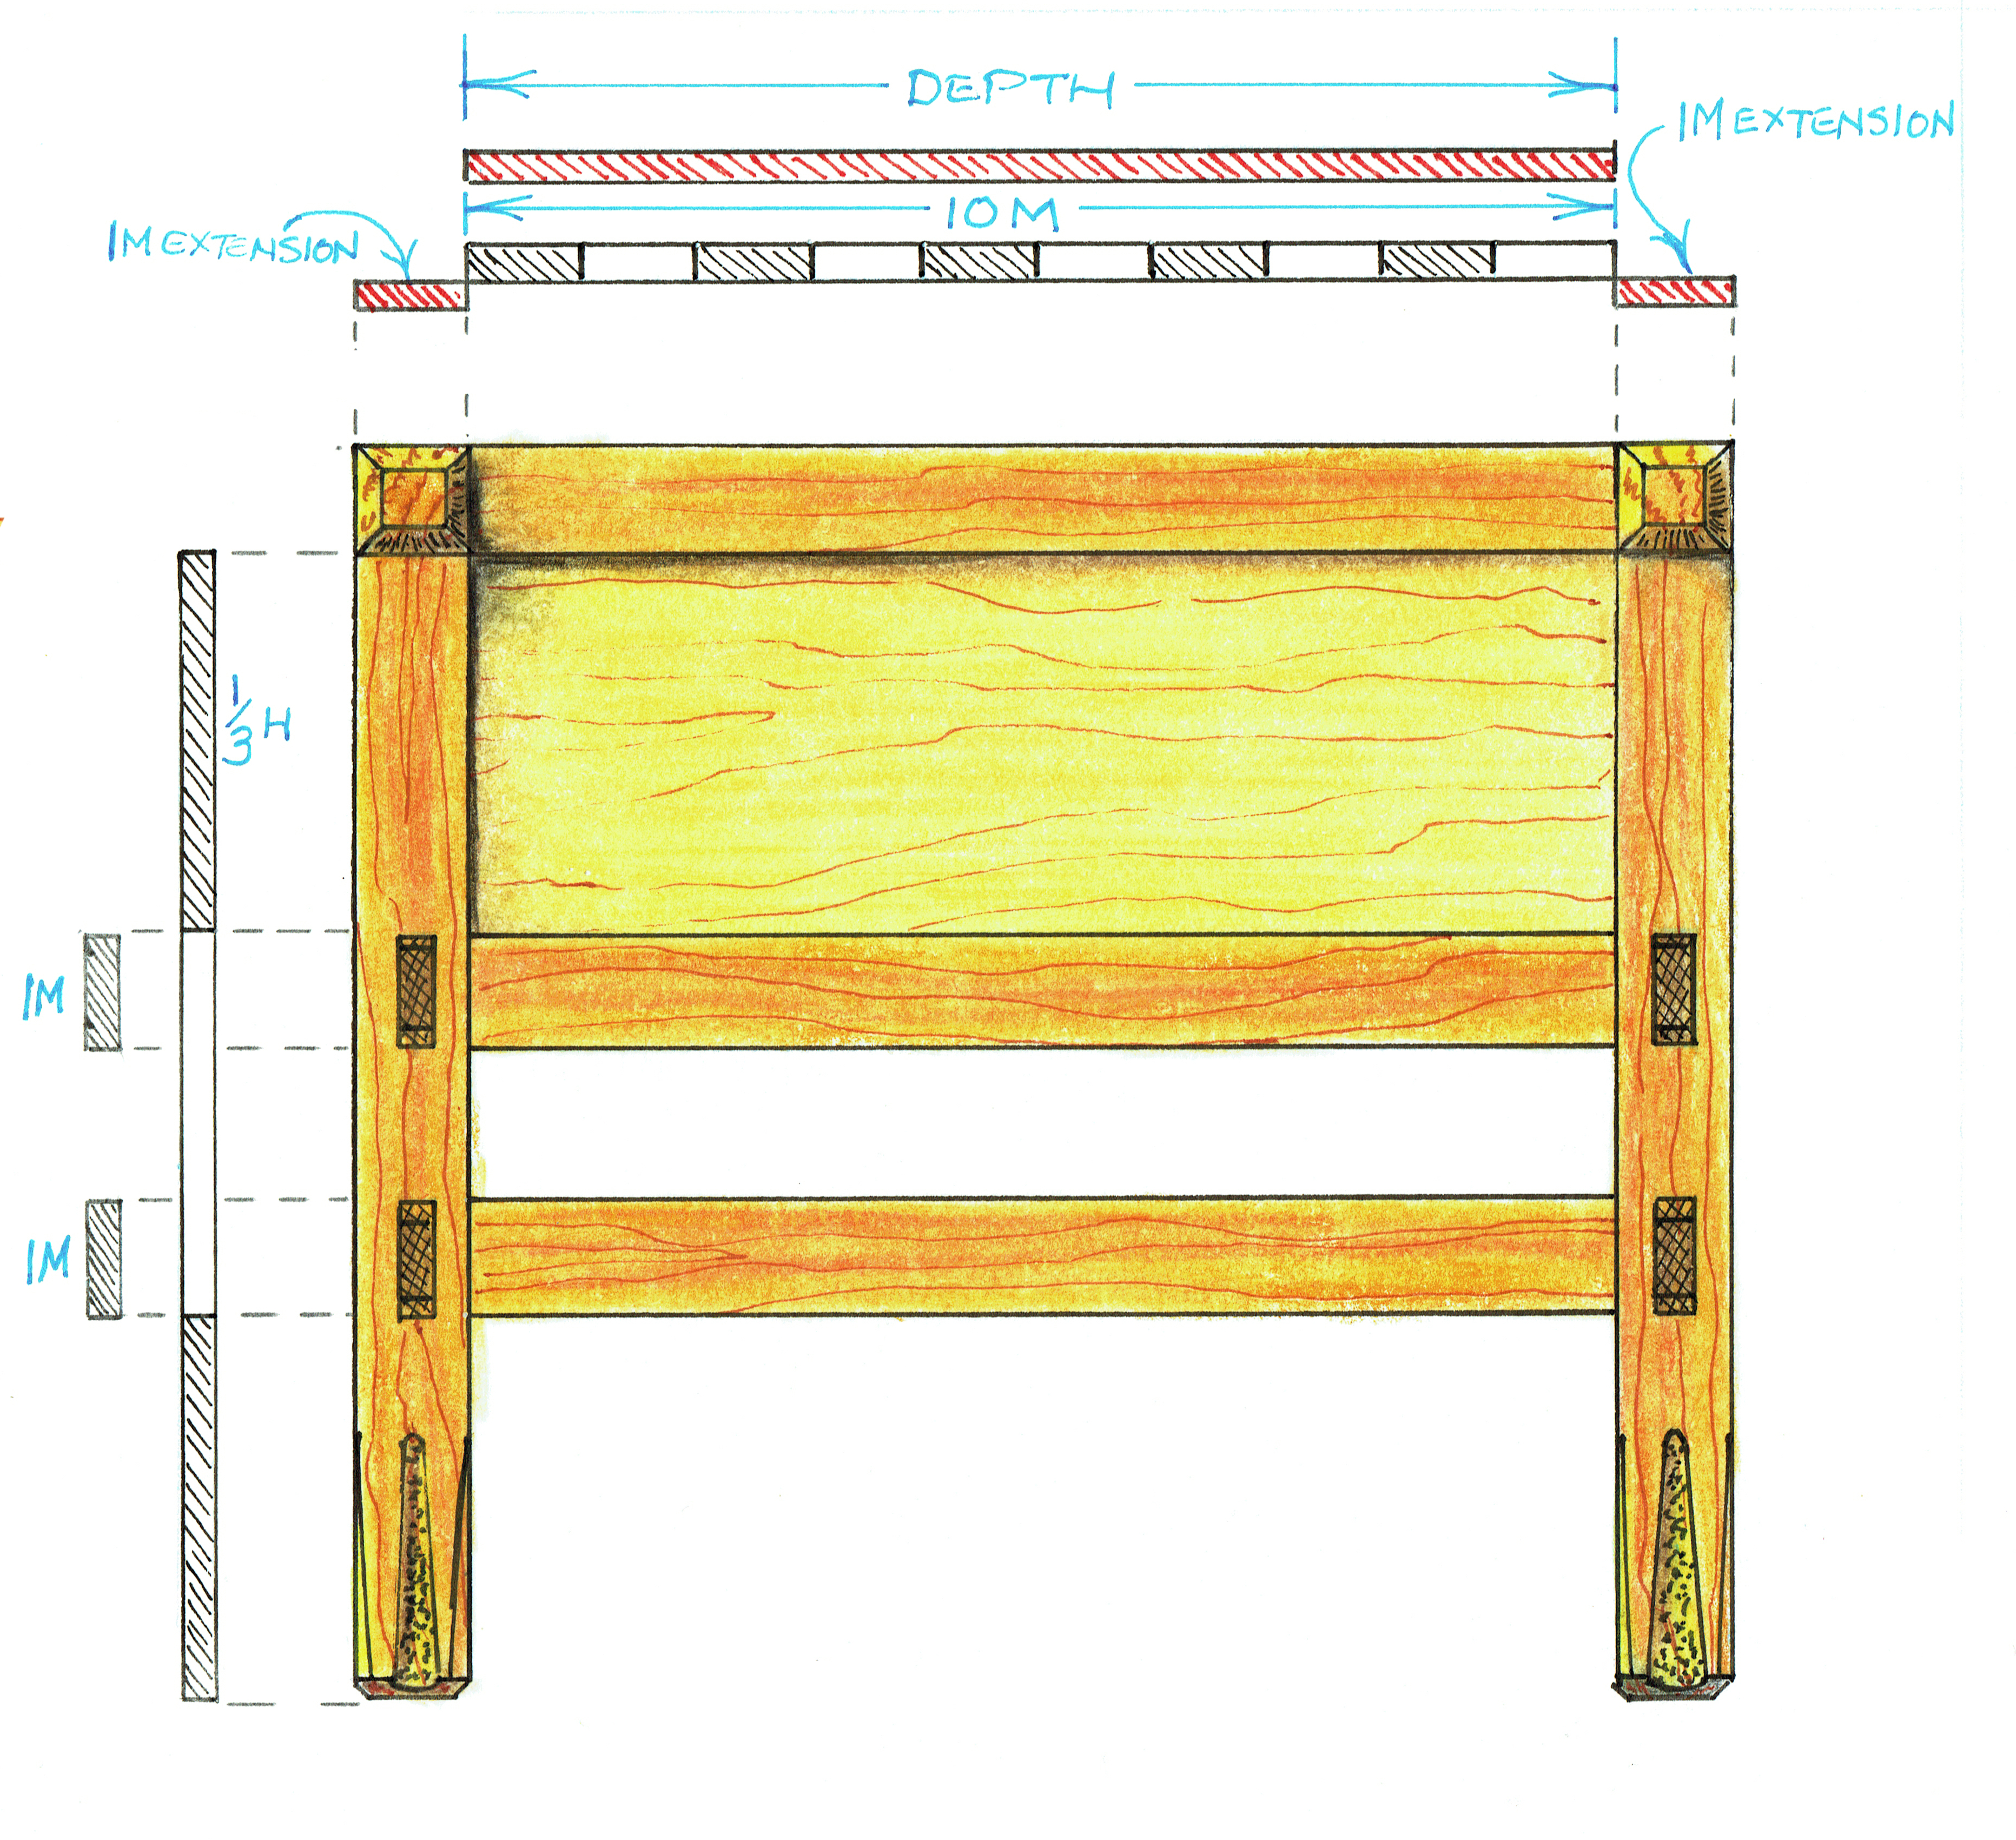
Note that I have chosen to install a panel in the top opening only and a simple lower side rail as opposed to an apron. There are several combinations that could be applied at this point. However, I have chosen to keep the details on this side elevation simple because this piece will be viewed primarily from the front when employed as a nightstand.
So now I have a completed design. See how easy that was. Just kidding, it took me several days to get to this point. Although it’s getting a little easier every time.
I know I said that I would explain the details I chose for the front elevation in this post, but I think I’ll save all of the what-for and why for one final post.

Have been looking around myself and found only vague descriptions of how to design furniture (or anything else for that matter). Of corse design process can be broken cown to its base parts and desribed like any other method of work. Thank you so much for bringing up the subject and sharing the way you work!
Allso thank you for writing thisblog. Found it today and have been reading through some of your projects and considerations. Feel that i just got a little wiser and more inspired to make.
Keep up the good work
Pingback: Nightstand Design-Part 2 | GREG MERRITT – BY MY OWN HANDS
Pingback: Nightstand Design-Part 4 | GREG MERRITT – BY MY OWN HANDS