
I ended my last post with a final sketch that was ready for refining into a workable design. Before I go into the next stage I want to talk a little bit about proportions.
I design all of my projects based upon proportions, as opposed to dimensions. Why? Using proportions gives a structured way of sizing elements as well as spacing elements. If you rely on dimensions how do you choose the sizes of parts and their layout? What rule do you apply? I used to design projects with dimensions and used the “best guess” method for establishing sizes and layout. It worked, but it was hit-and miss as well as stressful. By using proportions you gain two very helpful benefits.
The first benefit is that you now have a consistent method for sizing and spacing. Everything is a proportion of the whole. You are not provided with exact sizes for anything, but given a structured method within which to design.
The second benefit is that, once established, a proportional design is quite easy to scale. The entire project can be scaled up or down as need dictates by simply altering the module (base measurement). So what the heck is a module and how do you establish it?
Generally speaking, the module is the base distance (measurement) that is used to build the entire design. There are no hard and fast rules as to how to arrive at it. Sometimes you can proportionally dived a given distance and derive the module. For instance, 1/5 the desired height of a cabinet. Other times you can begin with a module and build up the design. This latter method is my preferred method. The vast majority of my designs are built around a module that is equal to 36mm. Why 36mm? Glad you asked.
I use 36mm for two reasons. One is that it easily breaks down into the thicknesses of material that I can easily obtain from the big box stores. Examples being:
36mm = 1-1/2″
1/2(36mm) = 18mm = 3/4″
1/3(36mm) = 12mm = 1/2″
1/6(36mm) = 6mm = 1/4″
As you can see, it’s quite easy to obtain the thicknesses of materials based upon the proportions of my chosen module. This in turn supports my second reason for using 36mm. The required material is easy to obtain. This is for my benefit as well as others who may stumble upon my blog. Obtaining quality lumber to work with can be challenging for some of us. Availability, cost or both can be a serious obstacle. One of my goals personally and with this blog is to hopefully show that quality furniture can be produced from, let’s call it, marginal lumber. So I design my projects around material that can be purchased at any big box store. These thicknesses also can be obtained by culling from discarded pallets and even recycling discarded furniture.
So refining the sketch begins with establishing the module.

With the module in place I can begin to build the design. My controlling dimension is a height of ~16″ (400mm). Since I have already established that I will build the design around a 1:1 ratio, a quick calculation tells me that 10M will yield a square 360mm sides. I know, I know, (36) will divide into (400) a total of at least (11) times. I’ll clear that discrepancy up in just a minute.
So I begin with a square that is 10M x 10M.

From this basic square I’ll establish the top rail and legs. These will extend outwards from the base square 1M. See, that is where that eleventh module comes into play. With this extension I have an overall height of 11M (396mm/~15-1/2″) and a width of 12M (432mm/17″). Simple as that.

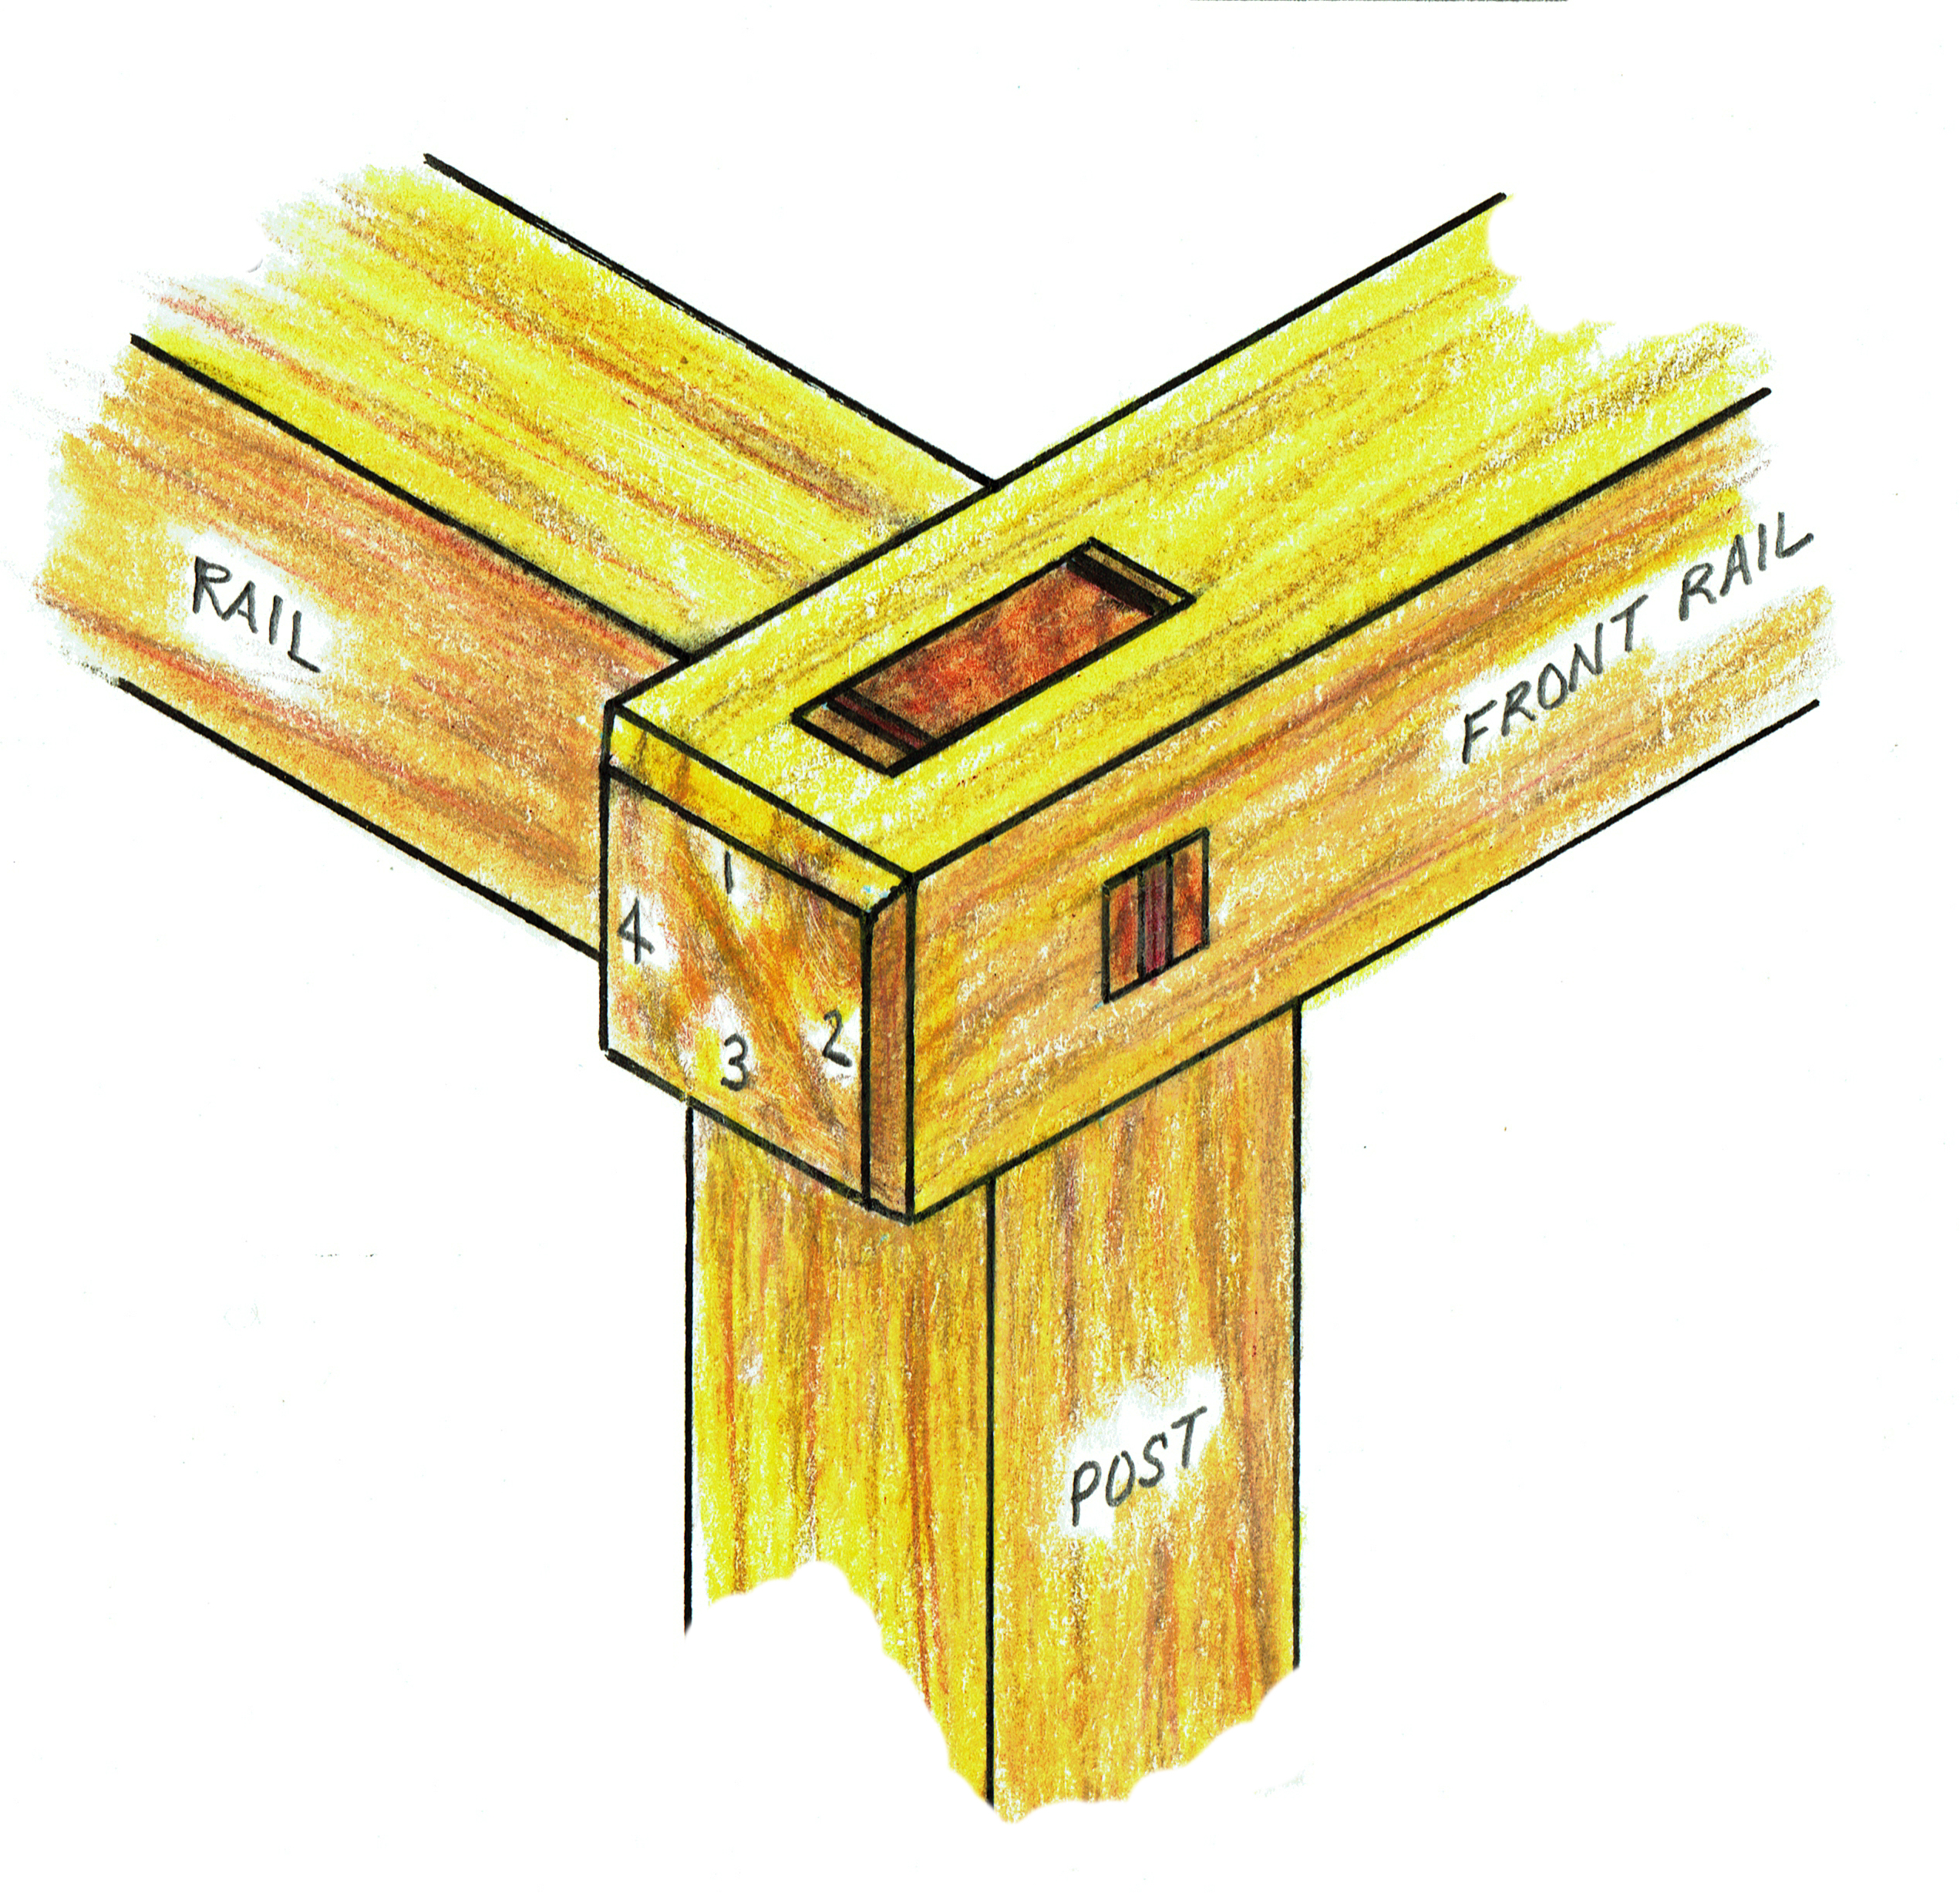 It’s at this point that I begin to pull from my “pallet” that I talked about in my last post. I know that I’ll be using the same joinery for the leg-to-top rail joint that I use in my HB Tansu construction. Which will require an additional 1/2M extension of the to rail on each end.

Now I need to proportion the enclosed space to contain the required elements. Looking back at my sketch I need a drawer, an apron and space below the apron. Three elements tells me that breaking the height into thirds will probably work pretty well. It’s at least a good place to start. I’m also fairly certain that I’ll want the cross rail below the drawer to be the same thickness as the legs and the top rail. This happens to be 1M.
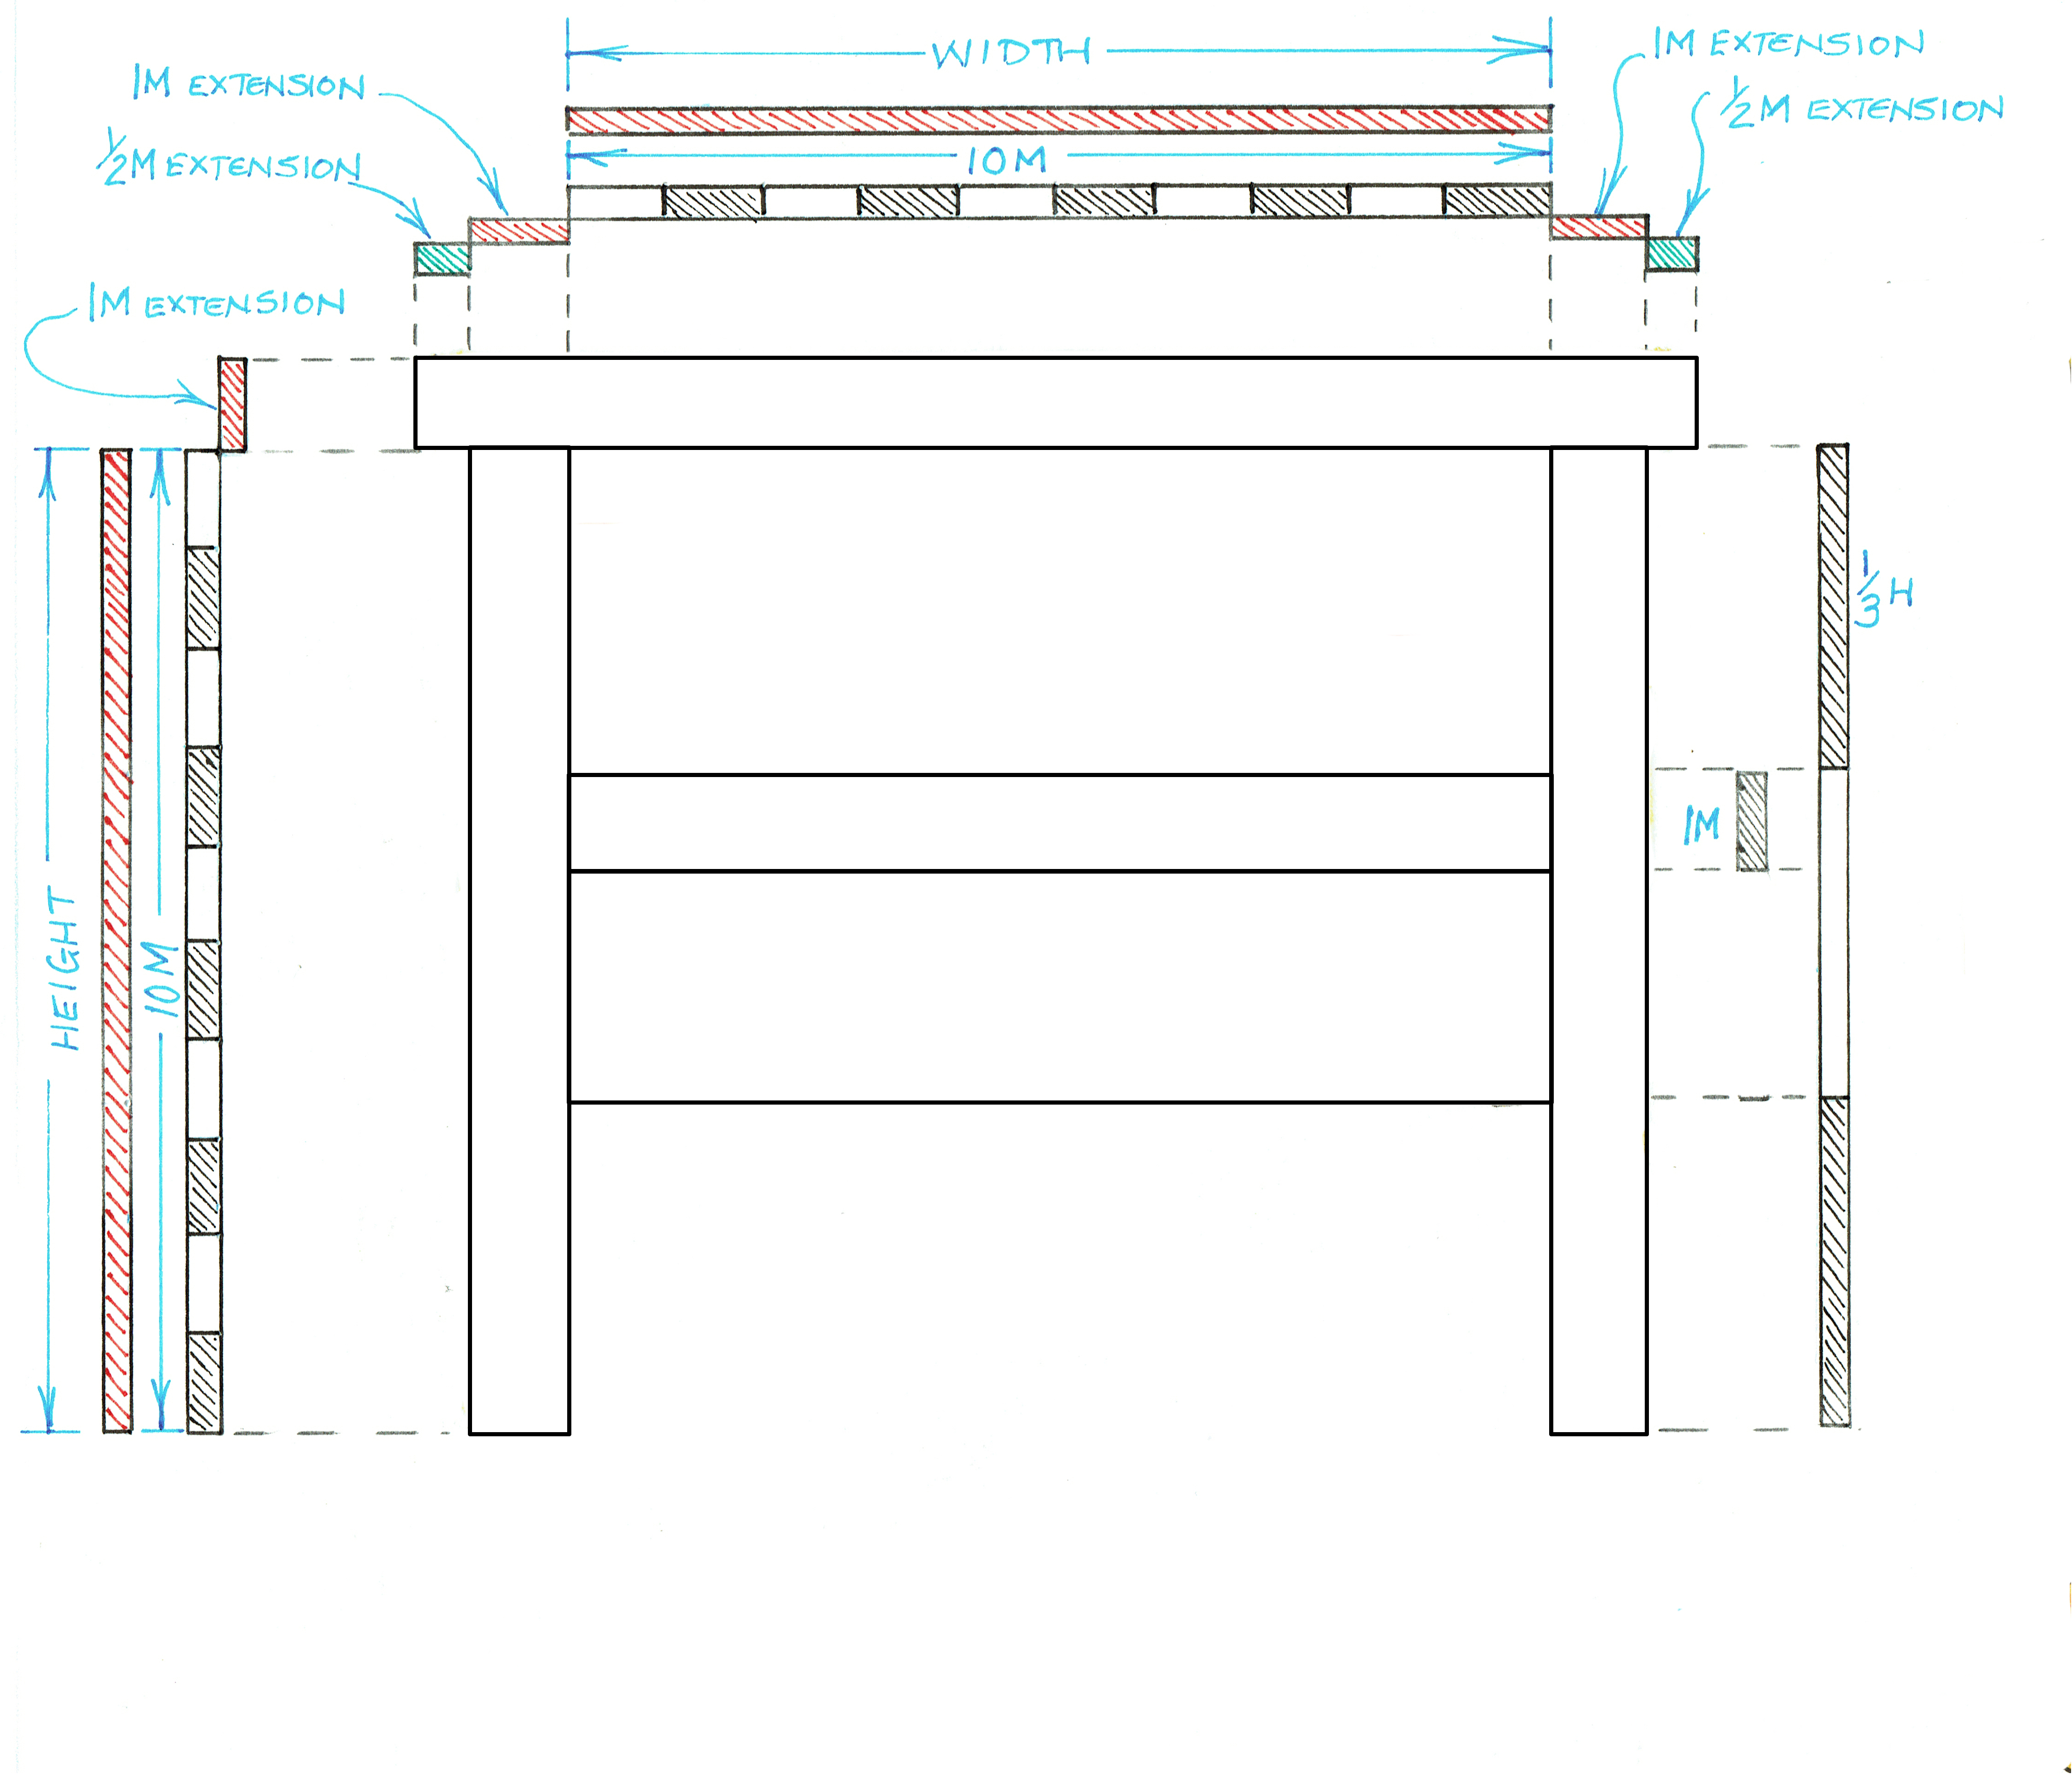
Note that I chose to drop the cross rail below the top 1/3 line. Again this is where the personal preference comes into play. It could just as easily be above the 1/3 line or centered on it. It’s what looks best to your eye working within the established framework.
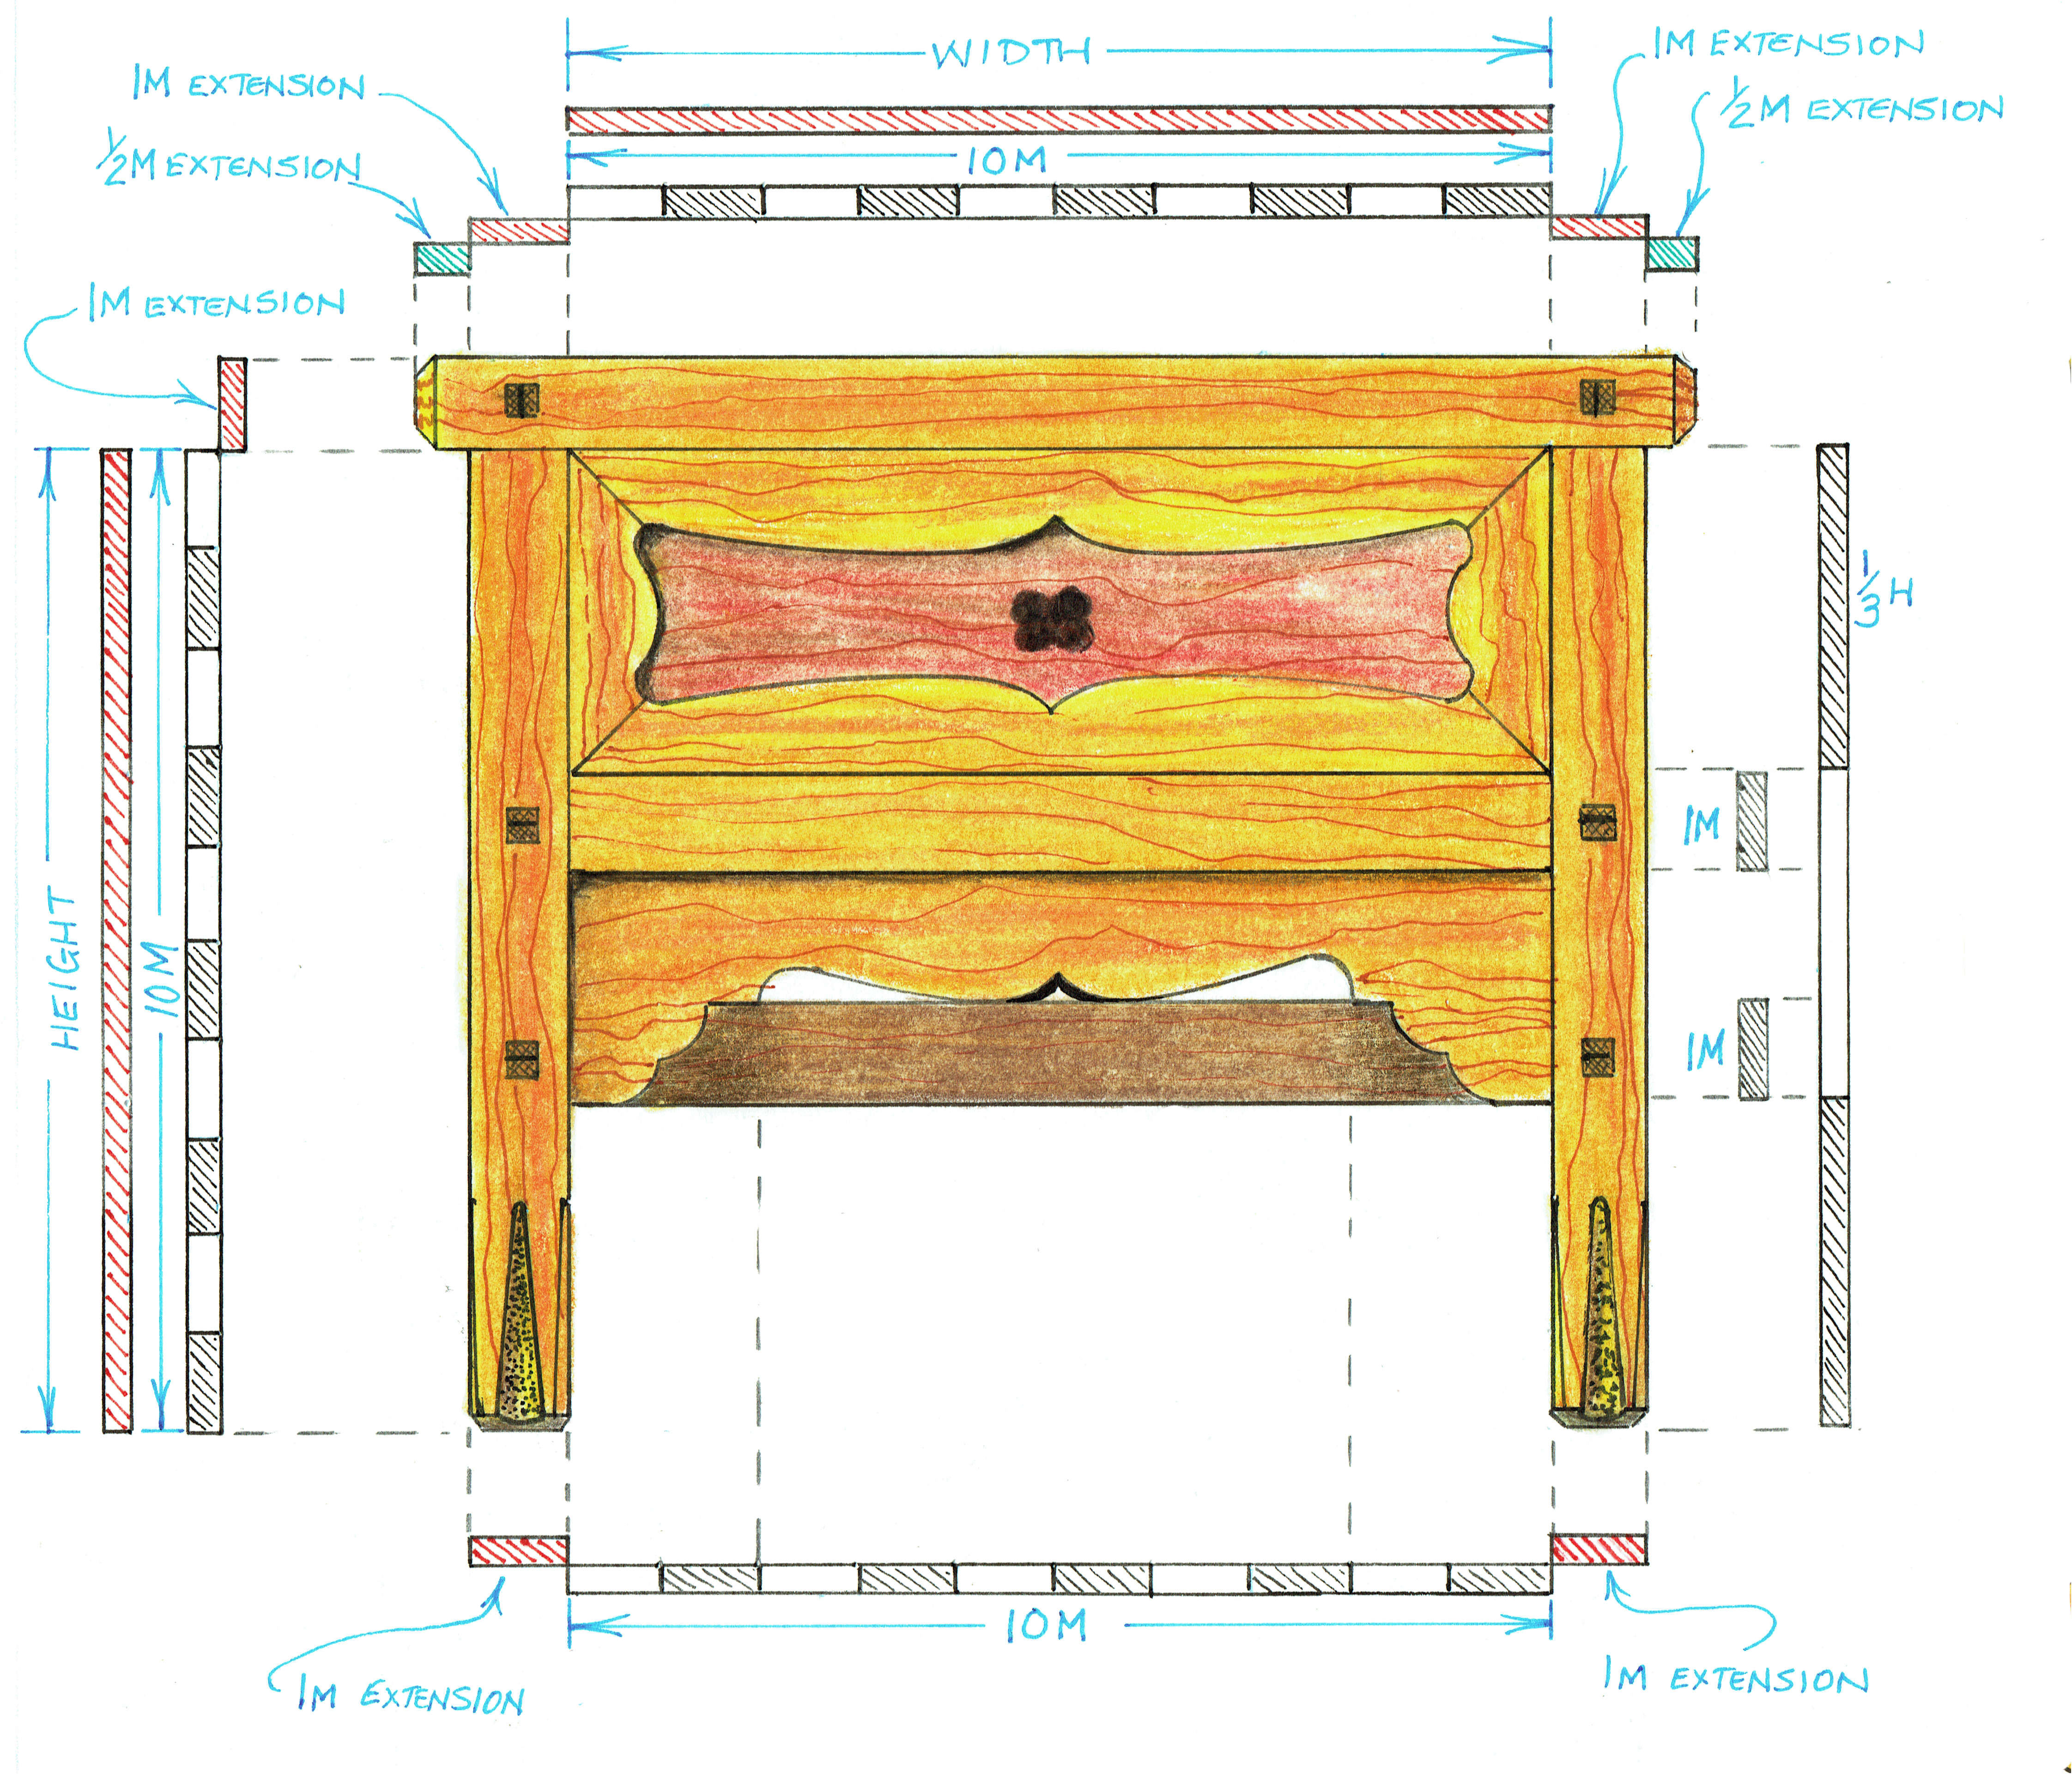
So we just about have a completed front elevation for the nightstand. I’m going to once again pull from my “pallet” and fill in the details of the drawer and apron. I’ll go into the “why” with my next post

Pingback: Nightstand Design-Part 1 | GREG MERRITT – BY MY OWN HANDS
So… now your blog posts have some design lessons….
Very nice explained!
At my very woodworking beginning, I was very intrigued by why the width of certain tools, like chisels, plane blades, drill bits… until I started to pay more attention and started to “see” some old furniture.
This post is like “priciples of design for dummyes” 🙂
“By Hound and Eye” was another great help, this summer too. For teaching some geometry and new uses for the dividers for the kids.
Title for next post… “Nightstand-design-part-2 – the Fibonacci dividers”…???? lolol
LOL. I don’t think these posts qualify as instruction. Just sharing my process. I do hope that some folks might find them helpful in some way though.
Greg
This is great stuff, Greg. This is exactly the kind of “application of knowledge” that was the whole Idea behind “By Hand & Eye”. I’m starting to think this way, also.
Thank you. “By hand & Eye” gave me a toolset to help guide my design work. Without this toolset I found designing very difficult. There were too many possibilities, making progress slow and cumbersome. Now, I find designing much, much easier.
Greg
Pingback: Nightstand Design-Part 3 | GREG MERRITT – BY MY OWN HANDS
I love the principle of proportions you shared, and as to me that was the hardest part of the design, and now applying structure to the design was what was missing from my repotire.
Thanks for sharing.
Pheroz
Your most welcome. Glad to here it was of some use to you.