
The “Naked Woodworker” video makes out like the bench build is a one day project. This may just be for effect or Mr. Siemsen may be able to pull this feat off. A well organised shop and an experienced builder might just be able to build this bench in a day. Since I come up a little bit short on both counts, my build will take a little more than a day. I did give it my best shot though.
Saturday I began by processing the 2x12s into usable parts. I first cut the 8ft seactions that will make up the aprons and tops. This left me with 4ft drops from each board. Then I did something that I haven’t done in a long time. I fired up my old portable table saw. I used it to rip the 4ft drop in half to yield eight pieces 5-1/2″ wide and 4ft long. From these I cut the legs and the rails for the leg assemblies.
In the video it is assumed that you do not have enough clamps for all of the assemblies. So all glued assemblies are temporarily “clamped” with screws and the screws are removed once the glue dries. So I followed along and “clamped” everything by screwing them together.
My goal for day one was to have all of the glued assemblies together so that on day two I could remove all of the screws and start assembly. Day one went as planned and I turned out the light with everything glued and screwed.

Sunday, day two, I started by removing all of the temporary screws and feeling pretty confident that I would have the bench together by the end of the day. That confidence quickly began to fade though.
The first task today was to build the leg assemblies for each end of the bench. Nothing complicated a couple of lap and butt joints secured with screws.
Big ol’ lap joint.
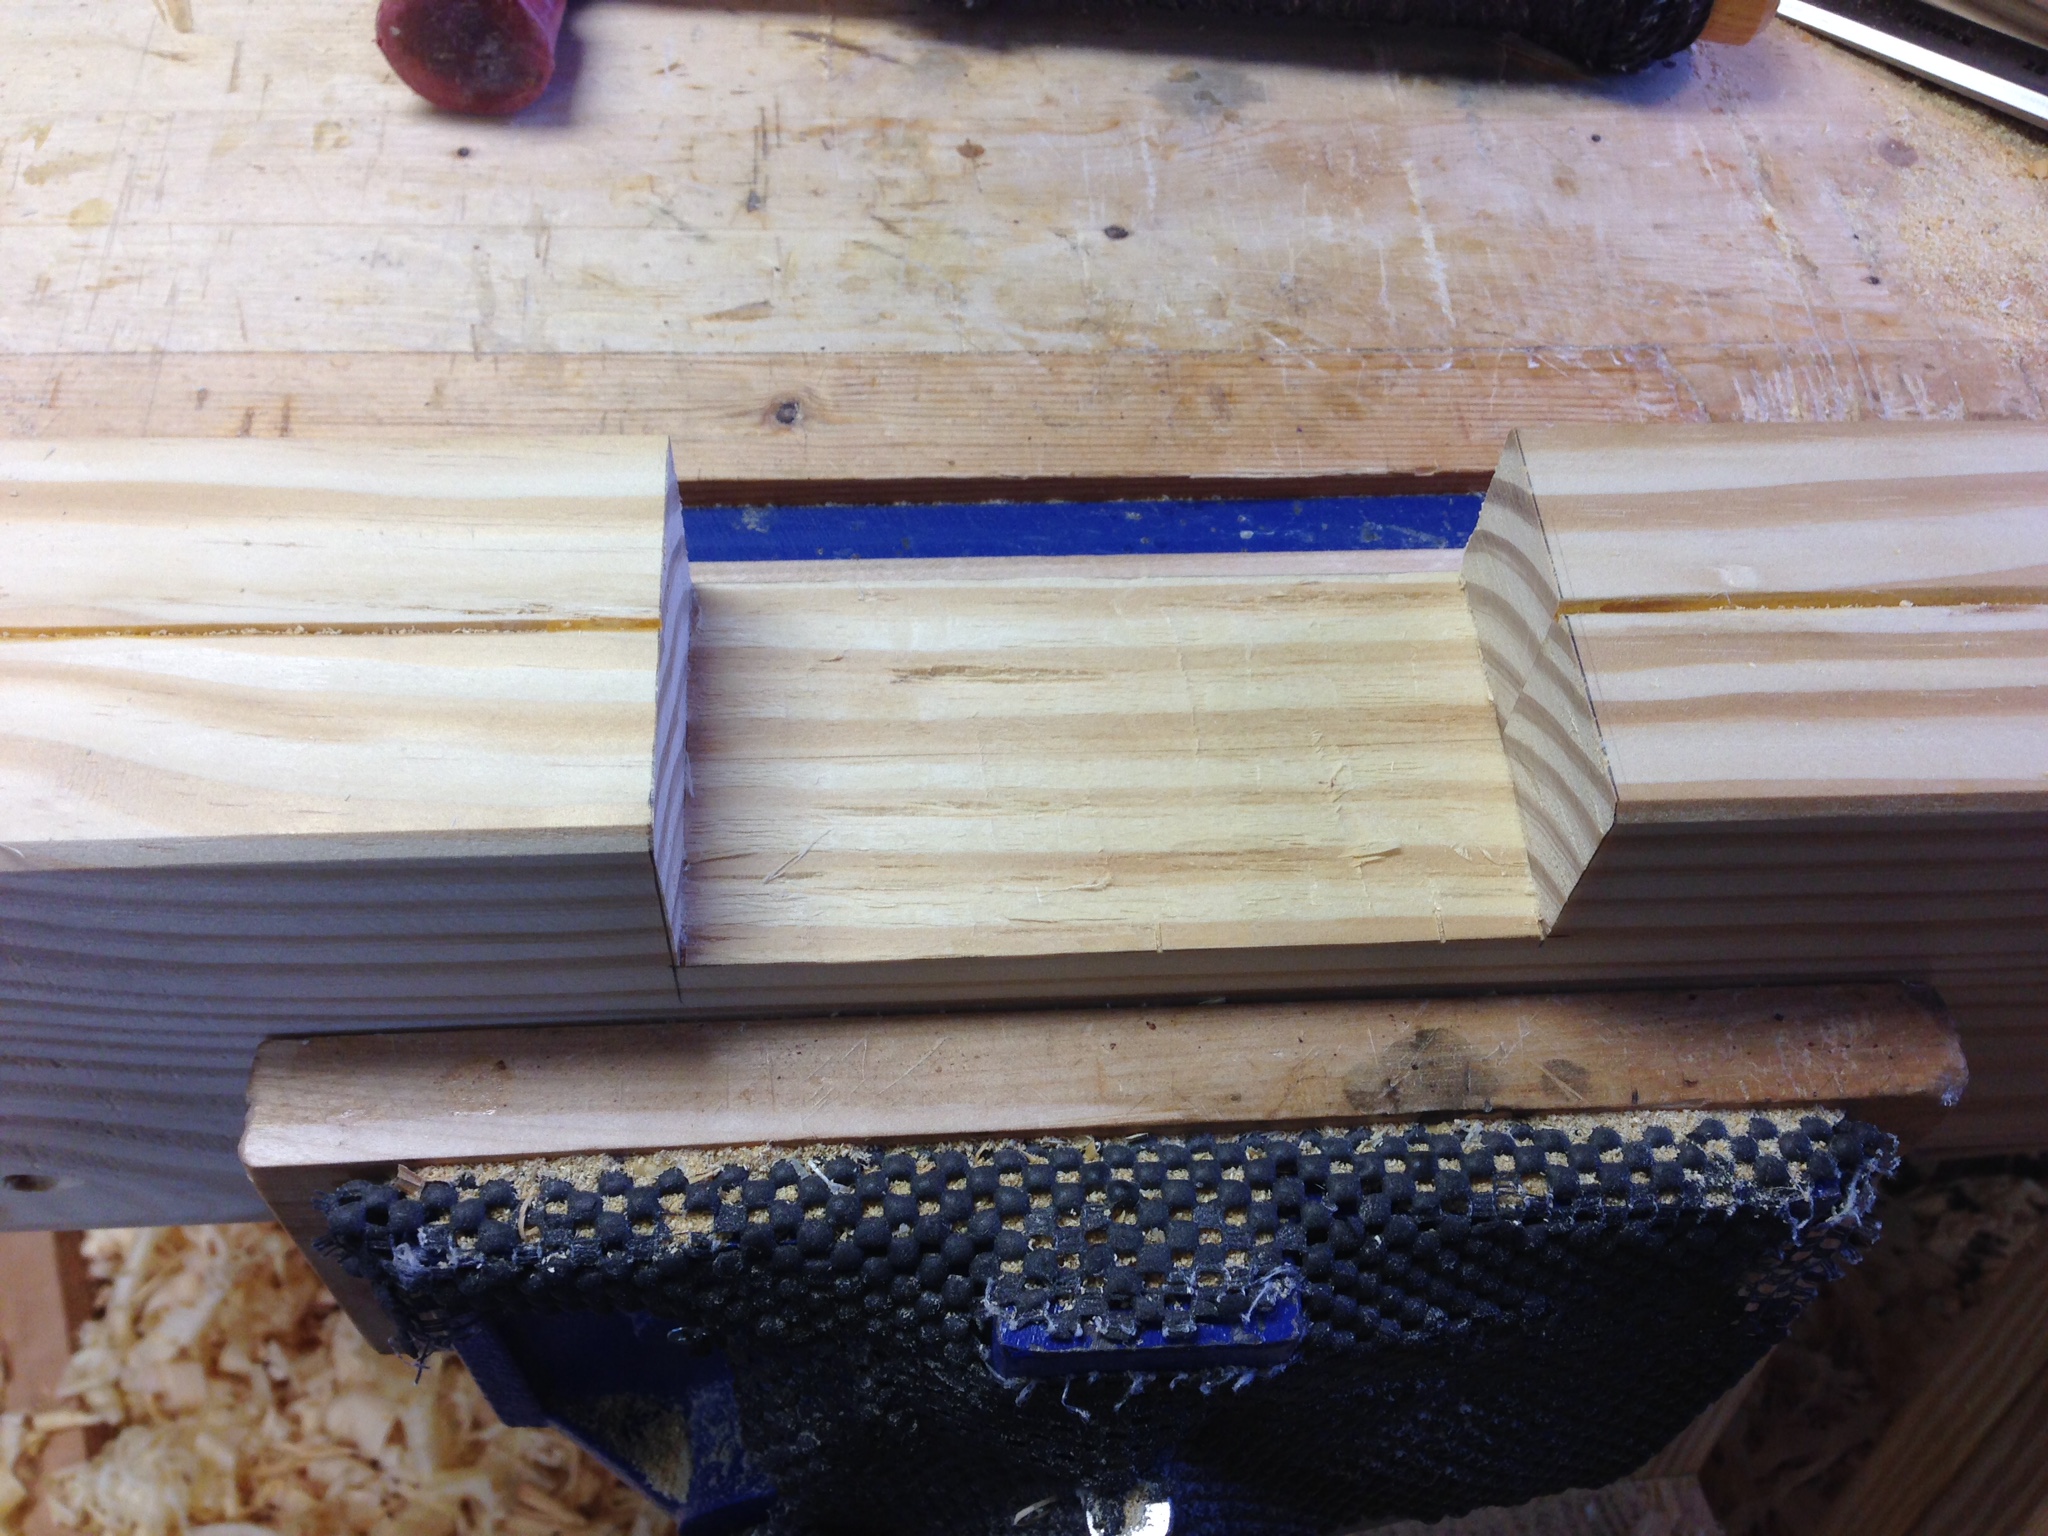
Piss poor planning left me to chop one lap joint through a big and tough knot.

She’s on her feet!

Fitting the cross bearers.

In the video, Mr. Siemsen states that he jointed the front edge of the top board and flushes that jointed edge to the apron during assembly. There is no mention or demonstration as to how you are supposed to joint that edge without a bench. My solution was to leave horns on the cross rails of the legs and stack the top boards on those. This allowed me to use the partially assembled bench to joint the top boards. I’ll trim the horns off flush later.
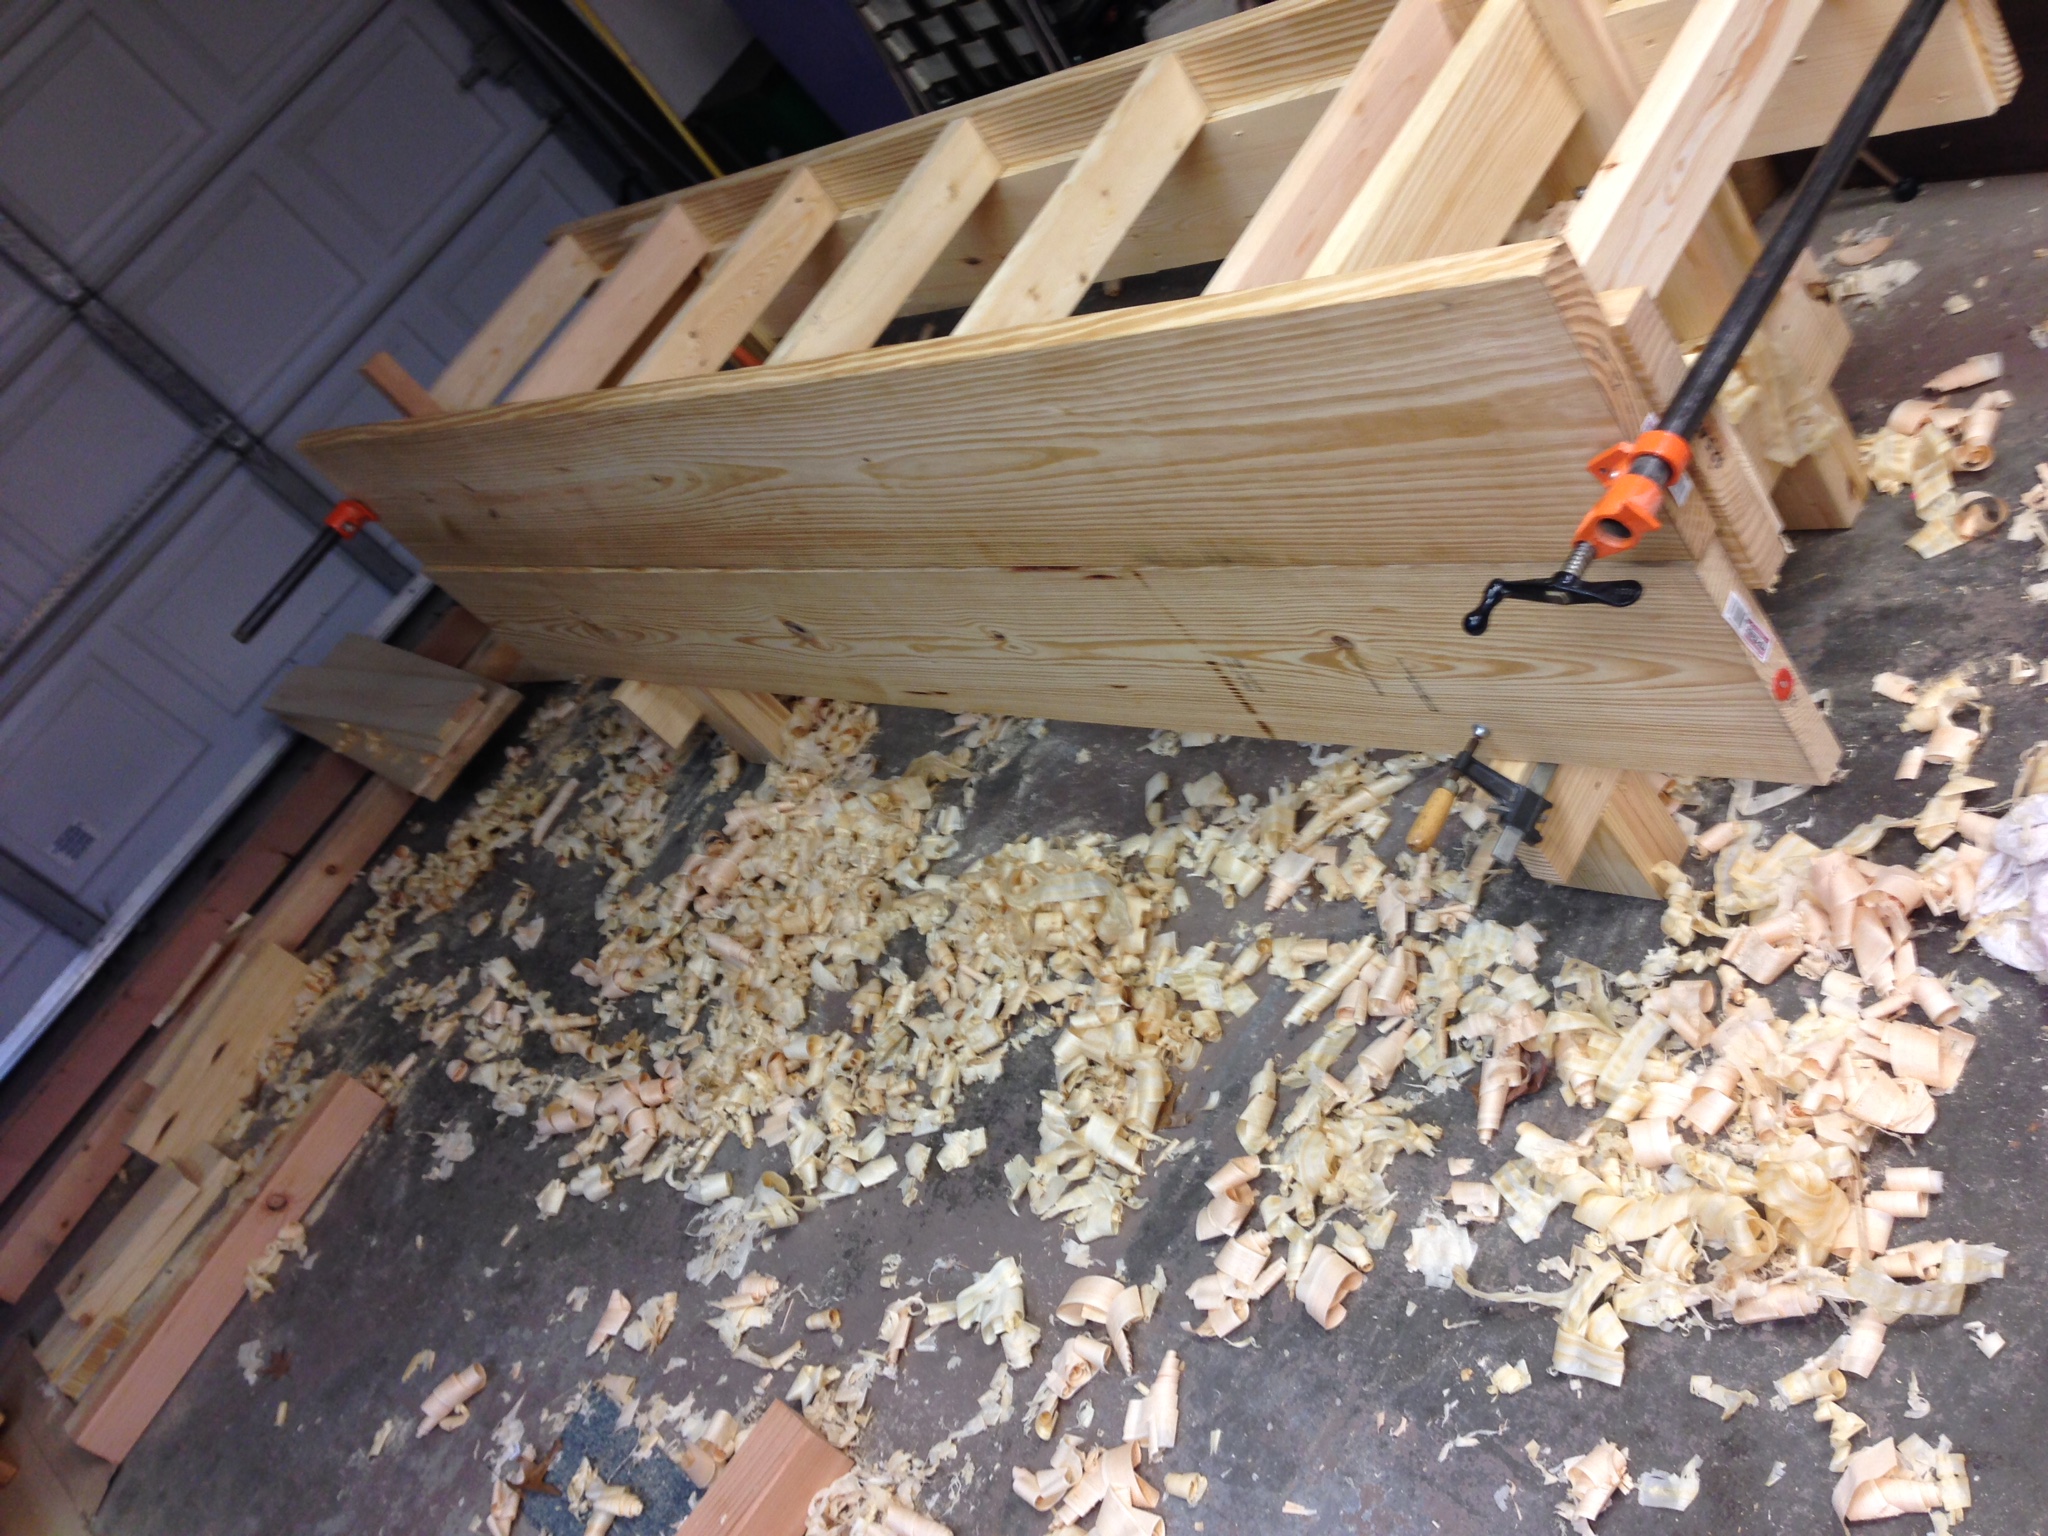
Well, I gave it my best shot, but I flat ran out of steam and time. The top has yet to be installed. The rear top board has a bit of crown in it. So I clamped it straight and will leave it in the clamps till tomorrow evening.

Greg Merritt Part 2

That is a pretty sight. Before I got to the part where you wrote about using your table saw, I thought “I hope he uses a table saw on this.” 🙂
I have nothing to gain by ripping 16′ of SYP by hand. LOL The table saw is perfect for processing 2x material.
I’m thinking I’ll swap the 1×8 boards that go behind the aprons for 2×8’s. See any issues with doing that? I can’t think of any, but these issues often reveal themselves to me after I start trying to put the boards together. I’d like to try something other than 2×4’s for the blocking that goes under the top for the dog holes, but not sure how well that will work. Maybe more 2×12 pieces would work, but I haven’t been able to visualize it yet.
Wesley I see no problem in using 2x8s for the ledgers. The only thing I can think of is a problem installing a vise. Quick release vises especially. So, if you are planning on adding a vise look close at how its mounted.
Anything should work for the blocking. Remember, the video is to show a low-cost option. Don’t over think it.
when Mike jointed the apron I think all he did was set it up on the lower assembly and proceed to plane away,
@ Wesley I doubled up the rear apron assemble on mine. No worries, adds a fair amount of depth for holdfasts to grab onto.
Same solution, double up the thickness of the top by face laminating the 2x12s. Again that’s what I did after reading about issues with the blocking coming apart from the top. I face laminated the 2x12s together using screws exactly like Schwarz did in the 2-day french bench built with the Ikea countertops.
When you double up the top you end up increasing the bolt length necessary to secure the tops and make sure you countersink them deep enough.
Yes, he demonstrates jointing the top of the apron. He also says that he jointed the front edge of the top board, but no explination of how he held the board to do so. This was my solution to the problem.
I think it looks great and, while you may not have quite finished, you are almost there in a very short time. This is the cheapest, easiest way to get a very nice bench I can imagine. The comment about planning for a vise during construction is a very good one, something I wish I had done. It took a lot of extra time and fussing because I didn’t.
Thanks Andy. This really is a fast and simple build that yields a great bench.
Wow Greg. The production coming out of your shop is impressive. Either you get a lot of time in the shop, are very efficient, but probably a combination of the two. Bench is coming along at light speed and looks good.
Thanks. My time in the shop comes and goes. This weekend I was lucky and had the entire weekend to be in the shop. I also try to get a few minutes in the shop after work most days of the week. Even 20min can add up quickly to a lot of progress.
Agree with that. I find myself doing the same thing, squeezing in 20 min here and there. If a guy is ready with a clear bench and clear idea of what he intends to accomplish then a lot can get done in 20 minutes
That’s looking good, and puts me to shame as I have been planning on a new bench for months, and haven’t started. 😦
I see you have the top boards ‘heart up’ which I understand is the best way, as any shrinkage on drying will crown the middle, which is easier to plane down flat again.
Every source that I have looked at says “heart up”, so that is what I did. It does make it much easier to plane flat.
Why have you been planning your bench for so long?
Pretty impressive for two days work.
Thanks. Don’t be too impressed. This really is an easy build.
Reblogged this on Paleotool's Weblog and commented:
Greg Merritt is making himself a very nice workbench based on the Naked Woodworker’s plan. Have a look.
Thanks for the support George!
Looks great so far! And congrats on conquering that killer knot.
I was too focused on putting clear wood on the “show” side. It bit me hard with that knot.
Nothing worse than realizing. You need to cut a joint or bore a hole in the middle of a knot. Looks great and a lot less work than my Roubo
That knot was my fault. Focused on the wrong thing.
This is a crazy easy build. Dang near impossible to screw it up.
Greg, the bench is looking good!
I have built about 25 of these benches, I have built a couple with all hand tools in about 9 hours each. It goes faster when you don’t have to figure anything out!
To joint the edge of the tops I just set the top on edge on the leg section where the apron would set, clamp it and plane it. You can use the bench as a bench before it is finished.
I don’t see the need to double up the tops. I have never had a block come loose from under the top, and the aprons seem thick enough to me with just 3/4 inch material. In the original English benches many of them had 1″ boards for the off side of the top and the off side apron.
Wait ’til you start using it!
Thanks for that Mike and thanks for taking the time to comment!
Wow, 9 hours is pretty impressive. It goes together quickly, even for a first timer though. Not 9hrs quick, but realatively quick.
I’m having a lot of fun putting this thing together and I’m really looking forward to putting it to work!
As to jointing the top boards….my first thought was to swap them out with the apron boards, but I was afraid it would rack the assmbly too much. So I did just what I’ve been telling others not do. I over-thought it!
Judging by my limited research, we tend to over-build workbenches today. Some of the examples that I have seen of old benches from working shops look downright rickety. Yet those benches also look very well used. Hmm….
Anyway, thanks for the input. I really appreciate it and it will be beneficial for those who might stumble onto this blog.
Pingback: NW Workbench-Progress 2-Complete | GREG MERRITT – BY MY OWN HANDS