
This was a lucky week and weekend for me. Waaaay more shop time than normal. If it wasn’t for that pesky day job there would have been even more. Of course, management insists that her and the boy need eat every day. Ingrates!
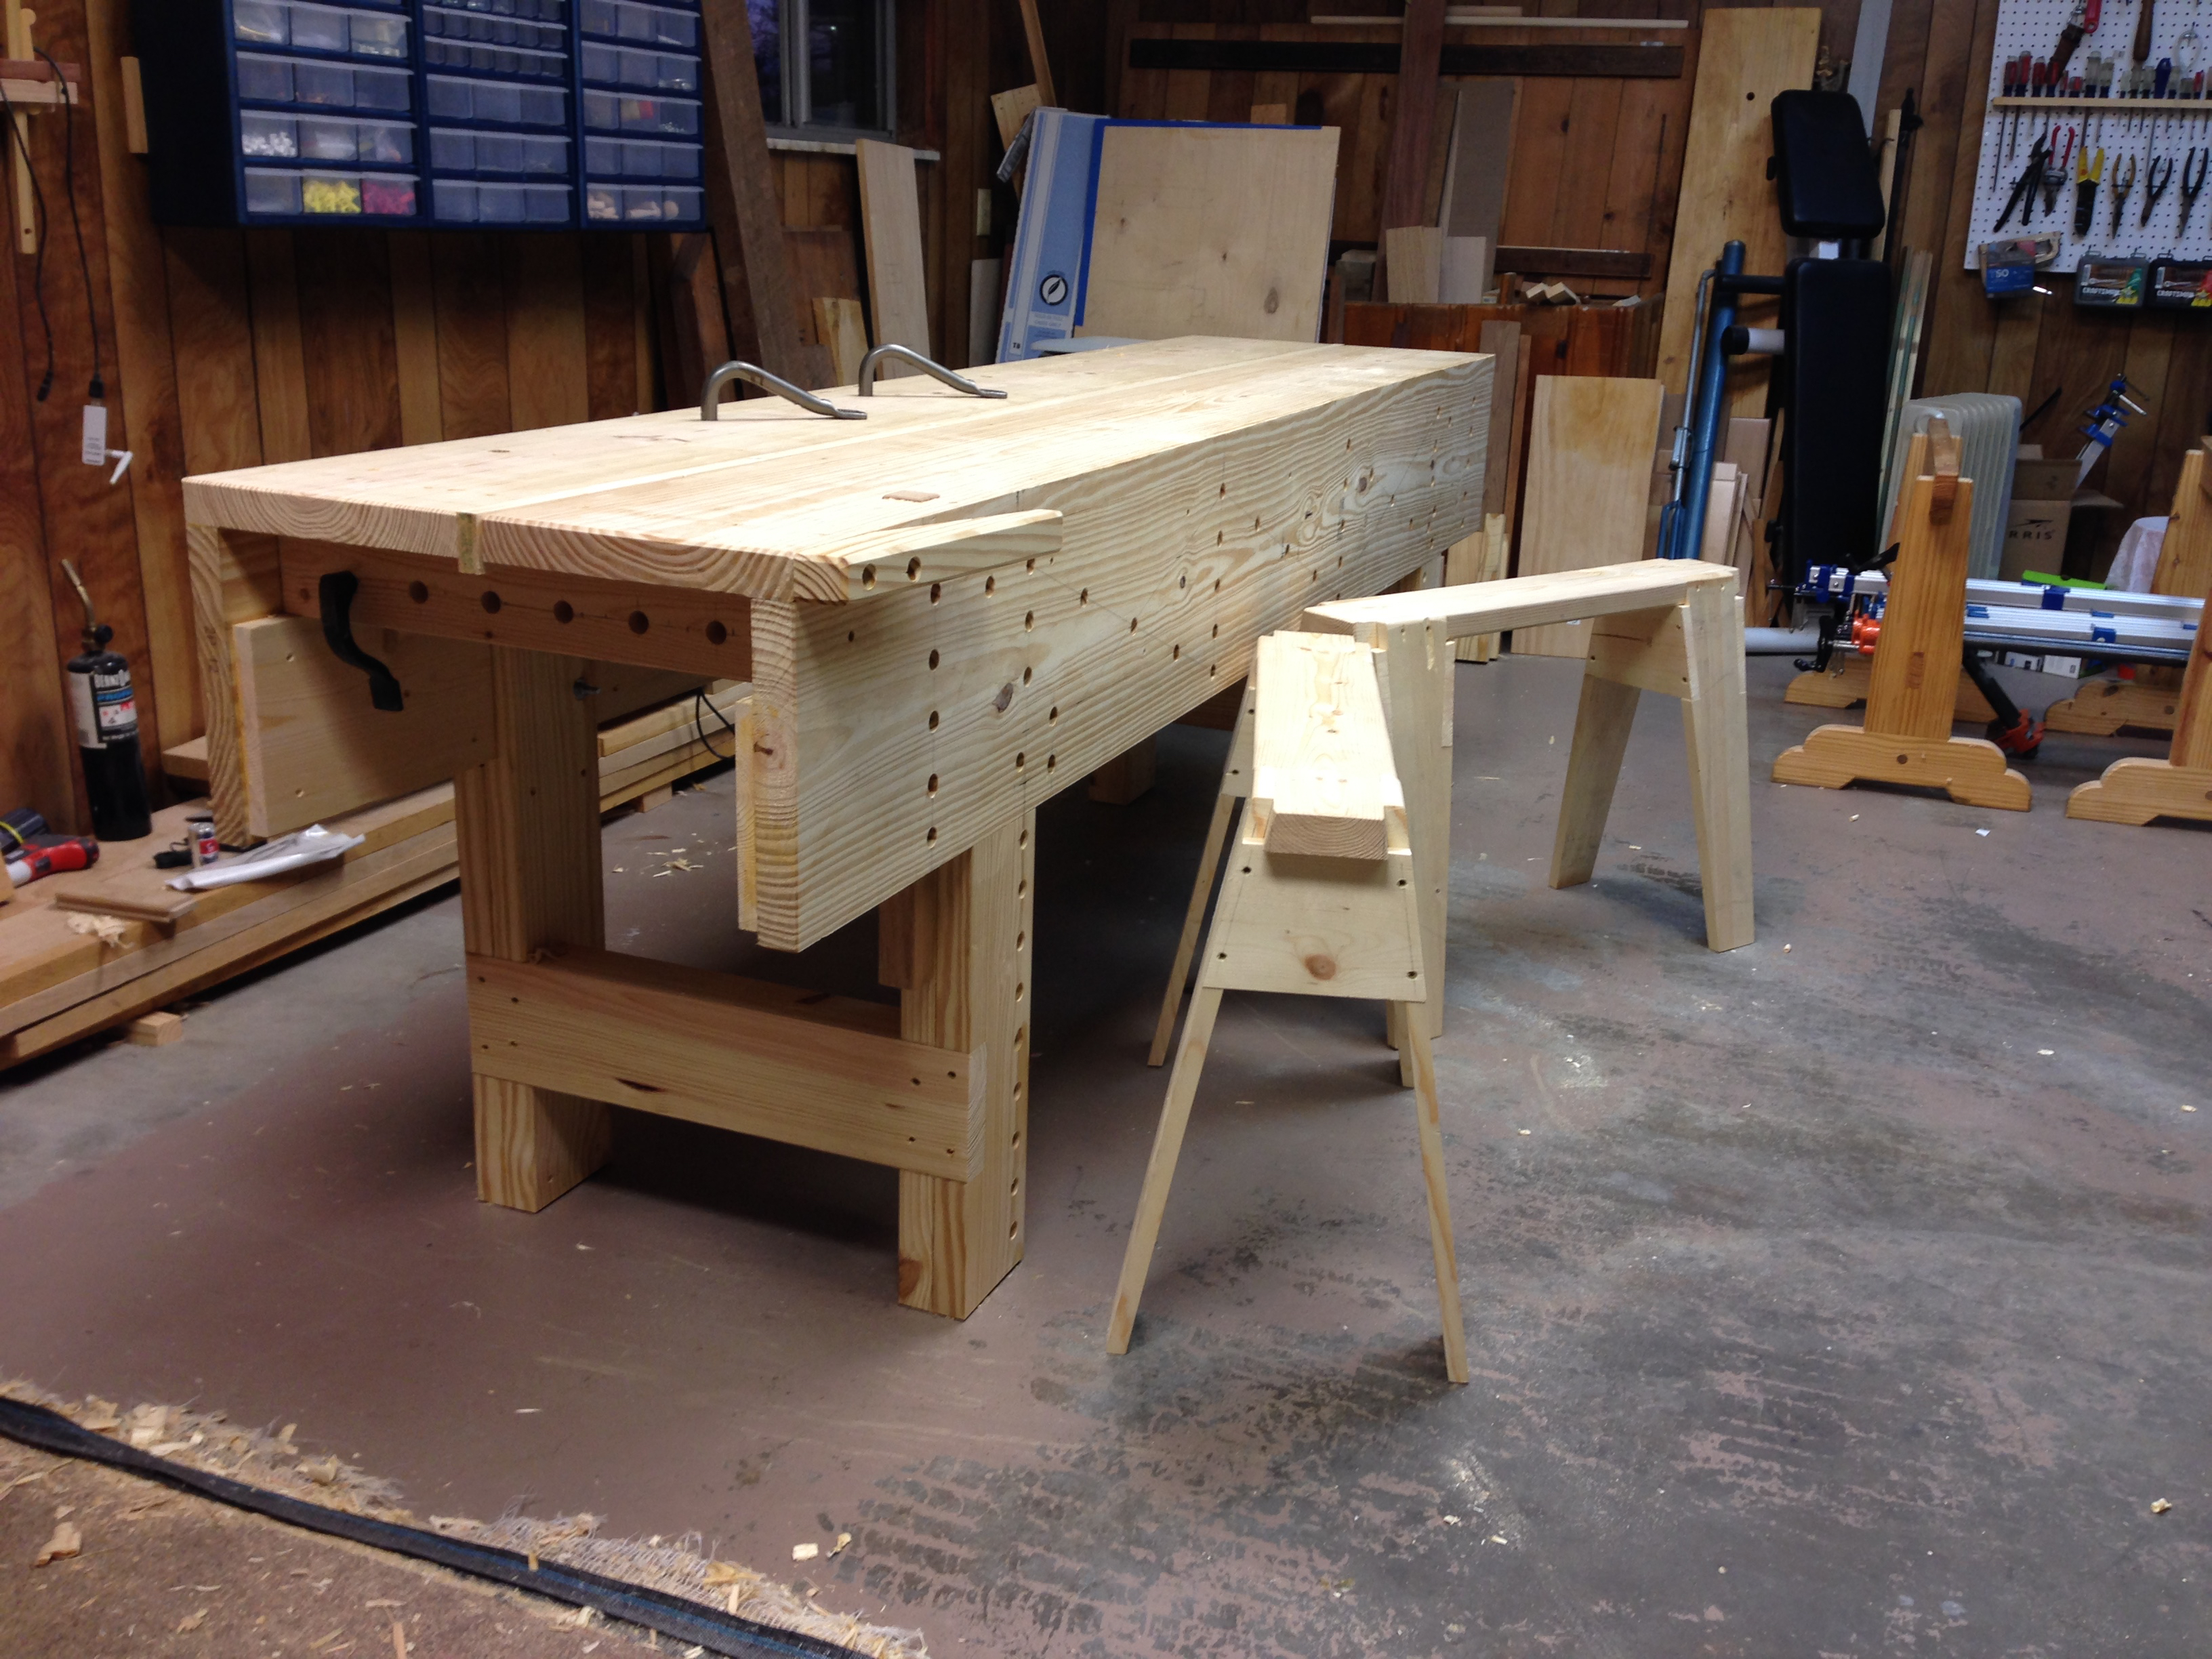
The bench progressed throughout the week. The legs were bolted in place and added blocking to the bottom side of the top as per the video. This blocking adds a little extra thickness for the holdfasts to bite into. Then the top was flattened. Then the aprons were planed square to the top. Since the frame was flattened as I went the planing of the top and aprons was a pretty easy task. I also whipped up a crochet from a piece of drop and marked out all of the dog/holdfast holes.
A center stick was fashioned, again as per the video, and dropped into place. Then I spent a good deal of time boring 3/4″ holes. There are a lot of holes! Not hard work, just a lot of it.
Since I was following the video, I decided for the total immersion approach and knocked together a couple of the saw benches that are built in the video.

I bought the “Naked Woodworker” video when it first came out. Mostly for the entertainment value, since I had no intention of building another workbench at the time. Upon watching the video, I was impressed with the versatility of the design and enjoyed Mr. Siemsen’s teaching style. I should point out that there are actually two videos in the “Naked Woodworker” package. The first video takes the viewer to a tool meet and Mr. Siemsen discusses what is needed and what to look for to get started in woodworking. The tools are purchased and then taken back to the shop. From there, each tool is put into working order. In the second video, a saw bench is built. Starting with the layout of a full-size working drawing all the way through assembly. Then the building of the workbench is covered. Money well spent no matter where you are on your woodworking journey, IMHO.
Both projects from the video are readily accessible for the first timer. I have little doubt that with the two videos someone could go from an empty shop to working wood with no problem whatsoever. I also believe that there are nuggets of information to be had, no matter your experience level. Heck you may even wind up with a new bench!
I’ll need to run a few projects across this new bench in order to really get a feel for it. As of right now though, I’m quite happy with how it turned out and I’m excited to put it to work.
Part 1 Greg Merritt

Pingback: NW Workbench-Progress 1 | GREG MERRITT – BY MY OWN HANDS
Killer. I hope you have a lot of fun with it.
Thanks Jeff…I plan to!
Fantastic job! Any revelations encountered along the way? I’m not recalling specific instructions on where to place the bolts that hold the legs on in the video – I’ll review again before starting my build, but also figure common sense will guide me successfully in that department.
This evening (I’m changing my mind about things frequently at this stage) I’m leaning more toward following the dimensions / cut list exactly, and going with the 1×8 material for the ledgers behind the aprons. I wobble back and forth on that – I’m very tempted to add weight/mass to this bench wherever possible. In Mike’s videos I’ve seen the bench scoot around a bit while working on it. Some of that is unavoidable outside of a giant Roubo style, and this bench is stiff enough I don’t imagine it gets in the way of doing good work.
Still, mass is a strong temptation. For that reason I’ve also debated with myself using Maple for the legs, maybe everywhere except the top. Now that I’m living in Minnesota I’m a mile from my Father-in-law, who does some power-tool woodworking, has two portable mills and long story a wee bit shorter: we’ve got plenty of Maple and Ash to work with.
On the other hand, just running with the bench as described in the Naked Woodworker video, making a trip to the box store and buying the lumber, is probably going to be the quickest way I get this all put together.
You went with 2x4s for blocking under your dog holes, I take it? Those look like two Gramercy Holdfasts in your photo, correct? If so I’ve got two just like them, and will want to hear about your experience with them. Someone I read somewhere said they had issues with the blocking coming lose, and advocated for doubling up the top for that reason. Maybe though they had some crap 2x4s with too much twist in them, or something else interfering with the hold they were able to get.
If I hear from you before I build mine that your holdfasts aren’t performing as excellently as they should, that may lead me to go with 2x for the ledgers, or look into a firmer connection for the blocking (maybe 2x6s instead of 2x4s would secure better…).
Any way, looks great, and you finished it quick!
Thanks Wesley!
First, Mike Siemsen left a comment on my first post in this series and addressed the ledger/apron and blocking question. Basically, 1×8 is more than enough for the ledger and he has never experienced blocking coming loose. As to my blocking, I used any leftover bit that would fit. Some are 2×4 and some are 2×6. I used plenty of glue and have no doubt that they will be just fine.
Yep, the holdfasts are the Gramercy ones and work great. I played around a little and they locked down tight every place I tried them. I test clamped 3/4″, 1-1/2″ and 3-1/2″ material. All with no problems.
If you look close you will see that I jogged two dog holes on each leg. The sketchup drawing that comes with the video is a little vague but the lower bolt in each leg favors the center of the leg. I moved mine over towards the edge and just jogged the dog holes. I don’t think its any big deal.
My bench is mostly southern yellow pine and is plenty heavy. It will scoot on the concrete though. Not a mass issue so much as a friction issue. I put a piece of the spongy shelf liner under each leg. The bench smashed it flat and no more scoot.
Shoot me any questions that come up when you get closer to building one. I’ll have a little time put in with this one and will have a better idea of how it actually performs.
I saw that Mike commented – some days I just love the internet – here we are talking about what was meant to happen here or there, and the person we’re discussing hops in and gives us his take. Thought it was awesome of him to take the time and do that.
If your holdfasts are grabbing on secure to those ledgers, then I’m sure mine will too and there’s no need to deviate from the original plans. Only reason I think I would deviate from the plans at this point is if I end up with extra 2x and other material from this garage construction, and opt to not purchase more boards.
I hadn’t thought about movement from the perspective of friction before, but that sure makes sense. My minds turning around ideas this morning about ways to counter that – shelf liner would work – wonder if adding some fat feet, in the way of plywood squares, or doing something to create more surface area in touch with the floor…. Probably not worth messing with, but I enjoy puzzling through these sorts of issues, trying things out to see what works and what doesn’t. Part of the fun for me.
Really cool. I got the Naked Woodworker videos too, and I’ve been dying for an opportunity to build this bench. Maybe in the spring when the weather turns…
Thanks. It really is a fast and easy build. With a chop saw and power drill you could pull this off in a day and a half with no problem.
Wow, fantastic build. I also went full immersion with this DVD and built the saw horses first and then the bench. Mind you it was my absolute first woodworking projects ever, so I was very excited to complete it. Mine is a hell of lot uglier than yours though. You’ve inspired me to write up my thoughts on my finished bench.
Thank you Bill! As a new woodworker your thoughts would be very valuable to have out here on the web as to how this bench was to build.
Thanks Greg. You did in fact inspire me to write up my workbench build (finally) and here it is: http://www.woodnerd.net/post/2015/11/22/my-first-workbench/
My bench is obviously much rougher than yours, but I’m pretty happy with it. At least I have a bench now :). And I’m off and running.
Looking forward to seeing what comes off it, Greg.
You and me both!
That is a nice looking bench.I bought the dvd at WIA this past year and have yet to watch it.I am afraid it will tell me my hand tools are dirty and neglected..:)
Thanks Matt. Face your fears and watch it. Consequences be damned!
Dam… no naked persons again…. lol
Good work with the bench!
LOL…thanks my friend. Now lets see if I can make it work!
Wow Greg, that’s quick work! You’re putting us all to shame. I’m intending to replace the building my workspace is in, currently a falling down concrete panel garage full of leaks, mice and cracks. Temperatures now are below freezing. Until that’s done there will be no new bench.
I’m looking forward to anything you can say about how working on yours works out, insights are always good. I’m still undecided on the style of mine, especially the aprons.
Don’t be afraid to put some holes for the holdfasts in the tops of those saw benches, gives you a low ‘bench’ for serious carving or dealing with large green wood.
Thanks! Good luck with the new shop.
Once I run some projects across this bench, I put up a post on how it performs for me.
Don’t worry, I have no hesitations toward drilling a hole if the need presents itself. I fully plan to treat the bench and sawbenches as tools/jigs. They are there to be used to their fullest extent.
Pingback: NW Workbench-Progress 2-Complete | Paleotool's Weblog
There are a few ways to keep a bench from moving. I too like the shelf liner or the stuff you put under rugs for anti slip. Making the legs bigger or plywood pads will not increase the amount of friction it spreads it out over a bigger area. If you work on concrete stall mats are a good idea as you will break fewer tools when they fall on the floor. it is also nicer on your legs. You could also put down plywood and nail cleats around the legs. Since you will be standing on the plywood the bench won’t move. I am glad to see the original premise of the video is holding up. Keep up the good work! Mike
Thanks Mike! I rather like the principle of nailing the thing to the floor (or nailing cleats down, as it were). No reason to be moving that thing around so often anyway.
Thanks again Mike. Your insight is invaluable. I’m really impressed with the design. Very easy to build, from accessible materials and quite a nice bench.
I’m going to give the sheet of plywood idea some thought. The shelf liner locked the bench down but working over concrete makes me nervous.
I bought the dvd too because after using the Sellers style bench, I wanted something different. I would like a vise on the bench. I could put my iron vise on it. This time I want it flush. So I can use the whole apron to clamp. I was thinking about a Scandinavian style (Frid/Klausz) because I don’t want those bars in the way of the vise too. Choices, Choices.
If you want a flush vice, why not consider a leg vise? Very easy to add to this design and will be flush with the entire front.
I have no complaints with my Paul Sellers style bench. I just wanted a bigger bench and decided to try this style. For now I’m going to make a chop as demonstrated in the video. I’ll decide if I need an actual vise on this bench after a few projects.
Looks awesome Greg! IMO this is the best/most practical bench design. Speaking just for myself, if a workbench takes months to build then it sort of defeats the purpose. Will your bench remain in the middle of the floor? Good spot if so, I wish I could say the same. I notice that you have a rubber mat on the floor. I know this bench won’t move, and the mat will only help.
One day if I’m lucky enough to move to a house with a real workshop space I will take your cue and build a new bench for the occasion, and very likely it will be very similar to this one.
Once again, well done!
Bill
Thanks Bill. There is no doubt that this was an easy and fast bench to build. I have some organizing to do, but I plan to keep the bench away from the wall and make use of both sides. The previouse owner of the house left the matt and a large piece of indoor/outdoor carpet, the green stuff. I think I’m going to spread it out and put the bench on that and see how I like it. For now I’m quite happy that I built this bench. I think it will be a good one.
Pingback: Will the Nudity Ever End? - Woodworking Unplugged
What I understand from M Siemsen comment is that you could have a (light) portable bench with a potable floor with the cleats. If you are standing on the plywood, all the forces will be internal to the system (floor +bench) and there will be no relative movement between the bench and your feet (unless you make steps).
Don’t put the plywood on coasters, otherwise it would give the same effect as working in a small boat 😉
Nice looking bench. I like the idea that the wedges on the P. Sellers bench would compensate any leg shrinkage.
Sylvain
Not having a vice must feel odd and frustrating, do you feel that is the case with you.
I need to run a couple of projects across this bench to be able to say for sure. As I progress in my woodworking I find that I use the vise less and less. I did make a chop that is secured with the holdfasts and will use that for things such as cutting dovetails. I generally perform most tasks on the bench top against a stop, even with the old bench. So time will tell. If I decide a need a vise, I’ll install one though.
I suppose you are right since it is possible to work without one but I on the other hand would find it tedious to work without one. I have been craving for a tail vice for some time but I often ask myself if and when I do finally, eventually ever get around to building myself a decent work bench just how often will I use that vice. Keep at it Greg you may find you don’t need a vice after all.
Pingback: Honey Do-Kitchen Island-Part 1 | GREG MERRITT – BY MY OWN HANDS
Pingback: ≫ ¿Terminará alguna vez la desnudez? – Prensa de arte perdido