
 OK, this is my final final post on this bookcase. There was a comment or two in my last post pointing out and inquiring about my edge treatment to inside corners. This set me to thinking about what I do and how some of the details get glossed over. Not because I’m trying to keep them a secret, but they have become so engrained that I do them without much thought. Anyway, I thought I would go over some of the details that make up this bookcase. First, I’ll tackle the inside corner treatment.
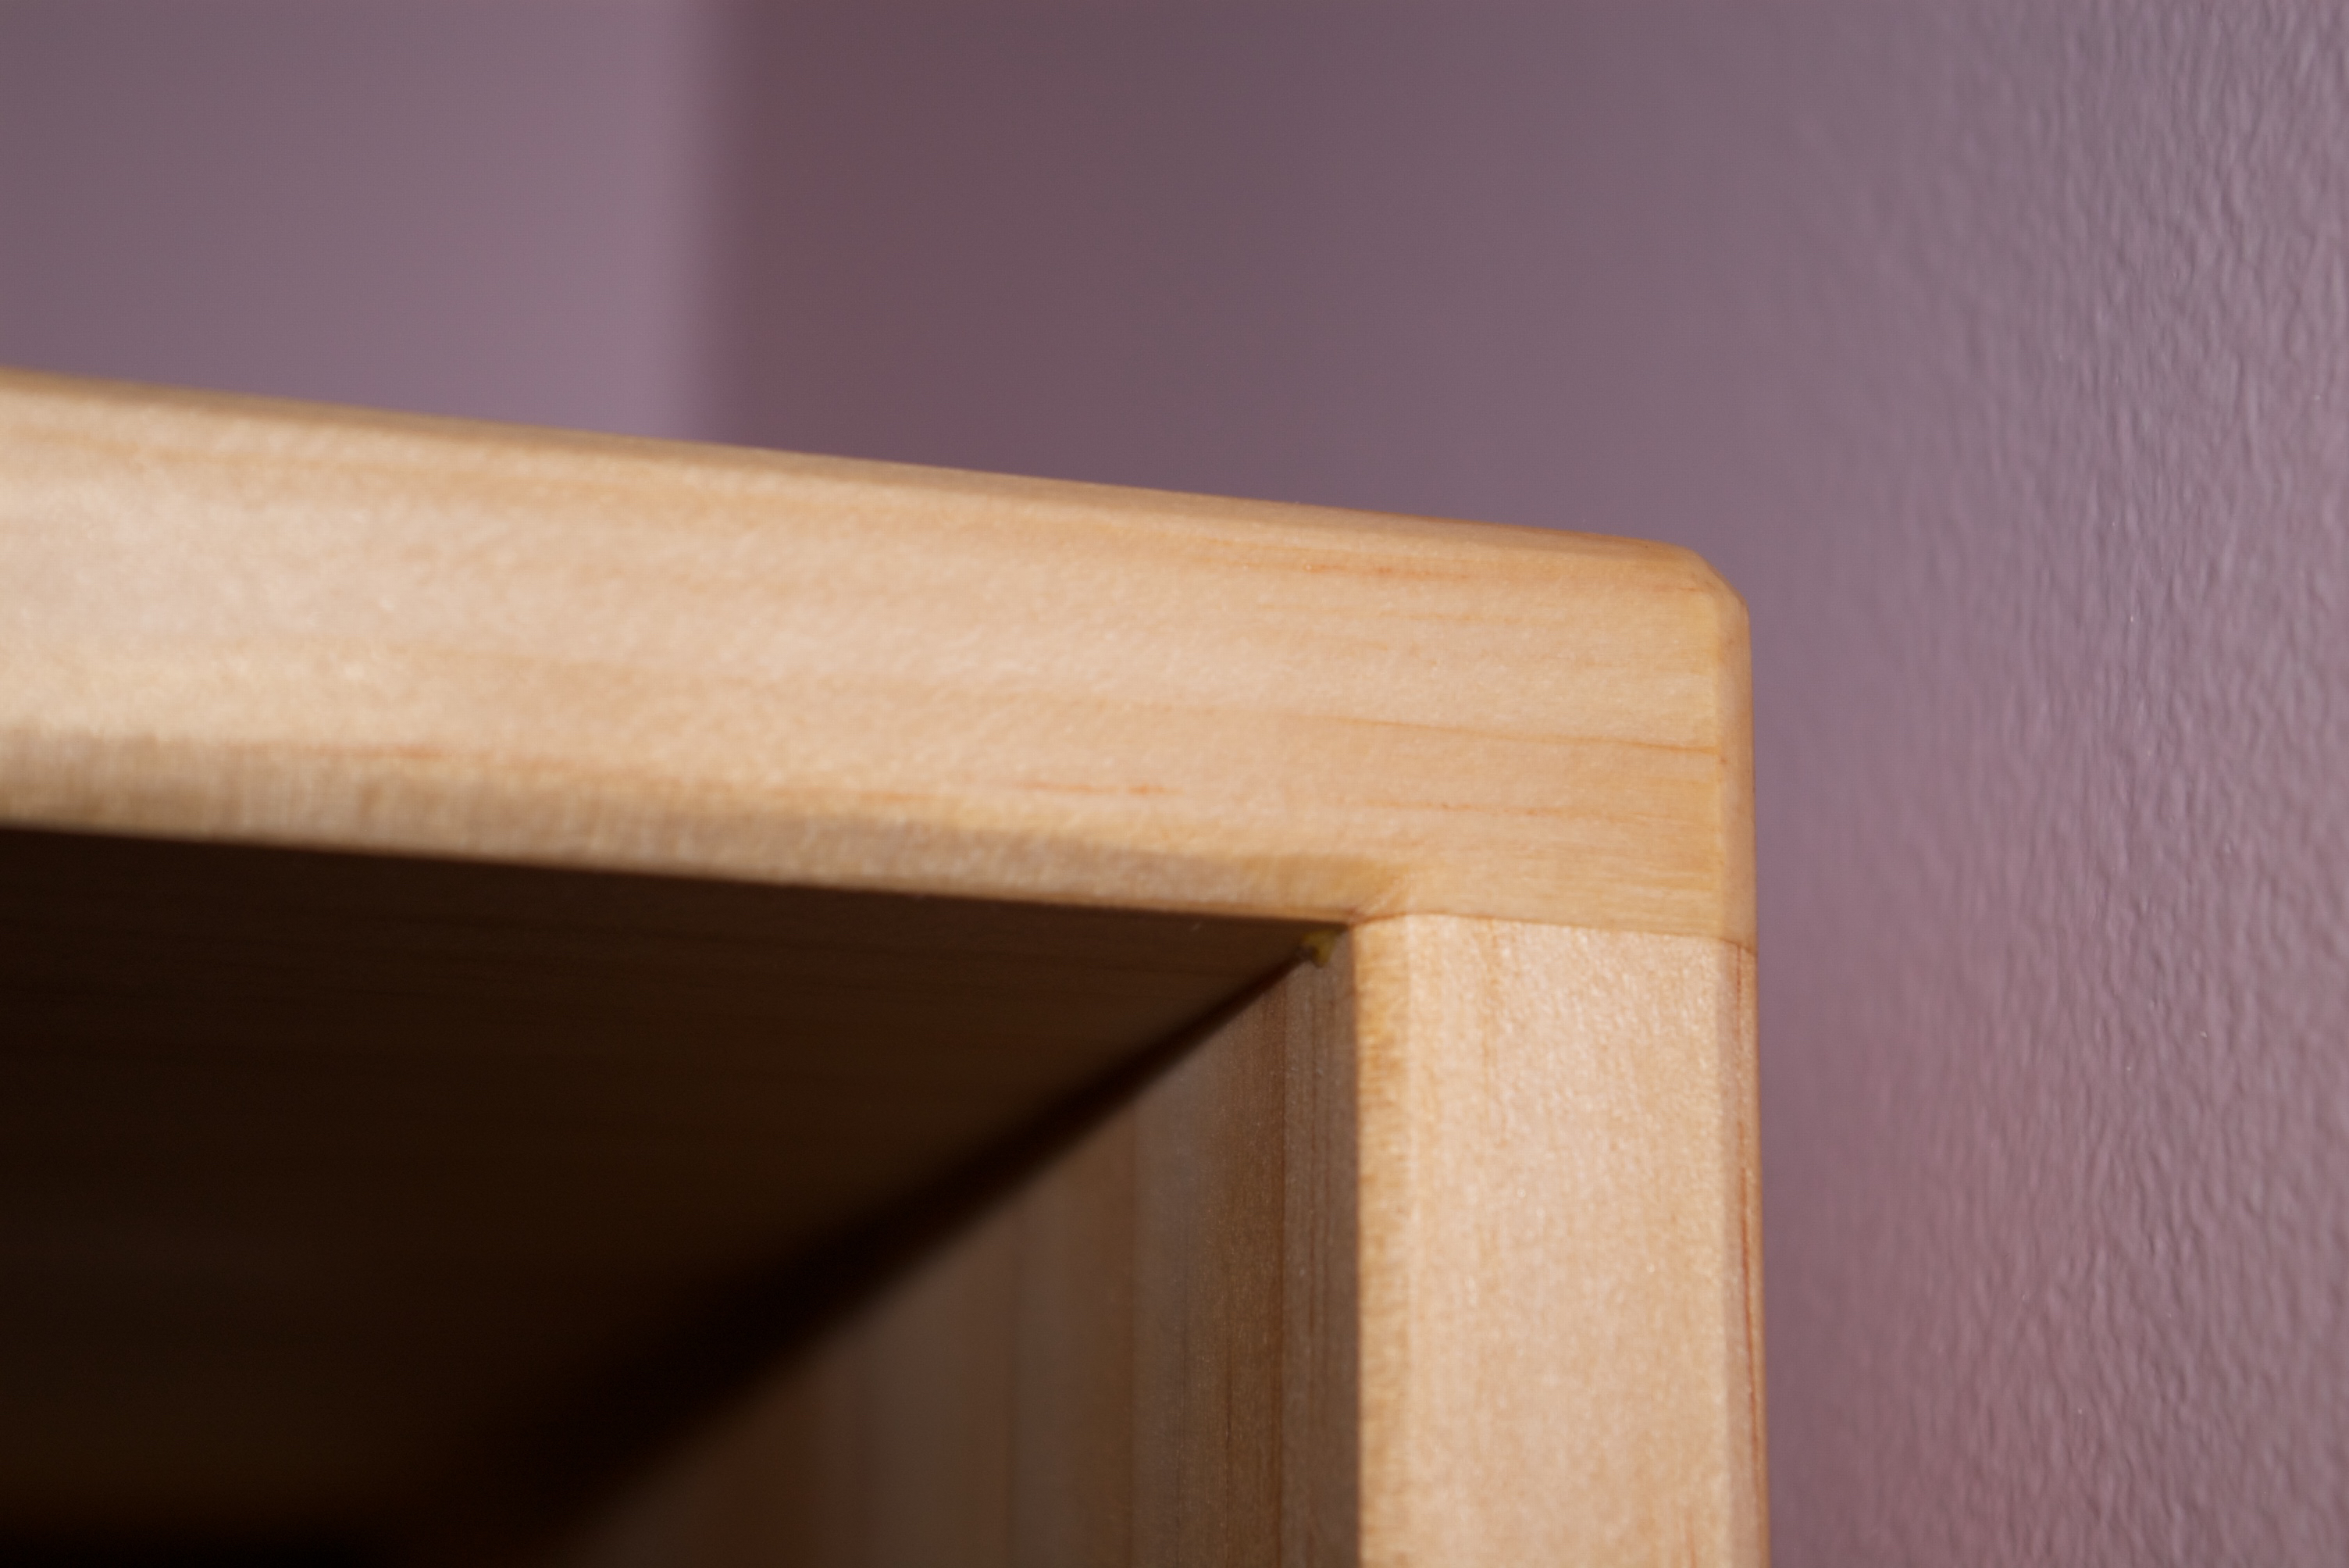
I never leave a crisp corner on any furniture pieces that I build. I like to put about a 1/16″(1.5mm) bevel on them. This is easy on the outside corners. A few swipes of the plane and I’m done. Since most of the inside corners can only be done after assembly, the plane is rarely an option. So for some time now I’ve been creating a bevel on the inside corners with a chisel and mitering all of the junctions. It’s somewhat of a meditative process for me. It’s also a great chisel control and grain reading exercise.
Here is an example on the bookcase carcass.
I do the inside of all of the drawers too, but try to keep that bevel to around 1/32″(.5mm).

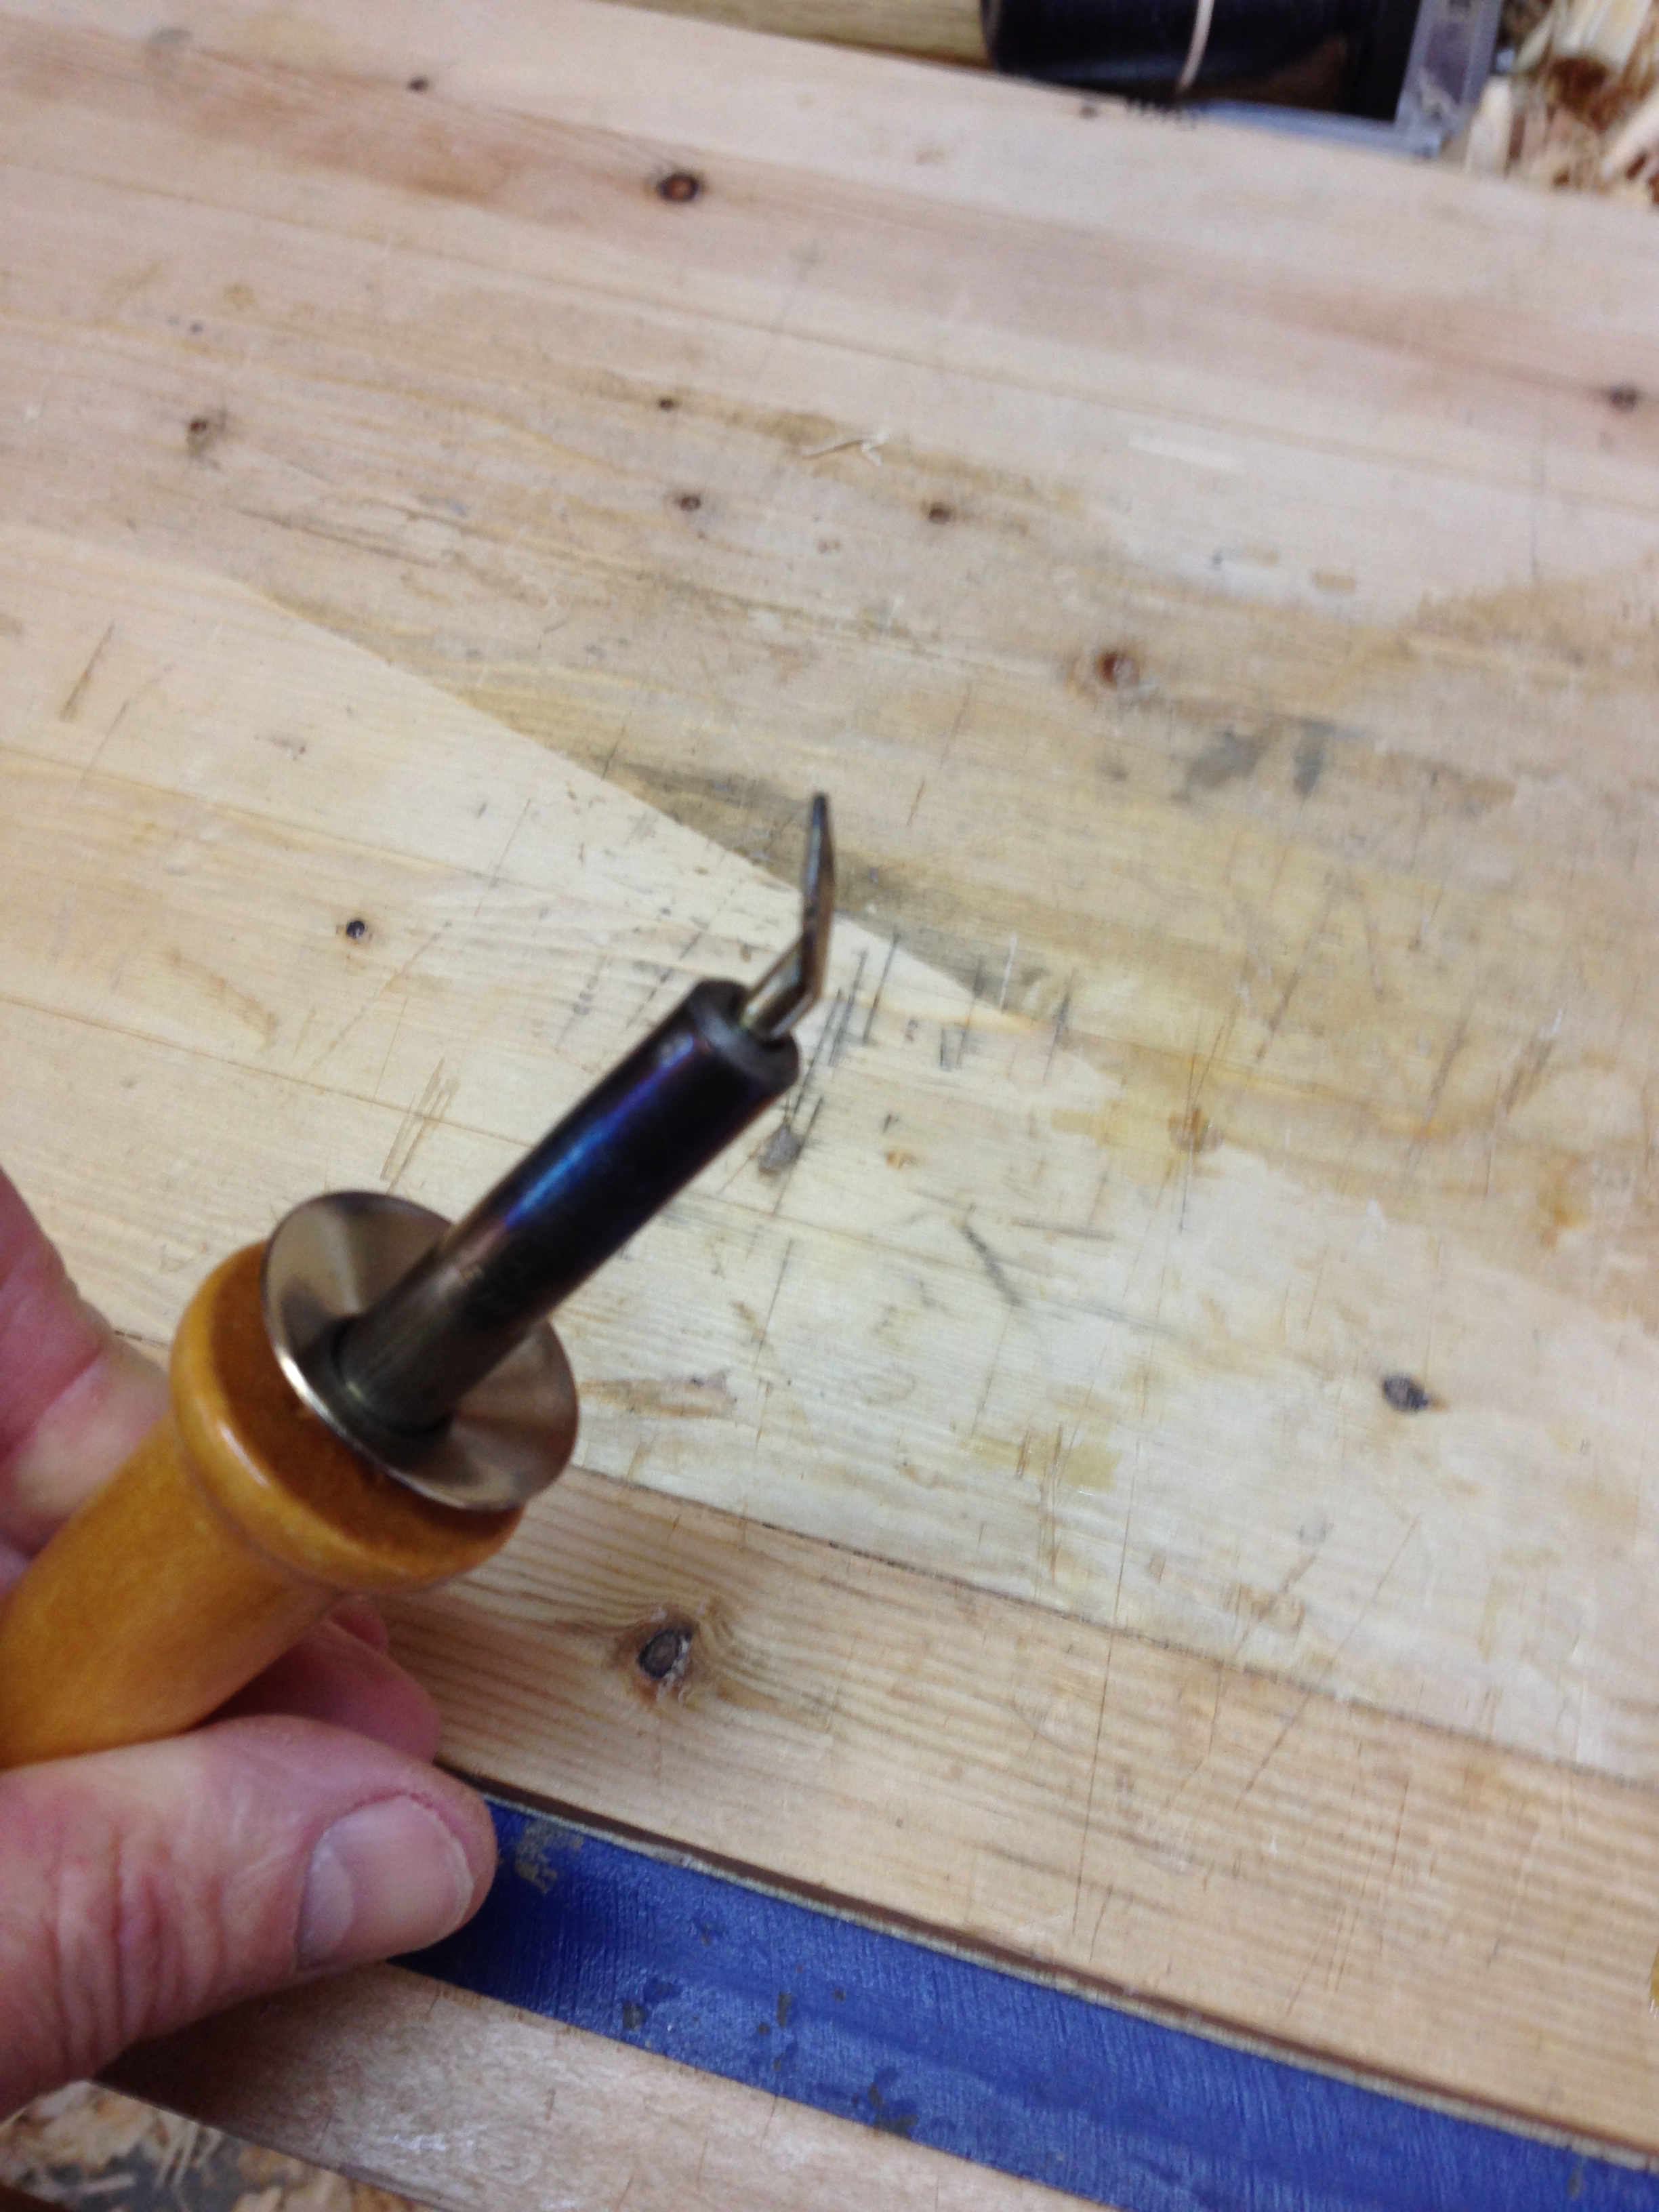
While I’m on drawers. I always add a bead to the perimeter of the drawer faces. I do this along the grain with the age-old trick of a slotted screw in a block of wood. I use a knife and chisel for the crossgrain portions. My #4 plane completes the round over on the outside and sandpaper evens it all up. Then I use a cheap craft store wood burning tool to burn the trough of the bead to create contrast.
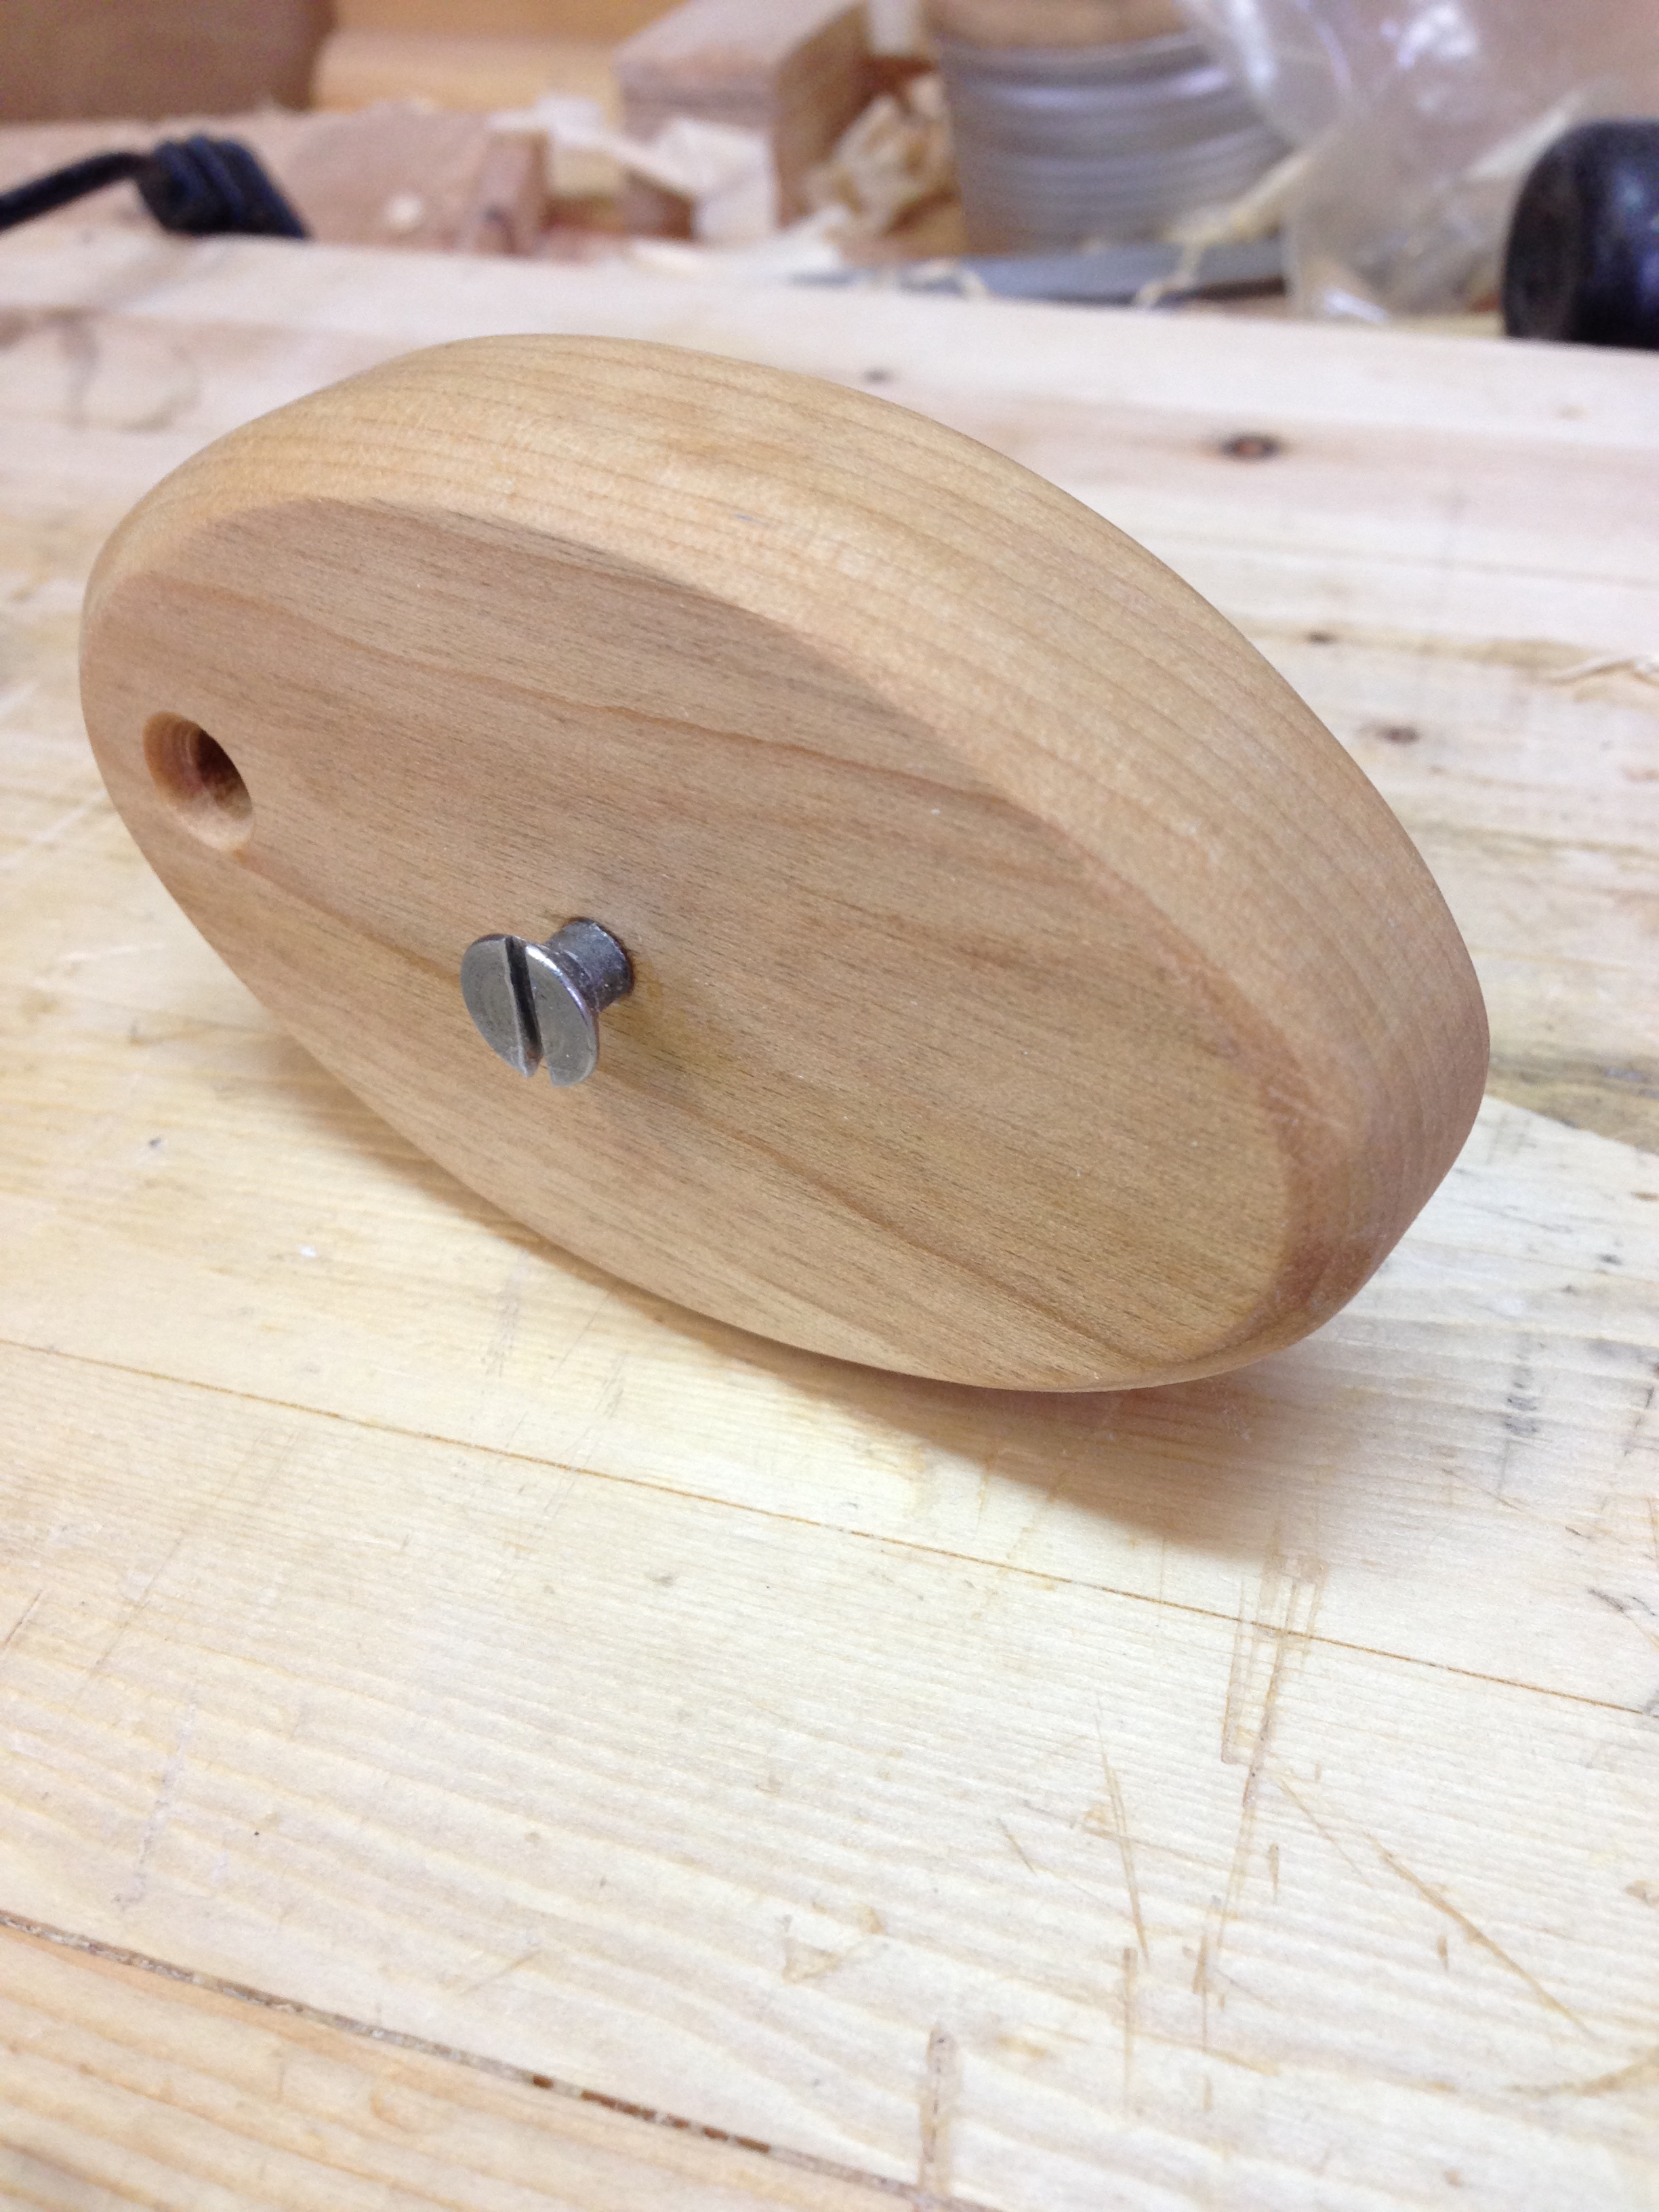
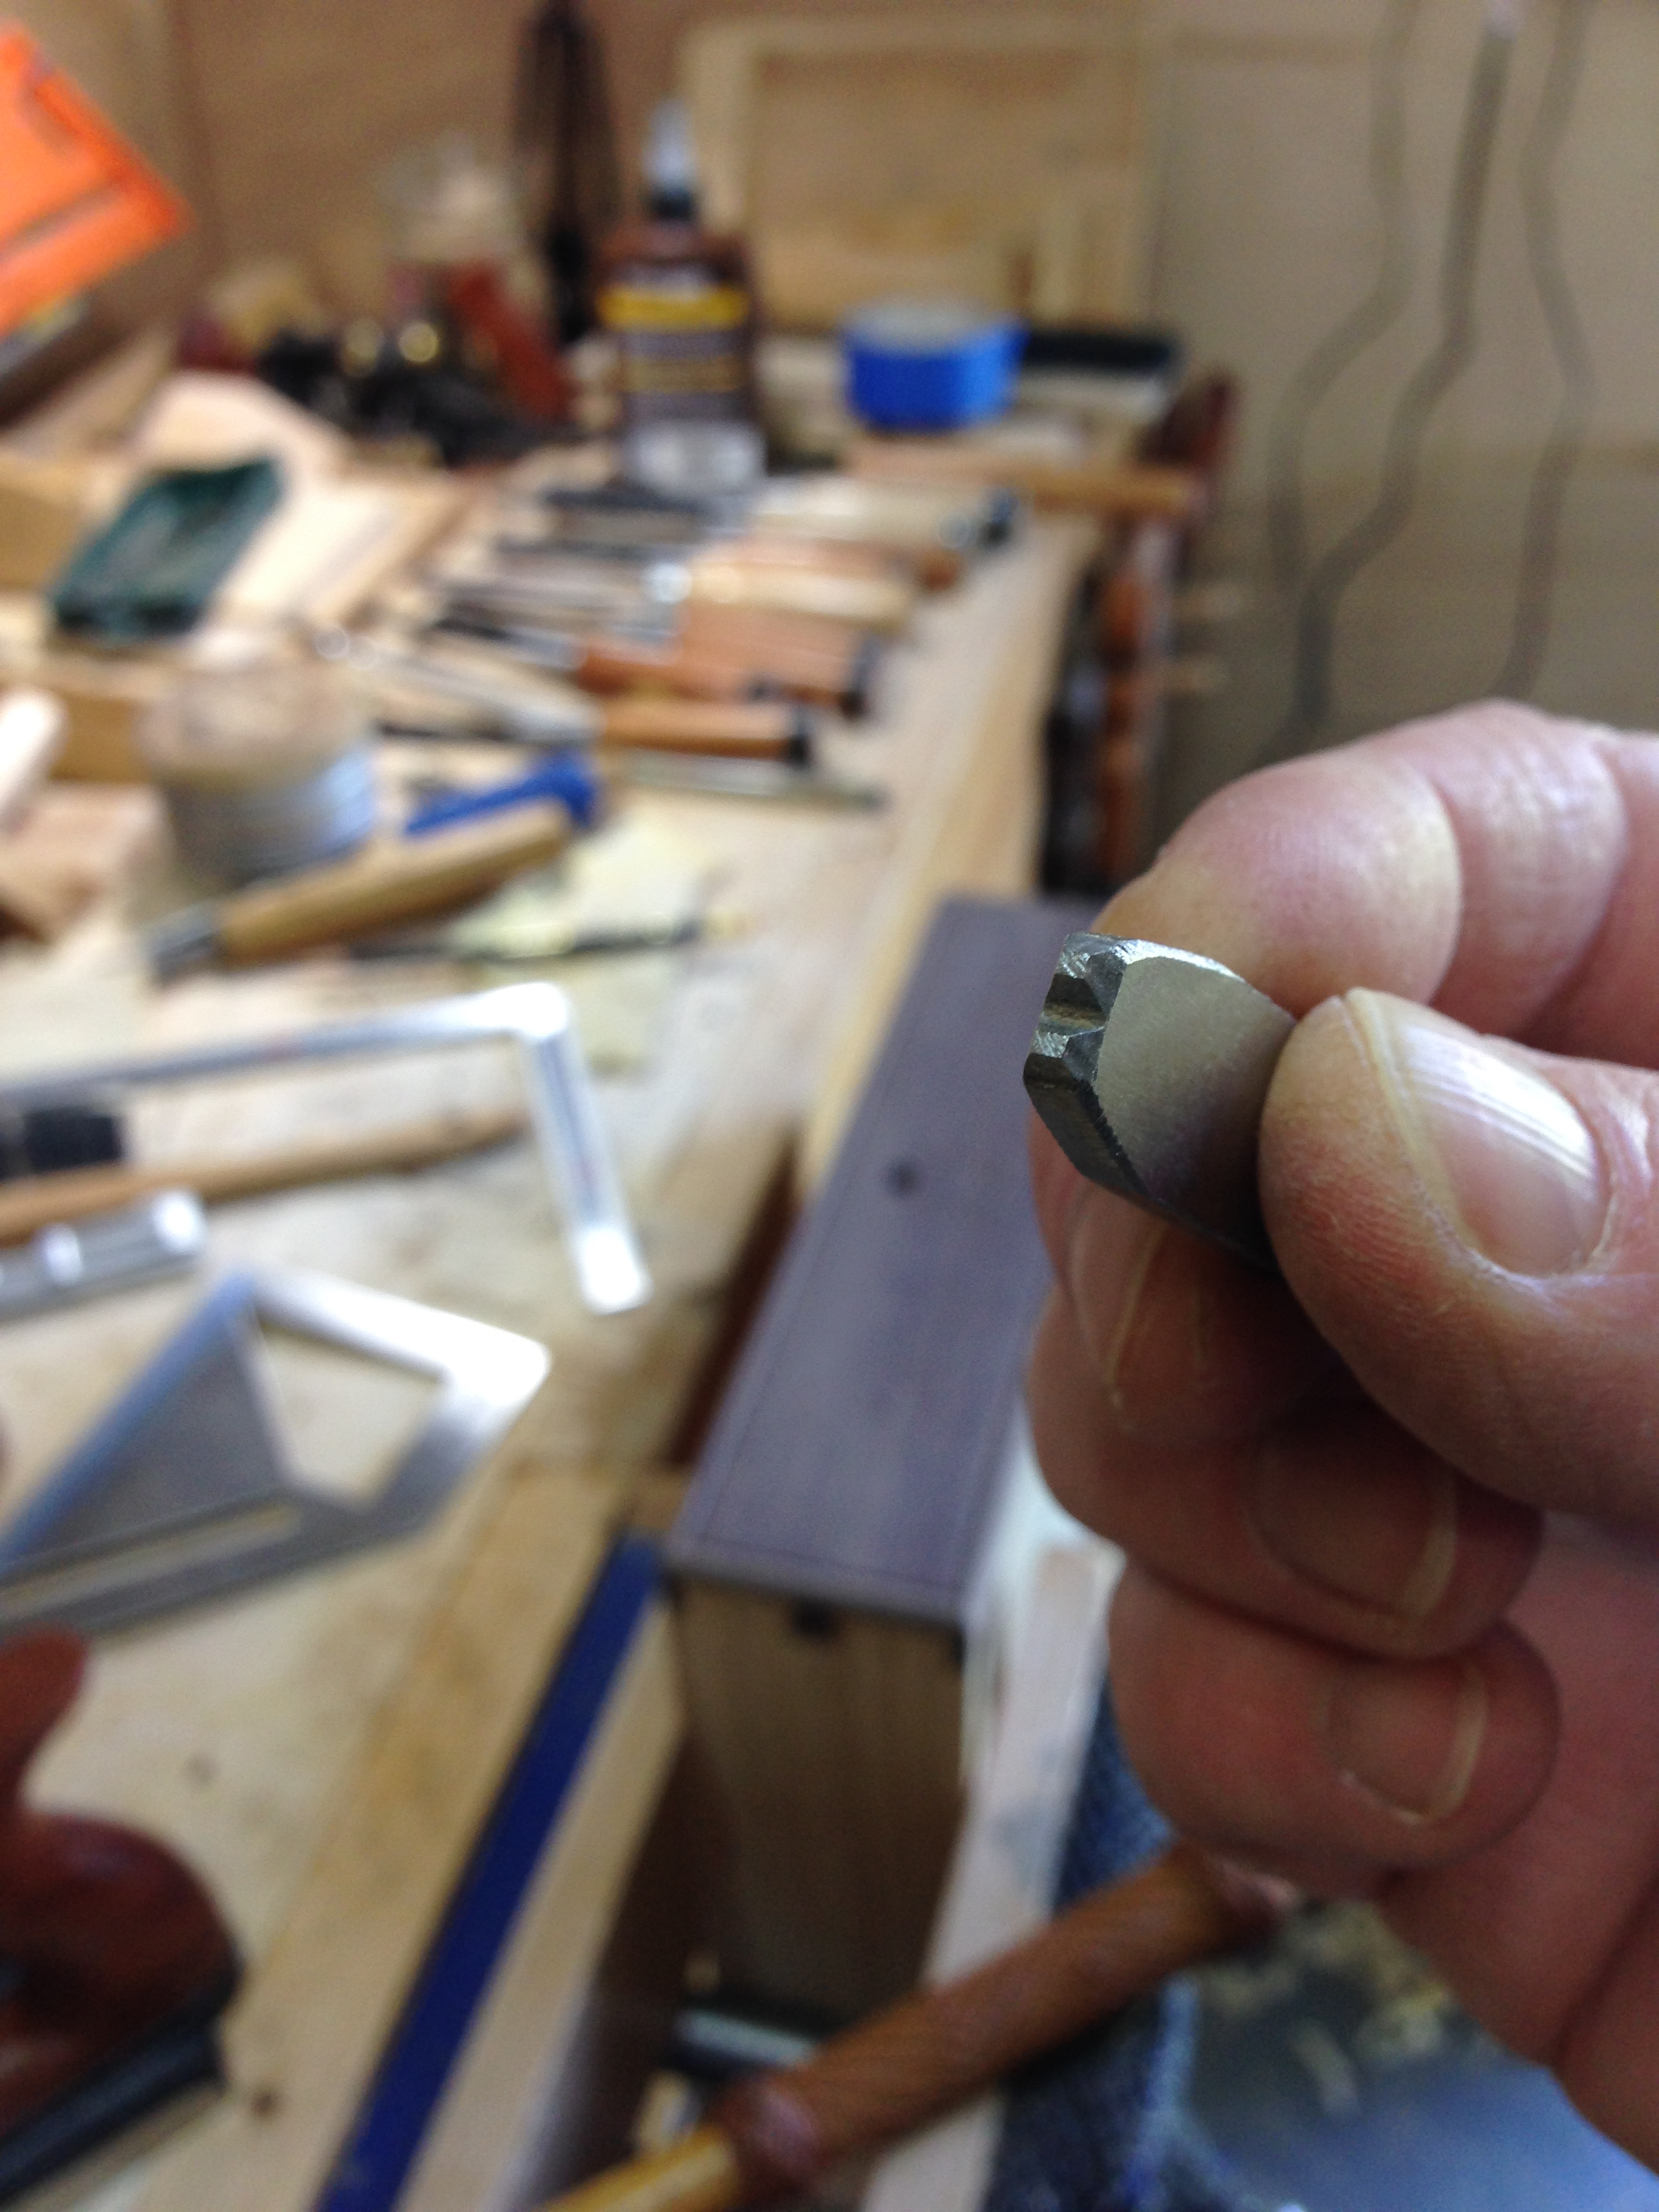
The texture detail on the drawer fronts were created with a simple homemade stamp. A piece of steel filed with a triangular file. I have one with two “nubs’ and one with six. Simple to use. Hit it with a hammer. The floral pattern was created with the same woodturning tool that I used on the drawer beads and the enclosing circle was scratched in with pair of dividers.


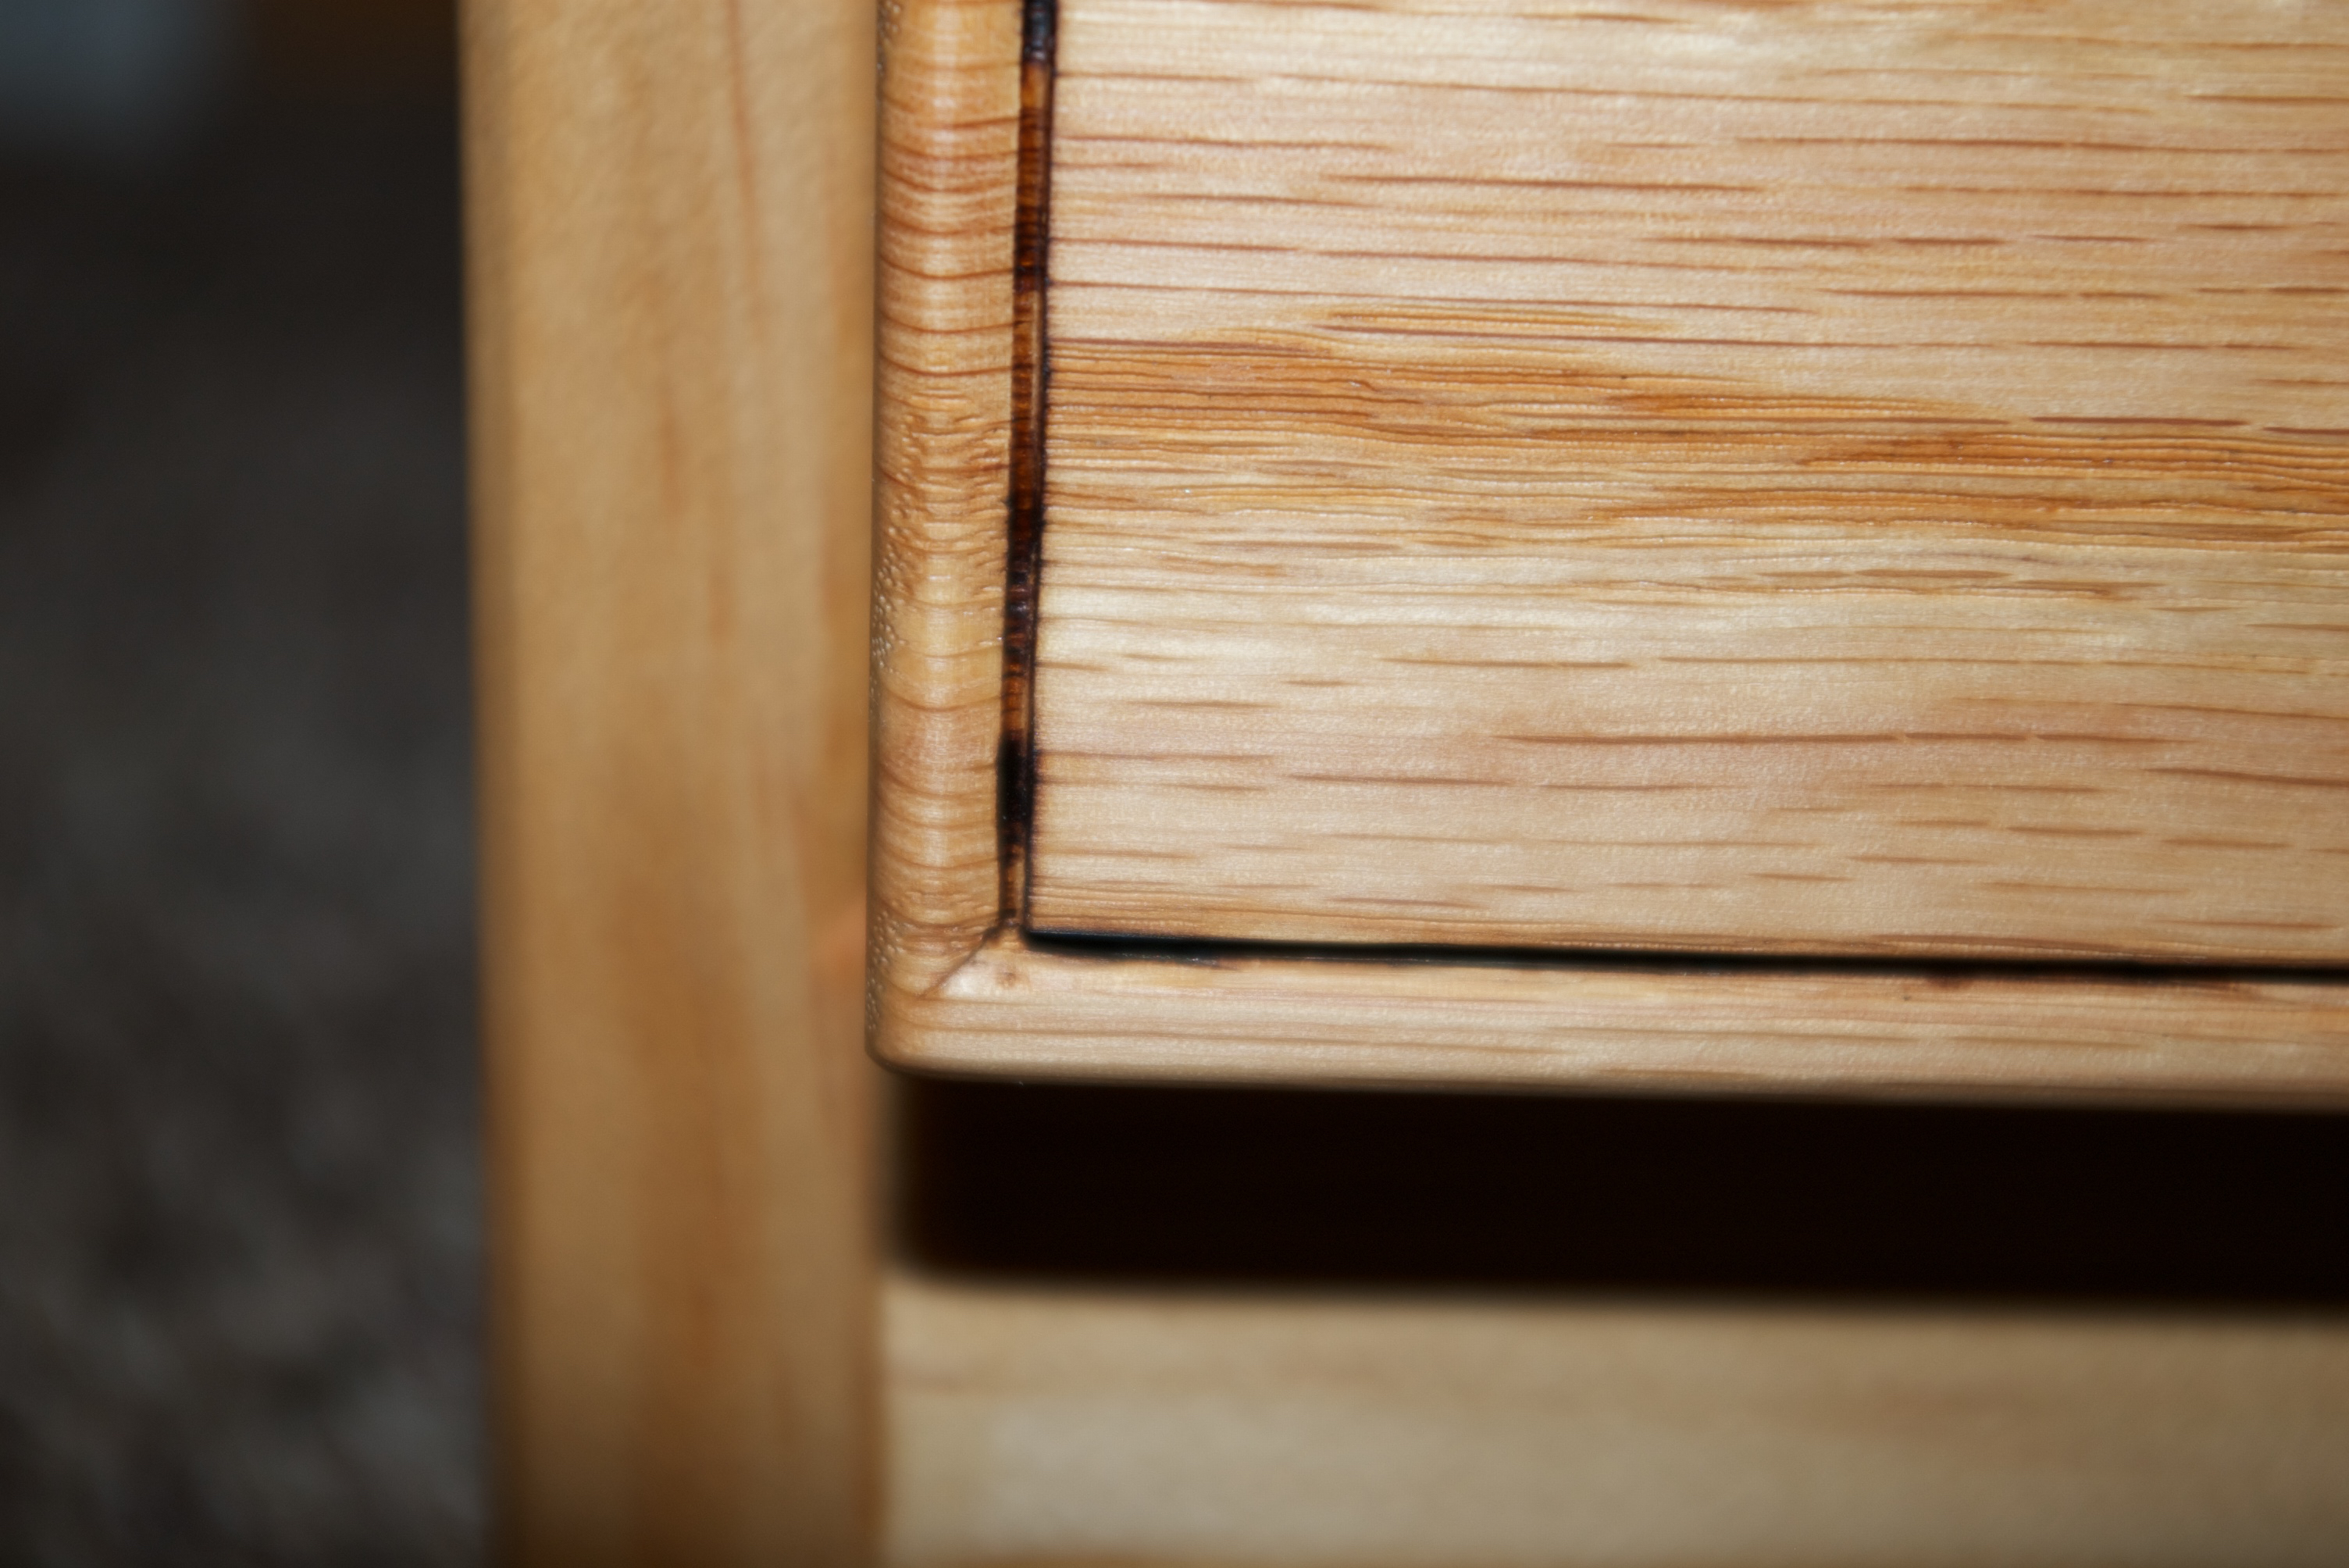
Before I leave the subject of the drawers, I want to point out that I inset these drawers from the face of the carcass about an 1/8″(3mm). The inset adds another level of dimension. Especially when paired with the bead on the drawer face.

The cove detail on the clover leaf/four intersecting circle detail and on the foot detail is a first for me. I simply used a gouge and took my time. I thought it would much harder than it was., but I think it’s actually easier than trying to do a round-over.

All of the above details are quite easy to create and really do not require any special tools. In fact, I bet that you have or could make all of them with what you currently have in your own shop. The only outlier being the wood burning tool. Basically, if I can do it, I know that you can do it too.
Hope that was of use to some and at least amusing to the rest.
Oh, just so I’m not the only one who will ever see it….here is what the back looks like. Yes, the spare bedroom/sewing room is painted pink. This was an edict sent down from management…I do not question the managements decisions. 😉

Greg Merritt

Hopefully management won’t require you to paint your new shop pink. 🙂
As usual, superb work, Greg!