
After my Cheerios and coffee this morning I headed out to the shop to try my hand at making dai #2. This dai will have the blade bedded at 45deg. My goal is to find the best blade angle for planing the typical material that I work with. I also want to forgo the chip breaker for simplicity’s sake. This may seem like folly on my part, but the path is my own.
Side Note:
Pictures are few for a couple of reasons. One is that my iPhone mount for my tripod is busted. Two is that I’m not entirely sure that what I am doing in making these dai is correct. The last thing I want to do is publish erroneous information.
I’m again using white oak and prepared a board slightly larger than the intended dai body. Planing it square and true. Then I began the layout process. One additional benefit of using a 45deg blade angle is that the layout is easy. The lines are either 90deg or 45deg. I like simple. I added a little water to my sumi pot and put the sumisashi to work. If you haven’t used ink for laying out joinery, your really missing something. An ink line put down with a well sharpened sumisashi is very fine and easy to see. Anyway, the layout is quick and only took a few minutes.
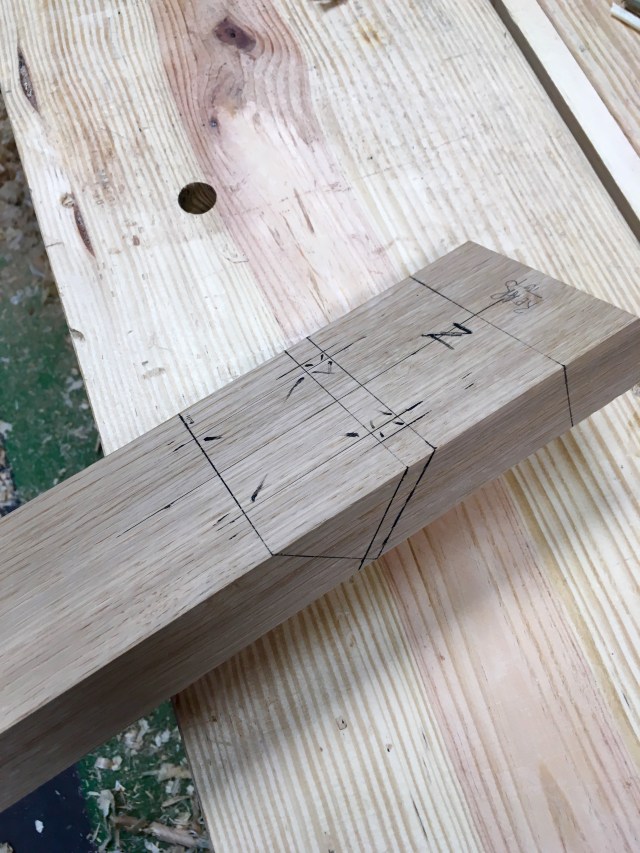
I began by chopping the mouth opening.

Then flipped it over and chopped the remainder of the opening. Then I sawed the ramps for the blade retention. Once that was done I turned my attention to fitting the blade. I have had to add a paper shim to every one of my Japanese style bench planes to tighten the blade because I remove too much material from the bed, including the one that I made this past week. That was not going to be the case with this plane. No sir!
I went very slowly and fitted the blade down into the dai millimeter by millimeter. It took me almost two full hours, but the blade fits plenty tight and makes good contact with the dai.

The mouth opening is good and tight too.
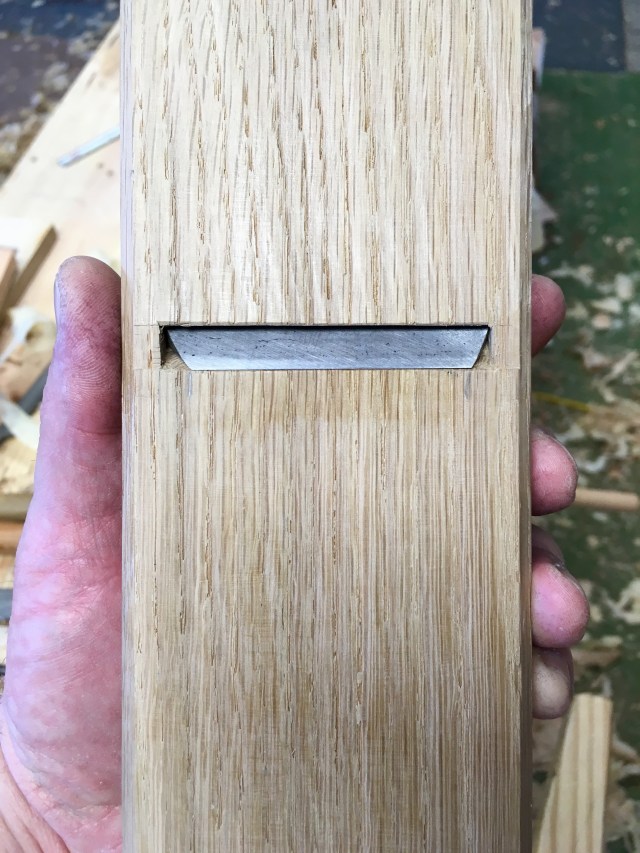
There is an opening down there, I swear.

Then I installed the blade leaving it a couple of millimeters shy of the sole and flattened the sole on sandpaper that was glued to a thick glass plate. Once I was satisfied, I began conditioning the sole to establish three contact points. One at the front, one at the rear and one just in front of the blade. My original plan was to only have two contact points, which is how I set up the 50deg dai. But I figured I would start with three first and see how the kanna functioned. With that done it was time for a test drive.

Now THAT is what I have been looking for! There is something very satisfying about pulling a plane and having a ribbon shaving leap out like a rooster tail. The resulting surface was smooth and burnished on the fir and SYP sample pieces that I tried. I think 45deg is the angle I have been looking for.
After filling the floor with ribbon shavings, I wiped the dai with a coat of Tried & True (except for the sole) to help keep the dai clean. I’ll let it acclimate overnight and refine the sole conditioning tomorrow.

A shot of the end showing grain orientation.

I’m old enough that I don’t get excited over very many things anymore, but being able to make my own dai and have a functioning kanna has me excited. Lots of possibilities. Crap…I have a chisel tray that needs to be completed…
Part 1 Greg Merritt

Well done old boy now you can make a whole set and don’t stop making them as well, the more you do the better you’ll get at it. Nothing wrong with selling a few on eBay.
Thanks Salko! I’m on the hunt for used blades already. It would take a heck of a lot more before I ever thought about selling them. I’m still surprised that I was able to pull it off twice in a row. LOL
It’s called skill brother, you have developed skill.
I might be getting the hang of this woodworking thing after all!
Nicely done Greg!
Thanks Brian…this could get addictive real fast!
Now you just need to put some ‘miles’ in it! 🙂
Yep…now I’m going to try my best to wear it out.
Hi Greg, wow… great work!
Thank you!
We woodworkers are strange. Who would imagine getting so much joy from making a tool?! Often more joy from the tool than the other things the tool helps us make. How strange is that?!
Beautifully done!
Thank you Bob.
We woodworkers are an independent bunch. Being able to make our own tools is yet another level of freedom and independence and we are keenly aware of that fact. So is it strange that we find joy in making tools?
That’s great Greg. A LOT of satisfaction in making your own tools. I’m looking forward to making some wooden planes after Richard McGuire does his video series on that.
Thanks again Matt. I’ll be looking forward to seeing what you produce.
Hi Greg,
great job. I’m not familiar with Japanese planes, but it looks as you have made a nice one.
It is producing pretty nice shavings And hopefully even more it is producing nice surfaces too 😉
The feeling having done a tool by yourself and it is working like expected is priceless.
Cheers,
Stefan
Thanks Stefan!
You are correct of course, the resulting surface is the most important aspect. The shaving is inconsequential, but is a good indicator as to how well the plane is setup.
The only way to know for sure if I have built a decent plane is to put it to work. Any shortcomings will reveal themselves pretty quickly. 😉
Pingback: Kanna in Action | BY MY OWN HANDS
Pingback: The Saga of the Kanna Continues | BY MY OWN HANDS
Pingback: Training | BY MY OWN HANDS