
The best way I know to learn a new skill is through repetition, lots of repetition. My ultimate goal is to transition over to using the Japanese plane (kanna) exclusively in my woodworking. However there are several challenges that must be met in order for this to happen.
The first challenge is to gain understanding and skill in setting up the kanna to reliably take a shaving. Part of this process is to learn how to properly condition the sole. Of course I took the hard road and went the extra step of making my own plane body (dai).
The second challenge is to learn to sharpen the blade properly. Japanese plane blades need to have a flat bevel, no rounding, in order to function optimally. I have had these blades for several years and poor sharpening in the past has led to a good bit of corrections that need to be made. So the sharpening at this point is mostly fixing these errors, but I’m getting close.
The third challenge in transitioning to the kanna is to train my eyes and muscles. Setting the blade squarely and for a depth of cut visually with a hammer takes some getting used to. The tricky bit is that the amount of blade protruding through the sole is quite small. Literally the width of a hair or less. Training my eye to “see” the blade and correlate the amount of blade with a depth of cut takes practice, lots of it. My body needs to learn the mechanics of pulling the kanna as well. My hands, feet and muscles all need to be trained.
So over the last several days I have been making an effort to spend at least on hour a day planing, sharpening and conditioning the sole. What is surprising is that very small adjustments can create dramatic changes in how the kanna performs. The bottom line is that the only way that I can comfortably begin using the kanna in my woodworking is that all of the above needs to become second nature. I have begun to see improvement, little by little. In another week or so I may feel comfortable enough to start a project with the kanna as my plane of choice.
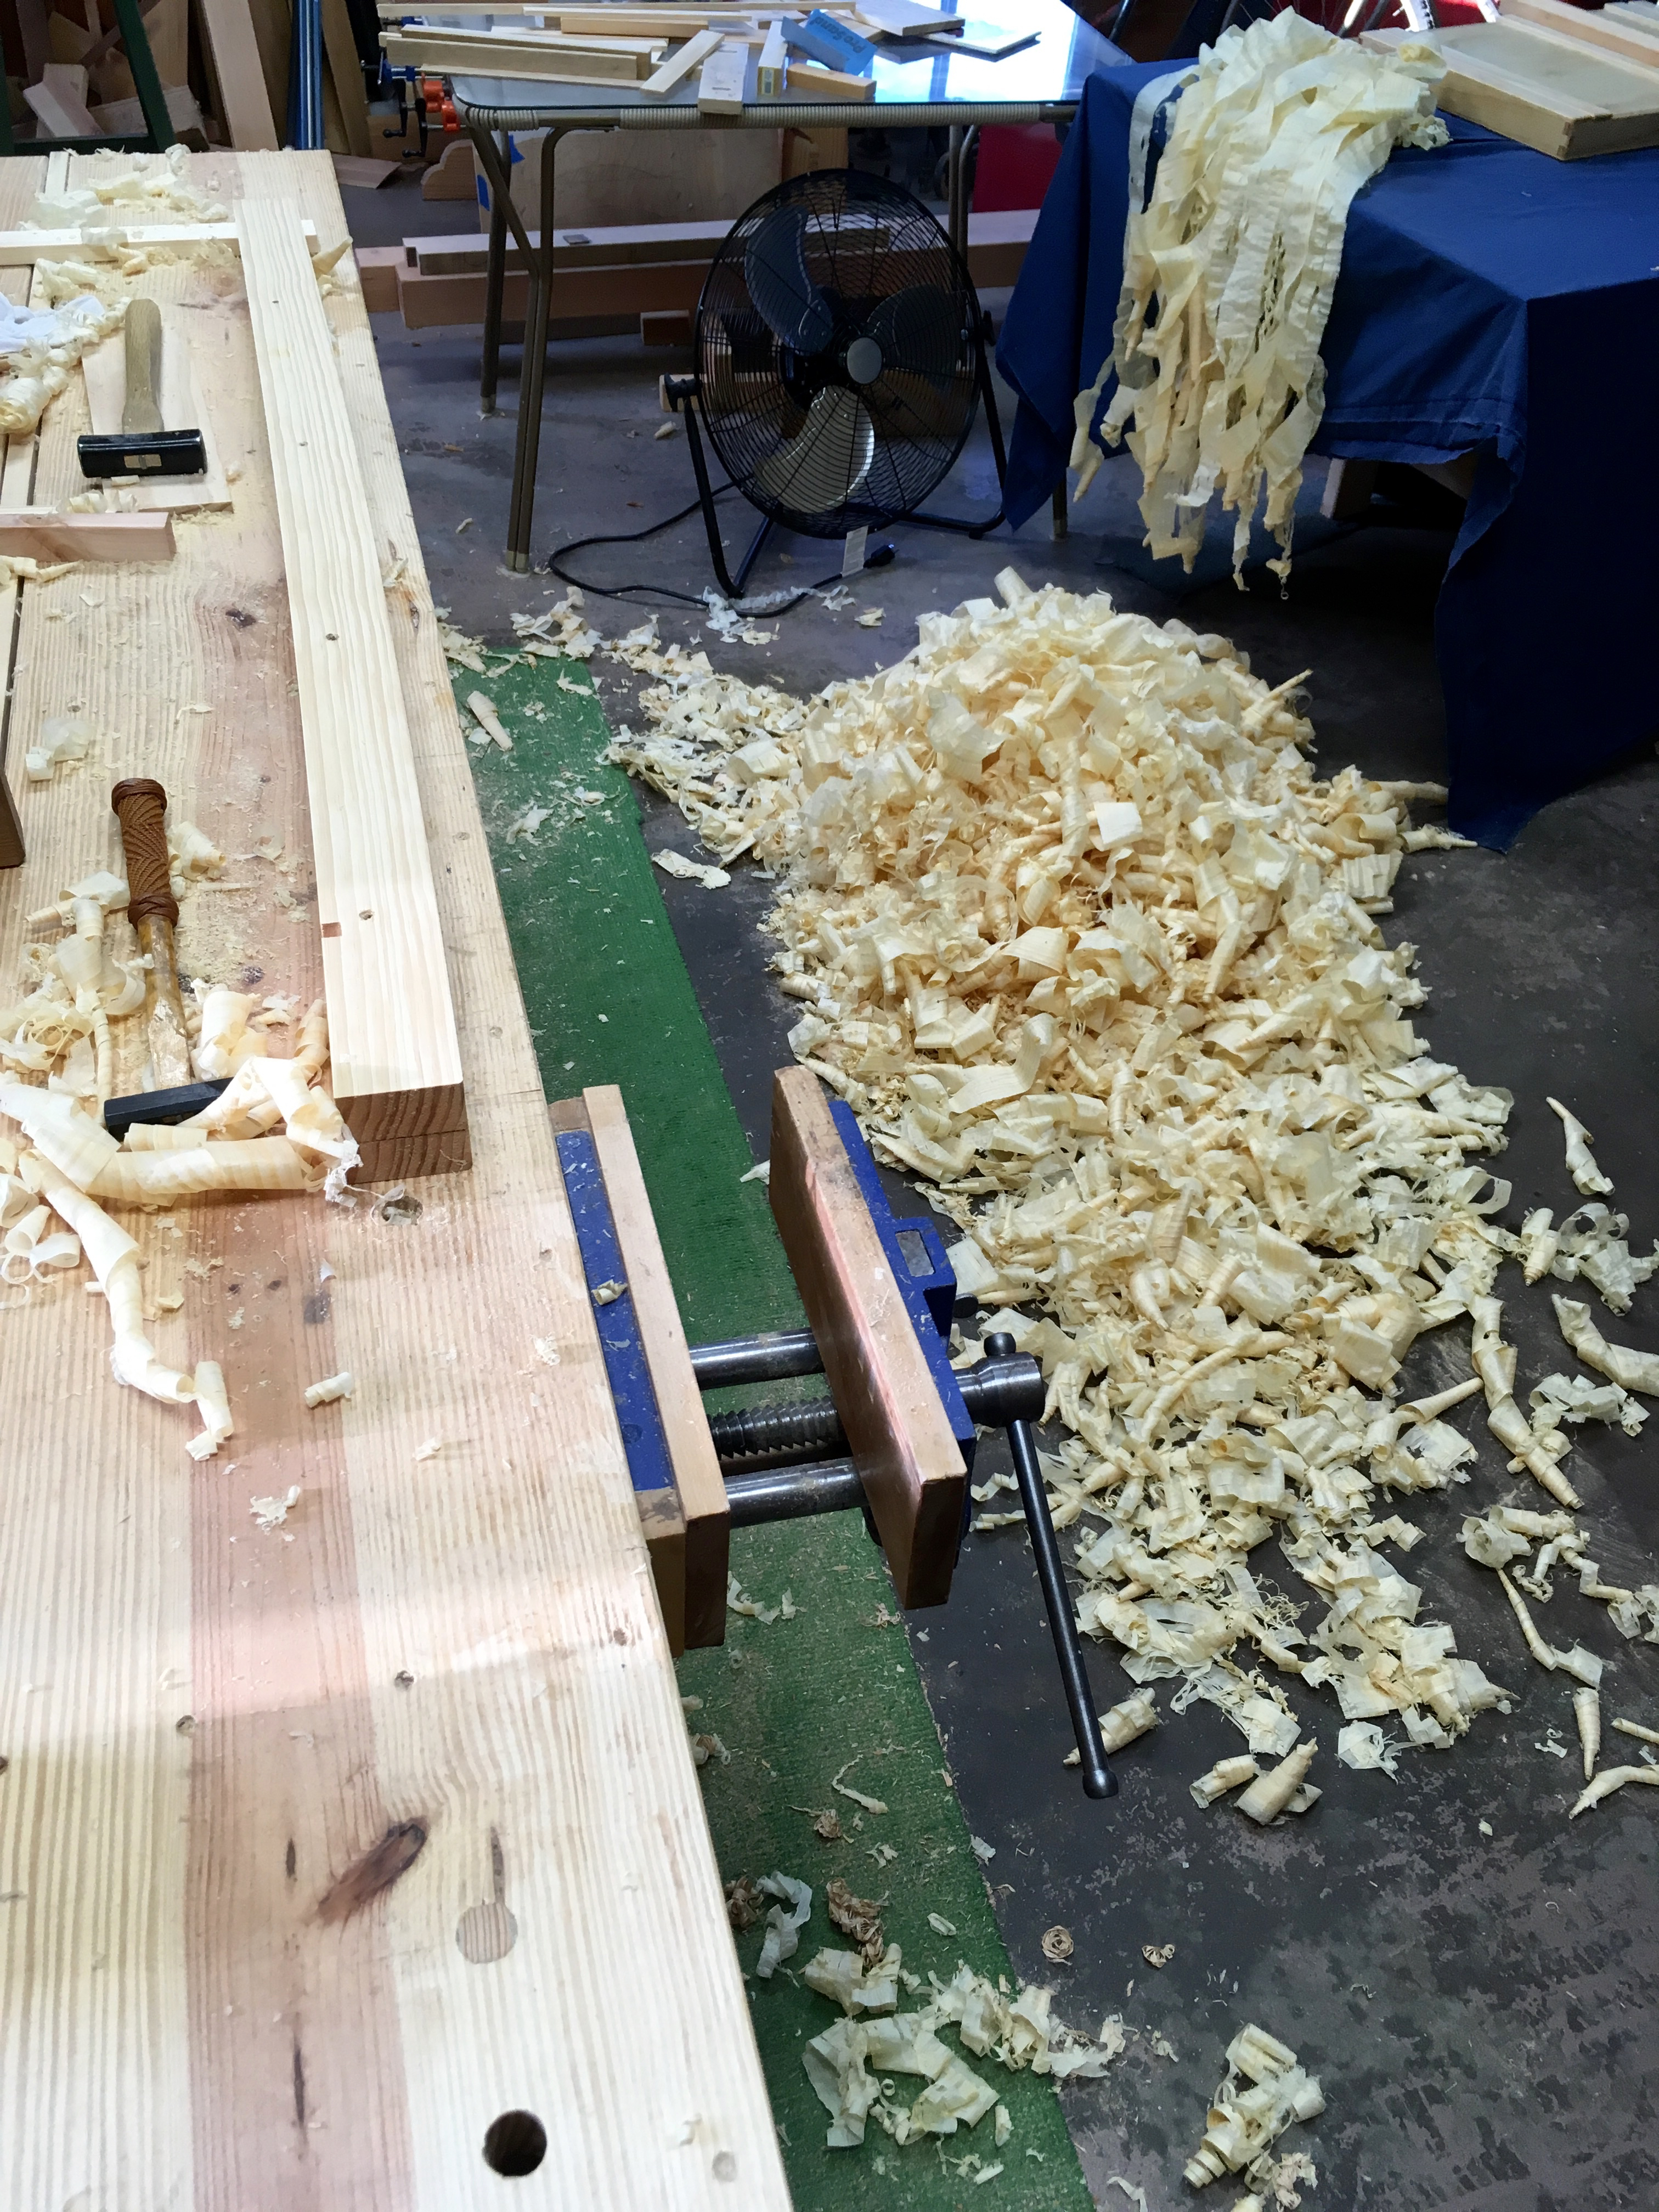
The only piece of wood of any length in my shop upon which to practice is a pitiful bowed piece of SYP. At least two faces are flat and it has enough length that I have to move my feet to plane its full length. The pile of shavings represents the last three days of practice. On the table to the right of the photo you will see full-length, full-width shavings. These are representative of when I got it “right”. So more practice is required.
Greg Merritt

Greg, if you have a white or light colored wall in the shop hold the plane with the bottom up and use that wall as a background. You’ll see the blade very clearly and it makes setting everything from side to side to depth much much easier than any other method I have used.
Thanks Brian. I’ll give that a try tomorrow.
A most excellent post the key word here is repetition, that is the success to knowledge and skill building. bpholcombe made a great suggested I would like to add to this what I do in my own blade setting. I use David Charlesworth setup of using a small thin shim which I run across both ends of the blade. I go more for feel than visual on the drag, I find it impossible to judge with precision by eye for parallel but feeling the drag I know when the blade is centered.
Thanks Salko and thank you for the additional tips. I’ll be experimenting until I find a combination/method that works best for me.
Regarding setting the blade, I wonder if the same method I use for Western planes would be appropriate. I put a (roughly) 3″ x 10″ x 1/2″ thick piece of pine in the vise, take a shaving with the left side of the blade, a shaving with the right side of the blade, and adjust until the two shavings are the same thickness. And also so they are both a thickness I like. Of course, I have a lateral adjuster and depth knob. I guess you have to do this with hammer taps.
I set my western planes exactly the same way. At test cut is always the last step, but trying to set a plane like this, western or eastern, with. Test cuts alone can become quite time consuming. The closer you can get by eye the less time will be needed in the test cut stage.
Love seeing those fine shavings, must admit I’m a bit jealous of the time you have to devote to the craft. This move has cut into my woodworking time but on a good note, ordered the 10′ glue lam beam so I can expand the shop in our new home! Keep up the good work.
Thanks John. It’s not that I have a lot of time, I just grab any spare minutes that I can. Sometimes that puts me into the shop at 10pm though.
Sounds like you are getting close to getting back in business. Moving is always a long drawn out process that seems never ending. Then one day you realize your done and can get on with your life.
Baby steps.
Yep…shaky and unsure, at least I haven’t fallen down…yet! 😉
Greg, what do you do with all those shavings? I believe they will not compost successfully, as they make the compost acidic? It sounds like you don’t need to burn them for heat in the workshop. So, what to do?
They are hauled off by the local garbage service as “yard” waste. They end up in the same pile as the tree trimmings, grass clippings and the like.
I can make you a good deal on them if your interested though…
Did I understand you correctly, that the kanna blade has no camber? I have viewed a number of YouTube videos recently of Japanese carpenters preparing timbers for a temple and the shavings produced by their kannas are amazing. I have been reading recently that western planes function best with some camber; very little on the smoothing planes and much greater on jack planes and scrub planes. Do the kanna’s use any camber?
Yes, some kanna need to have a cambered iron. As with western planes, roughing (jack) planes and intermediate smoothing kanna have varying degrees of camber. The smoothing/finishing kanna, depending on application, has little or no camber however. The ideal is that the smoothing kanna is wider than the material so only a single pass is needed to smooth the wood. In these cases there would be no camber. If multiple passes will be required to smooth the full width of a workpiece, then a slight camber at the corners will be required to prevent track marks in the planed surface.