
My Japanese chisels are middle of the road, decent user-grade chisels. As such, they are factory produced and marketed for the western buyer. They are a laminated construction and the steel is good, but the fit and finish is a little on the rough side.
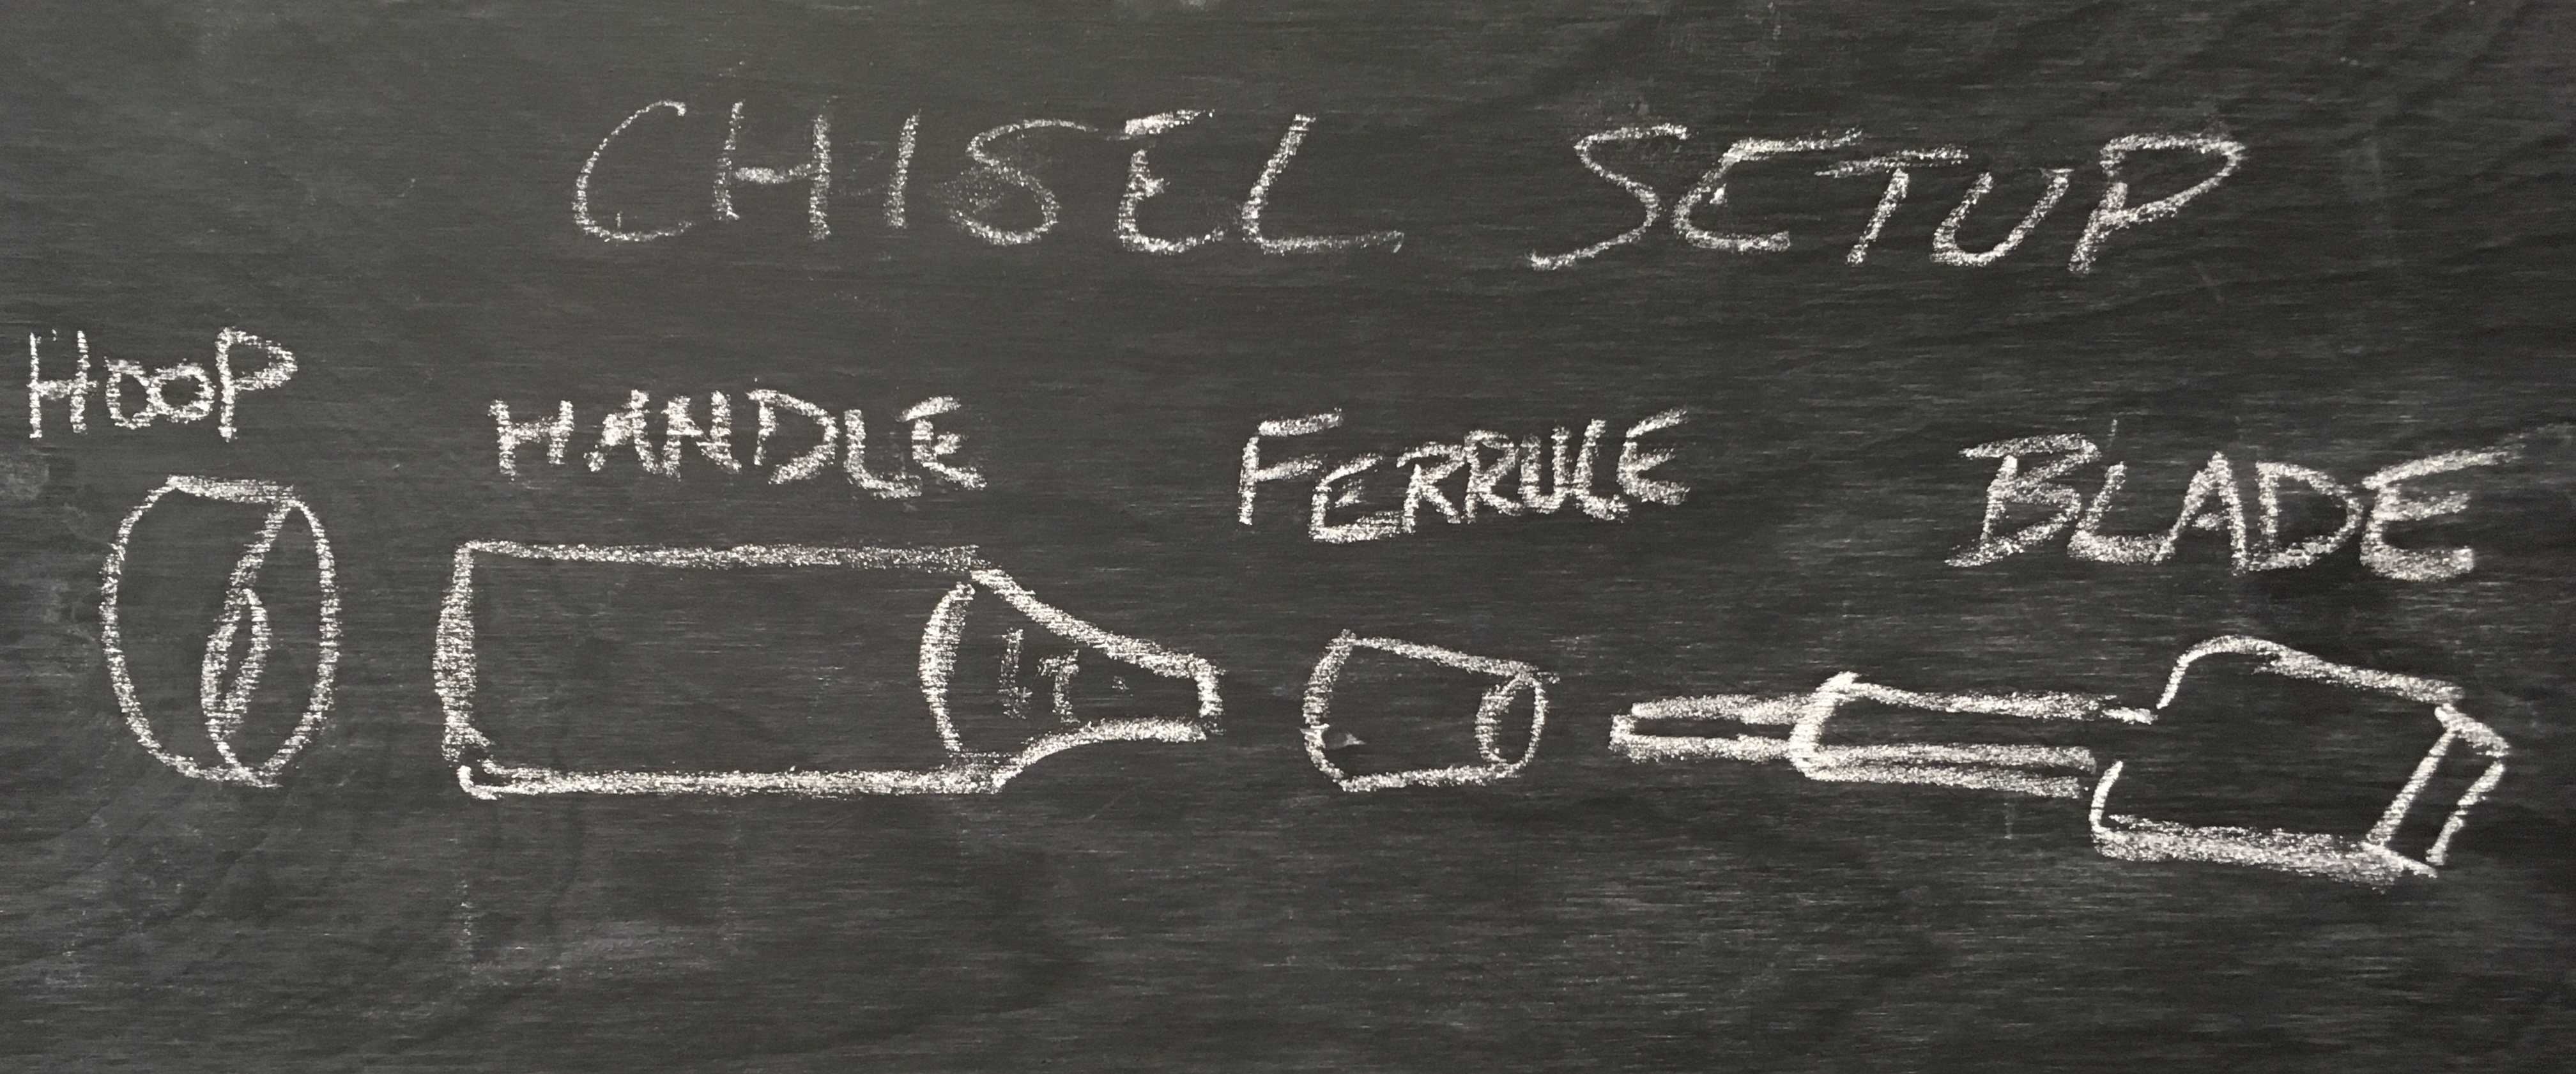
A Japanese chisel consists of four parts. There is a blade, ferrule, handle and hoop. The blade has a tang that is inserted into the handle. This joint is reinforced by a metal ferrule. The blade shoulders against the ferrule and the ferrule transfers compression into the handle. The metal hoop at the top of the handle serves to prevent hammer blows from splitting the handle. Historically these hoops are left loose by the maker and it is up to the end user to set the hoop before the chisel is put to use.
Apparently the western markets have some fear of this hoop setting process and the Japanese factories have begun shipping chisels with “pre-set” hoops. Supposedly this is to make it easier on the inexperienced user. Seems like a good idea, but not so much. Apparently Japan is a lot more humid than here in the States. Consequently, the “pre-set” hoops are loose on the handle by the time they arrive in the hands of the end user. Not to mention the ugly job of hoop setting done in the factory. A loose hoop is not really doing anything and if not remedied it’s just a matter of time before the handle succumbs to hammer blows. So this pre-set nonsense actually makes more work for the end user. The hoops still needs setting, but to do it you first have to undo the factory mess seen below.

The other issue with factory chisels is that the handles are rarely fitted to the ferrule very well. To work well the ferrule should never bottom out on the handle. Ideally the ferrule should be driven tighter and tighter as the chisel is used. If the ferrule comes to a ledge of wood on the handle it, like the loose hoop, is no longer serving its purpose.
Admittedly I’ve been using these chisels straight from the factory and I’ve been lucky there has been no damage done. I’ve had enough of pushing my luck and today is chisel setup day.
The first thing to do is take the chisel apart. So I wrapped a rag around the blade then, holding the chisel by the blade, I rapped the handle flat along its length against the apron of my bench. The whole assembly comes loose after a few hard whacks. I then trimmed the mangled wood from around the hoop and pulled it free.

The stickers are cleaned away and I begin fitting the ferrule to the handle. The idea is to remove any material that will stop the ferrule from properly compressing the end of the handle. It may seem like it’s fine now, but time and seasonal changes will cause the ferrule to move further up the handle. Removing this material is discussed in Toshio Odate’s book and I was reminded of it while reading thru Brian Holcomb’s blog posts as well. I used Brian’s suggestion of wrapping tape around the handle for a gauge line.

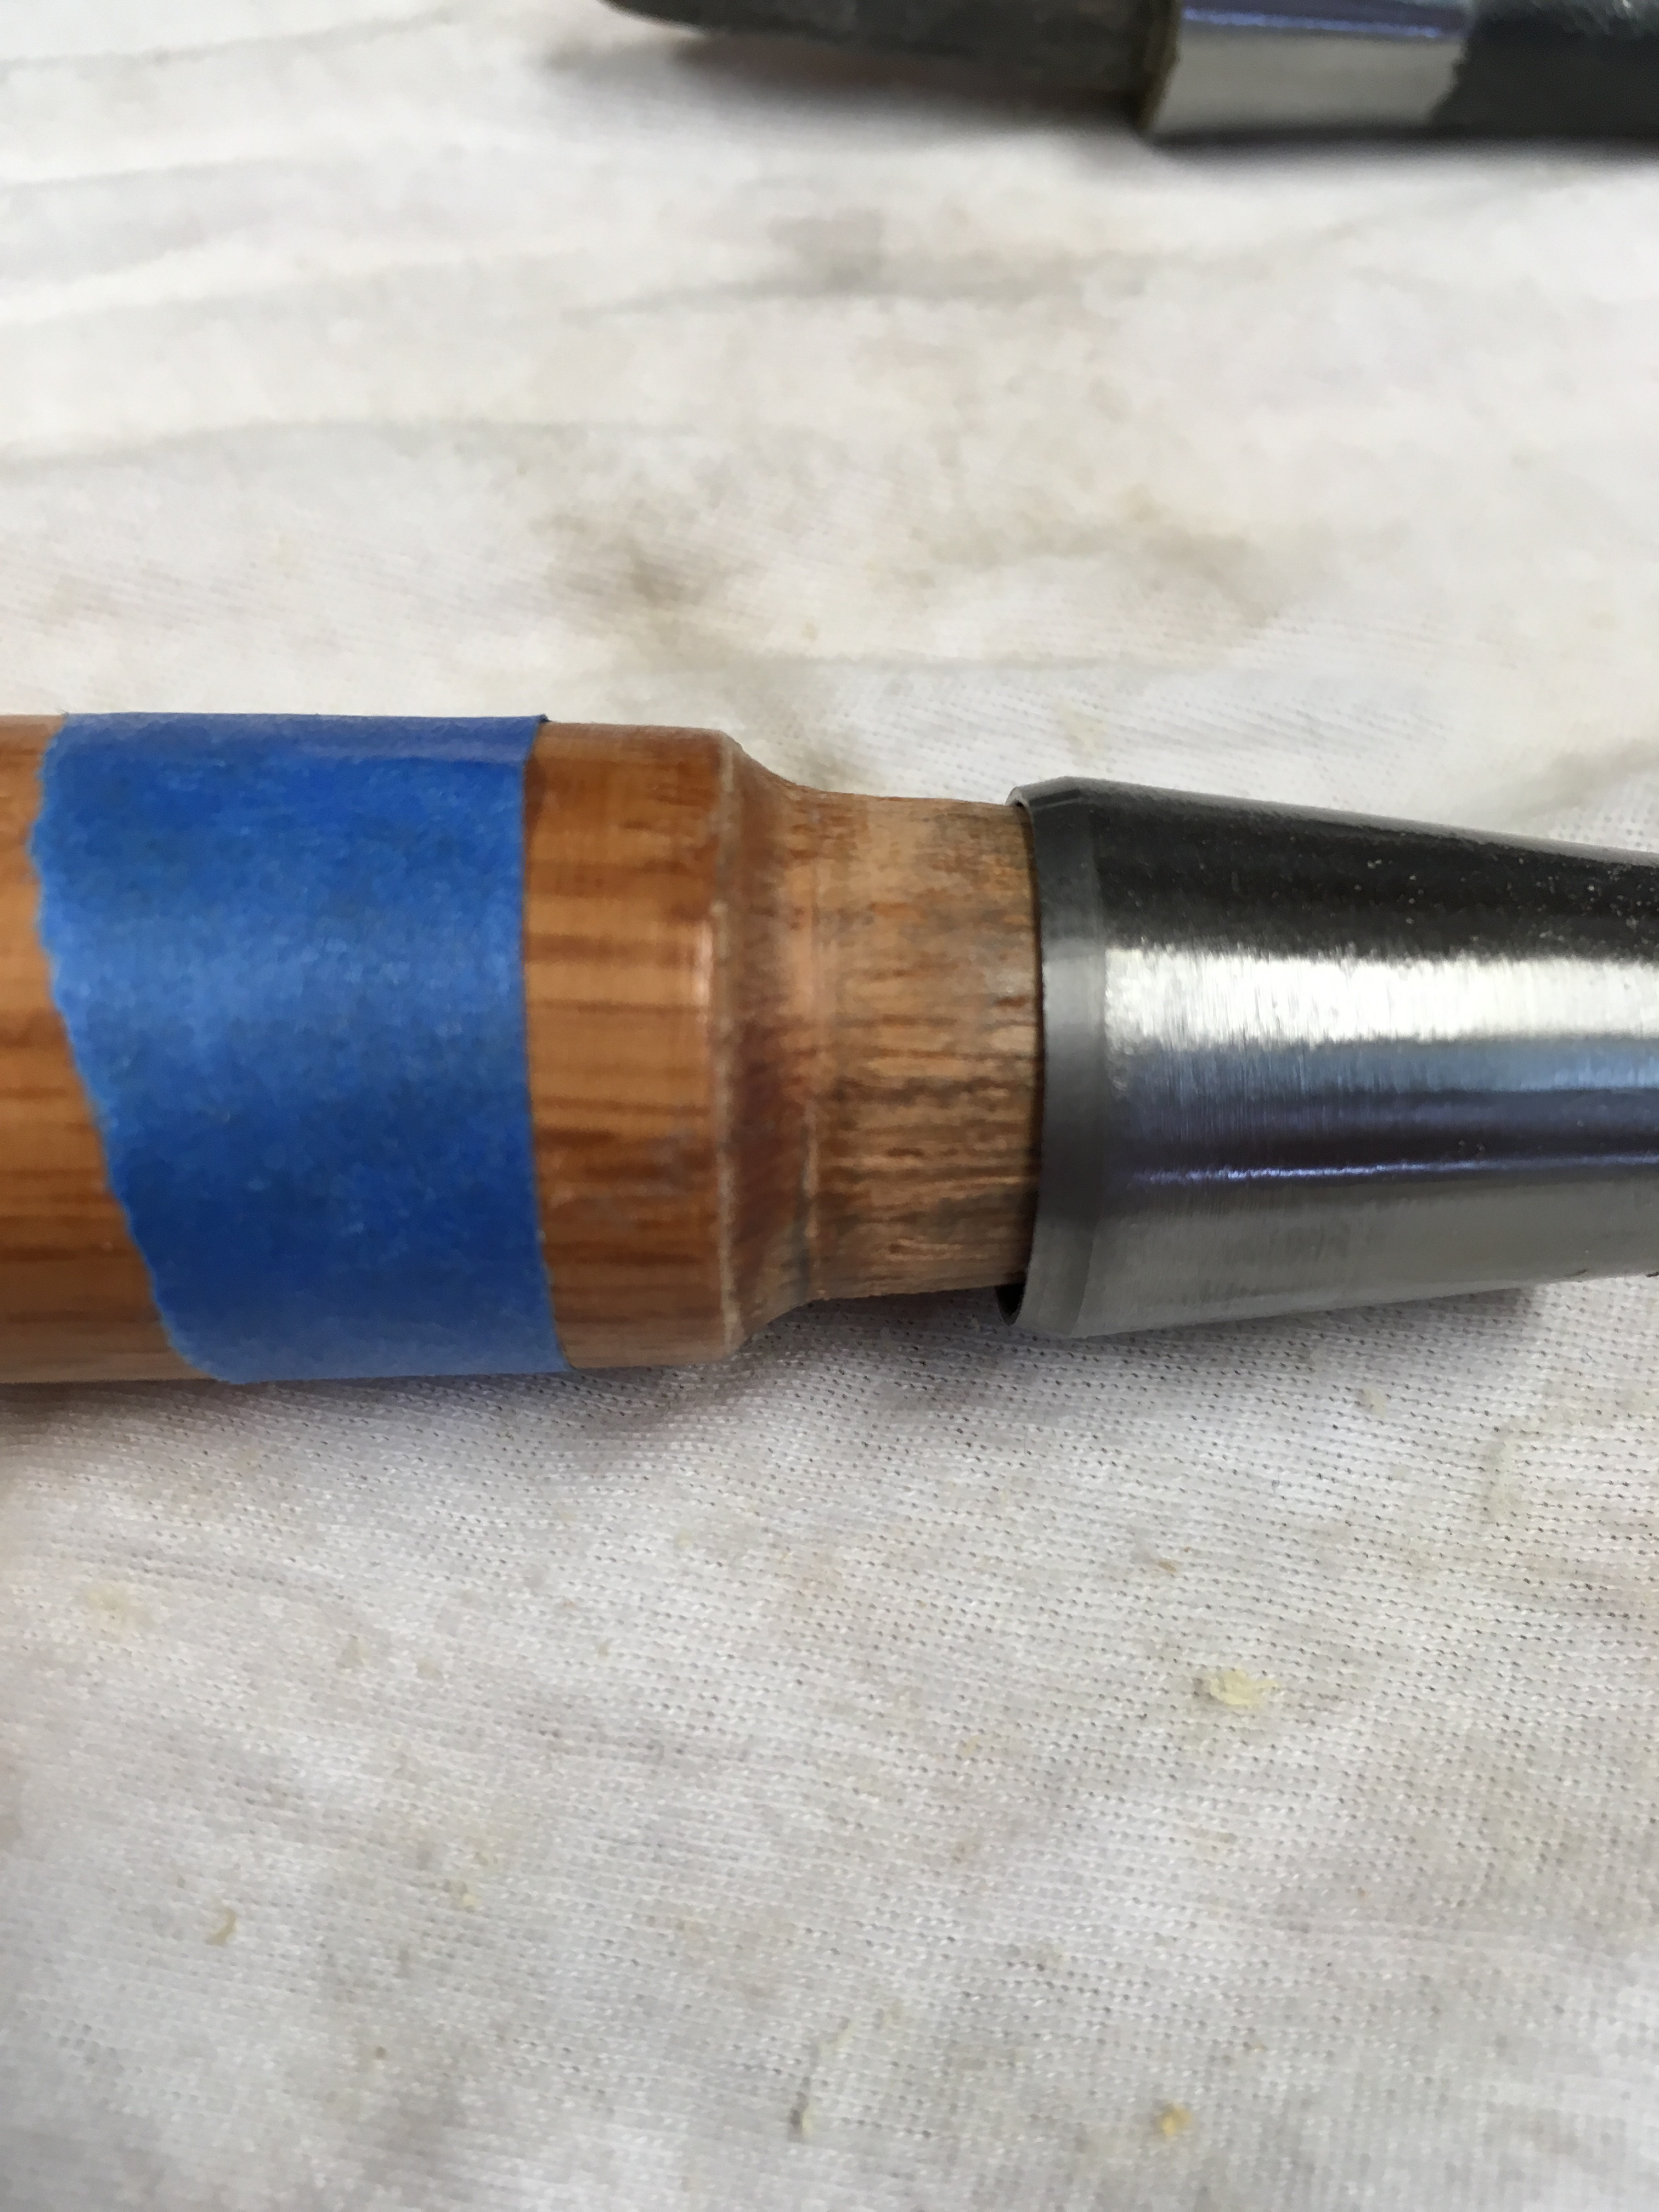
Then I used a knife to remove the wood and create the needed clearance. I was careful to maintain an even taper around the handle.

Now for the hoop. All of the “pre-set” hoops on my chisels are loose. I can spin them by hand and the only thing holding them on is the mangled bits of wood from the factory mushrooming. With the hoop removed from the handle I inspected it. There should be no sharp edges nor any burrs. The bottom edge of the hoop should have a slight bevel. This bevel helps to compress the handle as the hoop is driven on. If this was a square edge it would simply scrape away wood from the handle as it was installed. The top edge should not be square on the inside either, it needs a slight round over. The round over will prevent shearing off of the mushroomed handle and help lock the hoop in place. A little file work and the hoop was read to reinstall.

Top side after file work.

Bottom side with bevel on inner edge.

I used a hoop setting tool to seat the hoop back onto the handle with good even compression. This left me with a little extra handle to trim away.
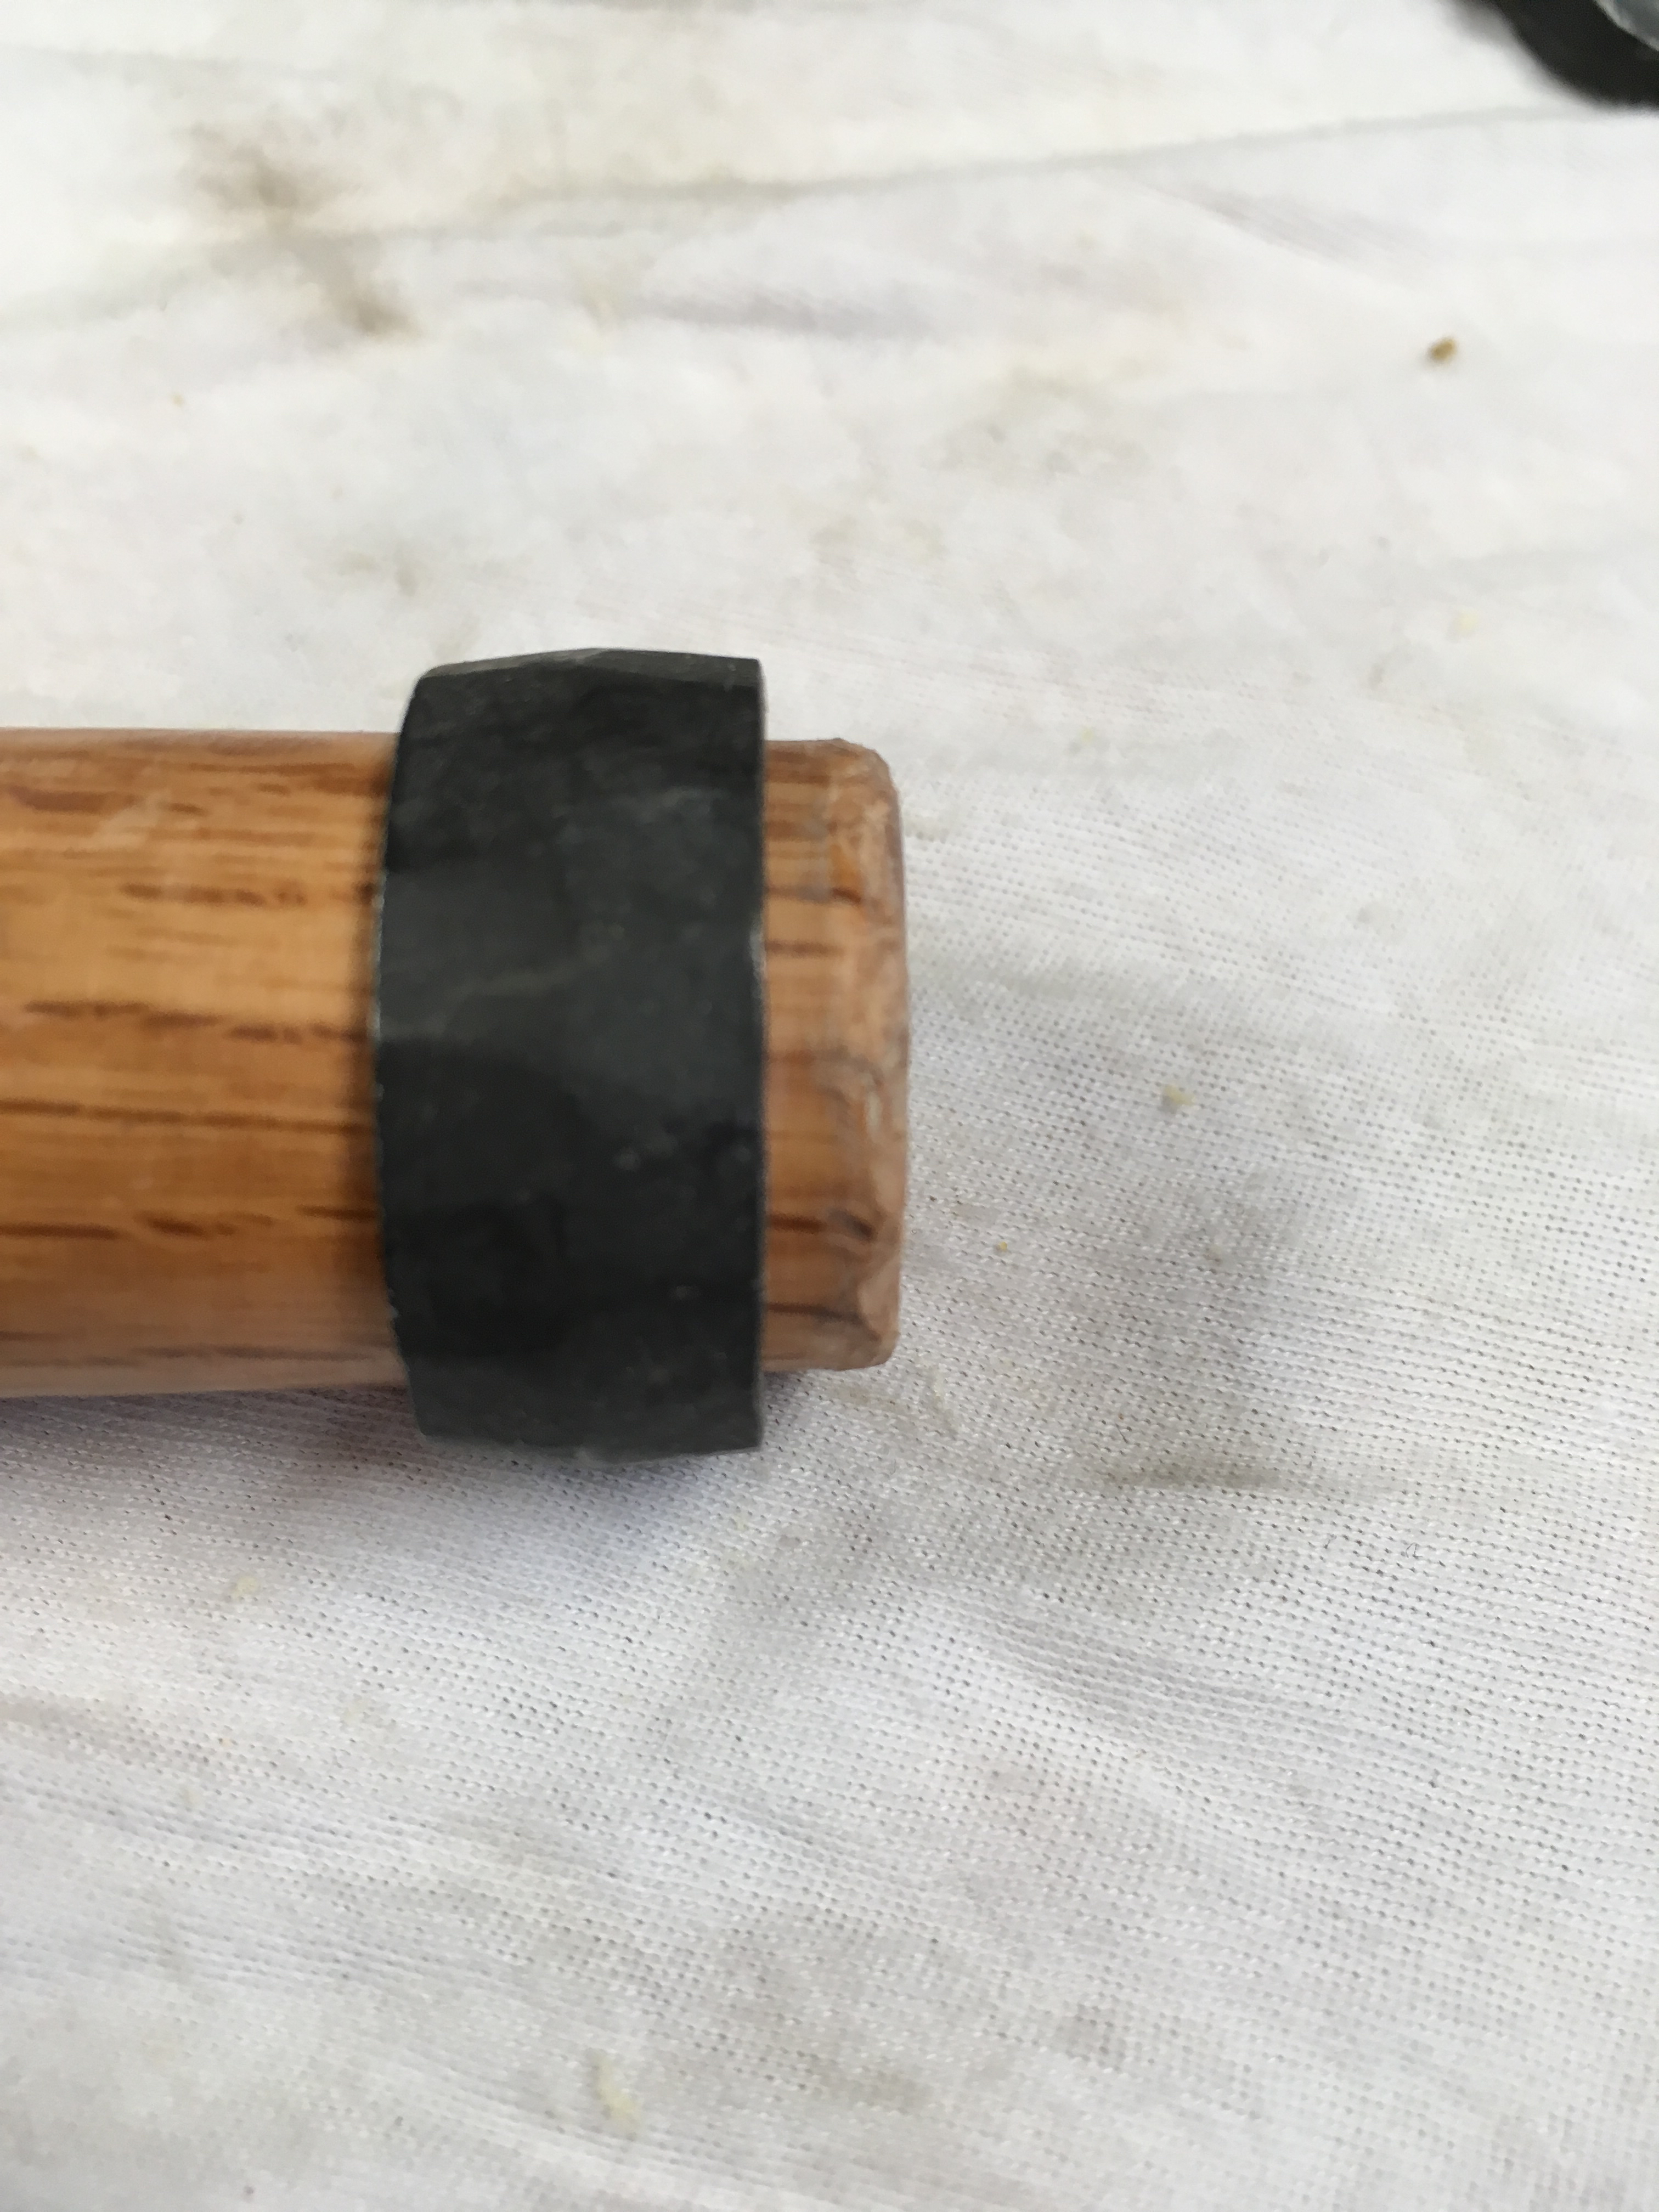
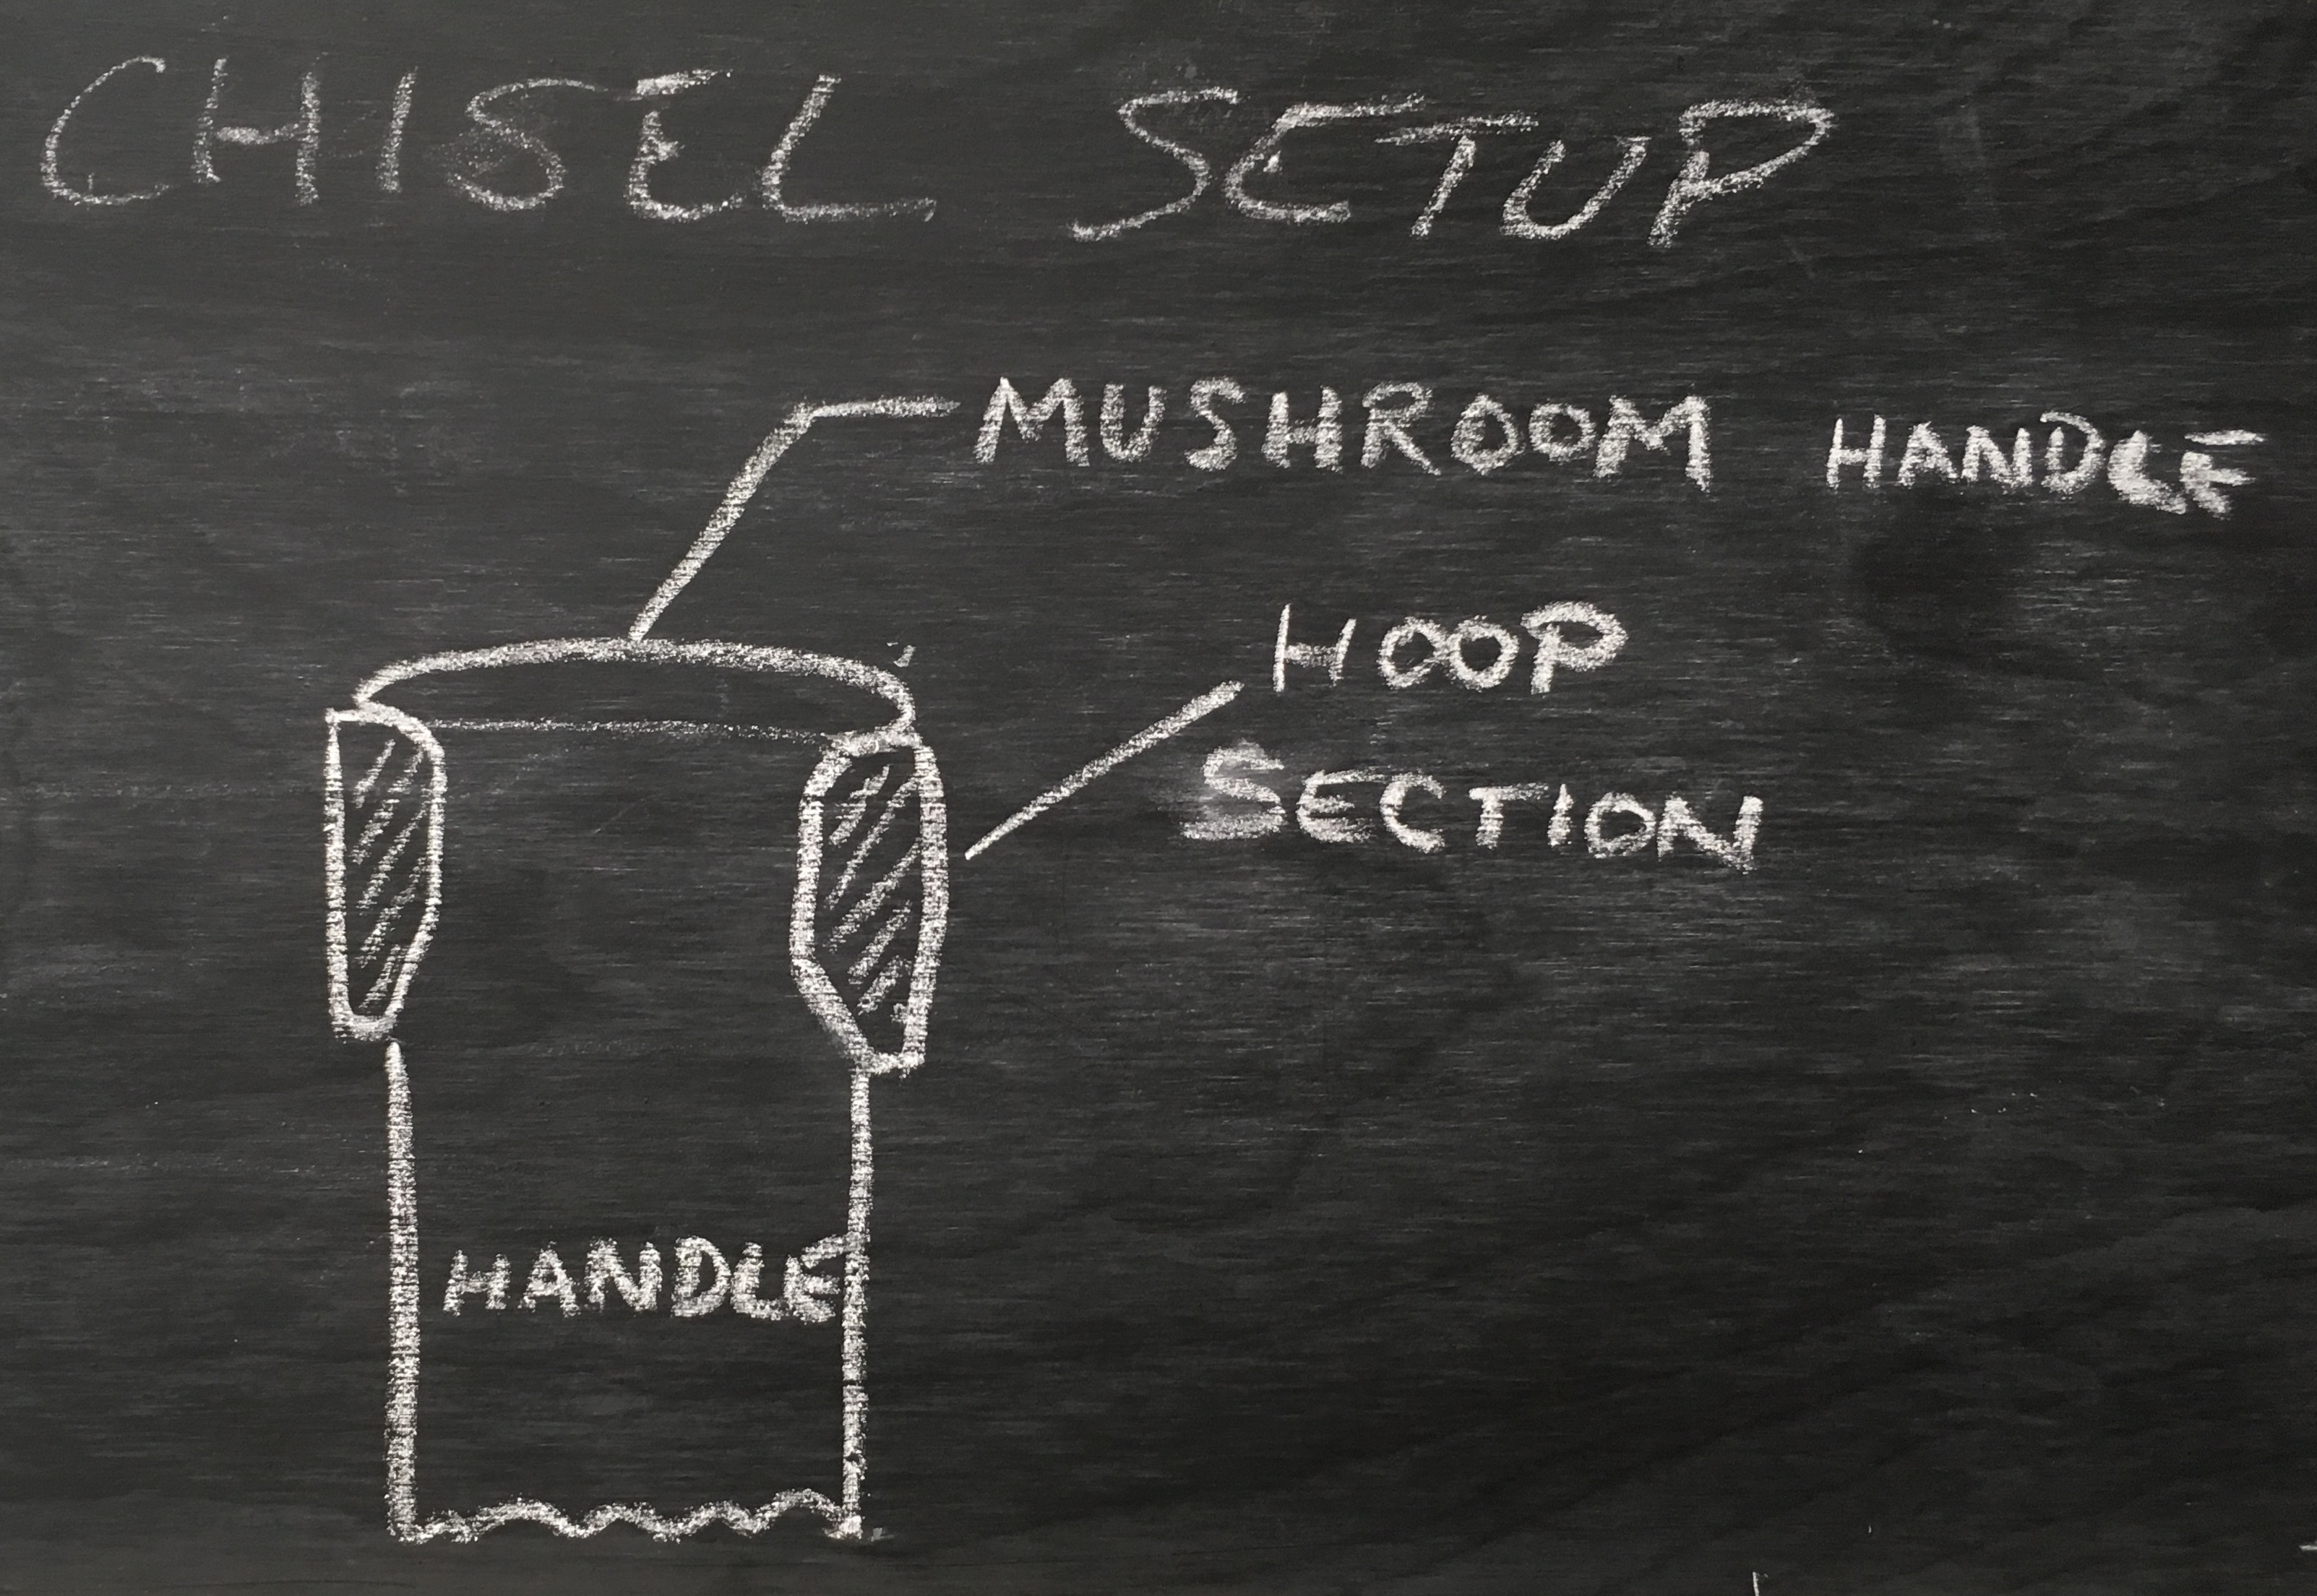
I left about a 1/16″ of handle sticking out from the hoop after trimming. The next step is to evenly mushroom the end of the handle around the top of the hoop. Essentially creating a cushion of wood just above the hoop. The hammer should never contact the hoop when you are using the chisel. Glancing hammer blows will compress and draw the wood out and over the inner edge of the hoop. To make this easier/possible you need to soften the wood. Odate recommends dipping the end of the handle in water for a few seconds. I just can’t bring myself to do that. I keep thinking of Thoreau’s ax handle. Anyway, I found that camellia oil works fine. You just have to wait a few seconds for it soak in.
The completed chisel.

I’m not sure why this has a reputation of being difficult. It really is quite simple and reasonably quick to do.
Side note (as if this post isn’t long enough). While practicing with the kanna this week I decided that the little block plane felt clunky in hand. It worked fine, but I struggled with the smallness when making the dai and the overall proportions just didn’t seem right. So I made yet another dai and I like the feel of it much better. It works great too!

Greg Merritt

You can definitely see the difference and the setup isn’t difficult as well, you simplified the process through your detailed explanation. You’ll be pleased to note that I have started to use my little dozuki more often now
Thanks Salko. One other issue with the ugly factory hoop setting is that it makes the chisels tough to push with the palm of you hand. Done right they are very comfortable to use.
With that saw use almost no pressure, push pull only. If you try to force it, it will wonder off track every time. Let the saw do its work and you are rewarded with a super fine cut.
Good advice I tried pushing it and it did wander, but I think you really need to be spot with sawing if your going to saw off the knife wall. Other than that I’m pretty much happy with it even with one tooth missing.
Lol I meant to say dozuku
Greg, after following the recent Mulesaw blogs, thought I’d better add a comment here, too. Been enjoying your blog for about a year. Great job making the chisel setup easy to understand. I especially like the chalkboard drawings, and the photos are very effective, too.
Jeff
Thanks for taking the time to leave a comment Jeff. It’s good to hear that you have been finding by blog enjoyable. I glad that my explination for the chisel setup made sense too.
The chalkboard was originally just for my own shop use, but I think it may prove handy for blog posts. I may even get fancy with colored chalk. 😉
Nicely done Greg! Glad that you found my posts helpful as well. I’m amazed that they take the effort in setting these chisels but do the job so quickly that it requires a do-over by the user.
Thanks Brian and thanks for your post. I found it very helpful
I aquired these chisels over the course of about two years. The first couple, I thought were an anomaly, but every single chisel, two different brands and two different suppliers, we’re all the same. I suspect they all came from the same factory in Miki City. It’s a shame really, they are decent chisels and well priced. At any rate, they are all good to go now.
Hi Greg!
I think those additional drawings in the chisel tray lid work very well!
Also this post is a good tutorial!
Thanks Antonio. I’m finding the addition of the chalkboard to be very handy. It easier for me to illustrate a point than to try and explain it in words. I hadn’t planned on using the chalkboard in this way, but I think you will be seeing more of it in future posts.
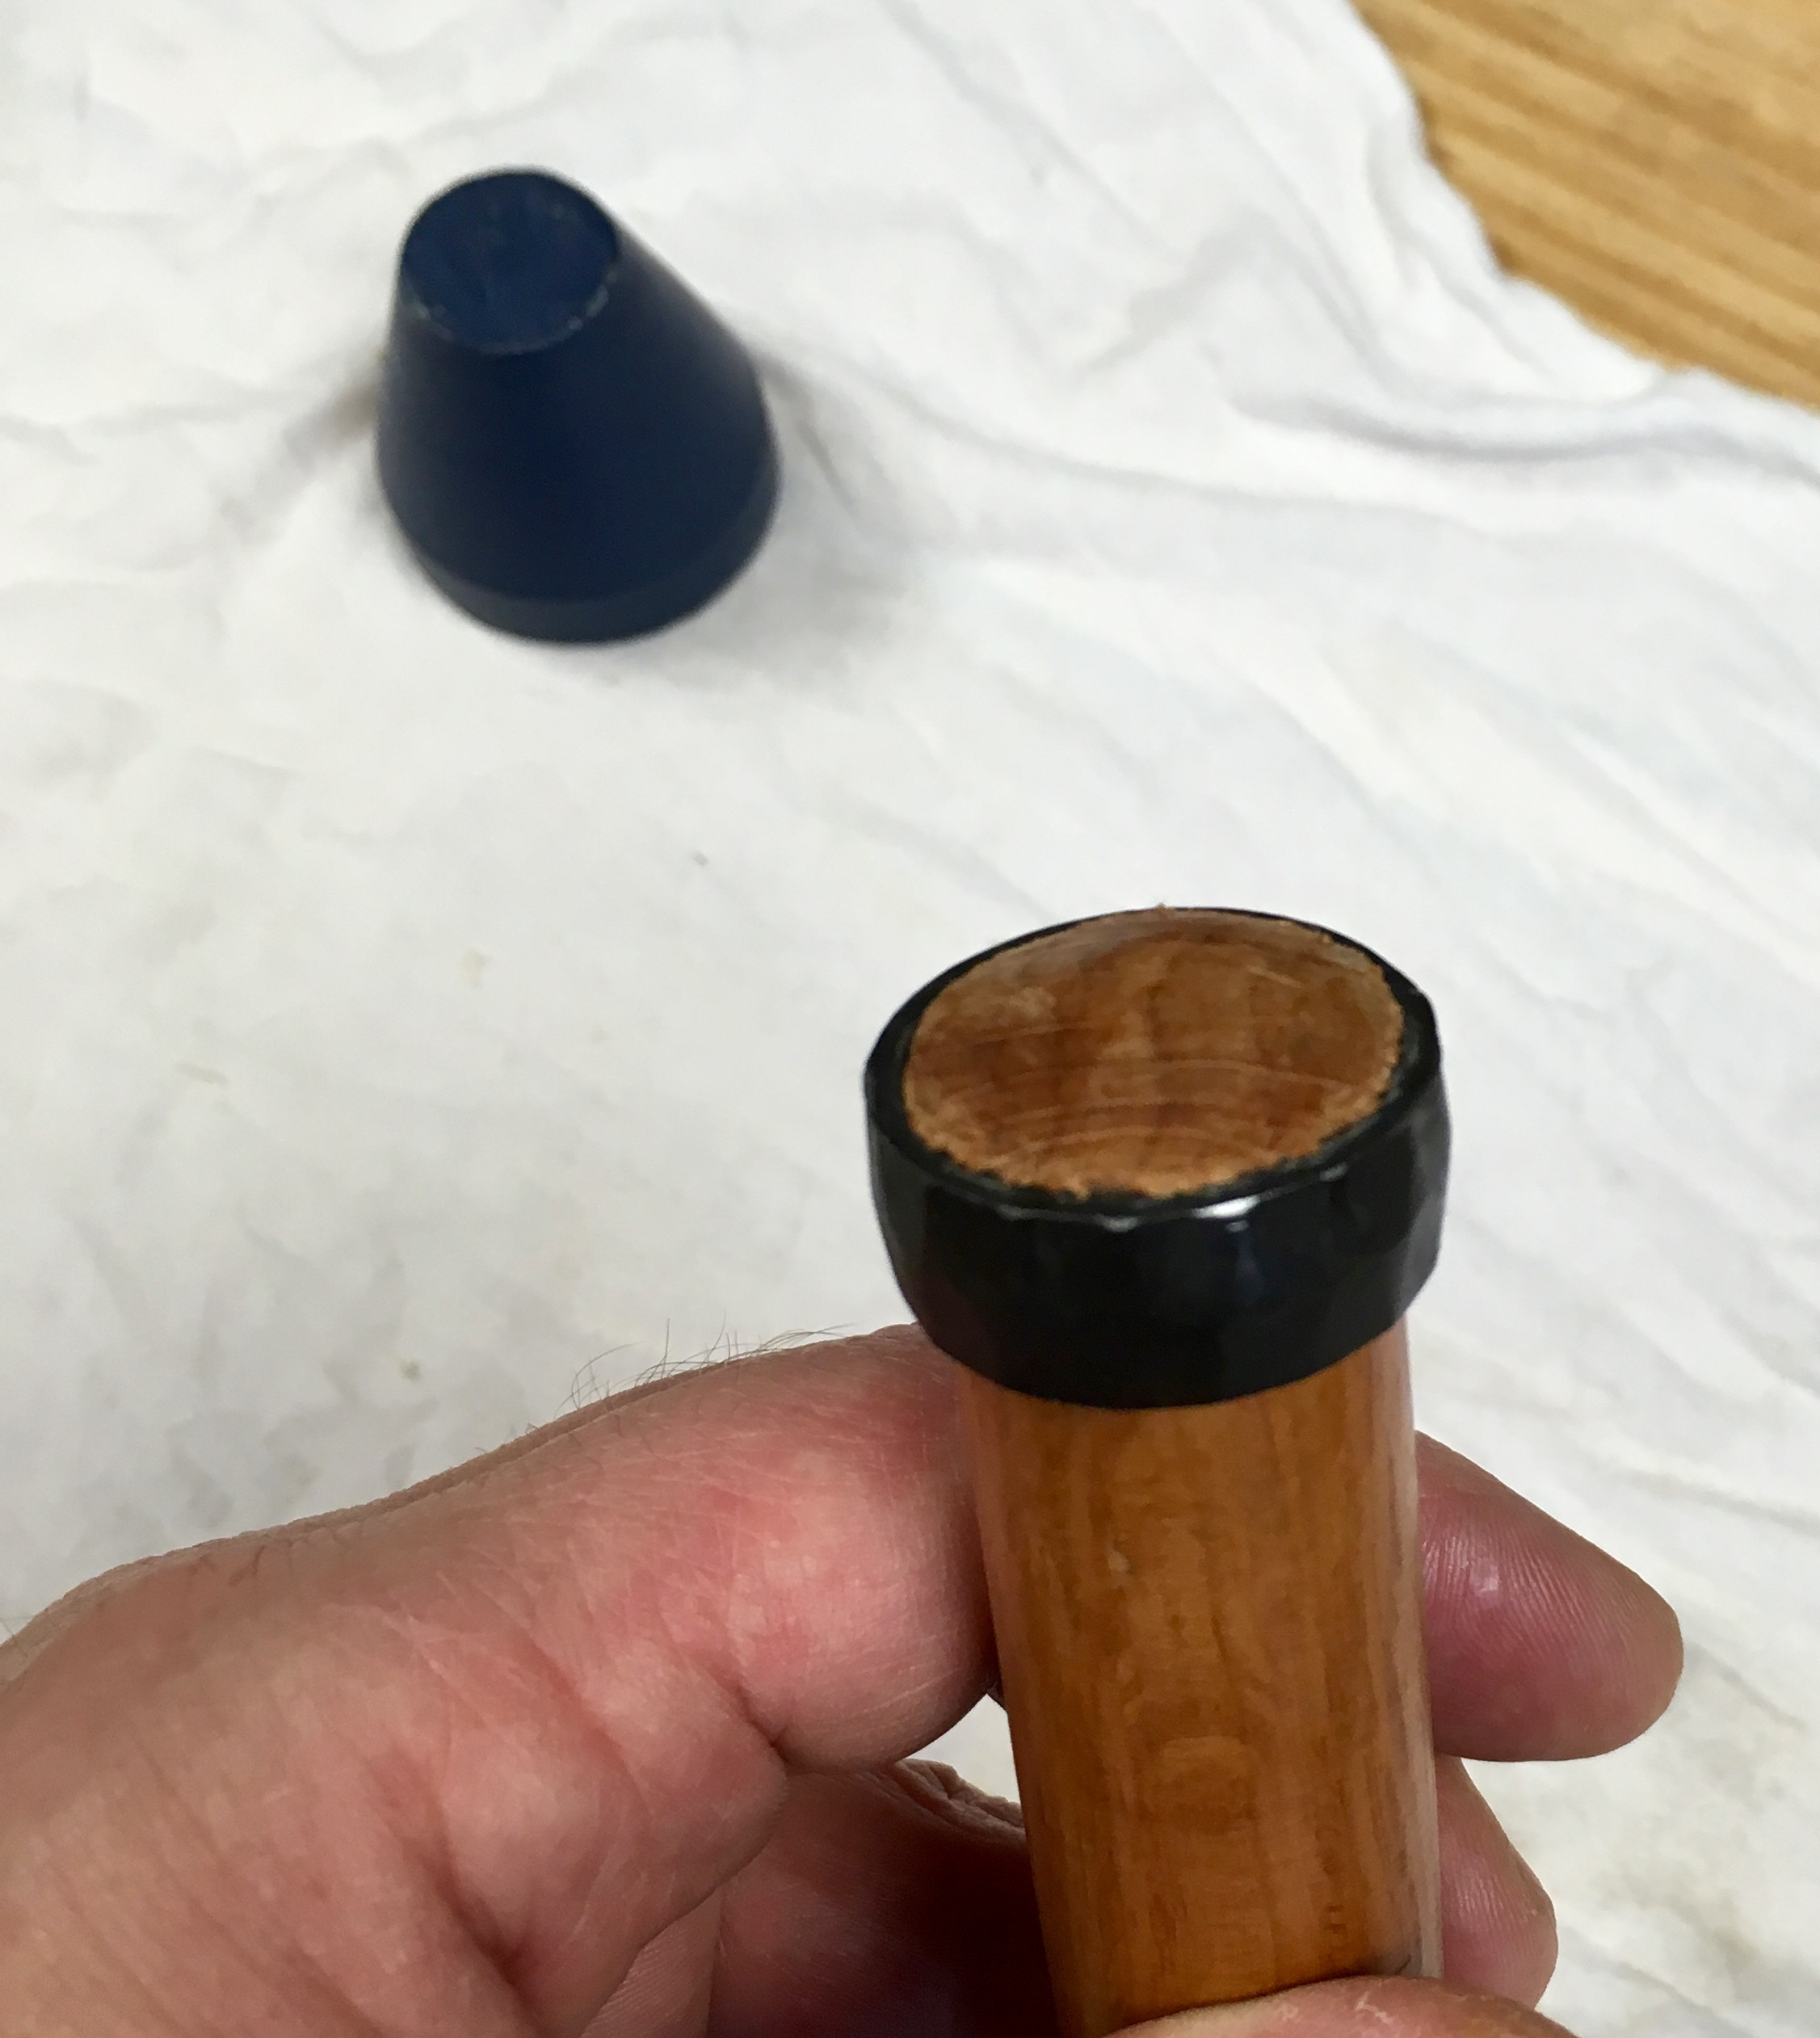
Hi Greg. I don’t understand how a “hoop setting tool” works. I don’t know what you can do to make a cylindrical hoop tighter if it was loose originally. Unless you swell the wood.
Sorry that I was unclear on that point Matt. The wooden handles have a very slight taper. The hoop setting tool (the cone shaped thing in one of the photos above) does nothing more than distribute even pressure as I drive the hoop down onto the handle. I had to drive the hoop down about and additional 1/4″ before it was tight. That’s why I had to cut some of the handle end off before mushrooming the end.
Hey Greg,
This is one of those chores that has been on my shop “To-Do List” for some time now. I have a 10 piece set the the Grizzly Japanese chisels and a couple of the matching gouges that I need to do. Where did you get your hoop setting tool?
Thanks for the inspiration! I really like the addition of the chalkboard. Great post.
Jonathan
Hey thanks Jonathan. I purchased the hoop setting tool from the local Woodcraft. Woodcraft and Japan Woodworker both carry it (they are the same company).
Setting up the chisels was a relaxing way to spend an afternoon in the shop. Glad to hear that you are inspired to get yours set up too.
The chalkboard seems to be a hit. I’m going to make an effort to use it in future posts for sure.
Hi Greg, thanks for this. I think this is one of those chores that is not difficult, but if no one tells you how to do it you are lost. Maybe I’ll add a Japanese chisel to my travelling set, if I come upon a nice one!
Hi Brian. You are most welcome. The hope is that it may prove handy to a few folks. It falls into my “if I can do it, any one can” category.
Maybe you will stumble on a nic one in you new local. Stranger things have happened.
Hi Greg
The chalkboard drawings are a nice touch.
Your drawings are generally way better than any other I have seen.
Brgds
Jonas
Thank you Jonas.
Hopefully my drawings prove helpful in conveying the information.