
Having botched the fitting of the blade to the dai on my first attempt at making a kanna with this new-used blade, I went into this weekend eager to start dai #2. What I got ended up being one of my most frustrating wood working experiences.
I prepped the maple block. The slab of maple that I pulled from the attic is grungy and rock hard, but I prepped the block without issue.

The layout went down without issue. At least I thought it did. I’ll come back around to that in a bit.

I began chopping out the waste, starting from the top side of the dai. Did I mention that this maple is rock hard? I resorted to a 1/2″ mortise chisel to beaver out the bulk of the waste. Then switched over to my cabinet chisels to finish the cutting. So far, so good.
Then I flipped the block over and chopped the mouth/throat opening.
Then I made the saw cuts to create the slots into which the blade will install. That went well.
Time to fit the blade to the dai. Here is where things began to turn.
As I began fitting the blade down into the dai it continually wanted to skew to one side. This happened with the first dai as well and I thought it was my technique. No matter how much I tried to correct it, the skew remained. During the layout I simply measured the width of blade and chip breaker and laid out the corresponding openings symmetrically around a center line on the block. Seemed reasonable when I was doing it, but as I was fitting the blade it continually wanted to skew farther on one side. I should have stopped and reevaluated everything, but no, I doggedly continued, still trying to maintain the symmetry and eliminate the skew. No matter what I did the skew remained all the while and my frustration began to turn to anger. Here is where things turn even worse.
The final hammer blow to seat the blade fully caused the skewed corner of the blade to catch the edge of the mouth opening. This, in turn, caused a portion of the mouth and sole to be chipped away. Frustration and mild anger now gave way to full-blown rage. In my younger days something would have went flying or would have been destroyed by the hammer in my hand. However, middle-age has softened me enough that I simply sat everything down, turned out the light and walked away.
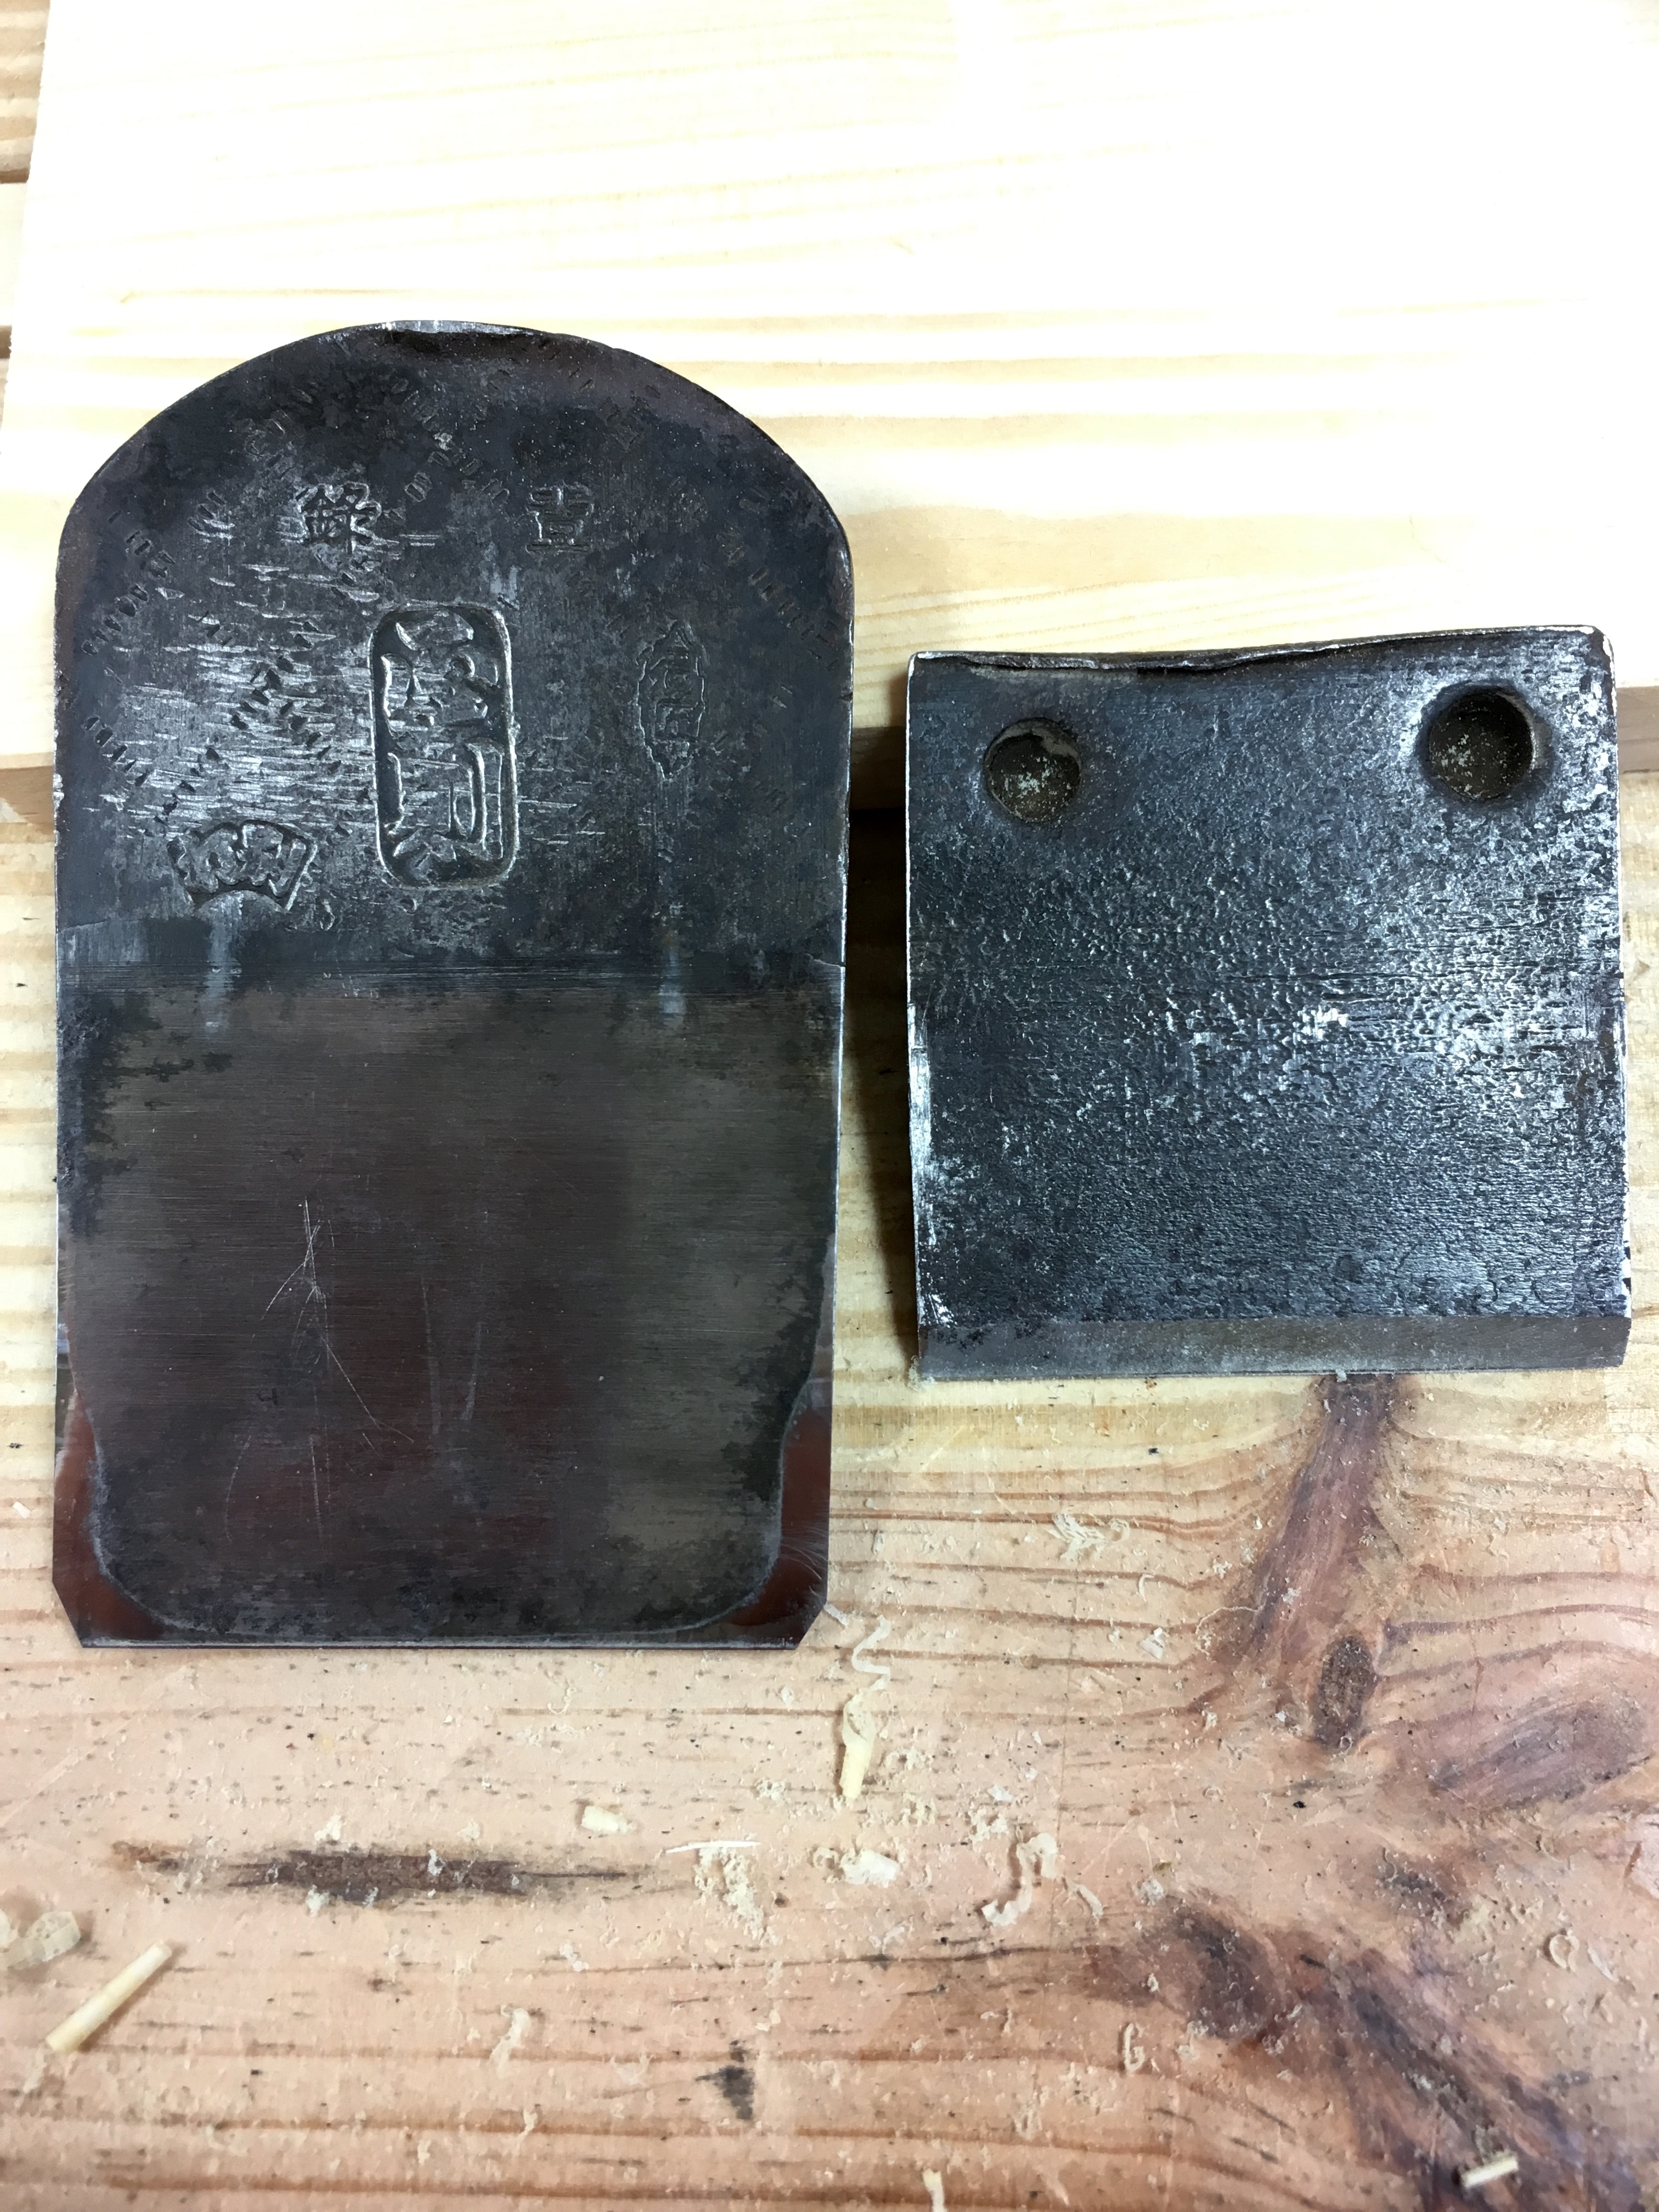
When working on something like this I become borderline obsessive-compulsive. So I began re-reading articles and looking at photos trying to discover where I went wrong. While looking at a photo of the blade set I noticed something that I had overlooked until now. The damn blade is asymmetrical! I’m such an idiot! In the photo below you can see that the right side of the blade angles outward from cutting edge to top more than on the left side. Its not a huge difference, but enough to cause the skewing issue.
So that answers the skewing problem. It won’t be pretty but that is fixable. Now what to do about that chip in the sole? I came really close to scrapping this dai altogether until I remembered seeing this video.
That just might work.
So Sunday was “fix it” day. I paired away material from the side of the slot to match the angle of the side of blade. That took care of 99% of the skew. The remaining skew was due to my trying to compensate for it otherwise. Then I marked out and removed a chunk of the sole and fitted a new block of maple into the opening.
So now I have a reasonably square, and well-supported blade…

…and a tight mouth opening.

I may just be able to salvage this thing after all…maybe. At the very least I learned another lesson or two.
Greg Merritt

I am continally amazed that something with so few parts can be so hard to get right. I constantly learn more/new ways to adjust or make right. Keep up the fight, at the very least you arer learning things you never would have otherwise.
The modern kanna only has four parts. To work really well each of those four parts need to first be tuned to within a fraction of a millimeter of tolerance. Then those four parts need to be combined to within a fraction of a millimeter of tolerance to each other. Its a very deep rabbit hole.
The whole process is changing the way that I look at and tune all of my tools. I’m confident that, at the very least, the journey will make me a better woodworker…or maybe I’ll go completely insane. Time will tell. 😉
I call it my “smash” stage, Greg. The rage reaches a critical mass and whatever is nearest or already in my hand is sure to get smashed or thrown. Breath in, breath out. Whew.
Yep, I know that stage all too well. I try really hard to not get to that point anymore, but came dangerously close this time. At least I know a couple of more things to be on the lookout for in future builds.
Another great video, Greg. In awe of how he quickly got the bottom of the dado perfectly flat with freehand paring. Then using a shaving to build out the bed for the iron. Wow. So do you think your plane may work even better having that end grain “wear strip” in place? You may decide to do this every time.
“I may want to do this to every plane that I make.” That was my first thought after installing the block. I still need to finish this one out and see how it works and how the block wears, but it may be something I end up doing every time.
Yep, that gentleman has a few videos posted. Even though they are in Japanese, his actions are so deliberate that there is little doubt in the “what” or “how” of what he is doing. Well worth watching and he is very skilled.
Well done Greg.
Thanks…I’ll get a handle on this kanna thing eventually.
Pingback: Hira Kanna Remake-Part 2 | HILLBILLY DAIKU
I understand that you wanted to keep the room for lateral adjustment to the minimum and you didn’t want to regrind your blade.
I have seen an old video of a Swiss tool maker:
http://www.rts.ch/archives/tv/culture/suisse-au-fil-du-temps/3464421-les-outils-de-bois.html
At about 10′, he explains (in French) that he is grinding the iron in such a way that it protrude the same way on each side.
This idea would be obvious for a skewed rabett plane. But nowadays for straight planes, people seems obsessed to have an iron grinded square.
Great fixing and I have seen in the next post that it gives great results.
I like the idea of the end grain strip at the mouth, it would be more wear resistant. I see in the video, he uses a minimum of glue to make replacement easy.
Your post are always instructive.
Sylvain
Thanks for the link Sylvain. I enjoyed watching that.
The extra gap doesn’t affect the function. The frustrating part is that I overlooked something so obvious as the blade being asymmetrical. It will not happen again.
I do like the inserted block of wood to close up the mouth, The end grain presentation should add a little longevity as well. At the very end of the video in my post he demonstrates how easy it is to remove the block so that a new one can be installed. Very slick solution all around.