
 One of the projects high on my list, in the event that I ever had a lathe, is a 17th Century turned book stand that Peter Follansbee reintroduced. It’s a nifty design with a ratcheting mechanism to adjust the angle of display and a wide shelf on which to seat the book. Now that I have a lathe and trying to learn to turn, the book stand seemed like a perfect project to aid me along. Plus, I simply really want to make one!
In a previous post I discussed that these beginning lathe projects needed to have a high probability of success. This book stand meets that requirement while also challenging me to improve my skills. One challenge is the need to replicate identical parts. The posts should be turned to look identical and need to be the same length. The spindles need to all be the same length, but don’t necessarily need to be turned identically. So not as much pressure there. There is also the added challenge of laying out and drilling for the spindles. Another skill builder in this project is creating and sizing tenons. Plus there is a lot of practice in turning a uniform cylinder.
Peter Follansbee is not known for using plans and, true to form, I couldn’t find any existing plans for this book stand. There are several photos on his website and there is an episode of The Woodwright’s Shop where he and Roy build the book stand, sans any mention of sizes or measurements. He did post photographs of a book stand with a known book resting on it and another set of photos with overall dimensions. So, using my best reverse engineering skills, I looked up the dimensions of the book and extrapolated from there. I took all of that information and made my best guess as to the size of the parts and the for layout. I used that information to build a prototype. I knew I could refine that guess and develop a proportional design drawing once I had prototype in hand.
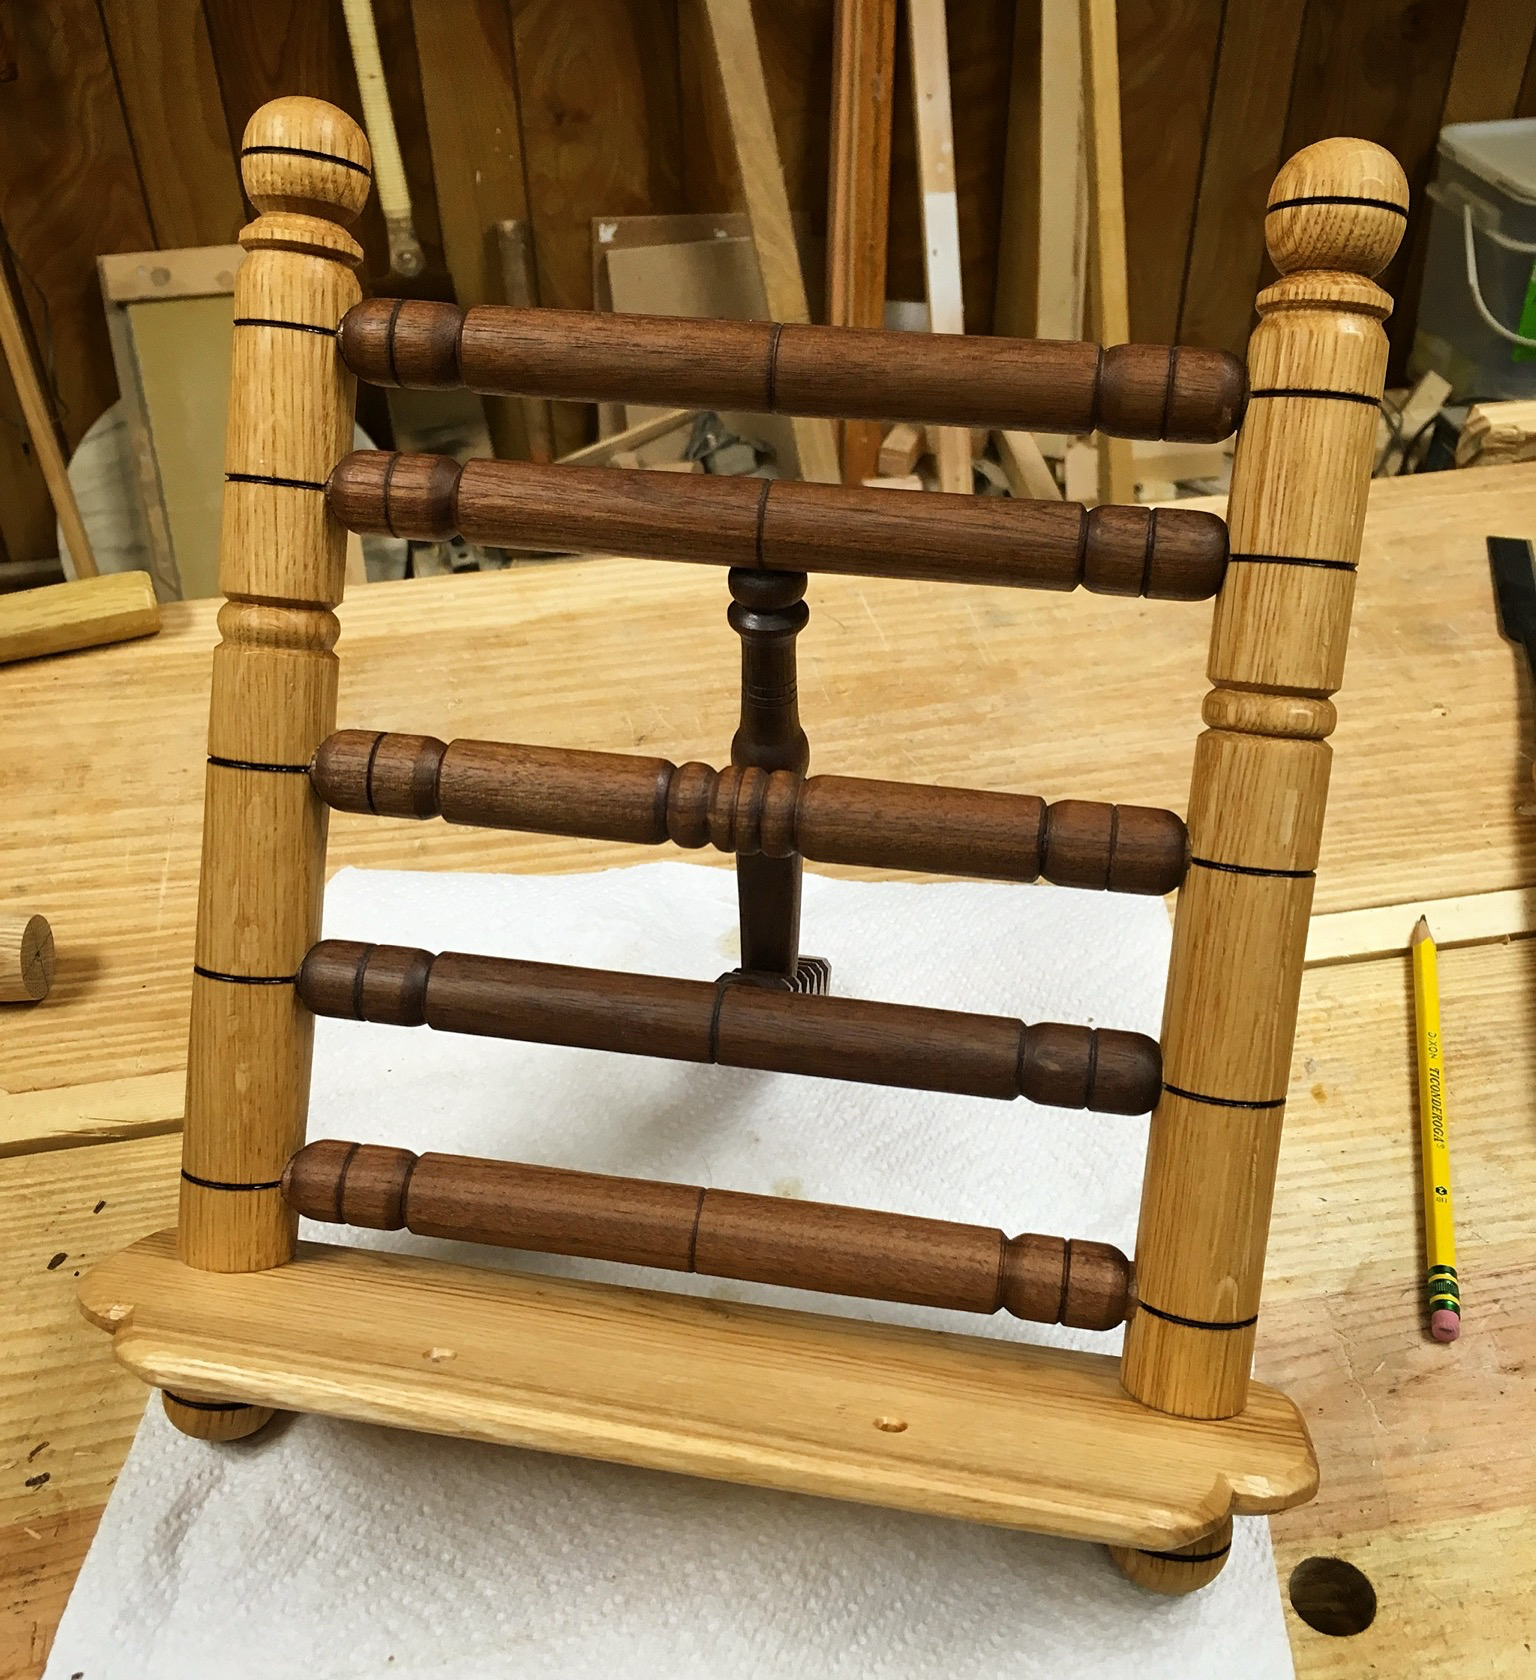
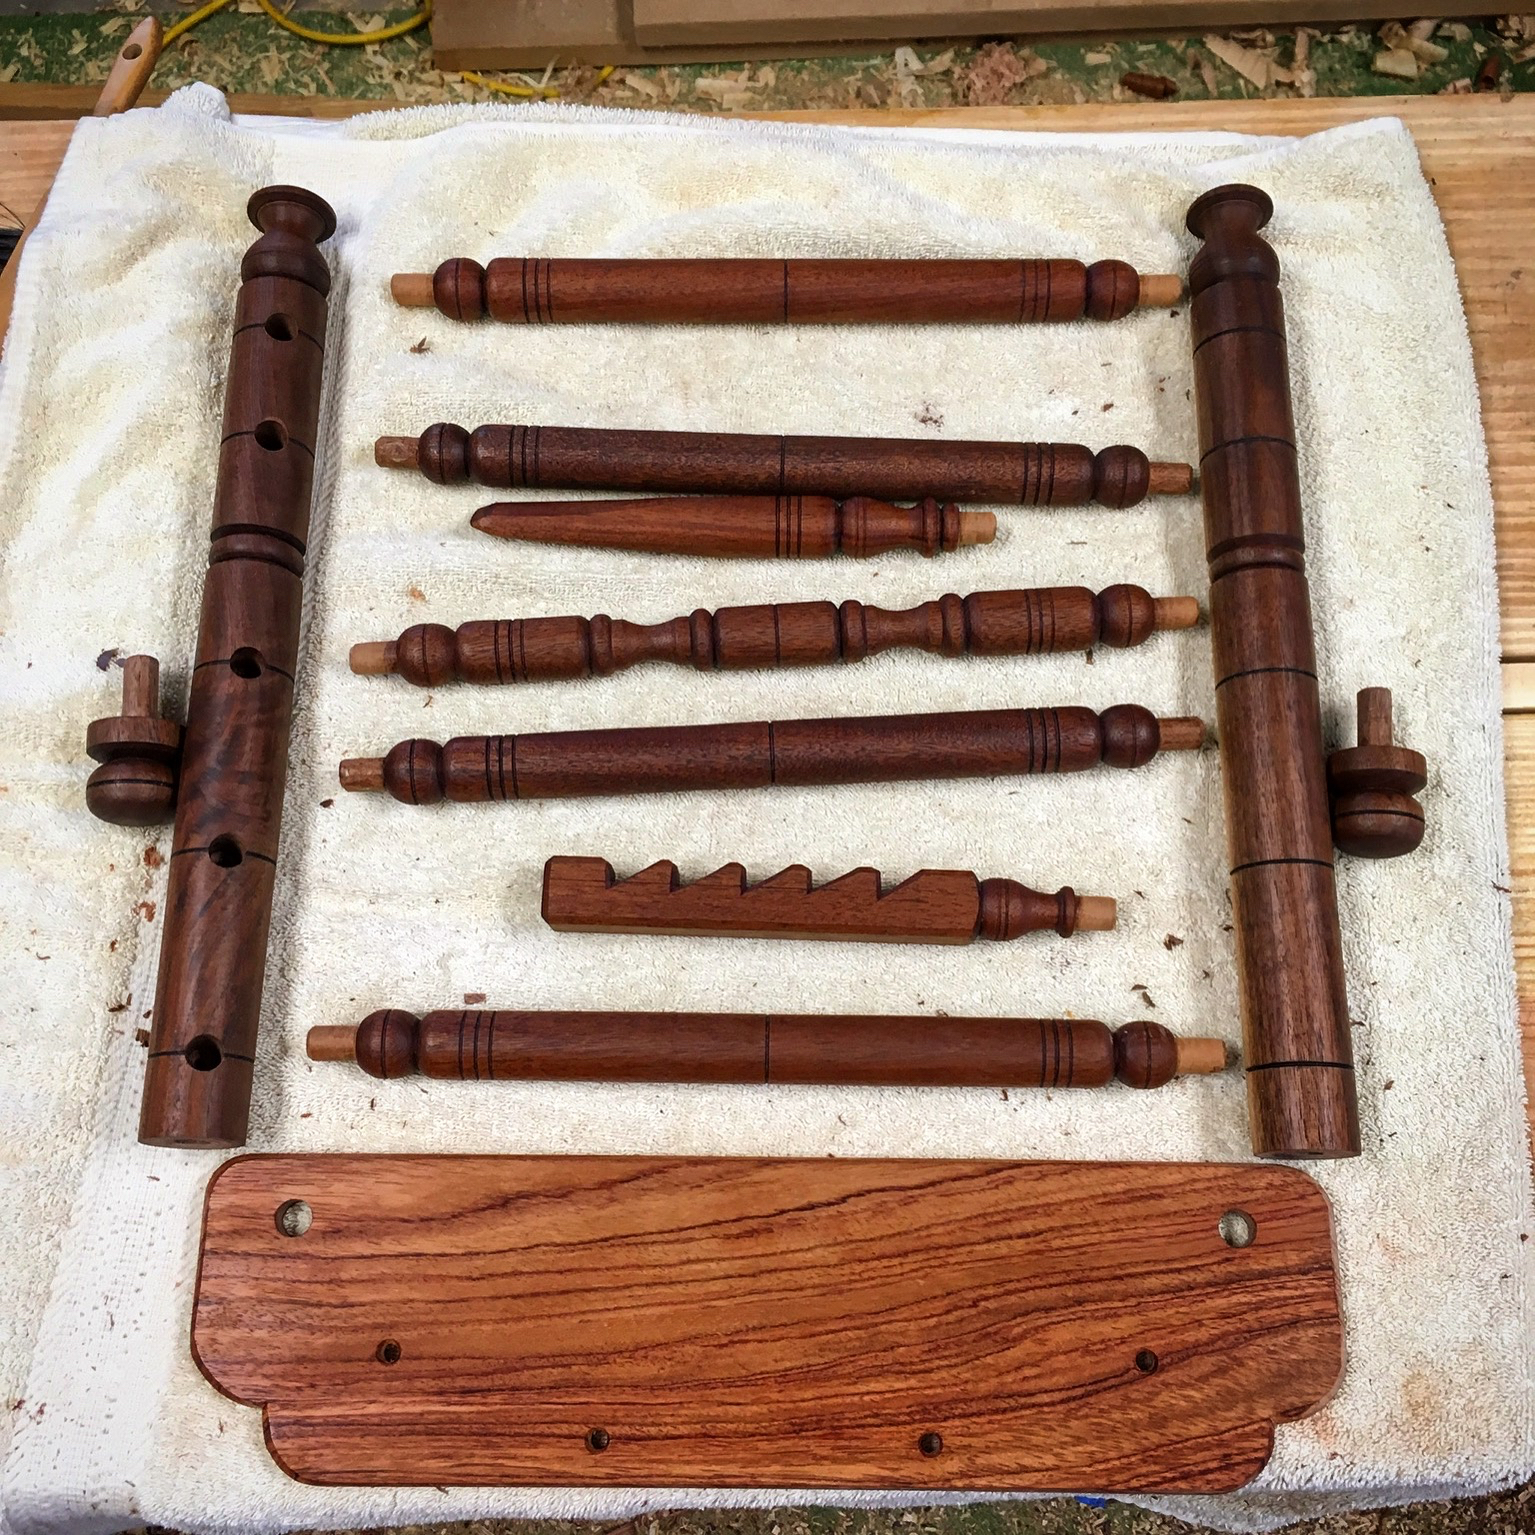
Using my rough sketch I began fabricating parts. Replication of identical parts was more challenging than I had anticipated, but I made a decent showing. The spindles were fairly easy, but getting the finials of the post to look the same involved a lot of fiddling and remounting before I was satisfied with the results. Soon enough I had a dry fit of the basic parts.
One element that I guessed wrong on was the ratchet “leg”. My first attempt was far too long. This caused the book stand to have too large of a footprint and it looked clunky. I simply made another shorter version.

I soon had my prototype complete with the first coat of Tried & True applied. Maple posts, white oak spindles and red oak shelf.

Now I could work out the proportions, make corrections and generate a proportional design drawing. My initial guess work proved to be pretty close. One thing that needed to be corrected was the locations of the spindles. I had noted, but chose to ignore, the asymmetric layout of the spindles on Follansbee’s examples. The spindle that houses the “kickstand” is offset towards the top spindle on his examples. I work with CAD every day, so I ran the layout on CAD to check as to if this offset is needed or is just an aesthetic choice. Turns out it can be beneficial. It allows the ratchet leg and kickstand to be the same length. Both spindle layouts work, but the asymmetrical layout does offer a functional edge and a bit of visual interest. I made a few other proportional corrections and then generated a final drawing to work from.
As with the lathe, I’ll not be posting my design drawing for the book stand. This is Peter Follonsbee’s work, not mine. He makes his living making, teaching and writing. I’m just some guy banging together stuff in my garage and my family eats the same regardless. Besides, rumor has it that he has a book in the works that may contain a certain book stand, so keep an eye out for that. I will post these drawings of ideas for finials, feet and spindles that I worked up.
Anyway.
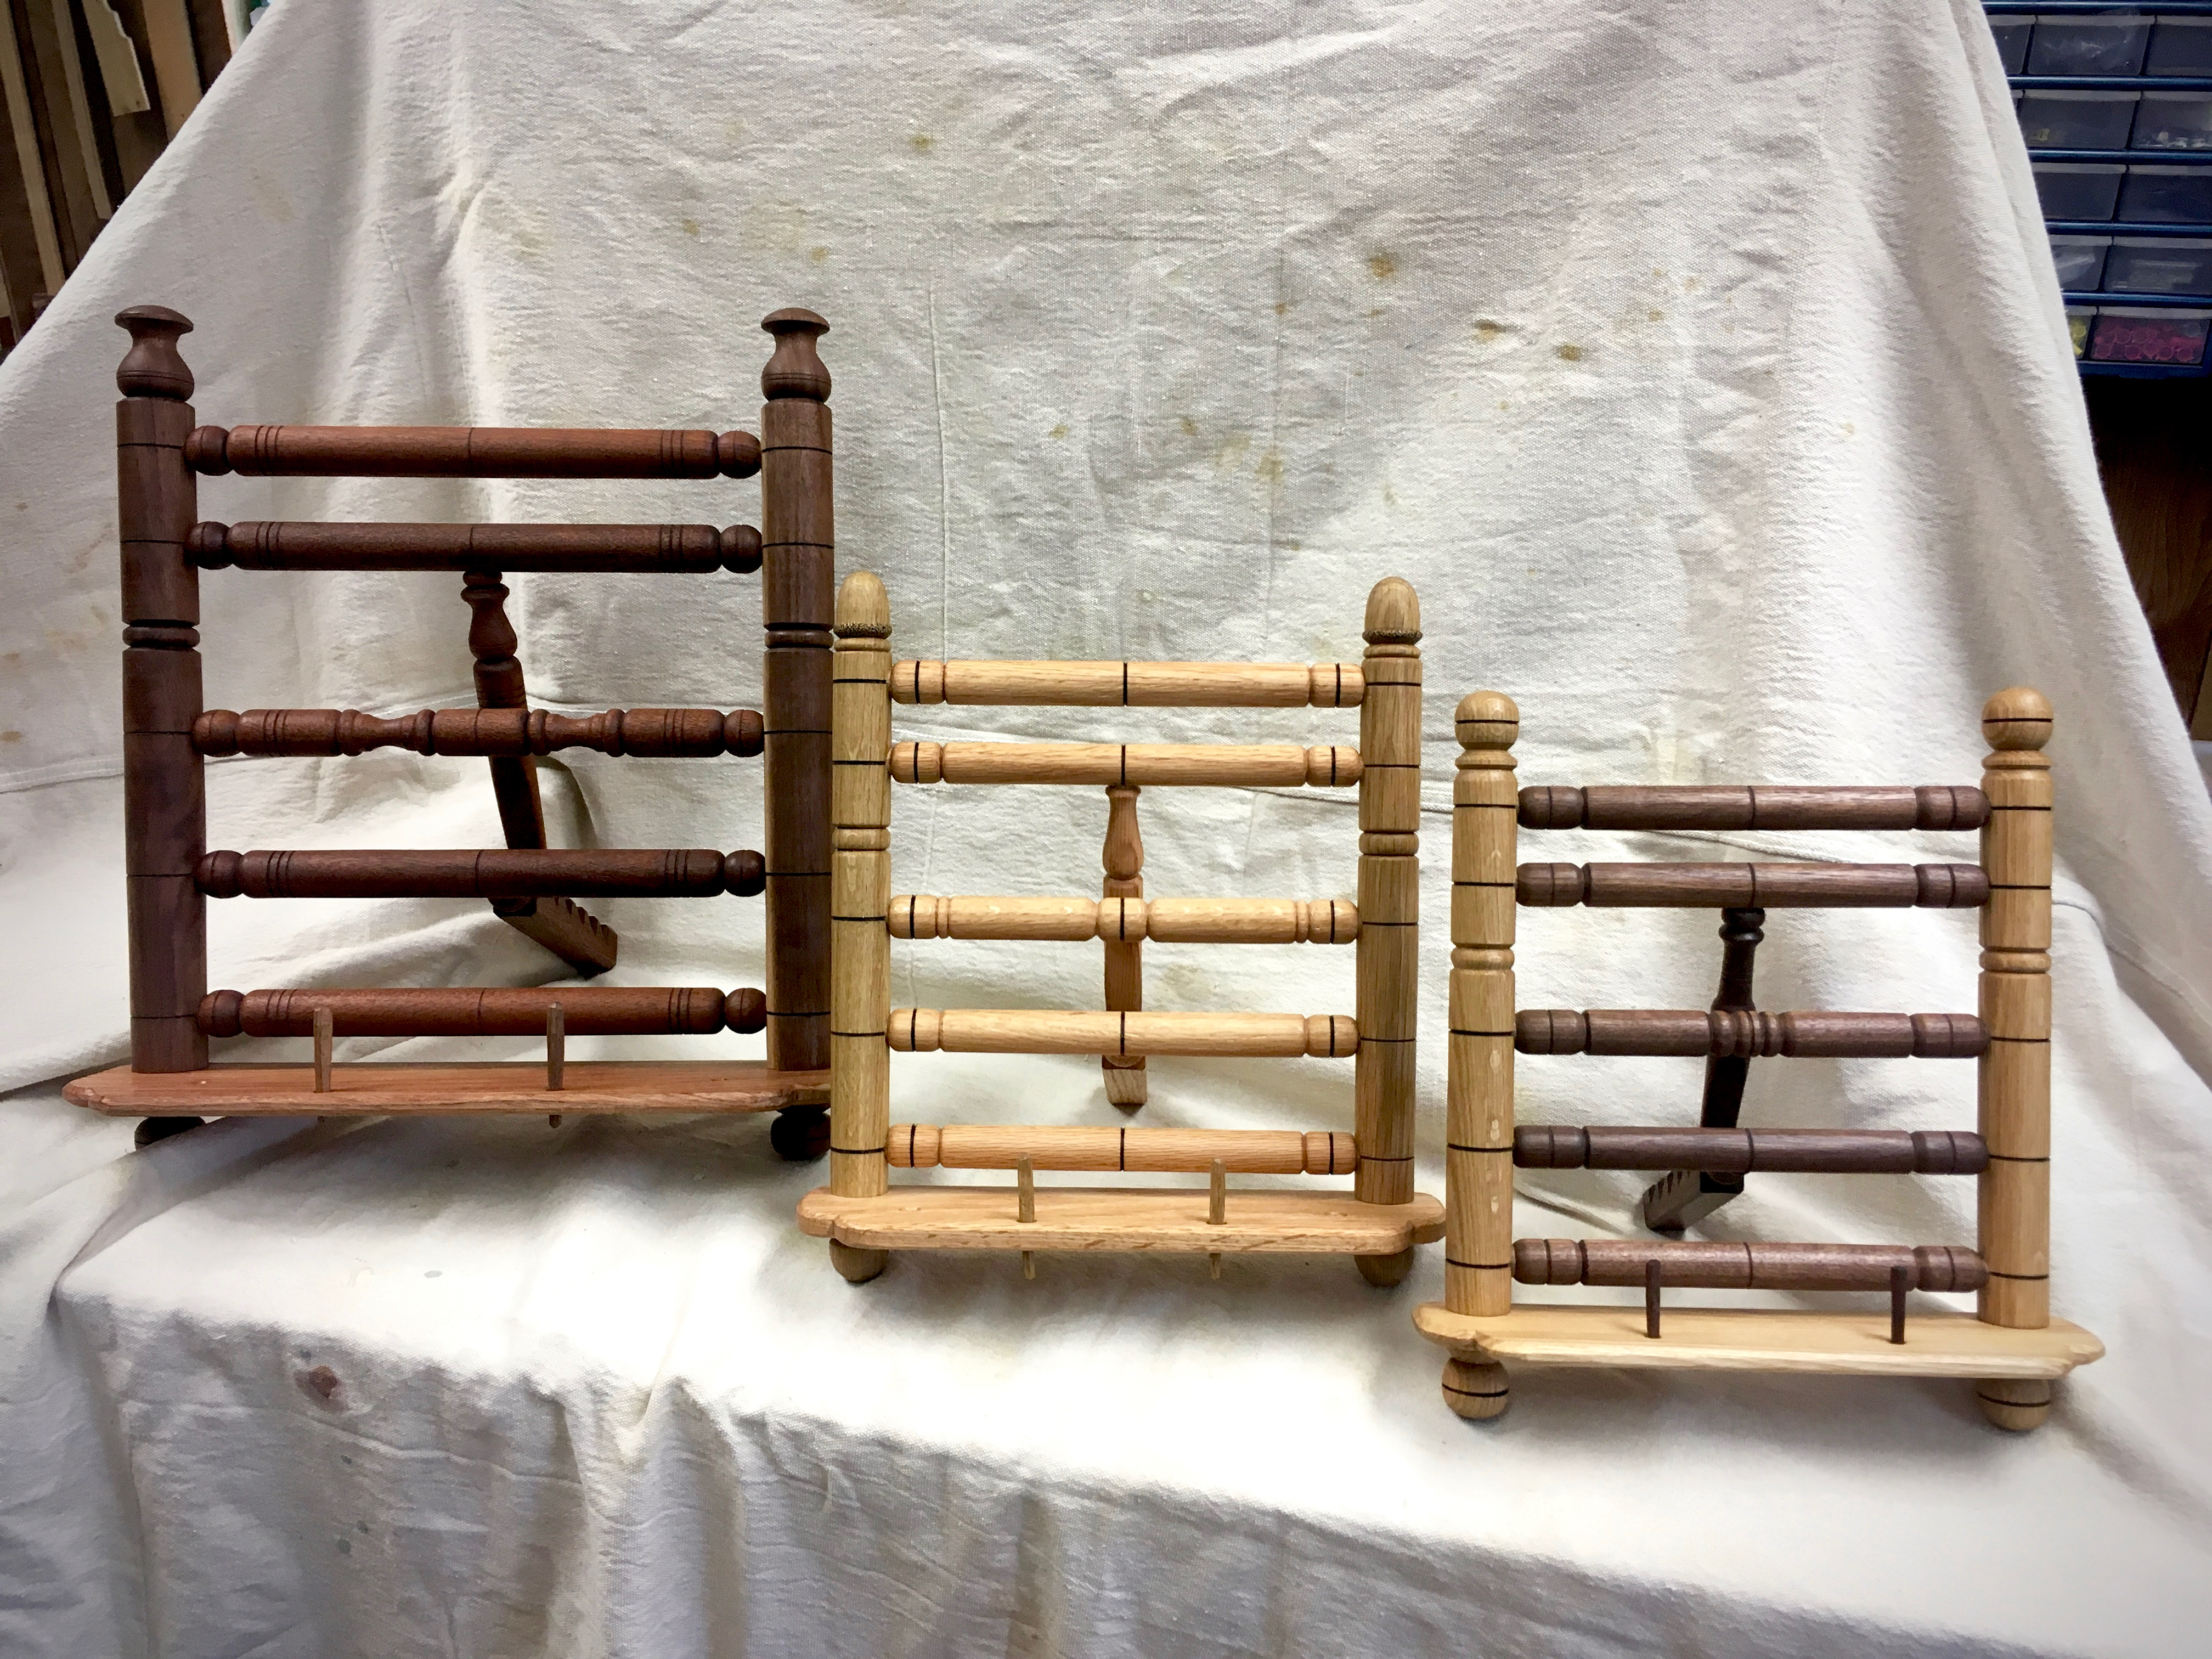
The full-size book stand is large and perfectly sized for larger books such as those produced by Lost Art Press. However, most people don’t have need of a book stand this large. Tablets have replaced books for most people these days. So I decided to build a 2/3 scale example that would function as a tablet stand and be more useful to most people. This scaled down version would also serve verify if I had the proportions correct.
To scale the book stand down from the drawing I simply substituted a smaller dimension for the module (controlling dimension). The full-size version is based on a Module of 300mm. I altered this by using a dimension of 200mm (2/3 of 300 is 200) and worked out all of the rest with a pair of dividers.
Just about all of the material for this version came from the offcut bin. The posts are white oak, the spindles are black walnut and the shelf is white oak from a particularly unruly piece (I had to break out the card scraper) salvaged from a pallet.
This 2/3 scale version is perfect as a tablet stand, but is bit too small to be functional as a book stand. Since I was on a roll, I decided to build a 3/4 scale version. Again, all parts were culled from the scrap pile, save one. I had to buy a piece of oak for the shelf. This one has white oak posts and red oak for the spindles and shelf. I also ran with the oak theme and tried my hand at creating finials and feet that had an acorn motif.


I think the 3/4 scale is a good compromise and will be the perfect size for most people. It will easily hold most books as well as the popular tablets of the day.
I still needed to build another full-scale version that is based upon my design drawing to round out the set. So I rummaged around in my magic attic (previous owner left a lot of scrap wood up there) and culled out enough walnut and mahogany to build a full-scale version. The walnut is a little gnarly and has a big knot running through it and contains a little sap wood, but is fine for this. The shelf is from some unknown stuff that I have had for quite a while.

Quick tip: To locate the holes in the shelf for installing the feet install a finish nail in the post and clip it short. Then assemble the frame and press it down onto the shelf in the desired location. The finish nail will mark the location on the shelf for the hole.


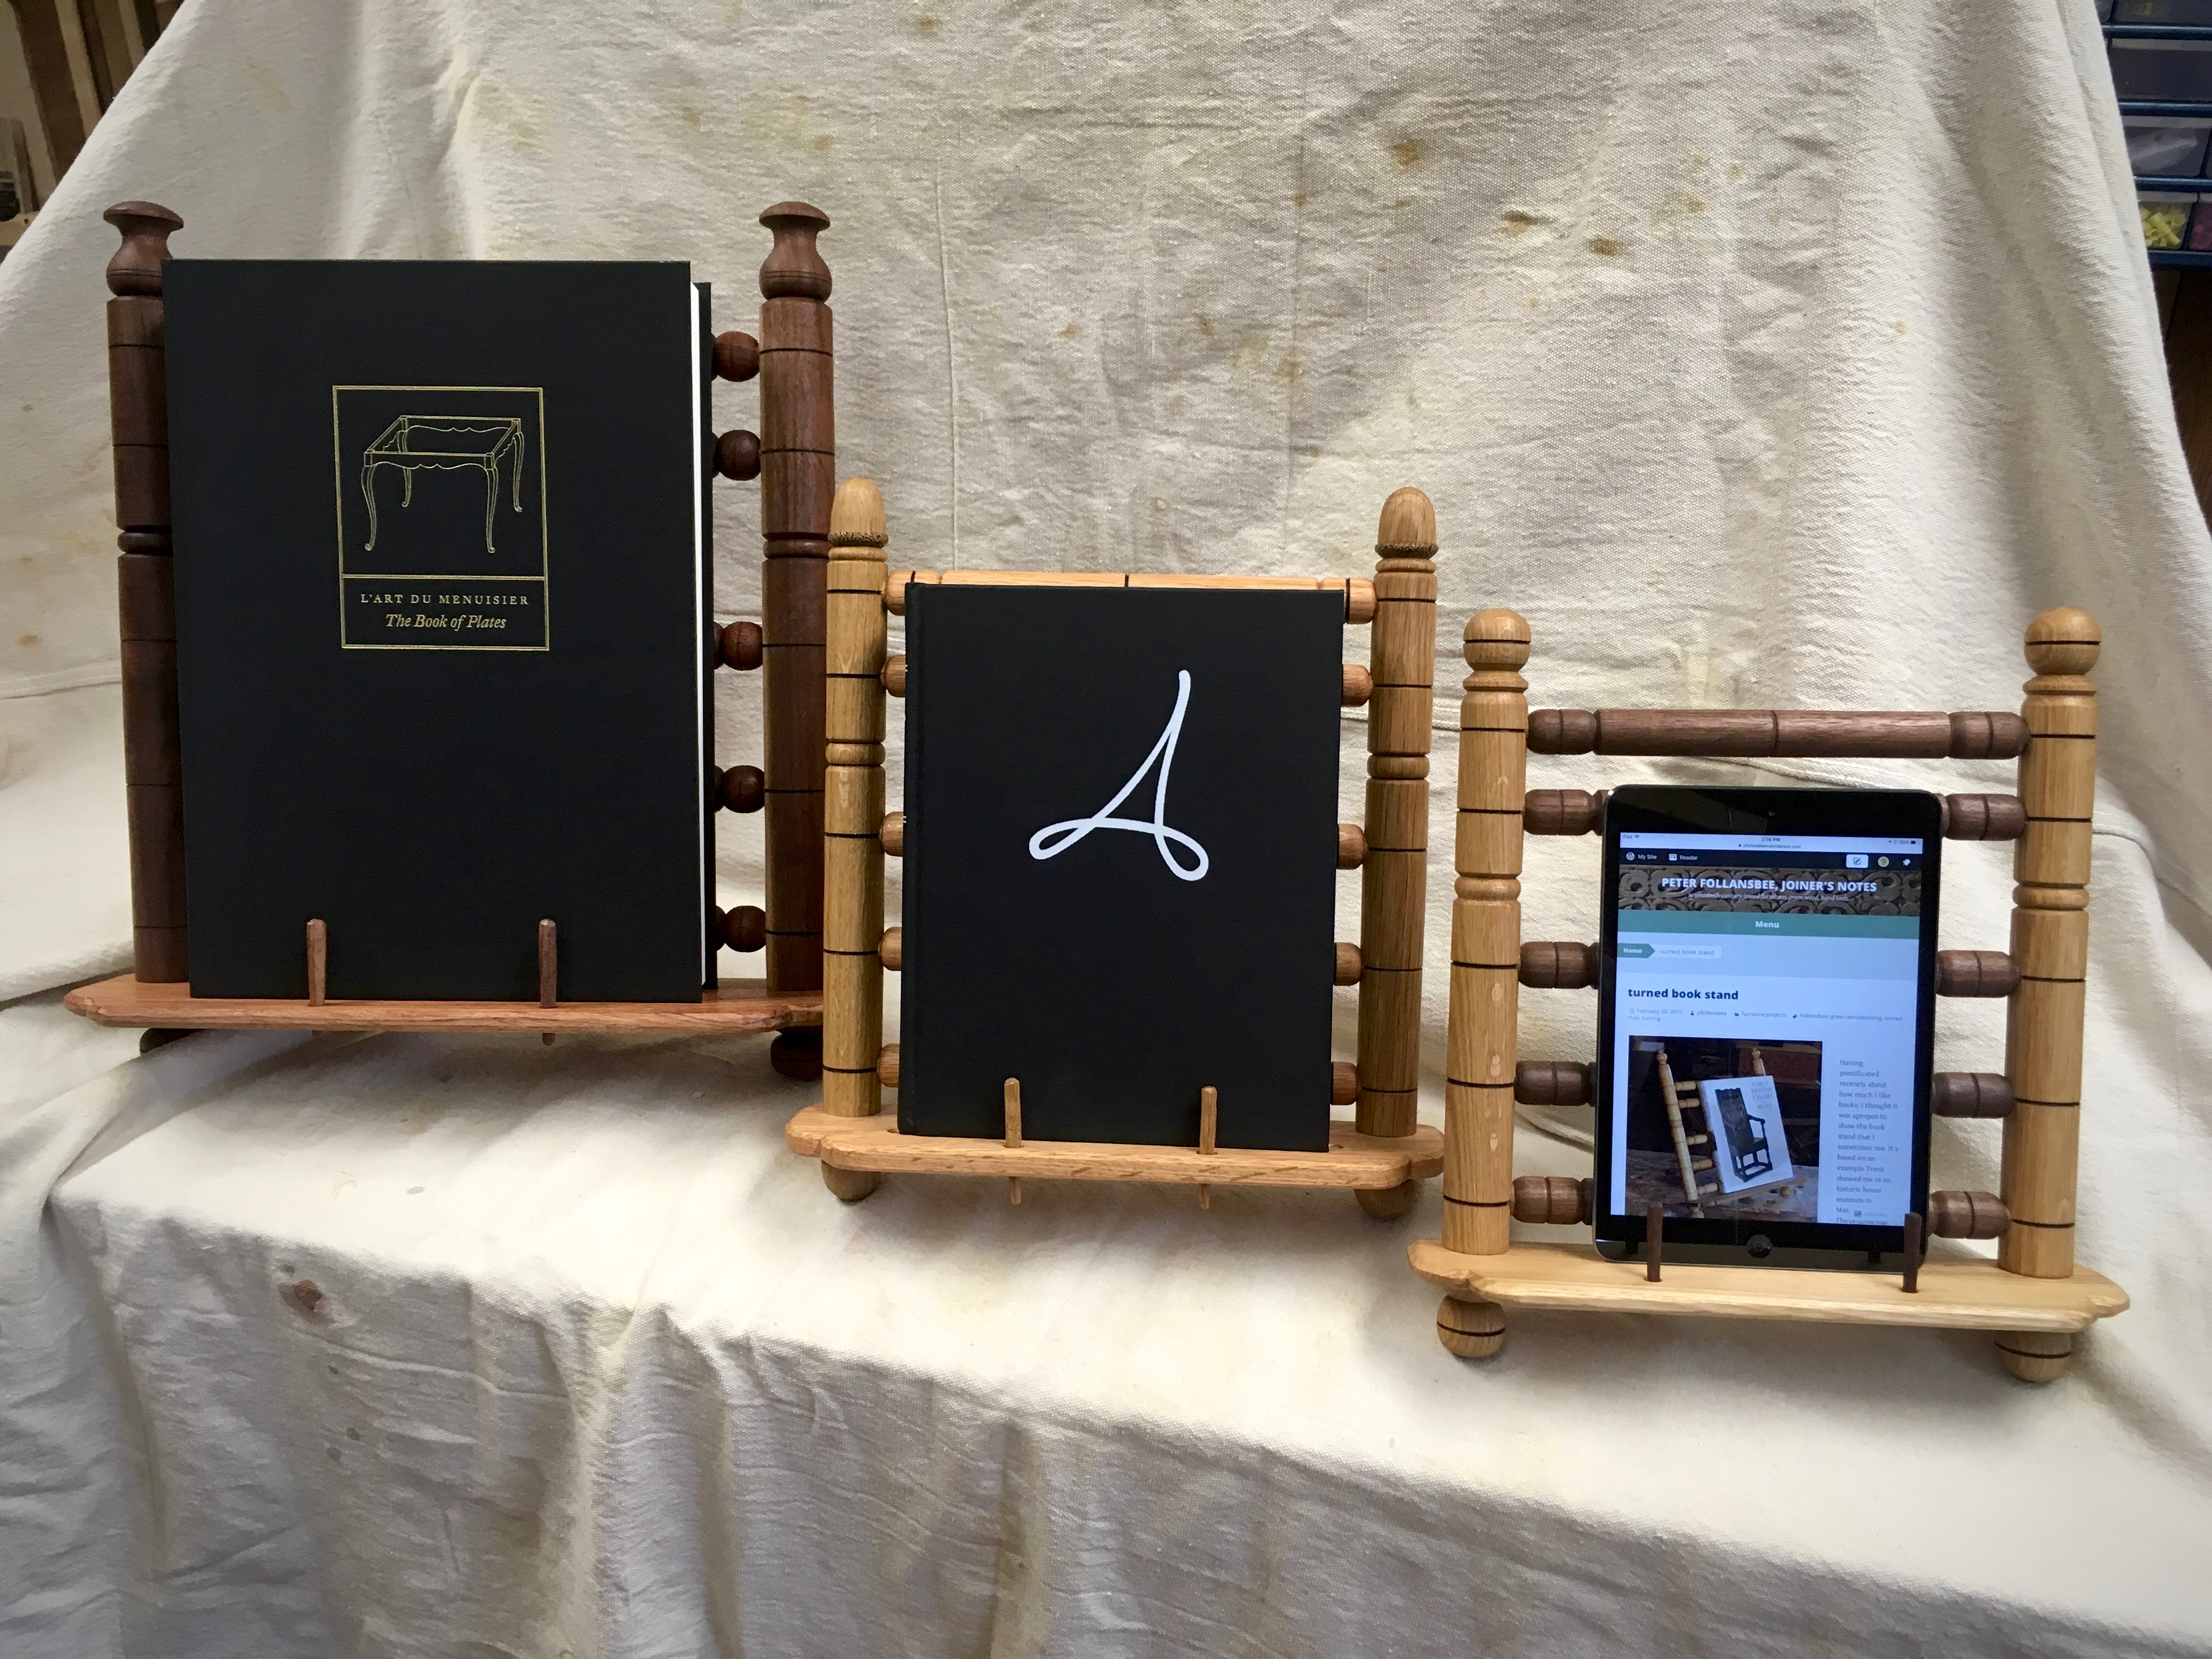
The following shows exactly why I like designing with proportions. A piece can be scaled up or down and retain the same visual look. I can plug any distance into the Module (within practical reason) and produce a version to suit the need without altering the overall appearance.
For an idea of scale: LAP “Book of Plates“, LAP “The Anarchist’s Design Book” and an iPad Mini.
These book stands are a lot of fun to build and are a great skill builder for learning to turn. They are also a great way to shrink the offcut pile.
Greg Merritt

It’s great to see you enjoying your lathe and a book stand is a great choice for your real first project. Turning cylinders to a constant diameter by hand is challenging but don’t expect perfection anytime but with practice you can come real close. Just take your time when doing it and lock your wrists and elbows and sway to one side and the other. Think like a milling machine and take small bites, don’t let impatience get in the way. I also have a bad habit of not matching my turnings something I’m going to have to work on.
I’m getting comfortable with turning a cylinder and duplicating the simpler shapes. Duplicating the larger shapes is still quite a challenge. Mostly due to my lack of comfort with the tools. I’ve only been turning for a few weeks now, so I still have a lot to learn.
Very S-W-E-E-T work Greg!
Thanks for the drawings of finials. Those alone make great practice pieces.
Thanks Bob! I really am having a lot of fun…maybe too much. I need to get back to work on seating pretty soon.
Glad you can find some use for my scribbles. I needed something to get the visual in my mind and these seem to be working for me.
Very interesting post, Greg. You’ve come so far with turning in so short a time. Those book stands all look great.
Thanks Matt. I have just scratched the surface with turning. I’m still stumbling along, but I am a little surprised at what can be accomplished with the very basic of skills.
I like all the stands, but the red oak/white oak combination is pretty cool. As always, nice illustrations.
Thanks Jeff. I like the way that one looks too. Part of the fun has been piecing together offcuts and finding combinations of wood that may look good together.
You really put your brain working into this!
The stands look great!
Thanks Antonio. I really like these book stands and have admittedly gotten a little carried away with them. I see several more in my future.
Very nice Greg!
Pingback: Ratcheting Book Stand-Redux | HILLBILLY DAIKU