Knot Tying Introduction

knot_board_1
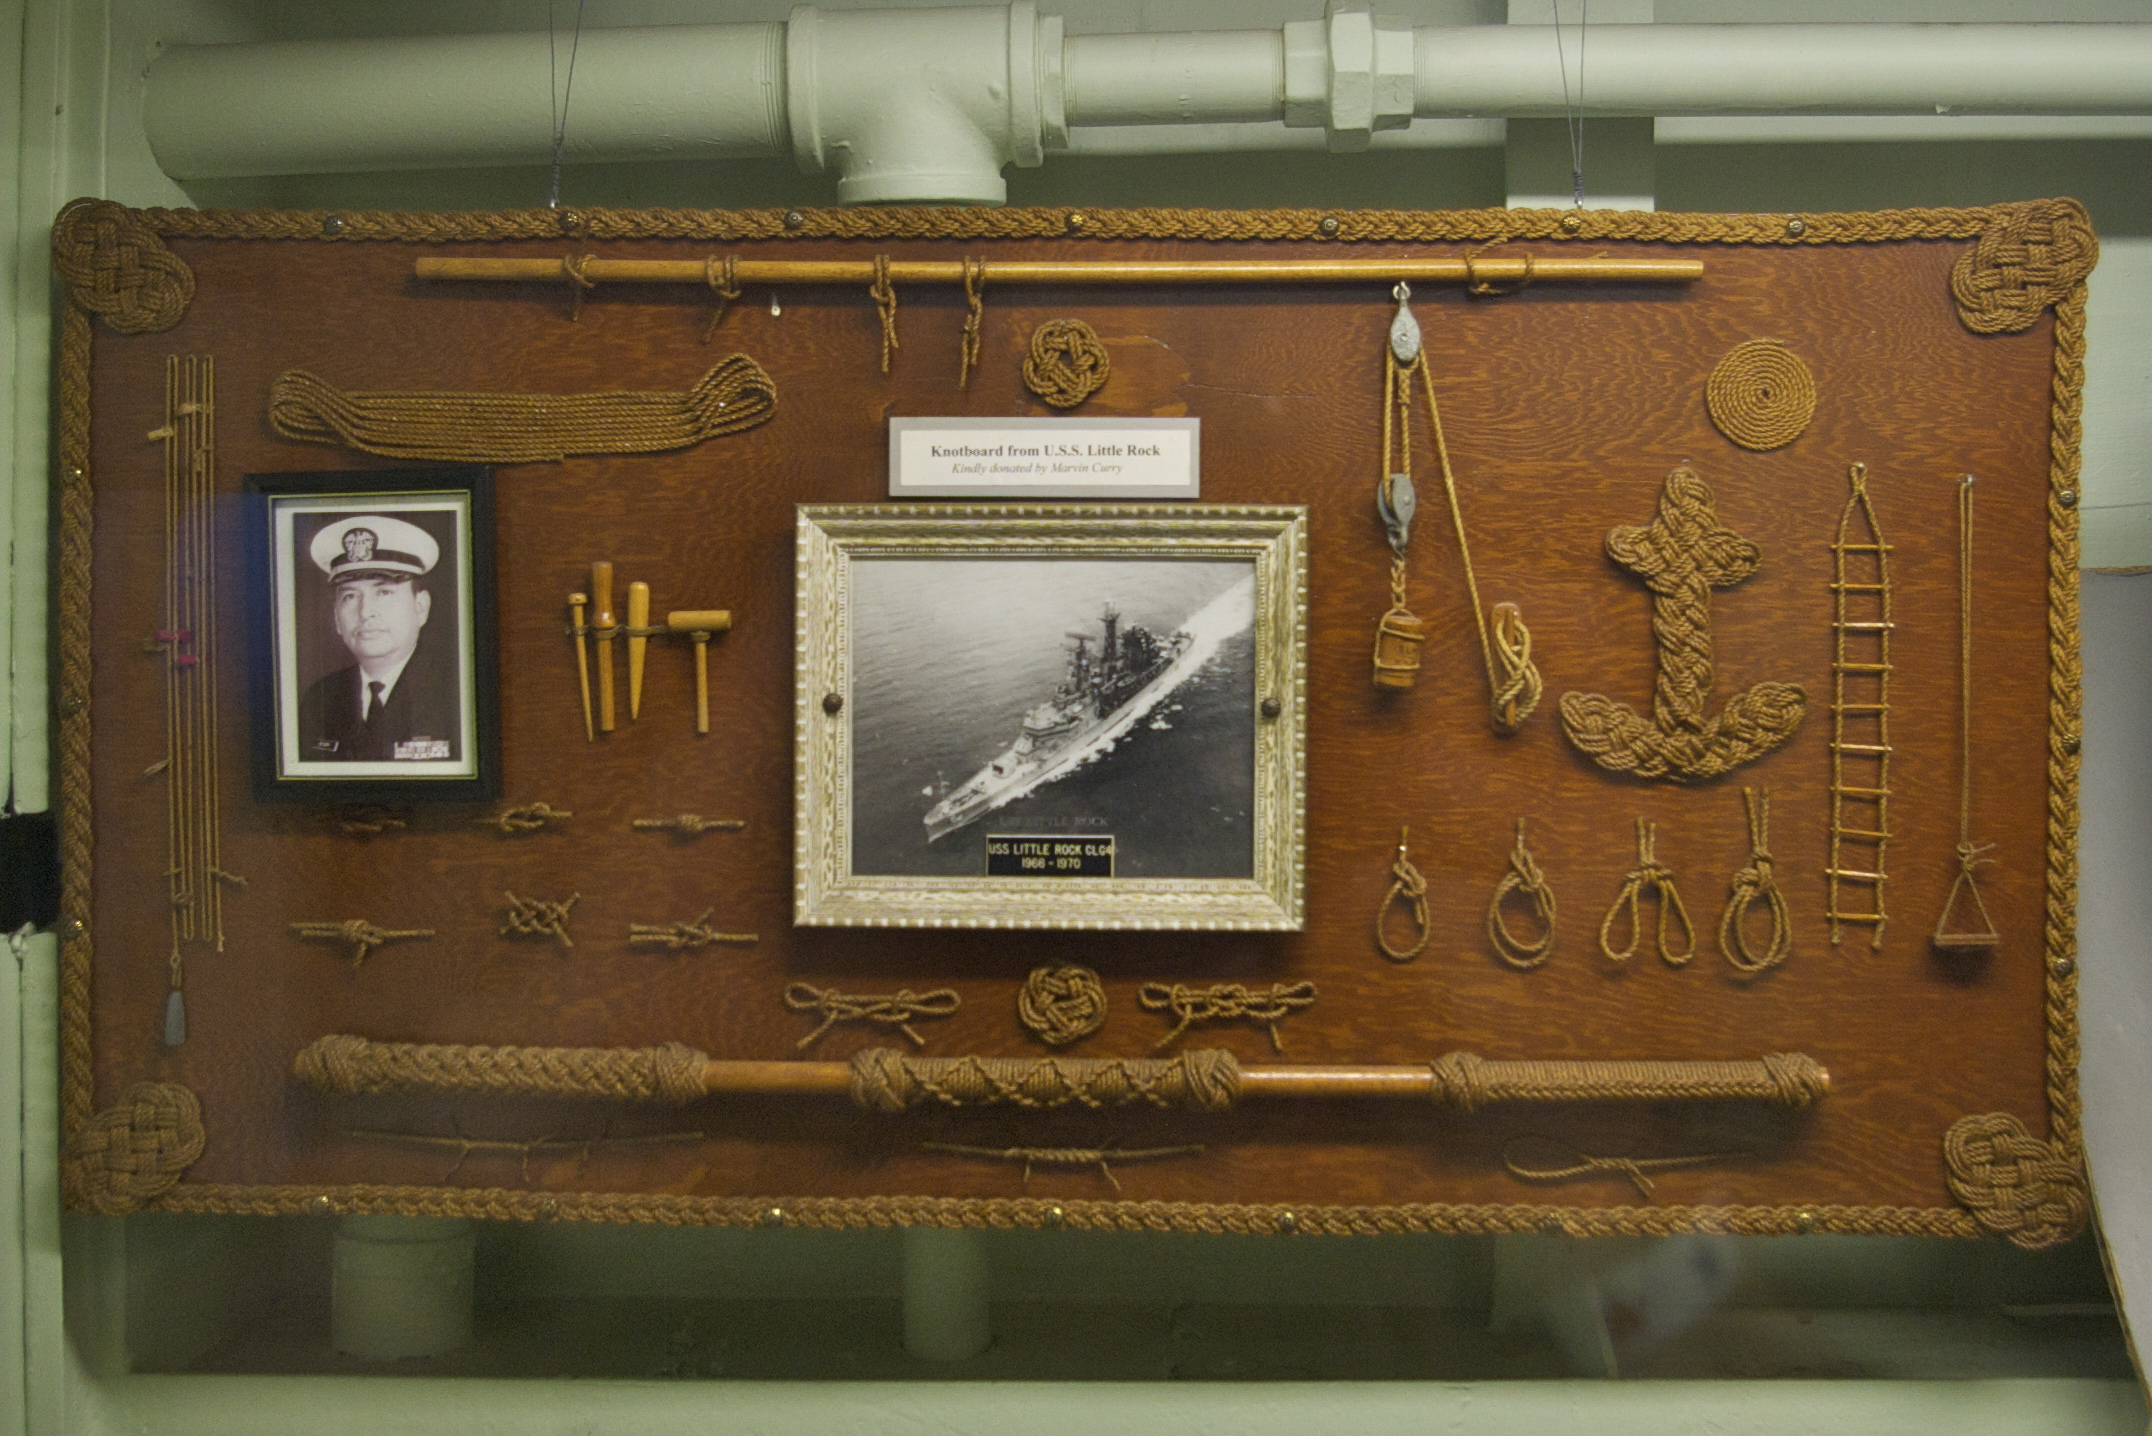
My love of knot tying began some 25yrs ago while I was in the Navy.  Contrary to what you might think, the Navy doesn’t teach knot tying then or now.  Maybe if you become a bosun’s mate, but generally it’s a skill that is no longer needed.  What the Navy does have is a long tradition of decorating ships and shore facilities with decorative knots.  Hand rails receive coxcombing, ceremonial bells have a fancy bell rope and retirement ceremonies were always laden with decorative touches fashioned from rope and cordage.  Seeing all these things peaked my interest and I went in search of information.  What I found has become one of my most treasured possessions.

ABOK-CoverThe ABOK or Ashley’s Book of Knots.  Clifford Ashley was an interesting man and accomplished a lot of things, but his book on knots is one his most enduring legacies.  His book contains instructions and illustrations for thousands of knots and has become the ‘bible’ for knot tying enthusiasts the world over.  It was with this book that I started my journey.

Fast forward to now and I still reference my copy of the ABOK on a regular basis.  I’m now a member of IGKT (International Guild of Knot Tyers) and I’ve learned several practical and decorative knots along the way.  There is something very satisfying about creating something useful and/or beautiful from a few bits of string.

As with just about every craft, there is a select set of tools and materials that are needed in order to effectively execute the projects.  The materials required are fairly inexpensive as are the few tools that you may need to purchased.  Most of the knots that I will discuss will lean towards the decorative elements of the craft, also referred to as decorative marlinspike seamanship.  So the materials and tools that I discuss will pertain primarily to this aspect of knot tying.

belfast_cordThe traditional material used for decorative knot tying was tightly twisted (hard lay) three strand cotton twine.  In the days of the sailing ship, sailors would make their own cotton cordage by pulling the yarns from cotton sails and twisting the yarns together to make the twine they needed.  In the WWII era the US military PX stores carried Belfast cord and it became the material of choice for decorating Navy ships.  Sadly it is no longer manufactured.  I have read about, but never used, the cordage supplied by Martin Combs and it is said to be a very close approximation of the Belfast cordage.  Personally I like to use materials that are easily sourced and have settled into using tarred nylon twine.  tarred_nylon_twineThis type of twine is available in several sizes and most marine supply stores carry it.  My favorite supplier for tarred nylon is R&W Rope in New Bedford, MA.  They have just about anything you may want when it comes to rope and cordage and I have always enjoyed excellent service with every order.

A spool of #18 and a spool of #36 #72 tarred nylon twine will last you a quite a long time and are good sizes for decorative work.  Other sizes are nice to have but you can easily get by with just these two.  A spool of waxed sail twine is handy as well but you can substitute unflavored dental floss for most of what I will be showing here.  A roll of masking tape and a bottle of CA glue will round out the materials list.  Of course, just about any firm twine will work for these techniques and you should find what is readily available in your area.

As to tools.  You will need a fid or marlinspike.  Either of which is really only a long pointed object that can be worked under lines and into knots.  With this tool you can open up a space to pass a line through or it can be used to tighten up a completed knot.  This tool is indispensable when tying knots.  You can buy it or make it and I will be showing you both.

knot_pull_3_drawer_chestWith just a few decorative knots in your tool kit you will have the ability to add beauty and uniqueness to your projects.  I’m working on a series of knotted pulls that I think you will find useful.  The techniques are not that difficult and the materials and tools are relatively inexpensive.  I hope that you will follow along and add knot tying to your list of skills.
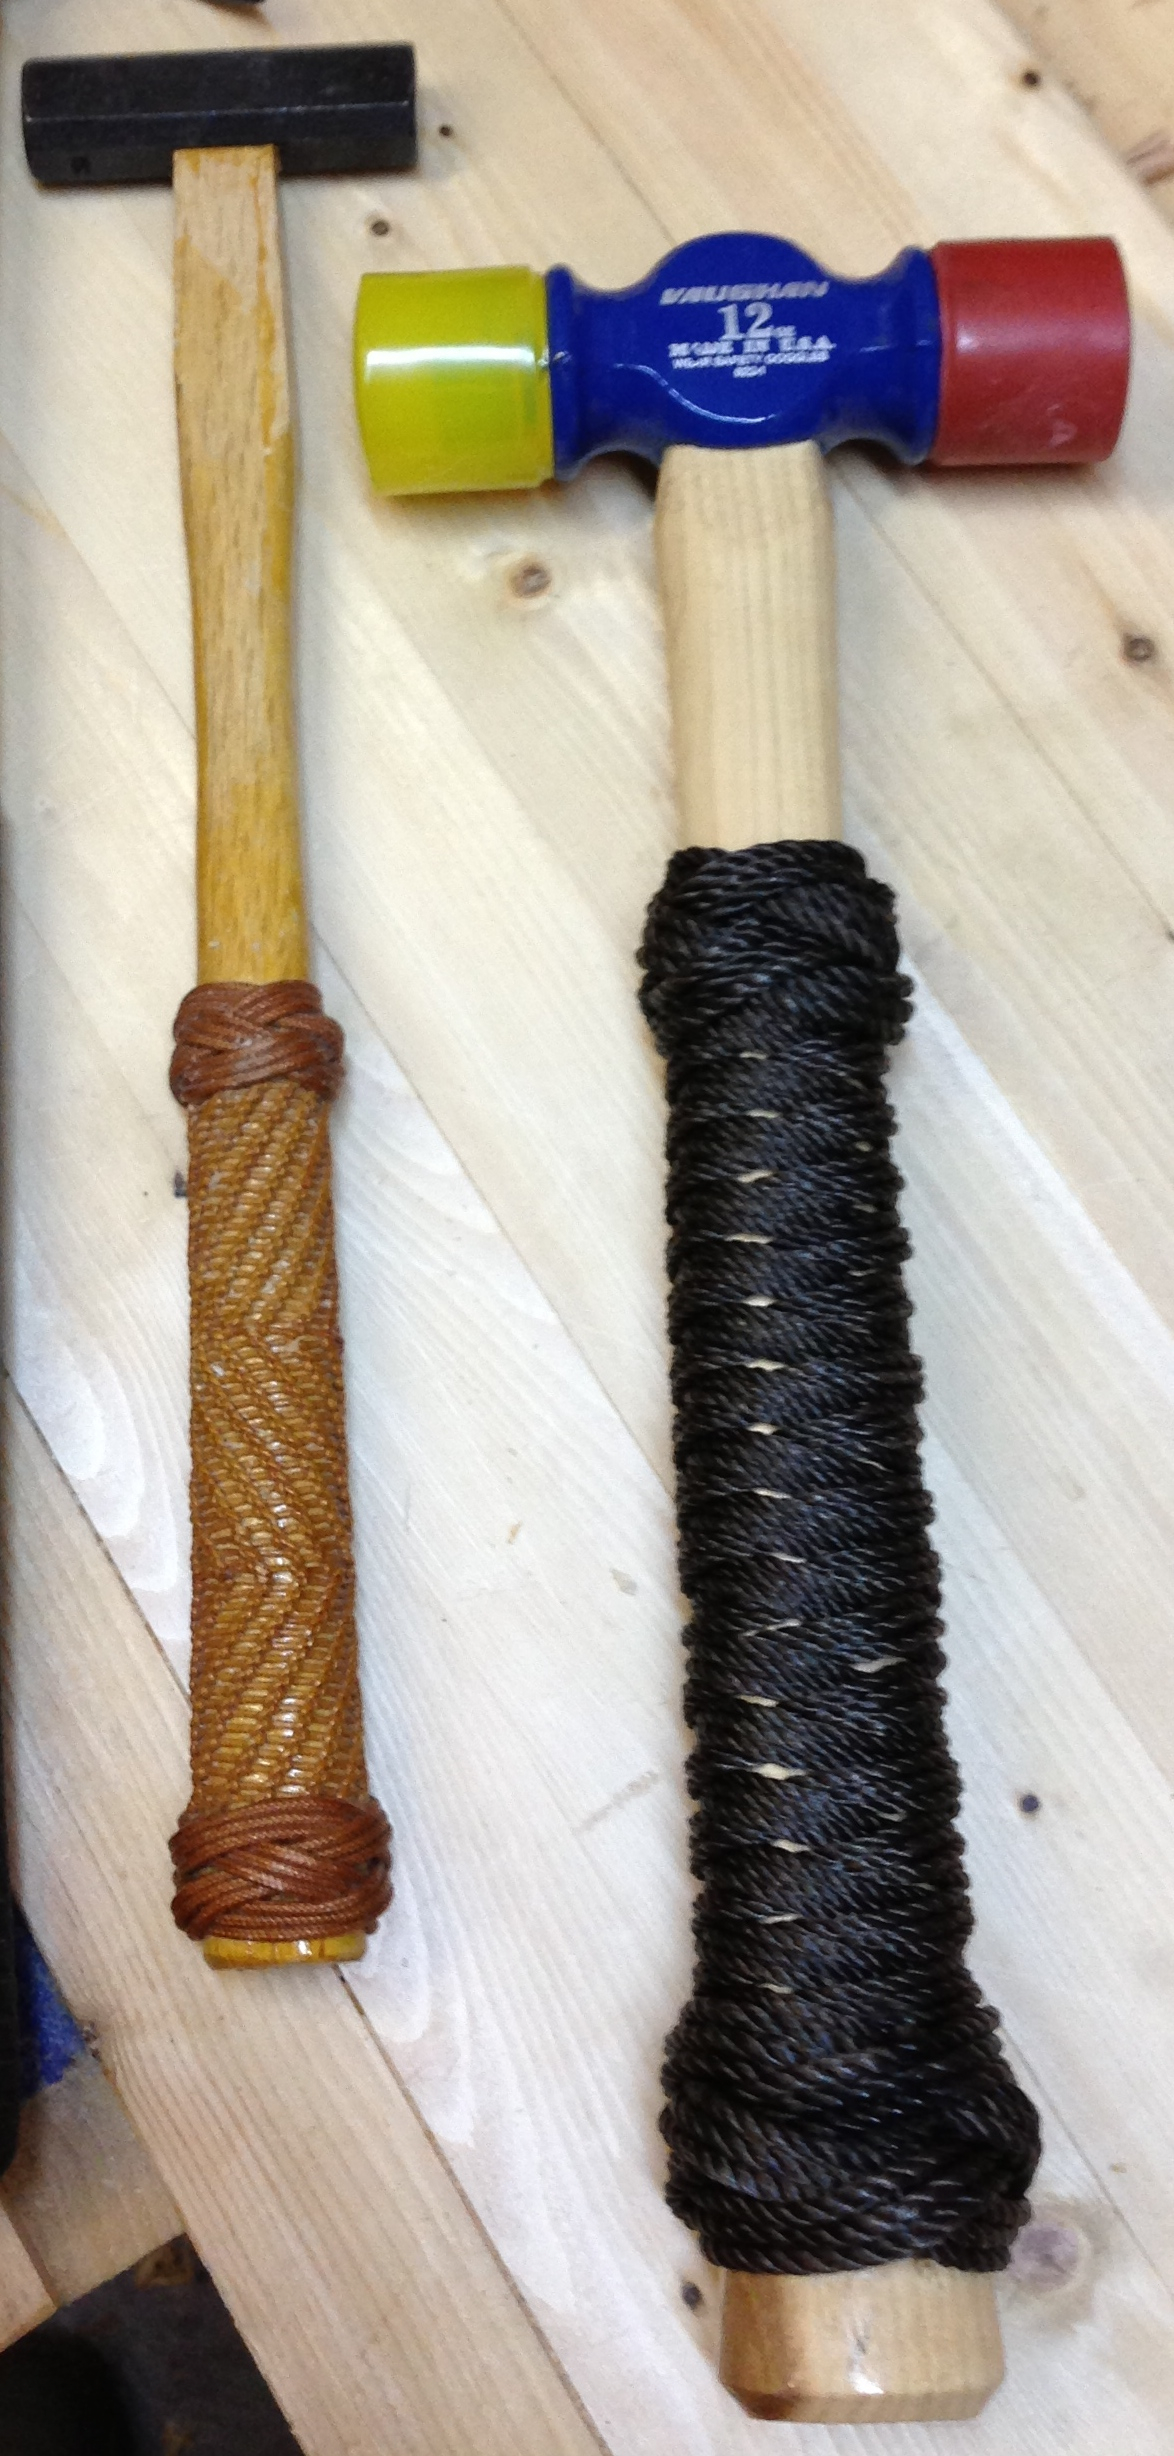
wrap_hammer_handlesturks_head_keeper_tote

Greg Merritt

Posted in Knot Tying | 3 Comments

Geometric Construction-Line Segments

The Line Segment constructions allow you to quickly and accurately dived a line into equal parts or a desired ratio.  The equal segment construction may look familiar to those of you have used the ruler trick to divide a board equally.  These constructions may look a little involved but are quickly executed once you are familiar with them.  Allowing you to quickly divide a length as you desire. Continue reading

Posted in Design, Geometric Constructions | Tagged , | Leave a comment

Geometric Construction-Perpendiculars

perpendicular_bisectorThe Perpendicular Bisector construction is one that you will use over and over once you add it to your tool kit.  On it’s own, it will allow you to establish a working center line from a baseline.  Which is one of the most common starting points when beginning a design or layout.  Beyond that, the perpendicular bisector is the basis for numerous other geometric constructions. Continue reading

Posted in Design, Geometric Constructions | Tagged , | Leave a comment

Why All the Geometry?

I am about to embark on a series of posts concerning geometric constructions.  I feel that it is important for every craftsperson to be able to translate their ideas into a layout drawing.  Geometry is the tool that will best enable this function.  In order to create a thing we must first be able to visualize the thing.  Both in our mind’s eye and on paper.

For some, myself included, this comes easily.  These people are most often referred to as visual learners or right brain thinkers.  These people can construct items within their mind’s eye.  Visualizing each part and how it is to fit with the next.  They can turn it, change it’s size and even add color to it.  They know what the item will look like long before the physical construction begins.

For others this visualization does not come easily.  Its a skill that must be learned and practiced.  These are the left brain thinkers.  They think in words and in logical sequences.  Computational mathematics come easily for these people and they prefer things to be absolute.

Educators once understood and embraced this fundamental difference in how people think and interact in the world around them.  This pedagogical approach led to manual training programs being instituted to allow each type of thinker to grow in their real world skills.  The system of Sloyd is an example of this.  The idea being that each side of the brain must be nurtured in order to fully educate an individual.  Each person must develop skill sets in both the abstract and the concrete world in order to be a ‘well-rounded’ productive member of society.

Mathematics has the unique ability to bridge the two types of thinking together.  For the right brain, visually based, thinkers there is geometry.  It can be easily visualized in the mind’s eye as well as physically manipulated in the real world.  For the left brain, logic based, thinkers there is algebra, trigonometry and calculus.

Art, music, wood and metal shop, cooking and technical drawing programs help the right brain thinkers link practical applications to the theoretical lessons they are being taught.  For the left brain thinkers the reverse applies.  These type of programs help them to link from theoretical to practical applications.

OK, I waded a little deeper into that pool of thought than I had intended.  My point is that in order to create something you must be able to first visualize that thing.  Geometry can be used as the link between the two.  For right brain, visual, people it links the brain to the paper.  Geometry gives them the ability to bring what they visualize in their mind into the physical world.  For the left brain, logical, thinkers it links the paper to the brain.  Geometry gives these people the ability to link the physical world into logical and sequential terms that they can best identify with.

So long story long, that’s why all the geometry.

Greg Merritt

Posted in Design, Geometric Constructions | Tagged | 3 Comments

The Compass

One more tool needs to be discussed before I launch into the actual geometric constructions.  The compass.  The compass is a certain type of divider where one leg of the divider is replaced with a drawing instrument, typically a pencil.

compass_general_toolsLike with dividers, you want a compass that is easy to adjust and that will hold that adjustment.  General Tools distributes a compass that is inexpensive and quite serviceable.  It is great for practicing constructions on paper and for keeping at the bench. This is what I would recommend you acquire first and it will fulfill most of your needs.  Later you can add a set of 6″ carpenters dividers to your tool kit.  With this type of divider one or both metal point legs can be removed and replaced with a pencil or a different style leg.  carpenter_dividersNew prices for carpenters dividers can be pretty high so check Ebay and other sources for a used pair.  Ones with the metal leg missing usually are the least expensive and your going to stick a pencil in there anyway.

Always, always, always keep the pencil point in your compass sharp.  A dull pencil will lay down a ‘fat’ line and lead to inaccuracies in your layouts.  One last thing.  KEEP THE PENCIL POINT IN YOUR COMPASS SHARP!

Greg Merritt

Posted in 5-Tools, Design | Tagged , , | Leave a comment

Experience, Tools and Materials

Just so we are all on the same page….

Experience:

I’m not an expert in woodworking.  I’m not an expert on tools.  I’m not an expert in any craft that I do.  I’m like most of you, learning as much as I can about being a craftsperson and working to build my skill levels.  I follow Paul Sellers and Woodworking Masterclasses to build my woodworking skills.  I prefer hand tools, but I’m not a snob about it.  I’m a member of the International Guild of Knot Tyers (IGKT).  So I’ll discuss knot tying, both practical and decorative.  I draw the old fashioned way, pencil to paper but make my living with CAD.  So I’ll discuss drawing techniques and how you can get your ideas on paper.  Yes, everyone can draw.  I dabble in leather and canvas work.  So projects involving those materials will crop up as well.  The bottom line is this, I know a little bit about a lot of things.  What I hope is to pass along what I have learned, good and bad, so that you can build your skills and maybe learn something new.

Tools:

To practice any craft you need, at least, a minimum tool set.  I’ll not attempt to tell you what that tool set is.  There are far more authoritative voices out there that can guide you in the acquisition of a beginning tool set.  A good place to start is by reading here and here and here as well.  I don’t own a great many tools nor do I own any high end tools.  What tools I have are well maintained and tuned to perform.  I like to make tools when possible and I find that making your own tools is a cost effective way to expand your tool kit and practice your skills.  I also firmly believe that you can become a very skilled and effective craftsperson with with a minimum of tools.  If there is a tool that is required for a project, I’ll point you in the right direction or tell you how to make it if applicable.  Concentrate on building your skills not your tool inventory.  So I’ll discuss tools that I own and tools that I’ve made along the way.

Materials:

I try to use the most cost effective materials that I can without sacrificing quality.  In my woodworking I use pine quite a bit.  I’ll use hard wood when the project requires it or if I desire it.  What I want to demonstrate to those that read my blog is that you can build projects of quality without spending a fortune on materials.  I want everyone to consider the projects accessible and not feel limited by material cost or availability.  I try to source my materials from the home center and other locations that are easily accessible for most people.  I will also share projects that involve canvas, leather and cordage (string, twine).  When I use different materials I’ll tell you where I acquired them.  The key is I want everyone to feel that they can build my projects and are not limited because I used a material that is too expensive or too difficult to locate.

Summary:

So why did I start a blog?  There are literally millions of blogs on the internet already and more are added every minute.  I’m not an expert at anything so there are more authoritative voices out there on all of the subjects that I am likely to discuss.  My hope is that I can represent the middle ground and give people who read my blog the feeling that they can do these things I discuss and begin or continue to create with their own two hands.  I’m just an average guy.  If I can do it, so can you.

Greg Merritt

Posted in Thoughts-Views | Tagged , | 2 Comments

Your Most Handy Measuring Tools

chisels-000Most everyone who uses hand tools knows that you size your mortises to match your available chisels.  There are exceptions, of course, but generally this is how it’s done.  Why then do we not use our chisels to establish other offsets and sizes.  I know some of you already do this but after talking to several people I was surprised that they had never even considered it.

Employing your chisels for double duty as gauges adds consistency, efficiency and accuracy to your work flow.  They can be used to establish offsets for table rails, tenon haunches, dovetails and just about anything else that requires an offset.  You can also use them to set depth of cuts for router and plow planes as well.  I quite often design entire projects based upon the width of a chisel.  My marking gauge for example.

As woodworkers we regard our chisels as essential cutting tools.  So much so that they are kept at the bench within arms reach at all times.  Does it not then follow that we should add them to our list of essential measuring and layout tools as well?  Convenient to hand and a fixed width (no measuring).  What’s not to like?  So give your chisels another job at the bench, you will be pleasantly surprised at how doing so will improve your workflow.

Greg Merritt

Posted in 5-Tools, Design | Tagged | 1 Comment

Build Yourself Trammel Points

trammel_pointsWhen you start drawing full-scale layouts on a regular basis there will soon come a time when you exceed the reach of your dividers. That is where trammel points come into play. Essentially they are just a set of movable points on a long stick. They will prove invaluable when you begin adding curves to your designs. In order to layout curves you will either need a thin bendable stick that you can coax into the right shape or you are going to need to find the center point of your curve so you can draw it out. Trammel points give you the reach that you will need to do it. As your projects become larger, trammel points will allow you to step of longer distances as well.

You can of course buy trammel points, but they tend to be pricy. Second hand can be had for a reasonable price, sometimes. New prices for quality trammel points will give you heart palpitations.  Or you can skip the bidding drama and heart medication and just build a set of trammels from a few scraps of wood and a couple of nails.  Do I recommend this set for a high end metal fabricating shop? No.  Are they perfectly serviceable for us woodworkers?  You bet.  Plus it’s another chance to practice your skills and shrink that ever growing pile of cutoffs you have in the corner of your shop.

The layout is based on the chisel width that will be used to chop the beam mortise.  I used an 8mm chisel.  So on my illustration, 1/3D=8mm.   If you don’t have an 8mm chisel, I would recommend using a 1/4″-3/8″ or 6mm-10mm chisel.  Just use what you have.  I used hard wood for the trammel heads and pine for the beam.  Pine is light, stiff and dimensionally stable.  For the pins I used a couple of finishing nails.  They are a little soft but very serviceable in this application.  You can make your metal points from anything you have to work with.

Hopefully my illustration will be enough for you to build your own trammel points but let me point out a few things that will make the build go a little smoother.

  1. Lay out your trammel points full scale on a piece of heavy weight paper, plywood or any flat stiff surface.  I like to use wood because as you lay out your module key the dividers will leave an indent in the wood.  These indents make it easy to reset your dividers to a desired distance from the module key.IMG_0809
  2. Chop the beam mortise first then make a plug to install in the newly chopped mortise.  This plug will prevent any major chip out of the beam mortise walls when you chop the mortise for the wedge.
  3. Make your beam any length you want.  For furniture work, a beam that is about arms length will serve you well.
  4. Pay special attention to the beam.  The more uniform the width and thickness, the smoother the trammel heads will slide along the beam.
  5. Take your time and enjoy the process.

Instructional Drawing:

trammel_points-000

Greg Merritt

Posted in 5-Tools, Design, Illustrating, Trammel Points | Tagged , , | Leave a comment

Dividers and a Straight Edge Are For

In an earlier post I discussed dividers and hinted at what they could be used for.  Let me expand on that thought and give you a list.

  1. swinging an arc
  2. transferering a distance

That’s it.

Also, in an earlier post, I touted the usefulness of a purpose built straight edge.  So here is a list of it’s capabilities when employed as a straight edge.

  1. scribing a straight line

That’s it.

So why all the fuss?  When you combine the capabilities of these two simple tools the possibilities are practically limitless.

In layout and design work they give you the capability to create any shape, curve or angle you desire.  As your understanding of their use grows, so do the possibilities.

As a practical tool for the craftsperson, dividers can be employed for a multitude of tasks. They can scribe an offset line. I know your marking gauge will do the same, but try using your gauge on a curve.  Dividers ride the curve with ease.  Dividers will help you find centers and divide a distance.  Dividers will give you the ability to lay out dovetails with ease, speed and consistency.  You will find that dividers will quickly become you constant companion at the workbench.

As this blog progresses I will attempt to show what I have learned so far and how you can employ these simple tools.  I’m still learning for myself so we will journey together.

Greg Merritt

Posted in 5-Tools, Design | Tagged , | 2 Comments

Build Yourself a Straight Edge

Dividers let you lay down the important points in your design.  The straight edge connects the dots to give your layout form.  I know it seems a little obvious that you need a straight edge for drawing straight lines, but its important enough to me that I felt the need to discuss it here.

There are generally four camps when it comes to straight edges.  There is the “whatever long thing is close at hand” camp.   Continue reading

Posted in 5-Tools, Design, Illustrating, Straight edge | Tagged , , | 4 Comments