
 I last left you with Norwegian Tine. The tine (teen-ah) is a traditional folk box made by steam bending a thin strip of wood into a circular or, most popular, oval form. Much like the Shaker oval boxes that most of us are familiar with. What sets the tine apart is the way the ring is secured and the lid. The ring is secured by braiding them together with a length of thin tree root. On each end of the box there is a post. These posts are integral to the lid design. The idea is that the lid is fitted in such a way as to take advantage of the flex in the box and snap down beneath the post ends. To remove the lid you flex the posts apart so the lid clears the post ends and is removed. I tried in vain to find a video that shows this in action. So I’m going on faith on this part.
I combined the general idea of the tine and my childhood memory and came up with a box design that I thought could actually work. I started by making a full-size drawing of the octagonal shape that I wanted. Then I cut out the pieces, tablets, for the side. I using the 6mm birch plywood cutoffs that I still have piled up from the tansu projects. Each edge of these pieces needed to be beveled at 22.5deg. I’m sure I could have set some sort of shooting board for this, but I just set a bevel gauge and did it freehand. To my surprise, they all fit pretty well. Next came the marathon session of hand drill work.
I used a marking gauge to scribe an inset line around all four edges of each of the tablet pieces. Then I used a pair of dividers to step off the hole spacing. The number of holes is not that important, just that they are evenly spaced. The number of holes in the bottom panel is a different story. The bottom needs to have eight fewer holes than the sides. Each corner hole is used twice. I found this out the hard way and had to remake the bottom. From there I used my Millerfalls eggbeater drill and drilled all of the holes. I then installed a countersink in the eggbeater and cleaned up both sides of each hole. I went quicker than you would think. It was actually quite relaxing once I fell into a rhythm. The bottom was completed in the exact same manner.
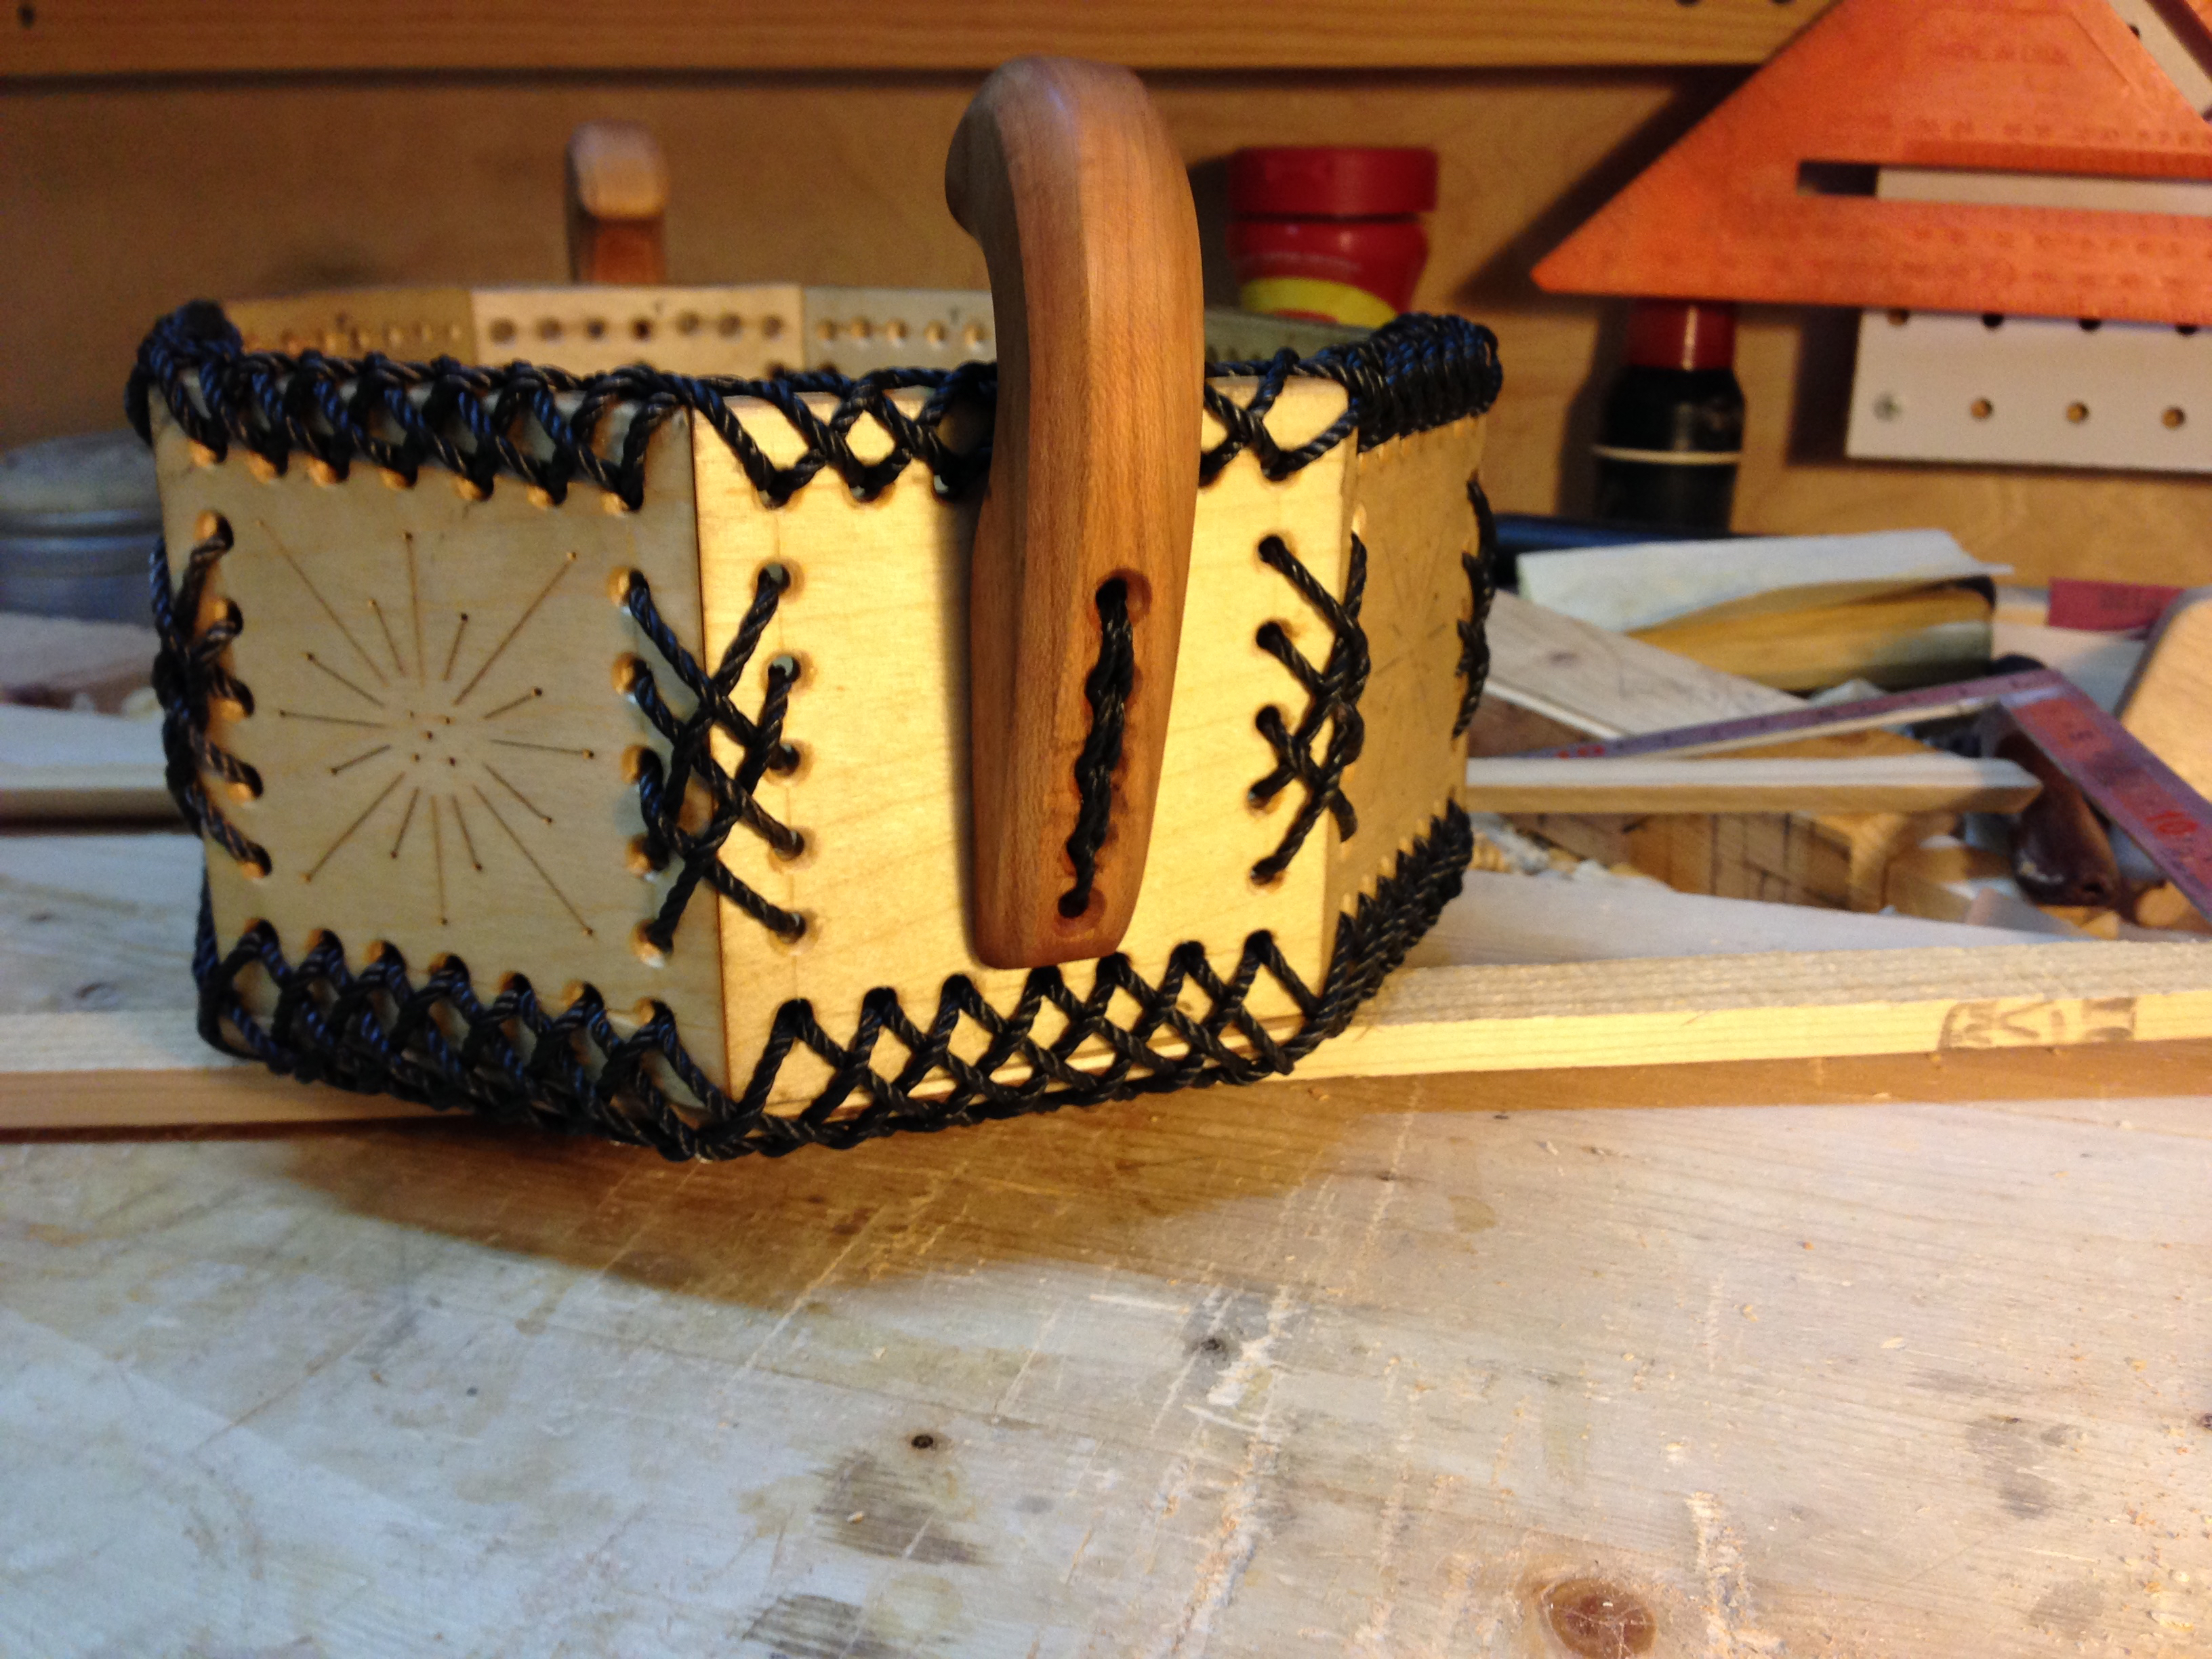
The posts are made from cherry. Their shape and position are a complete guess. I won’t know if the will work until I try and fit the lid. Fingers crossed.
After a good bit of sanding, I added some colorizing for decoration and a coat of BLO. These pieces will be handled quite a bit during assembly and the BLO should keep them from getting too dirty.
That brings us back to here.

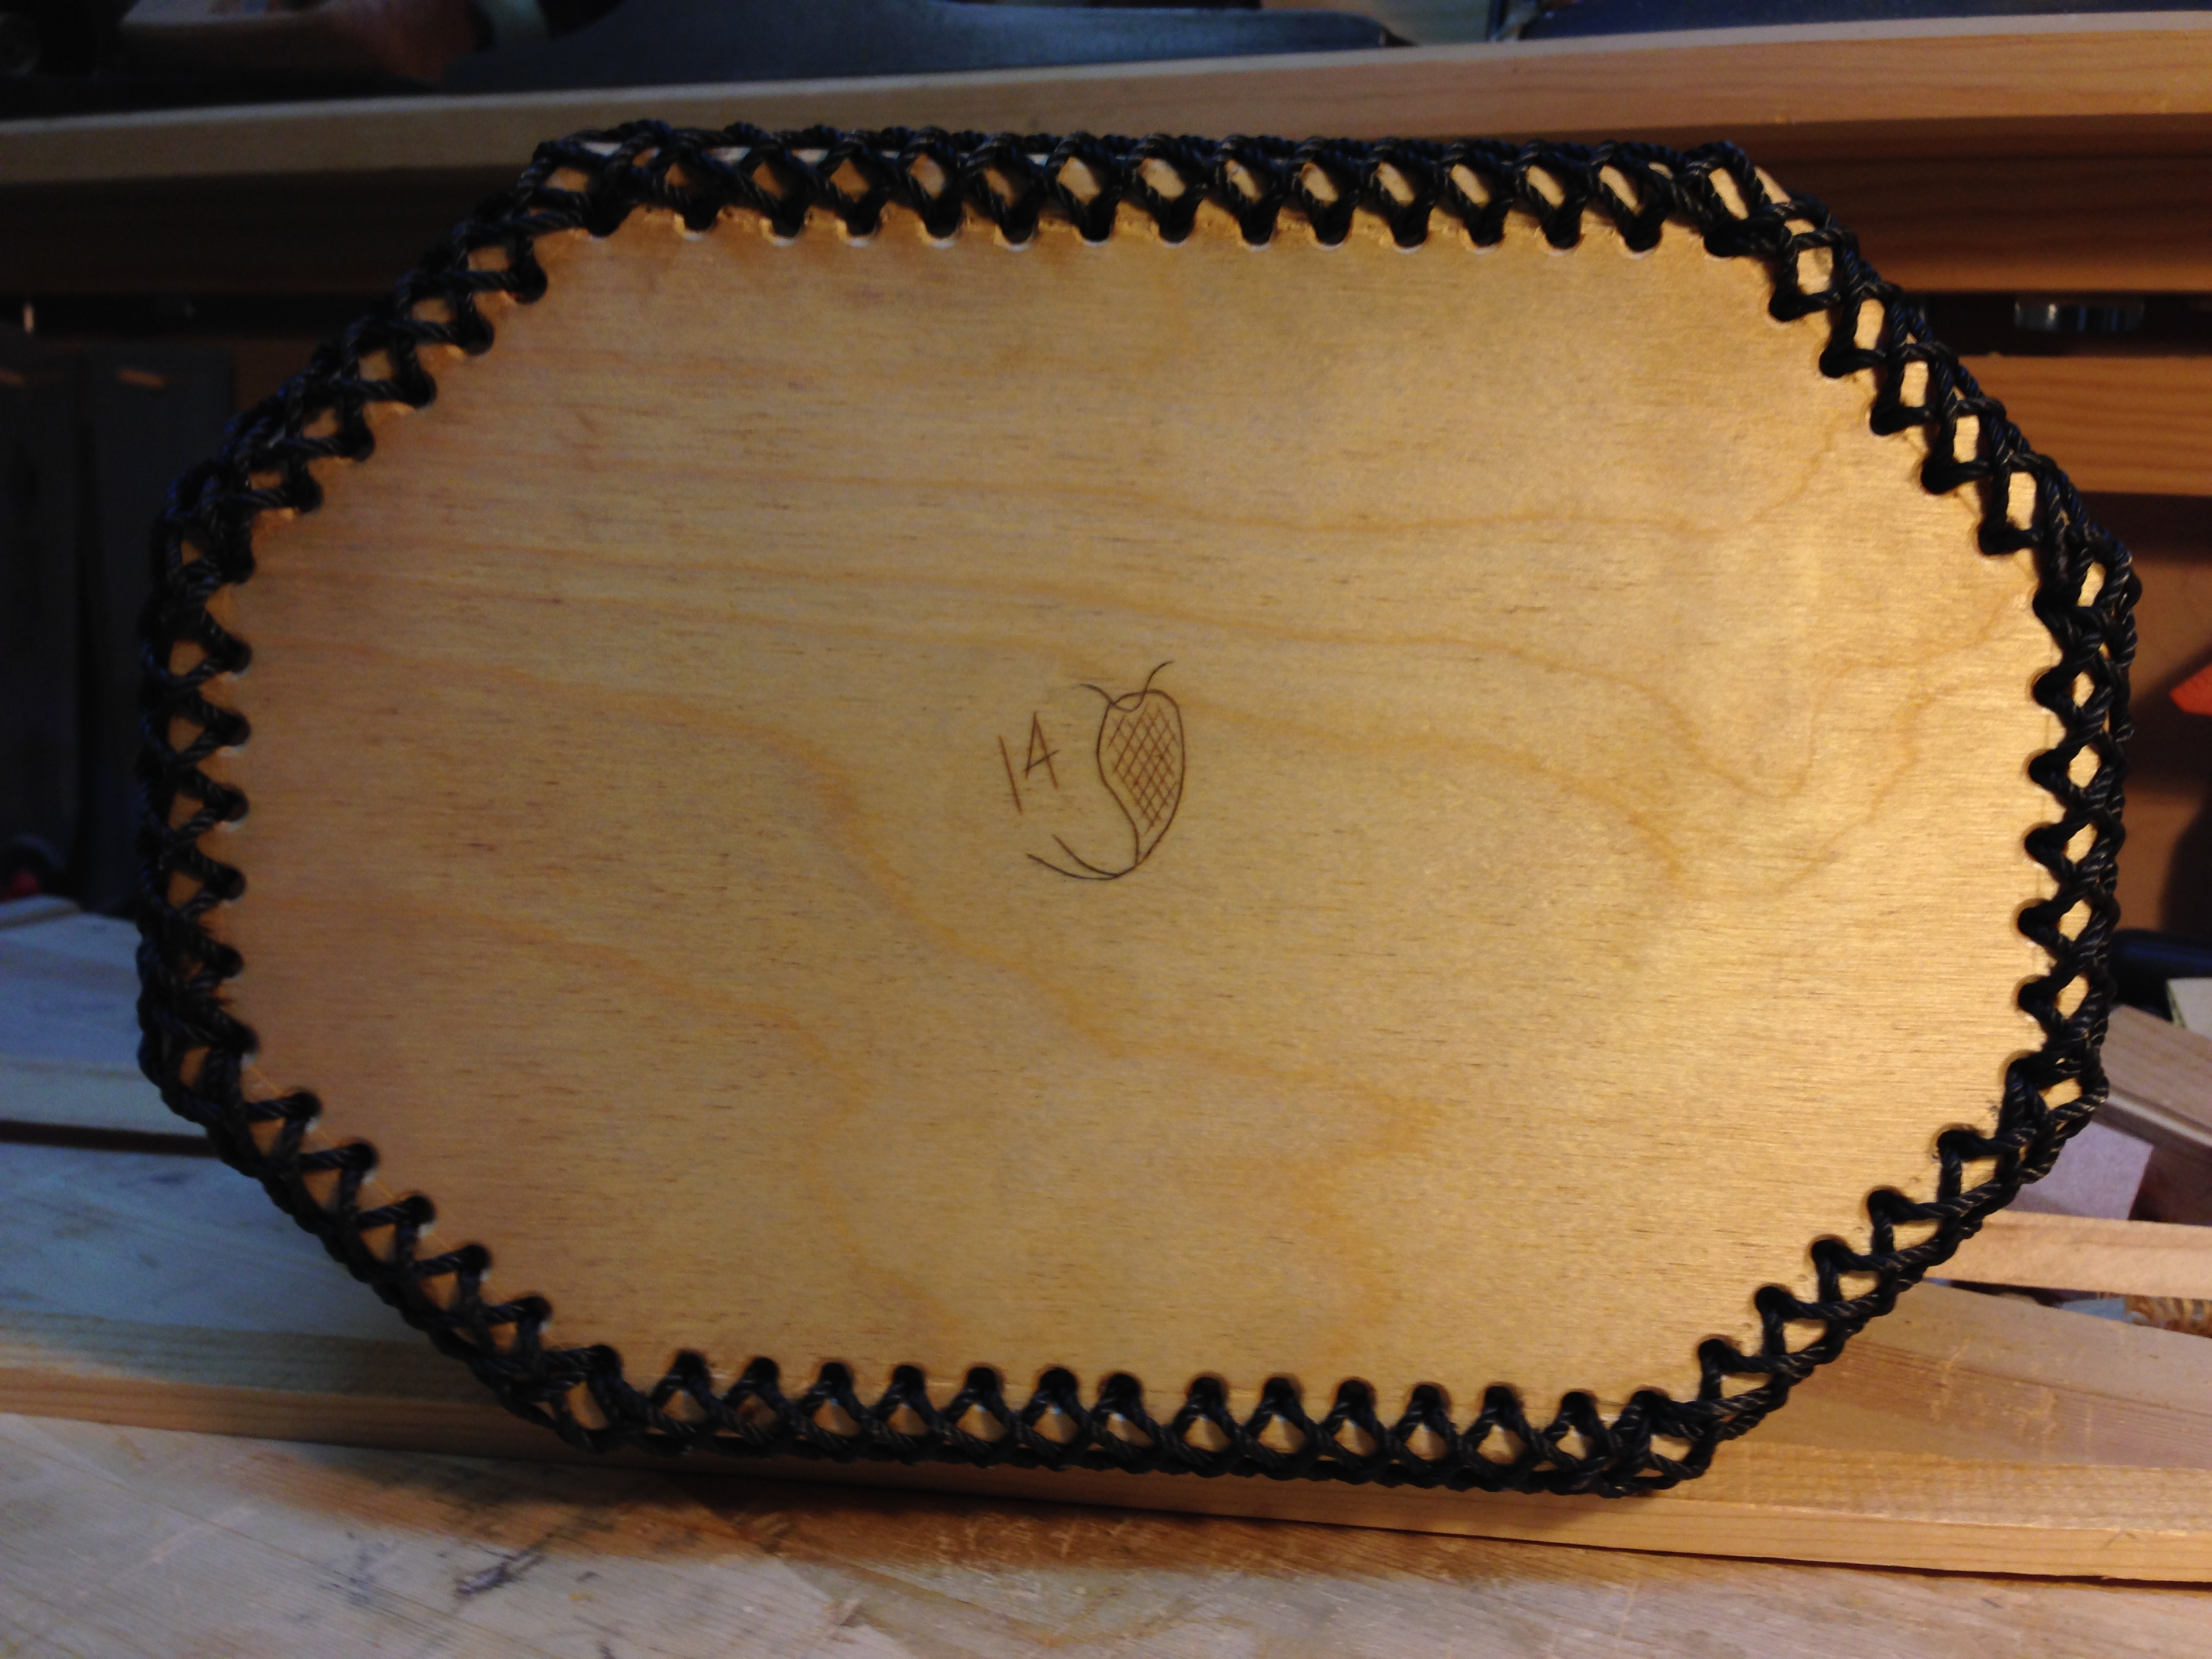
To assemble the tablets together I’m using #32 tarred nylon twine and a round braid lacing stitch. It looks far more complex than it actually is. You can find a “how-to” by following this link.

A look at the bottom.
The post are installed with a double loop lacing technique.
I have a couple more hours of lacing to do and then I can tackle the lid. So far I’m pretty happy with the way this box is coming together.
Greg Merritt Part 3

You need some help….
You’re becoming a “sewing machine”…. 😉
Lovely work!!!
Thanks Antonio.
LOL…its work that I can do in the house where its warm. The temperatures here are staying around and below freezing.
Greg
I thought your birch pieces were leather in the first post.
I take it that the lacing around the top wasn’t necessary but done to match the bottom lacing?
Yep. The top lacing is decorative and to cover the raw edge of the birch ply.
Greg
Once again, beautiful work! If I could put in a request, I’d love to see you make some tool holding, so I could copy it of course.
Thanks.
Bill
Thanks for that Bill.
My tool holding/storage is exceedingly practical, but I would be more than happy to write a post on my setup.
Greg
Great seeing your folk/artistic side here Greg. I think its great you embrace a number of ways to create. been on spoon and star duty, (30 stars and almost a dozen spoons) and soon to move again in february, but there is a true workshop space there where i hope to do more creating. In the meantime, i follow you with curiousity. Have some nice scrap maple that will make a good fid i think.
Wow, thats a lot stars and a lot of little parts. I love making spoons too. I find the process relaxing. Also, the maple will make a good fid. Like the spoons, the fid is a simple shaping exercise. No limits and no way to get it wrong.
Another move!? I don’t envy you that. But it’s good to hear that you will be gaining a work space. 🙂
I’m like a car crash…you can’t help but slowing down and looking at the possible carnage. 😉 The cold winter months make it tough for me to get in the shop. It takes too long to warm up to work out there after work. So I’m limited to weekends or projects that I can work on in the house.
Greg
Well its plain to see you are not wasting time! And yes another move but very short distance so nothing like the big cross- country we did earlier. I did a quick search on the blog, but wanted to ask which tarred nylon are you using? There is quite a few souls on the youtube that have some strong opinions on what is being passed off as bank line these days. I have yet to experiment with it, but wondered what your experience has tought you?
Most of the cheaper tarred nylon that I’ve tried is either loosely twisted, too dry or stiff. I buy all my tarred nylon from R&w Rope. Below is a link to my post about knot tying in general and towards the end there is a link to R&W Rope plus some discussion as to the sizes I use.
https://gregmerritt.wordpress.com/2014/05/03/knot-tying-introduction/
It’s a little more money, but high quality stuff.
Greg
Pingback: Stitch in Time Box-Progress 1 | GREG MERRITT – BY MY OWN HANDS