
After an additional couple of hours I finished all of the lacing on the box. Now I had to tackle the lid. Even with all of my internet searching I wasn’t able to find any details on how these types of lids are to be fitted. So I went in totally blind with only a vague idea as to how it was supposed to work.
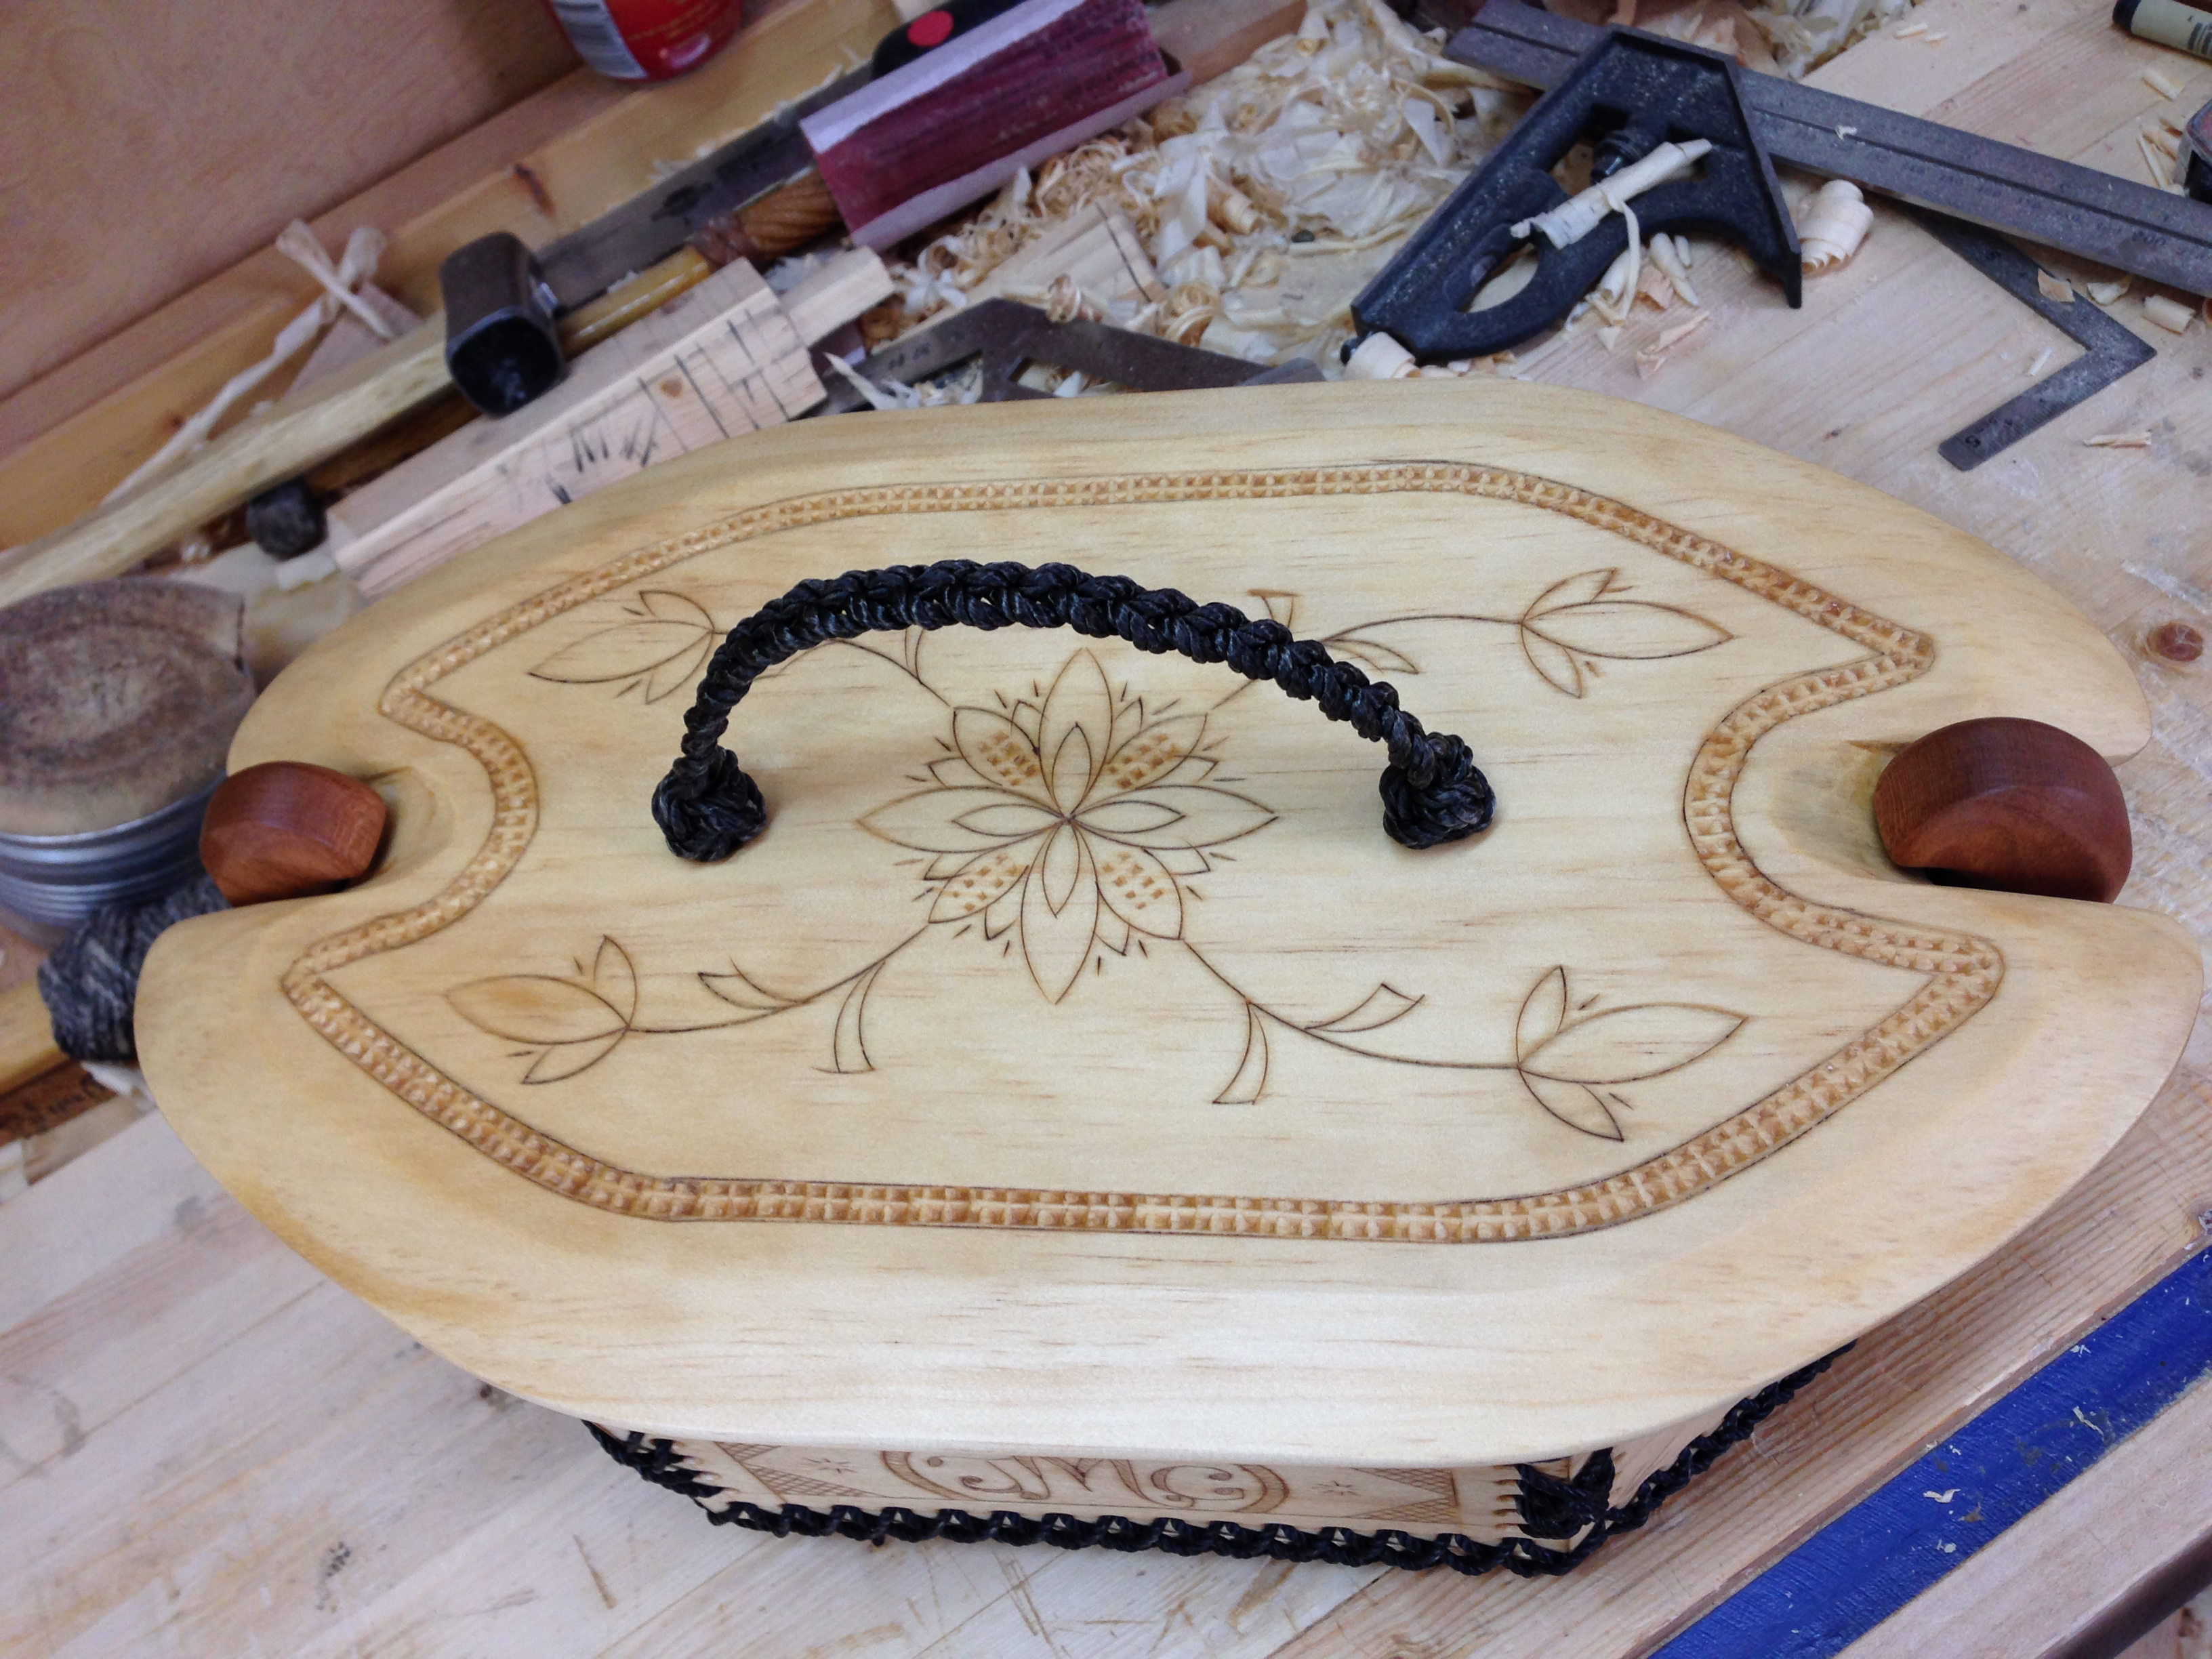
I began by cutting the lid to rough width and length. The width being wide enough toleave me with a 1/4″ overhang on the front and rear. The length was a 1/2″ longer than the distance from outside of horn to outside of horn. Then I notched each end to loosely fit over the horns. The distance between the notches I cut to match the distance from inside of horn to inside of horn. I knew this would be too tight but gave me some room for figuring out how it should work. With a gouge and rasp I began trimming the ends of the notches I continued until each notch would bottom out on the horns. With that done, the lid was still too tight to snap into place. The idea is that the lid spreads the horns just enough to snap into place. Once in place the lid still needs to be held in place by the horns. It’s a fine line, so slow was the going was slow. So I used a rasp to remove equal amounts from each notch until the lid finally snapped into place. I’ll be damned it worked!
I then fiddled with the general shape until I was happy with it. A heavy bevel all around the top edge lightened the look. This was done mostly with my smoothing plane. Plus a little chisel and sandpaper work. Then I added some kolrosing decoration and a decorative band. All of the kolrosing was done with a knife and two sizes of gouges. The decorative band was made with a homemade steel stamp. Just a chunk of steel with a pattern filed into the end. I then drilled the holes for the handle. The handle is pretty simple. A three strand braid with double diamond knots on each end.
The finish is a couple of coats of Tried and True Original. Plus lots of buffing with steel wool and a soft cloth.

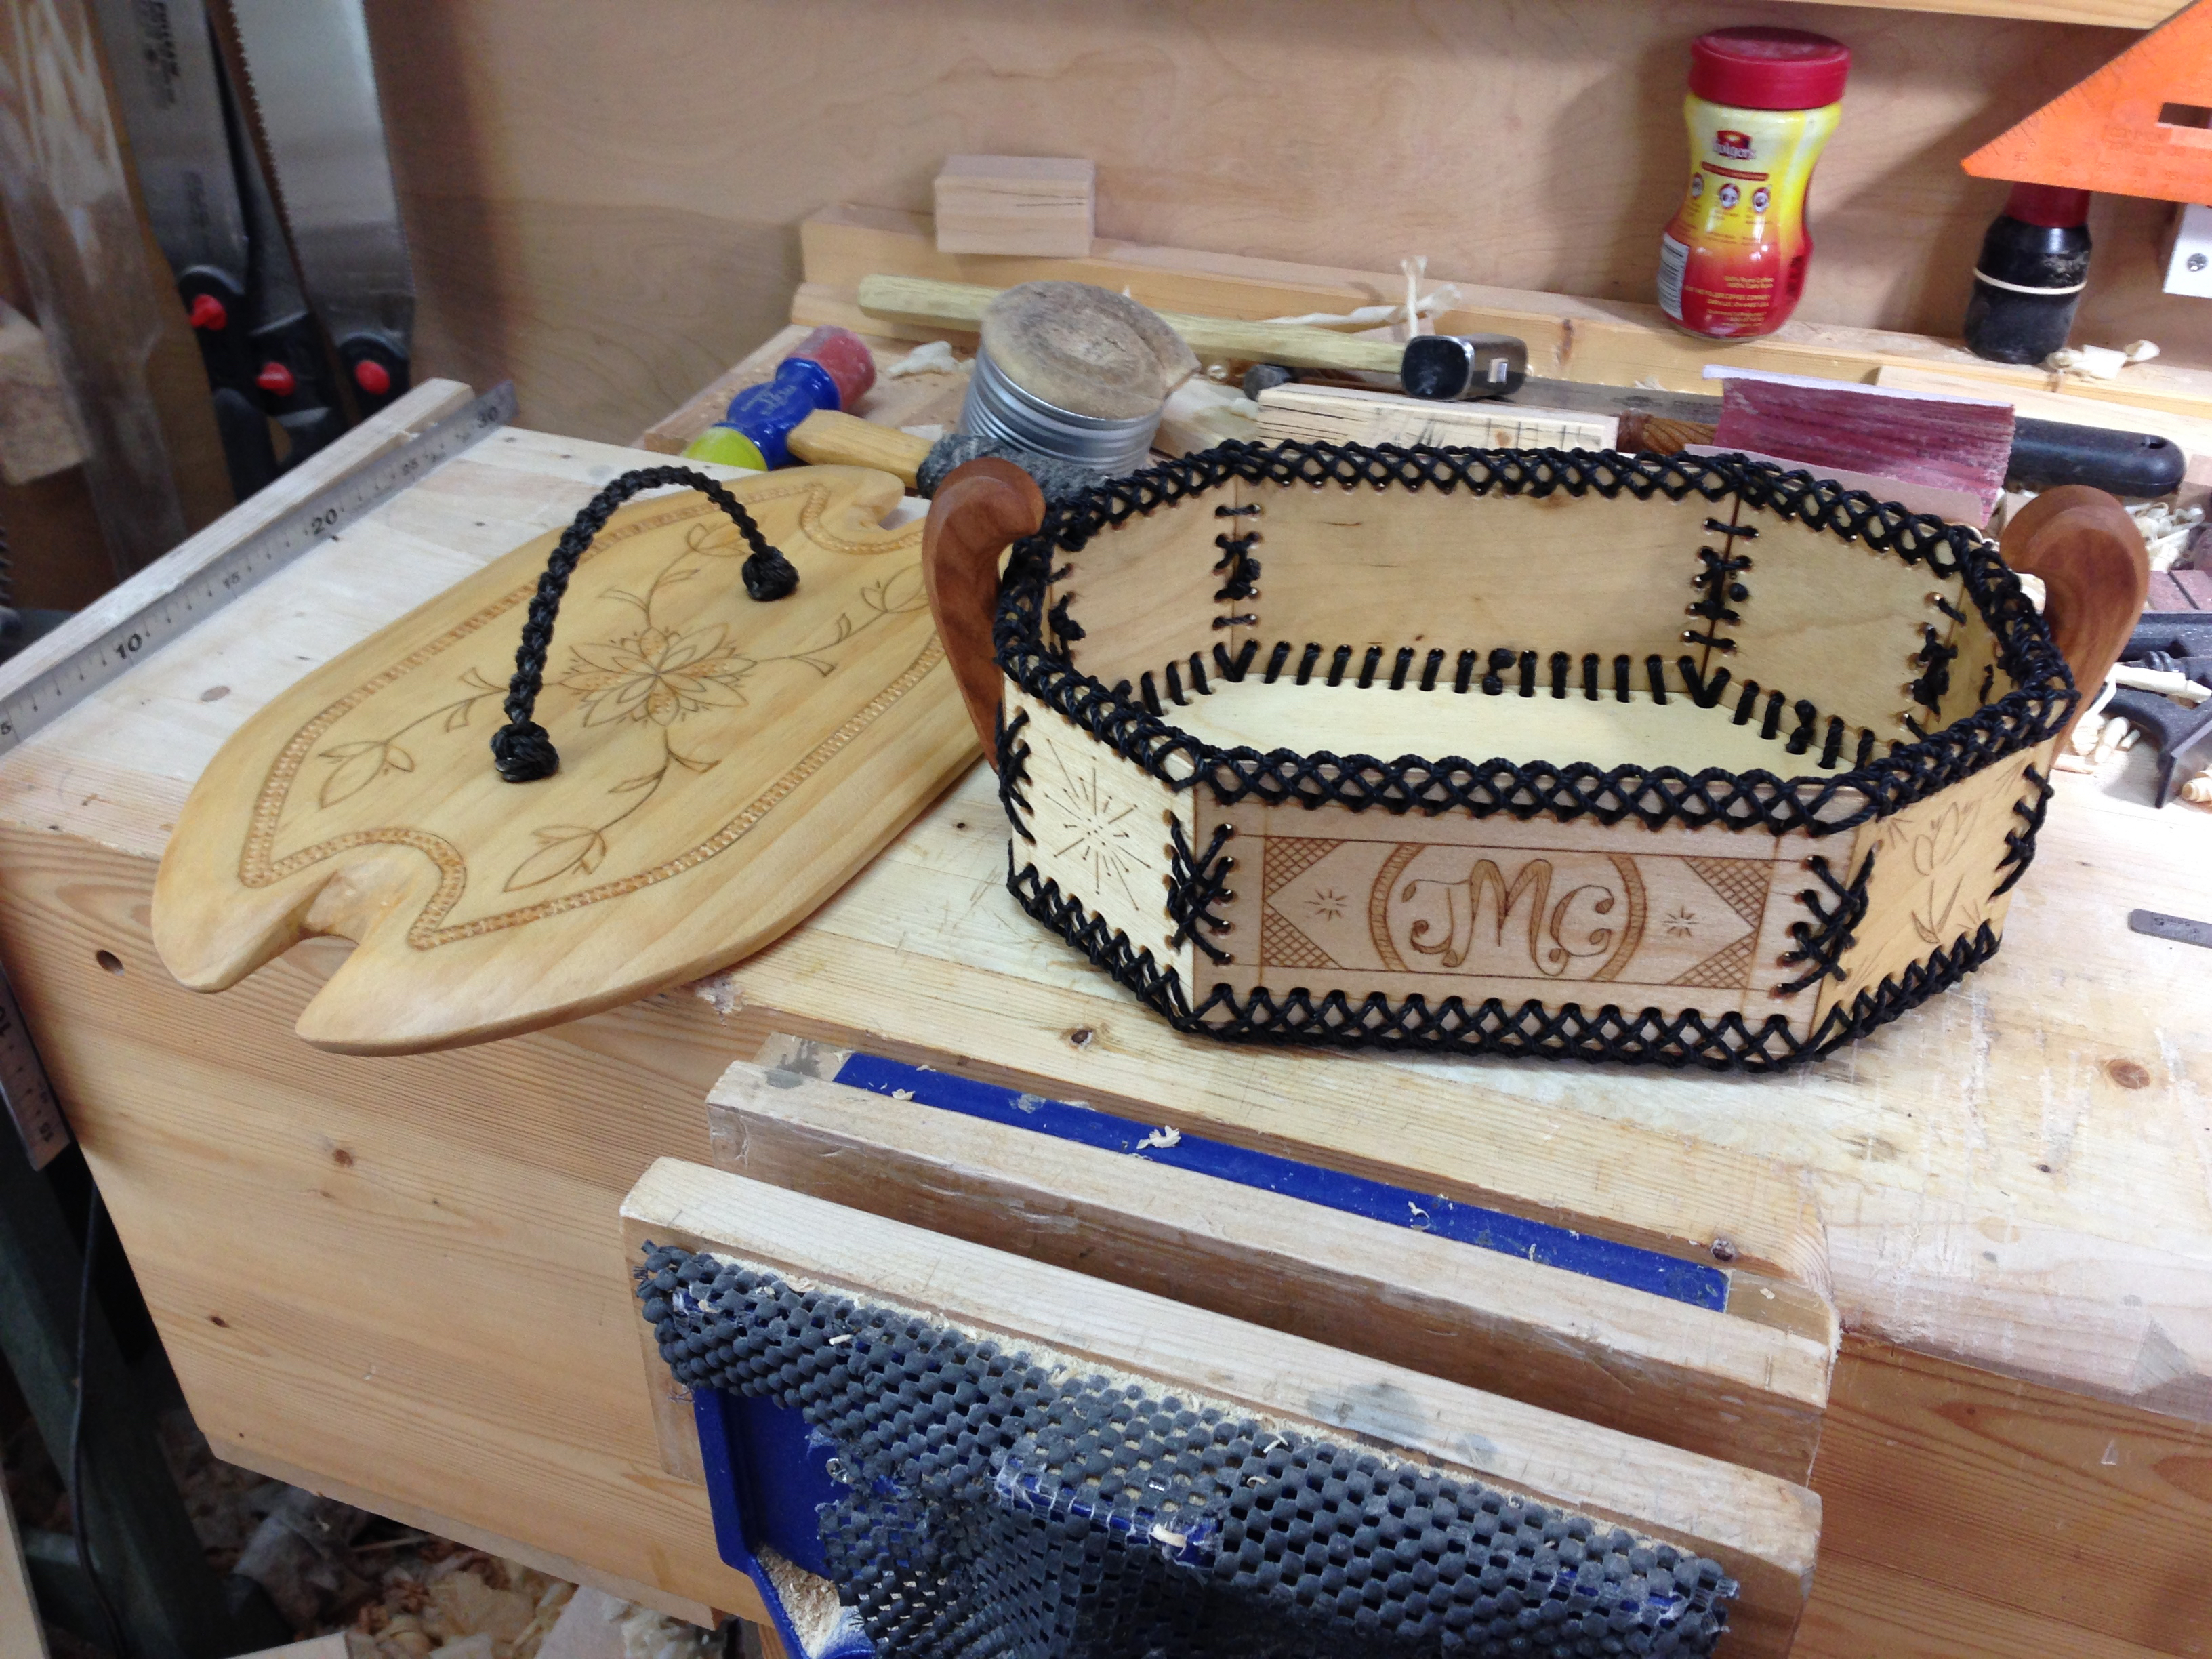
I’m really happy with how this experiment turned out. A lot of this work I can do inside the house. Which is perfect now that the weather has turned cold. I’ll be going thru my notes and refining a few points, but I’ll be building more of these for sure. The lid really sells it for me. It’s a simple but ingenious solution for adding a lid to a box.
Even with my poor to non-existent video skills, I was able to make a video of the lid in action.
Greg Merritt

This is really cool. The design is like nothing Ive seen. It looks great!
Thanks! The design is a little radical but I think it works.
Greg
Awesome job. Take 3 attaboys out of petty cash and take a day off of your choice.
Thanks Ralph. Did you place that LV order yet?
Greg
Pretty cool Greg. Let me grab you another Guiness….
Thanks Brian…and yes I could use another. 😉
Greg
Nice job gman!
Thank you.
That came out really nice Greg, your kolrosing in particular looks really crisp and sharp. I really like you you’re able to incorporate the ornamentation into the overall design.
Crazy idea – I’m wondering if you couldn’t use your knotwork as a lattice panel like a Kumiko? Maybe a pair of doors in a tansu?
Thanks Joe.
I’ve been toying with that idea. I’ve been trying simple weaves and possibly net designs. It has potential, but there are a few quirks to work out. Then I’ll have to design a project around it of course.
Greg
That’s a great project!
And an easy one… just make some millions of knots… and some “red-hurt” finger tips 😉
Merry Christmas and a Happy New Year!
Thanks Antonio.
Merry Christmas and Happy New Year to you as well.
Greg
Fantastic Greg, maybe that could be something you could make and sell as a business.
I suspect materials not too expensive , the shape and style could be modified and it would be quite easy ( for you) to personalise the Kolrosing to your customer requirements . Failing that it would be a nice project for you to teach as a class. They do say that the best way to really learn something is to teach it
Thanks David.
I think this box has some potential. However, there are a few bits that need refining for future builds. I do plan on setting up and making several pieces so that I can put a box together whenever the mood strikes. I’m not sure anyone would ever want to buy one though. But if I’m able to build several ahead I may take a shot with an Etsy account. Who knows, they may sell.
Teaching is something that I think would be a lot of fun. I’m not sure my skill level is up to snuff for that big step though. Maybe one day?
See David, your wearing me down. I’m starting to think about trying sell some things and I’ve even dared to dream of teaching at some point.
Greg
Pingback: Stitch in Time Box-Progress 2 | GREG MERRITT – BY MY OWN HANDS