 I thought I would take some time and discuss a few key points pertaining to the structural design of the Chinese Gate Bench. I designed this project from the ground up utilizing photos of antique benches and filling in the blanks with my best educated guess. Now that I have a dry fit of the structure I feel confident that all of my choices were, if not historically accurate, correct in function.
 The first item I want to discuss is the angle of the legs as viewed from the end. There were two distinct variations when I reviewed the antiques. One had a angle that resulted in the legs being wider than the seat. The second variation utilized an angle that kept the legs within the width of the seat. On this bench I choose to use the second variation. A very shallow angle in order to keep the footprint of the bench no larger than seat itself. In order to produce a stable bench the seat width must be a minimum of half the height of the bech. Any narrower and things start to get “tippy”. My design has the seat and resulting footprint exactly half the height of the bench. The bench is very stable and will actually resist a good deal of lateral force before showing signs of tipping front to rear. One point to note is that the outsides of the legs are directly in-line with the outer edge of the seat. Those antiques that utilized a wider angle had, for the most part, the insides of the legs directly in-line with edge of the seat. A small variation that results in a large visual and structural change.
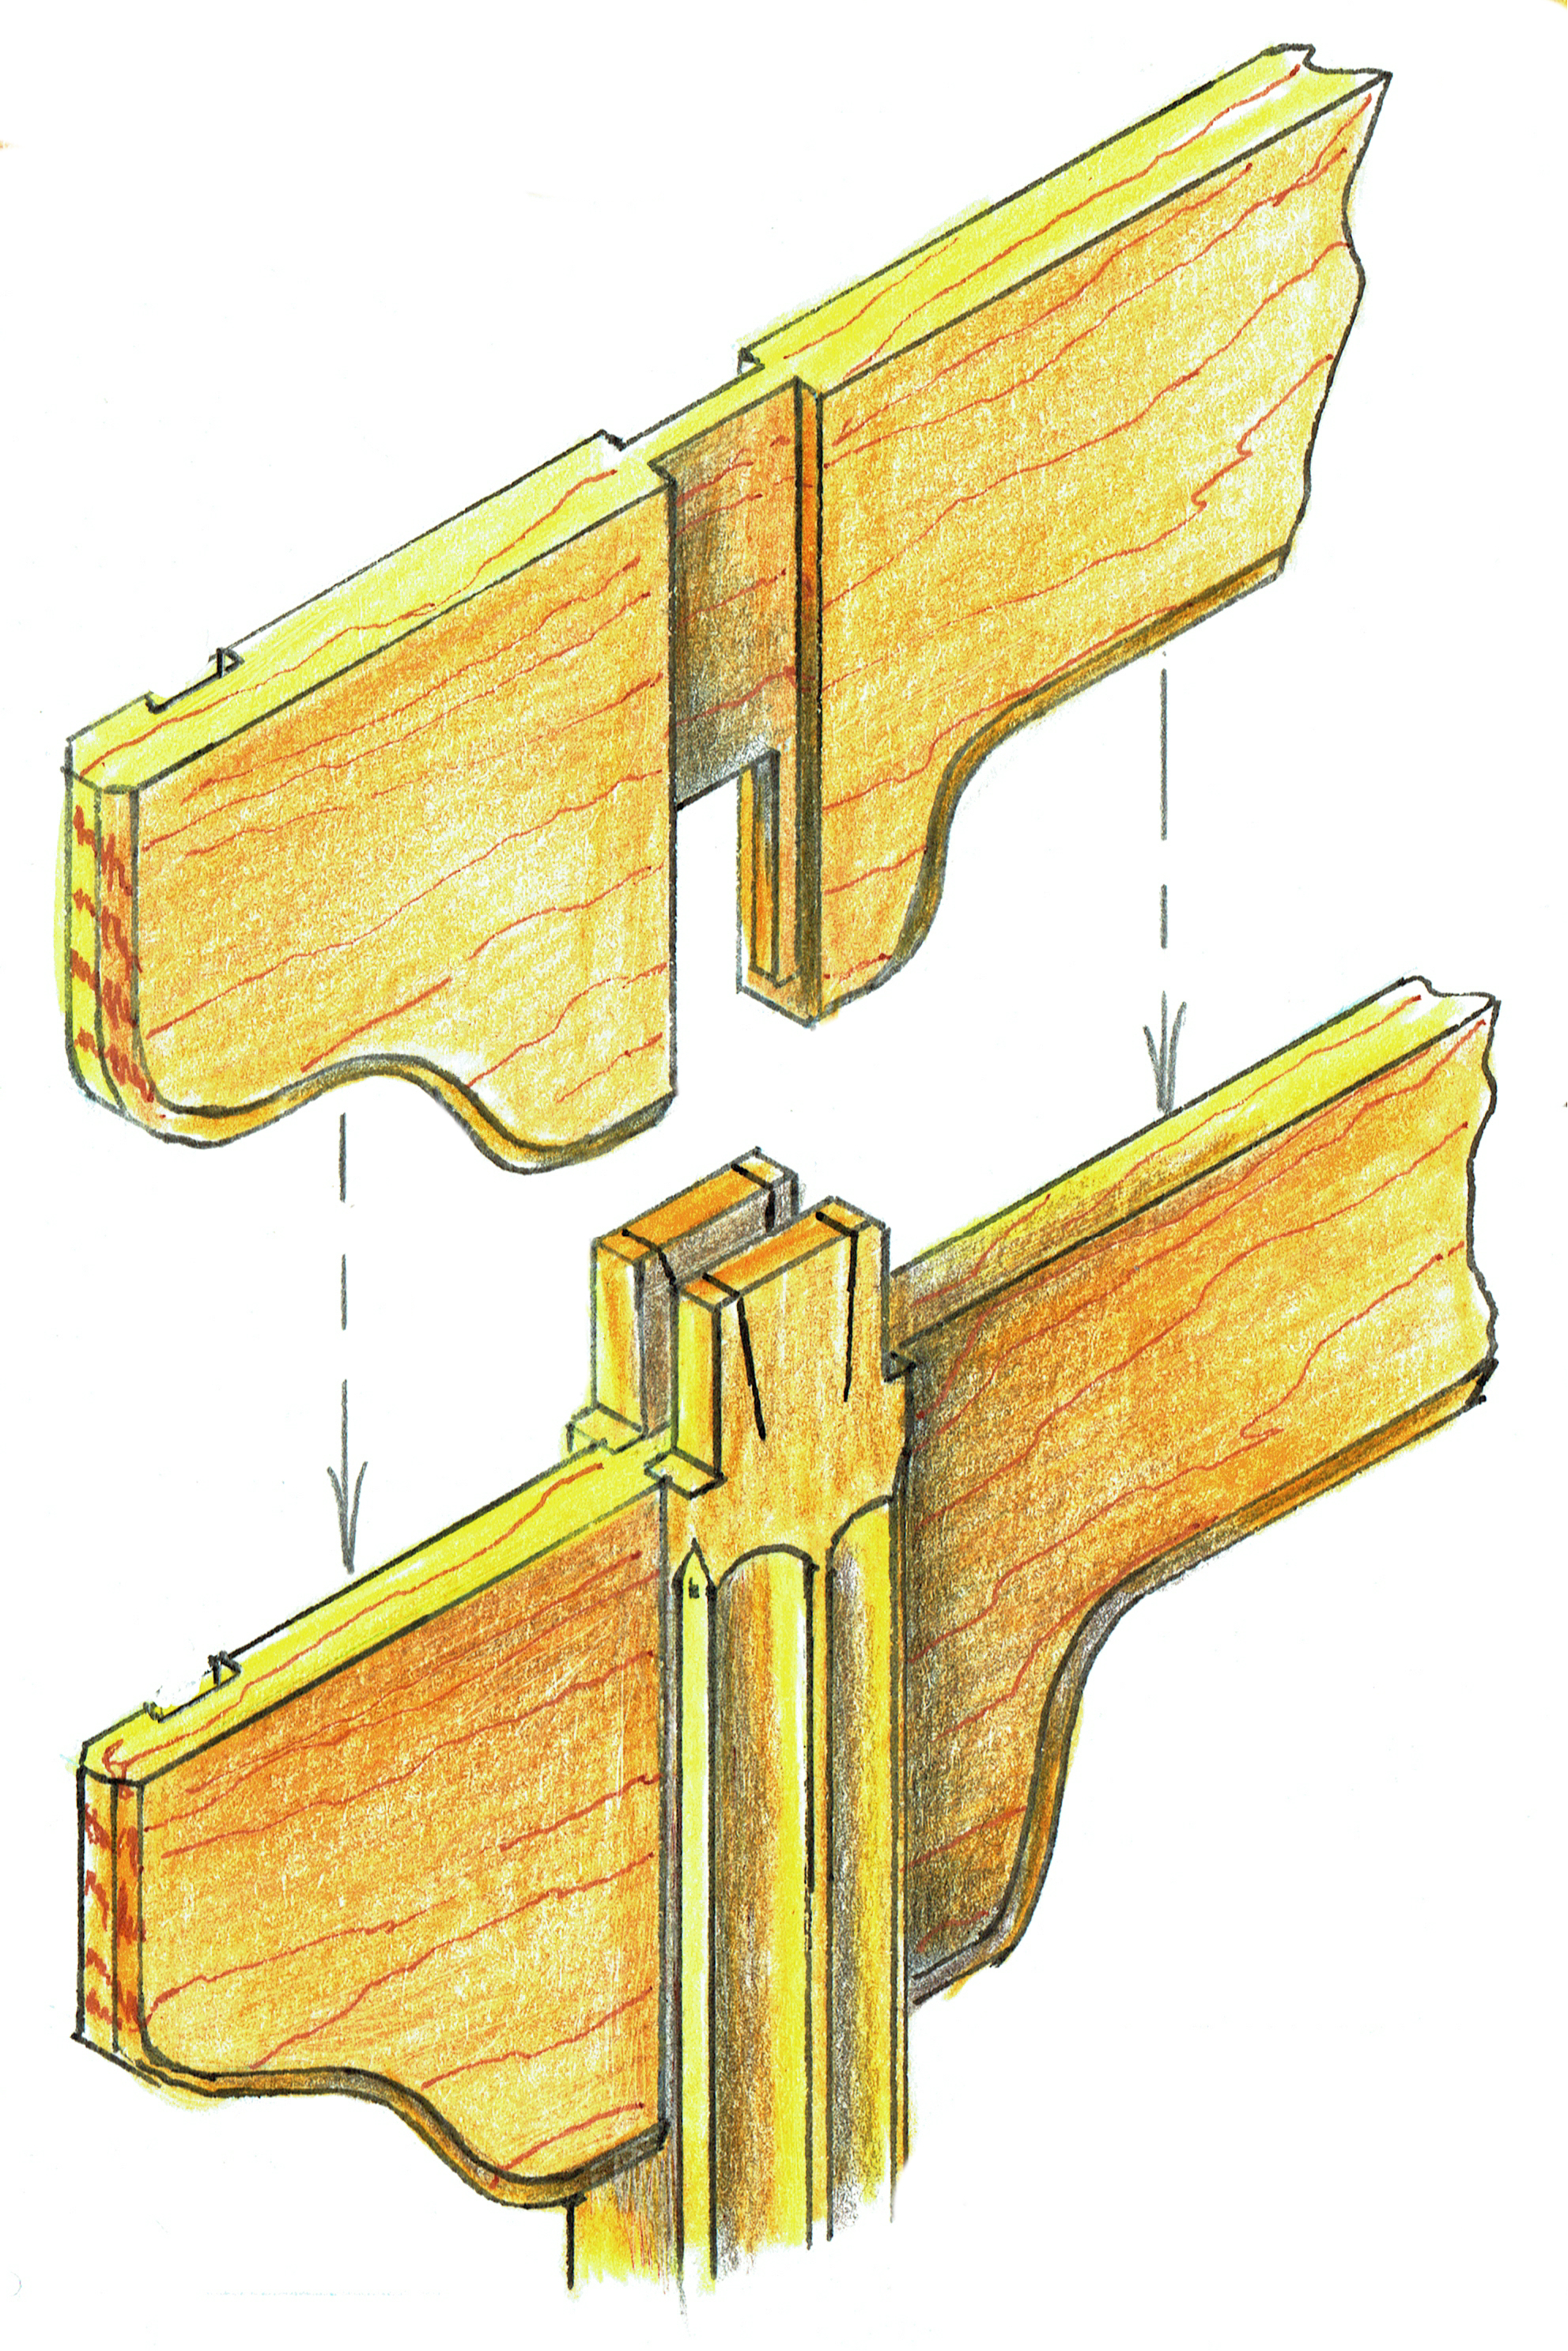 The second item I want to discuss is the joinery for attaching the long rails to the leg assemblies. Again I found two primary methods. One method had this rail constructed from a single wide board. The other utilized separate boards for the lower decorative gussets and then another board for the upper structural element. To the best of my knowledge the original antiques utilized a saddle joint for attaching this long rail to the leg assemblies. While it may appear complex, it is actually quite simple to execute. So why go to the trouble of this arrangement? Strength, a lot of strength. The four shoulders of each saddle joint provide support to each leg helping it to resist racking forces from either side. Essentially gusseting the top third of either side of each leg.
The third item I want to discuss is the double tenon at the top of each leg. Most of the antiques that I reviewed showed evidence of a single tenon penetrating through the seat at each leg location. A few showed the double tenon arrangement though. My best guess is that the single tenon versions actually have a stub tenon into the seat board in conjunction with the through tenon. Either way, these tenons are the key to locking the bench assembly together. The tenons install into mortises that match the flare angle of the legs. As the leg pairs are driven into the angled mortises they are steadily drawn closer together. In the bench that I’m currently building, this difference amounts to about a 1/2″. The short rails on each end assembly will only be fully seated when the legs are fully inserted into the seat board. This also clamps each leg around the long rail saddle joint. The only way to disassemble the bench is to back off each joint simultaneously, bit by bit. Once the wedges are installed in the tenons the entire structure is dovetailed together. Big deal you say? Think about it this way. In order for the structure to fail, all, I said all, joints must fail. In other words. The bench holds itself together. I think that’s pretty damn handy. Don’t you?
 The fourth and last item I want to discuss is wood movement. At first glance it seems that the seat board would soon be ripped apart due to wood movement. This however is not the case. Depending on the width of your seat the average amount of movement should be around 1/4″ in either direction. Due to the placement of the uppermost short end rail and the thinner cross-section of the legs, the top portion of the legs will behave like springs. Flexing ever so slightly allowing the seat board to expand or contract. The saddle joint aids in this spring action by creating even thinner cross sections that can flex at slightly different rates. The long rails also provide support to the seat board in the vertical direction. Additionally they act as shock absorbers for any inadvertent side-to-side stress. Since the long rails are not attached to the seat board they are free to flex horizontally along their length. This allows the absorption of racking stresses applied to the leg assemblies. The long rail saddle joint is also lapped onto the legs. This results in the “trapped” portion of the long rail being half the width of the original board. Any expansion or contraction is minimal and can easily be absorbed.
So this bench is stable, strong, flexible and is designed to hold itself together. At least that’s my take on it. Maybe you agree, maybe you don’t. I’m open to debate. Because I always learn more from being wrong than assuming I’m right. 😉
Greg Merritt

This whole design is just really cool, if a bit advanced – it for sure doesn’t look like a “beginner’s” project to me. The strength of the whole thing taken together is very appealing, and something I’d love to attempt to do myself.
Have you thought about attempting video for your blog posts? I’ve never been very good at being able to read spatial descriptions like this and see it going together in my head. I’d love to see a video of the joints all coming together.
Producing video is no easy task, I’m aware.
Advanced?…no,no,no. If you can execute mortise and tenon and dado joints, you can build this bench. The joinery is really that simple. It does require accurate layout. What doesn’t? The assembly sequence is very specific but not difficult and simply requires careful attention. Don’t let the joinery intimidate you! Hey…it’s just wood.
Video is a scary prospect for me. It’s waaay outside of my wheelhouse. I’m a one man show and that complicates things a little as well. I will give it a shot though. At least I’ll try and video the final assembly of the bench. No promises mind you, but i’ll give it a shot. 🙂
Greg
OK, Advanced was a poor word choice. Due to the angled mortise and tenons I’d call it “more advanced than beginner.” I like the idea of remembering: “it’s just wood.” All that said, don’t sell yourself short: this isn’t a “simple” project – it took some real skills!
This is the best break down on the 19th century Chinese bench joints I have found yet. did you look at any of the none gate benches? I am curious how close the joinery is between them as the simple horse benches did not require gluing to stay together.