 My earliest memory of my grandparents on my father’s side is Sunday afternoon visits. Grandma always seemed to have cookies, cake or pie at the ready and plenty of sweet tea. My grandpa Merritt was a firm believer that children should be seen and not heard. As a consequence my sister and I were always given something to do to keep us busy and quiet. There was a closet full of old toys, games and puzzles. My favorite, by far, was an old cobbled together tin of Tinker Toys. Hours of my childhood were spent on my grandparent’s living floor building “masterpieces” with those Tinker Toys. I wonder if that is where my love of joinery first took root? Funny the things you think of sometimes. But that memory flooded into the space between my ears tonight as I made a dry-fit of my screen.
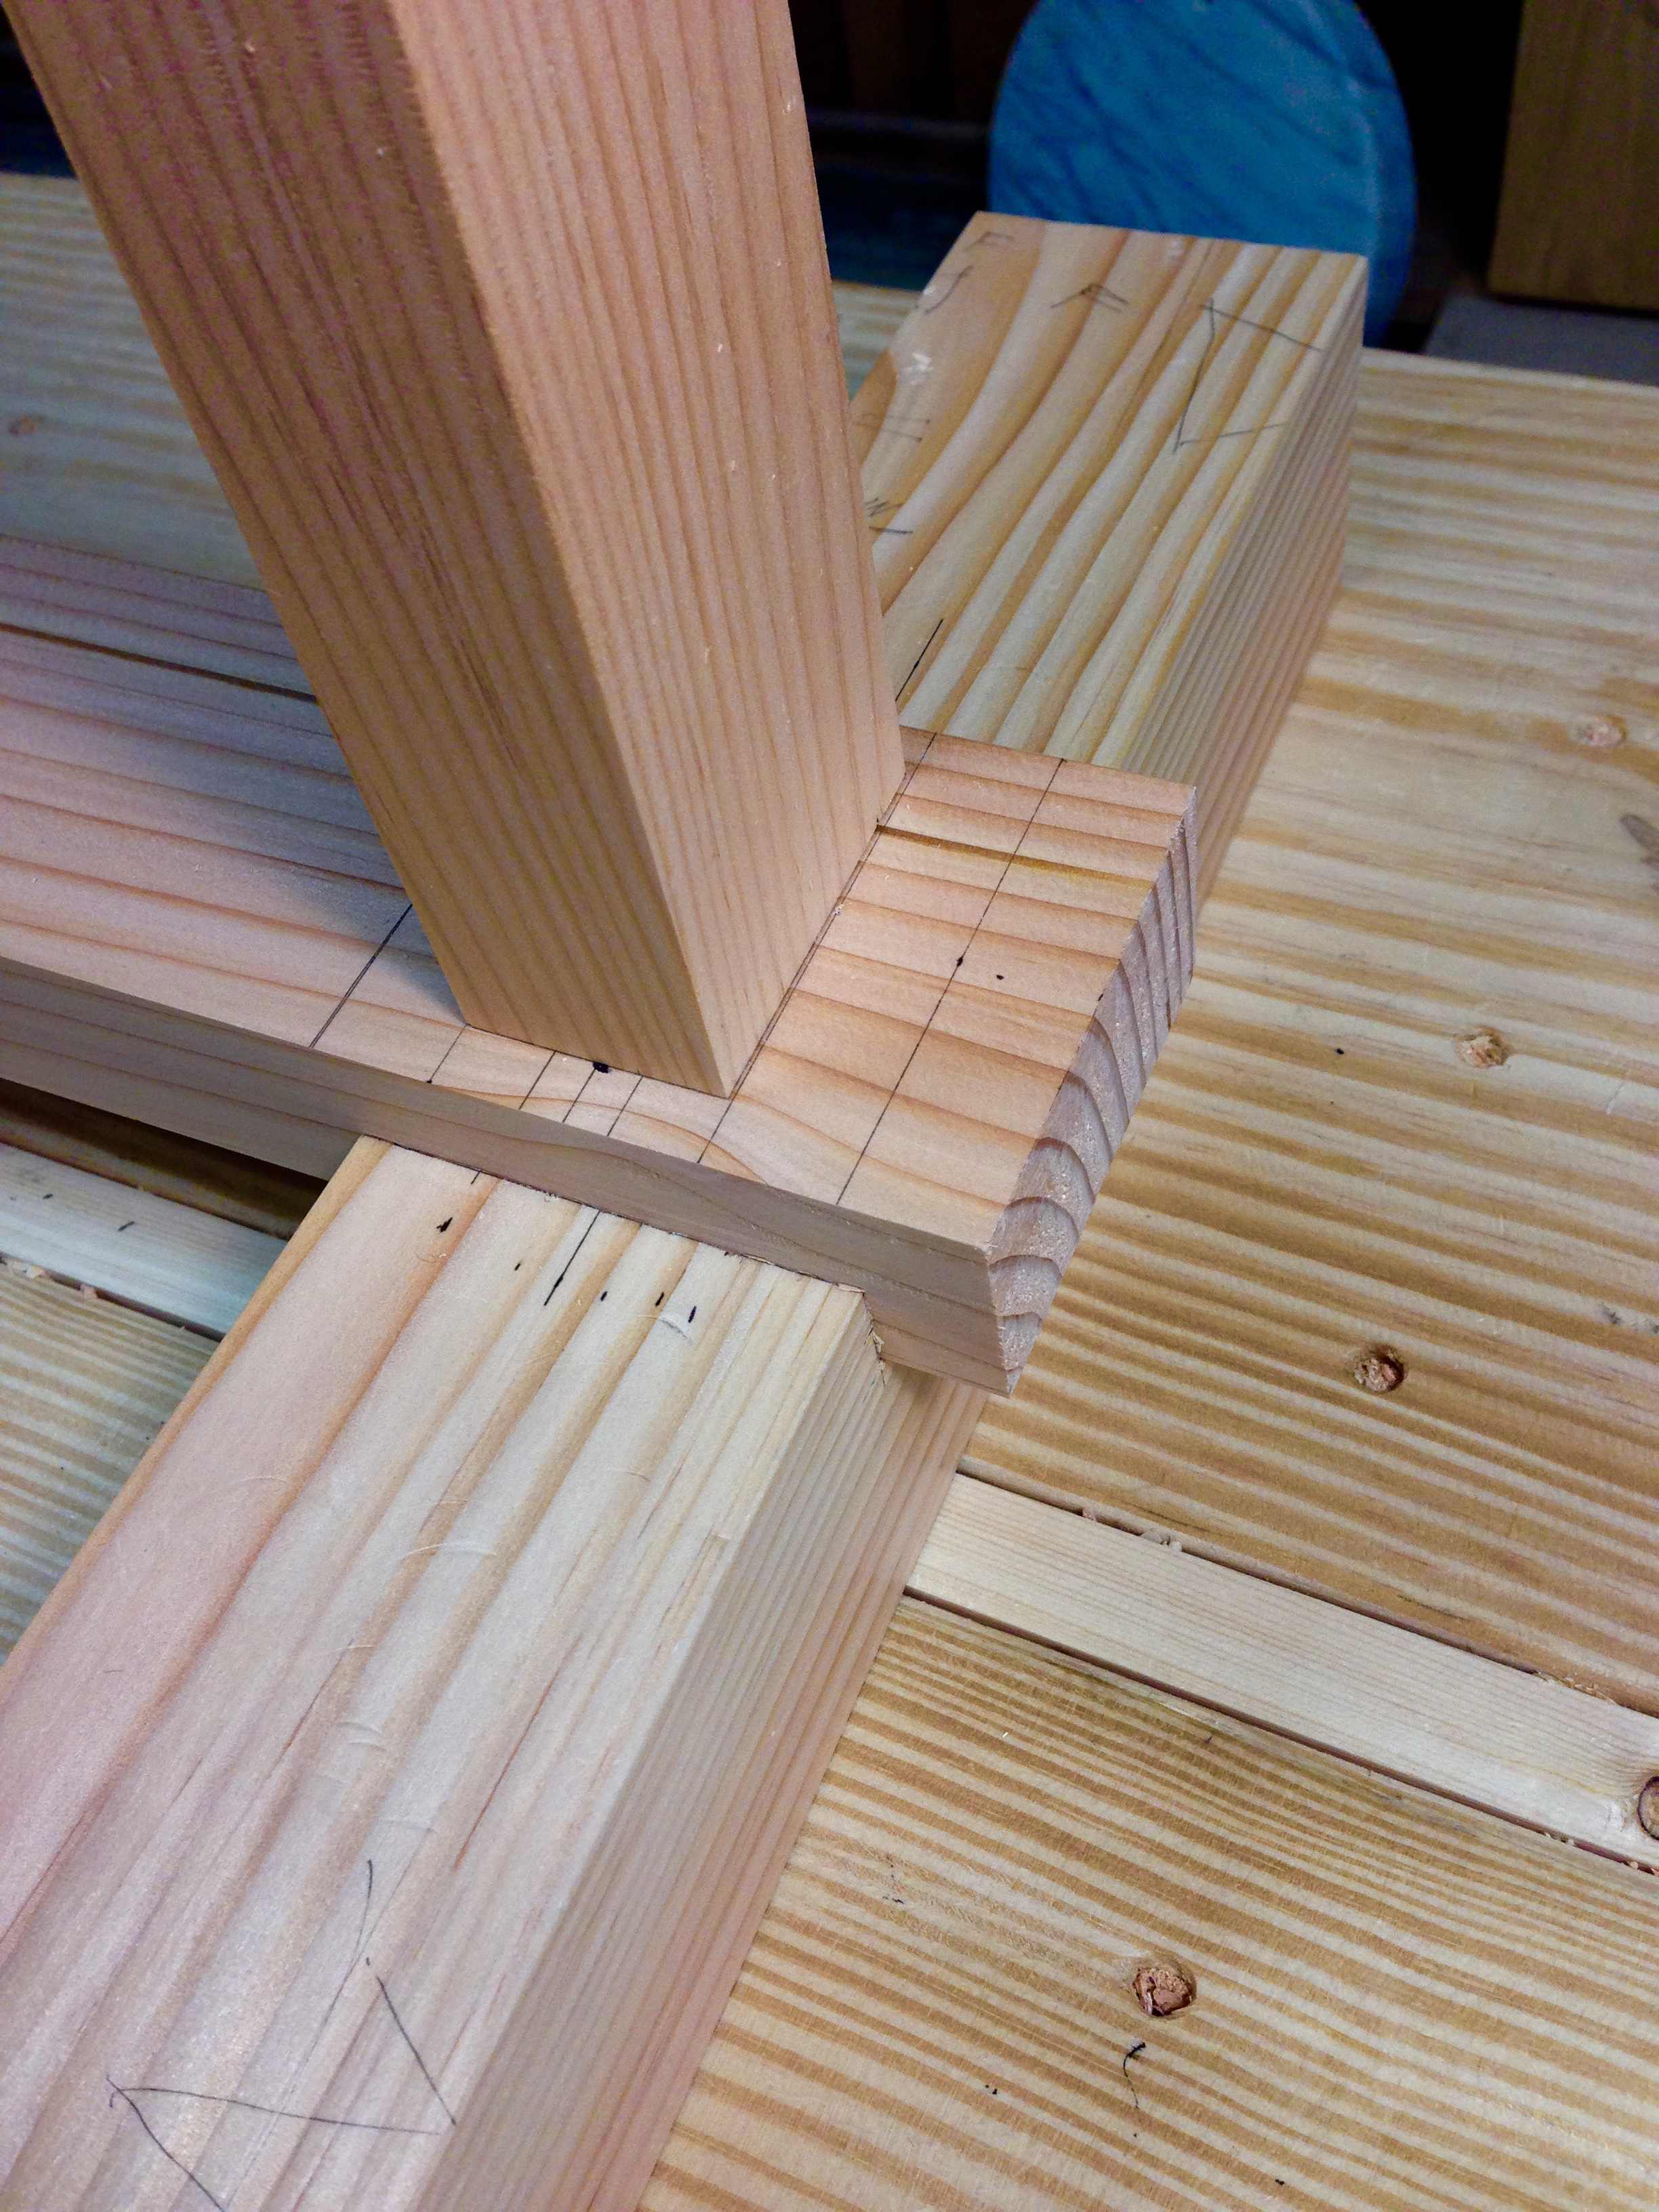
The next bit of joinery that needed to be tackled on this build was the cogged lap joint that joins the frame assembly to the feet. Basically, the lower rail of the screen frame laps onto the feet. Then a tenon on the end of the frame uprights passes thru the lower rail and into the foot. The tenon will be secured with a drawpin driven thru the foot. The use of a cogged lap joint is a little overkill for something of this scale and a simple lap would suffice, but I like the extra complexity and the challenge.
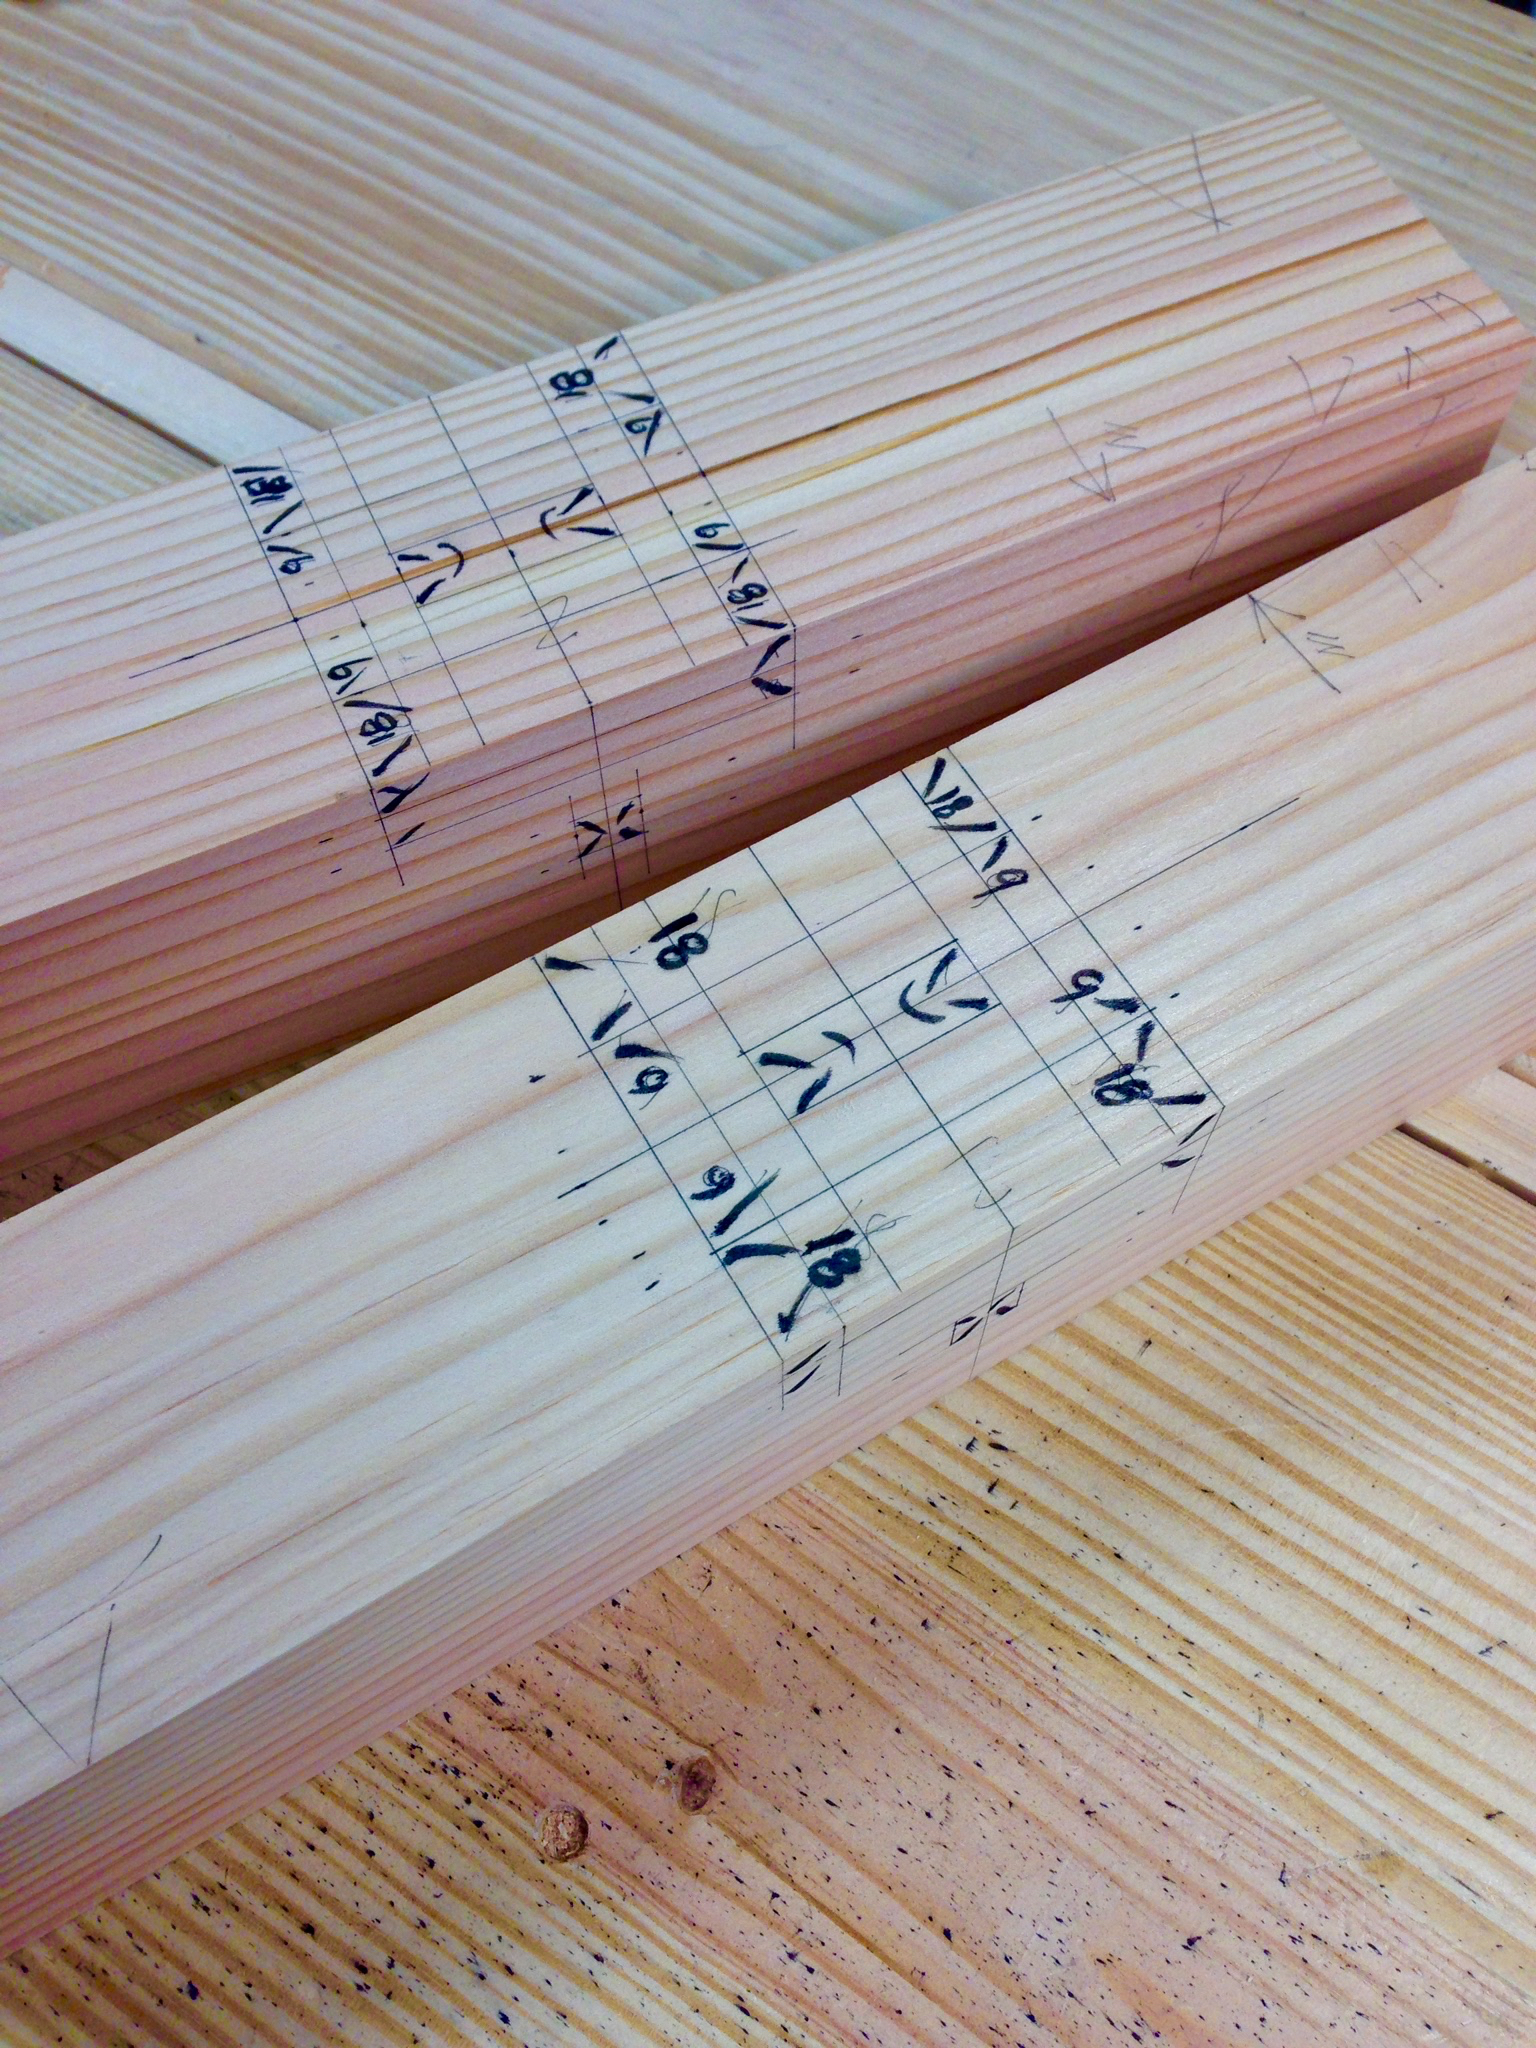
The layout is little scary to look at, but simple to execute. You really need some sort of system for marking out your joinery if you are going to tackle multi-level joints. Its far too easy to lose track of what is what without a workable way of tracking your layout. Once again there are no common faces and the marking gauge remained in the tool rack. I relied on my square and ink working from center lines.
The first order of business was to chop the required mortises. The mortise in the lower rail was simple to chop and pare square. The foot required two mortices the large mortise for the upright’s tenon and the small mortise for the drawpin. This is a 72mm(~3″) square block. So I removed the bulk of the waste with a brace and bit. Then cleaned finished off the mortises with a little chisel work.
To remove the waste on the foot portion of the joint I worked my way in layer by layer. First removing the outer, deeper portion of the lap and finishing up with the shallower center section that creates the cog. This fir 4×4 has particularly straight and stringy grain. I couldn’t skew my chisel far enough for a clean cut across the grain. So the joint is a little rough and ready but still functions as intended. I wish I had either a skewed or curved edge pairing chisel.

Knocked together.
The mating tenon was then sawed as per the usual. Rip cuts first and then the crosscuts at the shoulder.
Everything was once again dry-fit. Not so much to check the fit, but simply for the pleasure of watching and feeling the joints slide together with gentle taps from the mallet. No matter how many joints I make, I’m still amazed that I’m actually able to do it with any success at all.

Sometime this week I hope to shape the feet and begin adding the holes that will house the bamboo skewers in the top and bottom panel sections. I still need to pick up a piece of Home Depot mystery pine for the center panel. The local Home Depot sits directly across the street from the shopping mall in our little town. There was no way in hell I was going anywhere near there until Christmas was over. I value what little sanity I have left. I think it should be safe to venture to that side of town in a day or two, now that the spending frenzy has died off though.

Pingback: Hillbilly Tsuitate Screen-Part 2 | GREG MERRITT – BY MY OWN HANDS
This build is coming along really well Greg.
We are in port now, so finally there seems to be enough band width to allow me to comment on some blogs 🙂
Brgds
Jonas
Thanks Jonas! So far I haven’t screwed it up, but there is still time. 😉
I’m still amazed that you have any internet access at all when your at sea. I’ve become far too sheltered and behind the times. LOL
Best,
Greg
That is some fine joinery. Looking good!
Thanks Jeff! My interior surfaces are a little rough due to the stringy nature of the wood I’m using, but the joinery is sound.
Frame is looking good! I played with Tinker Toys too. And I love joinery probably as much as you. Hmmm, maybe there is something to that…
Pingback: Hillbilly Tsuitate Screen-Part 4 | GREG MERRITT – BY MY OWN HANDS