
 Winter showed up over the last couple of days and the temperatures plummeted into the teens. Even so, I couldn’t resist getting out into the shop and assembling my screen.
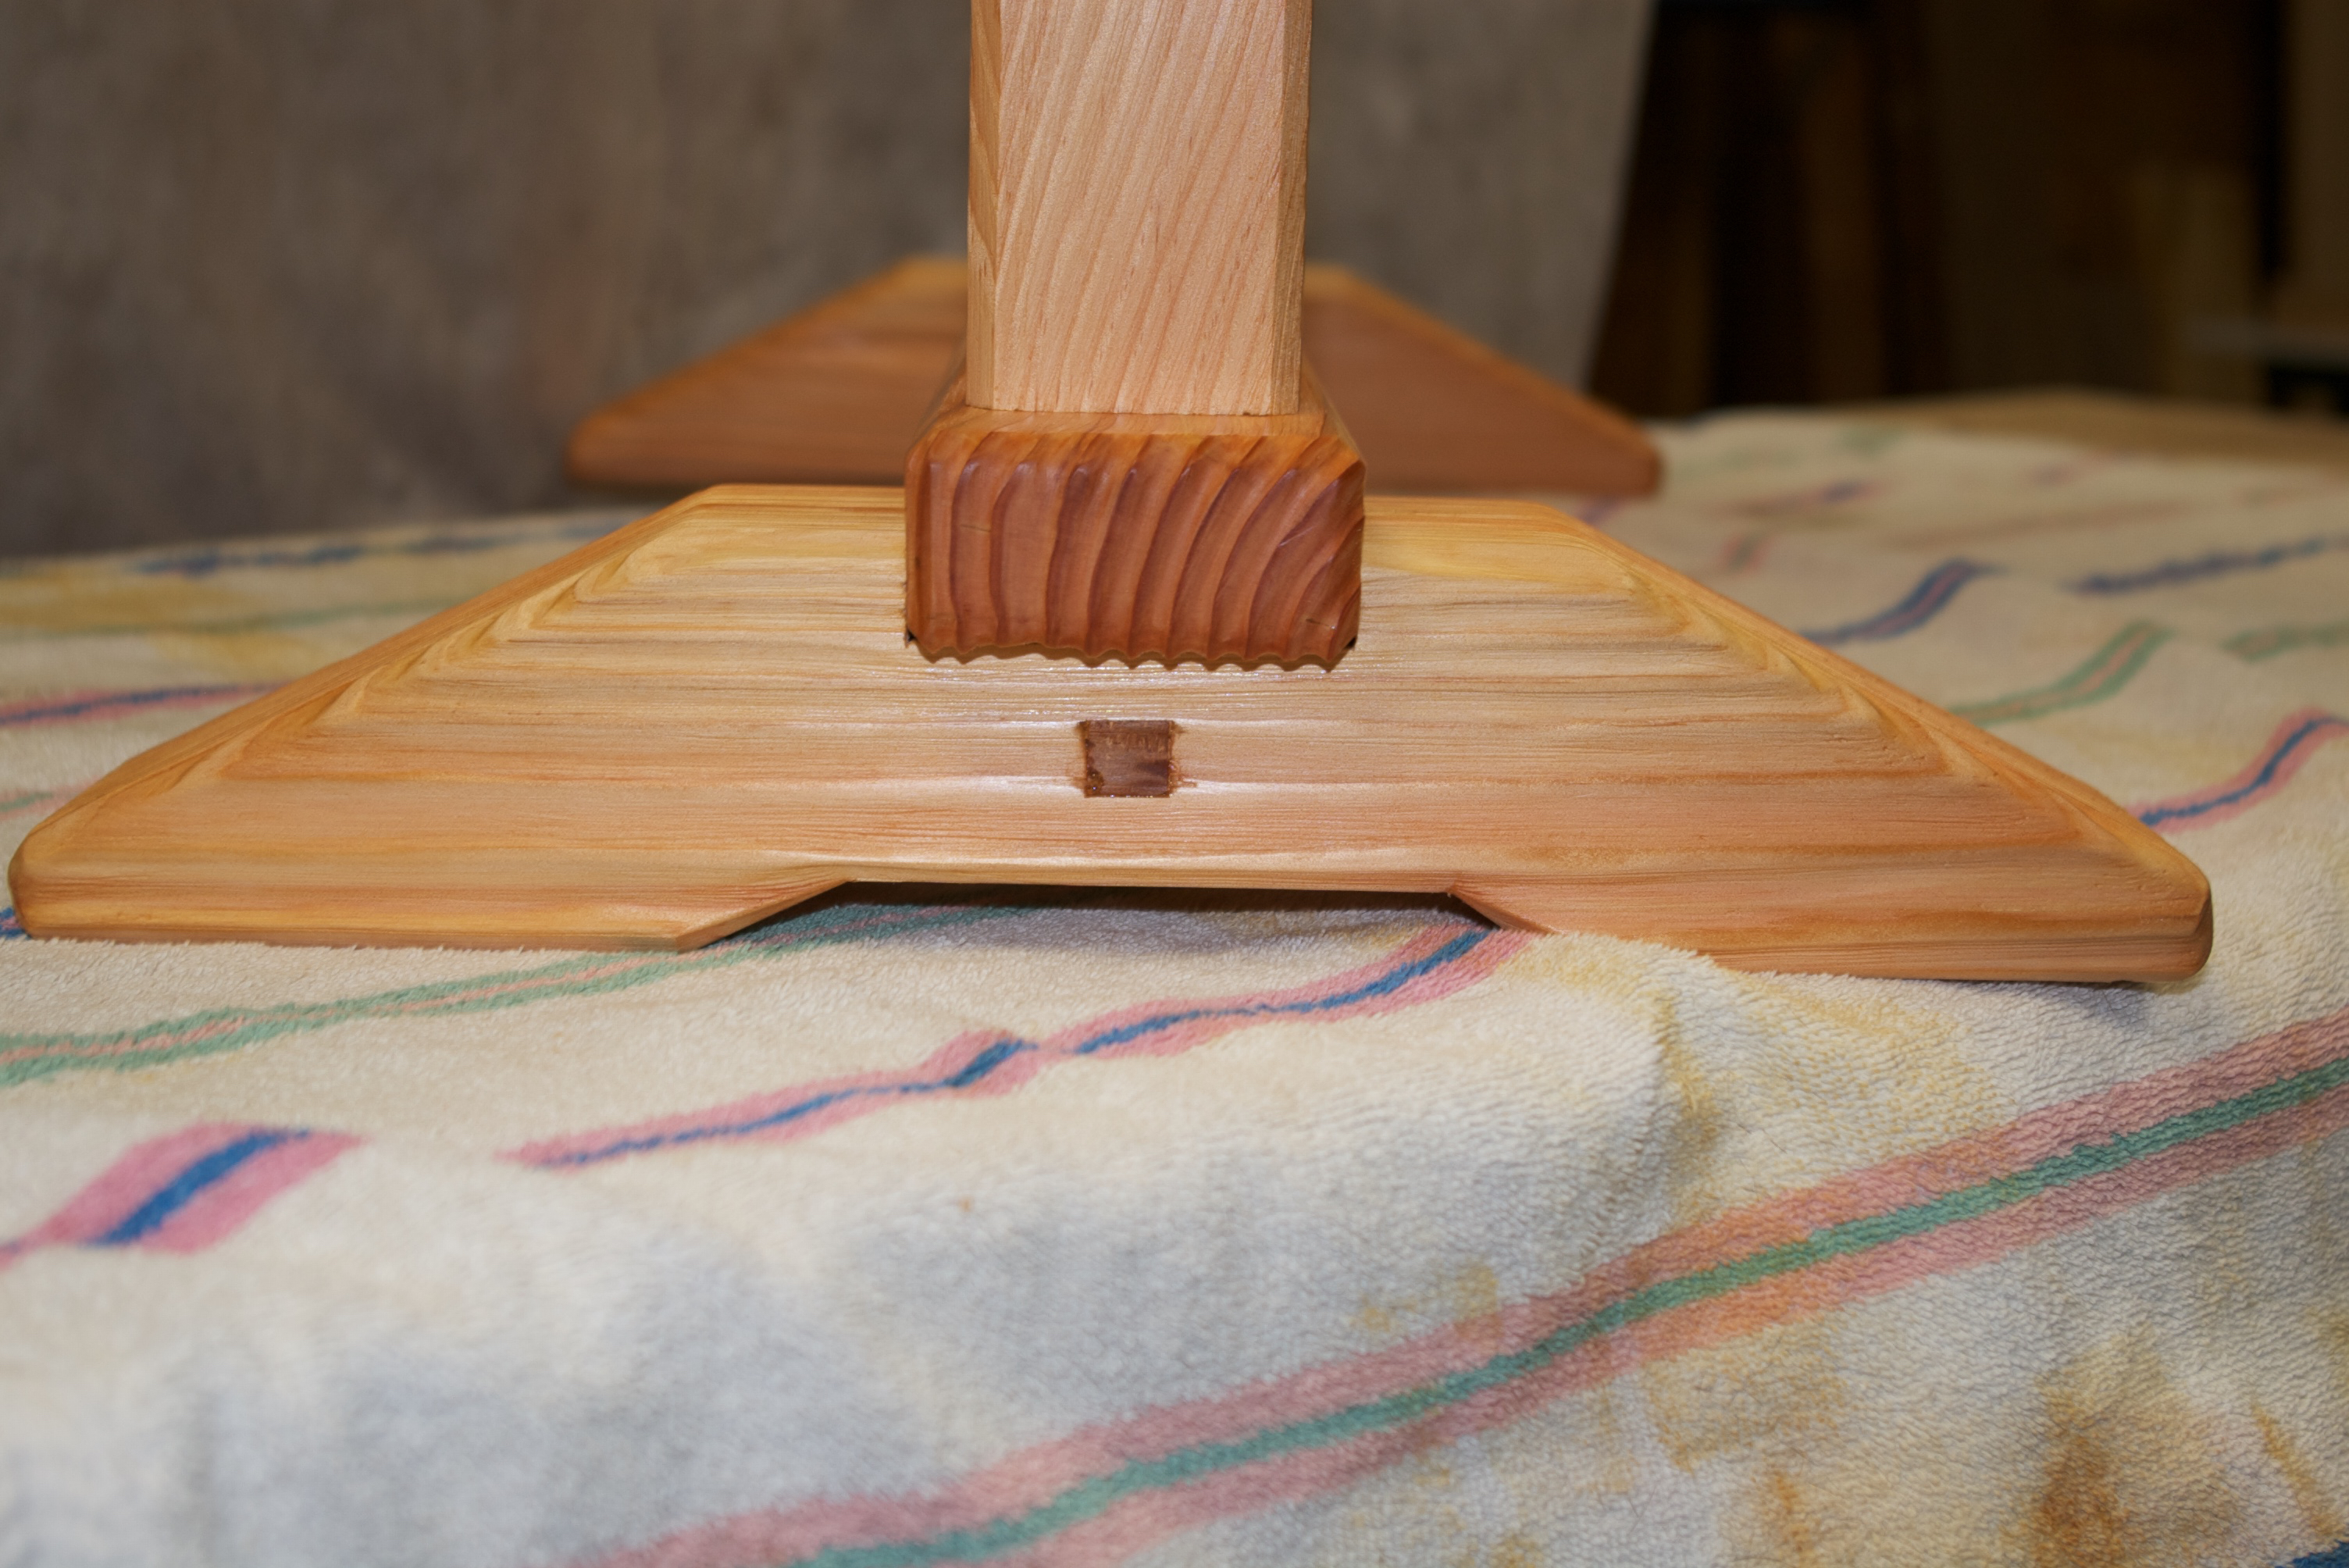
Assembly was quite easy and quick. I first installed the cross rails into the uprights along with the center panel. Then the uprights were secured by driving the tapered pins into place through the feet. This is a draw pin setup. Same as draw bore, except with a square pin, and I used a 3mm(~1/8″) offset do to the high compression rate of the fir that I’m working with.

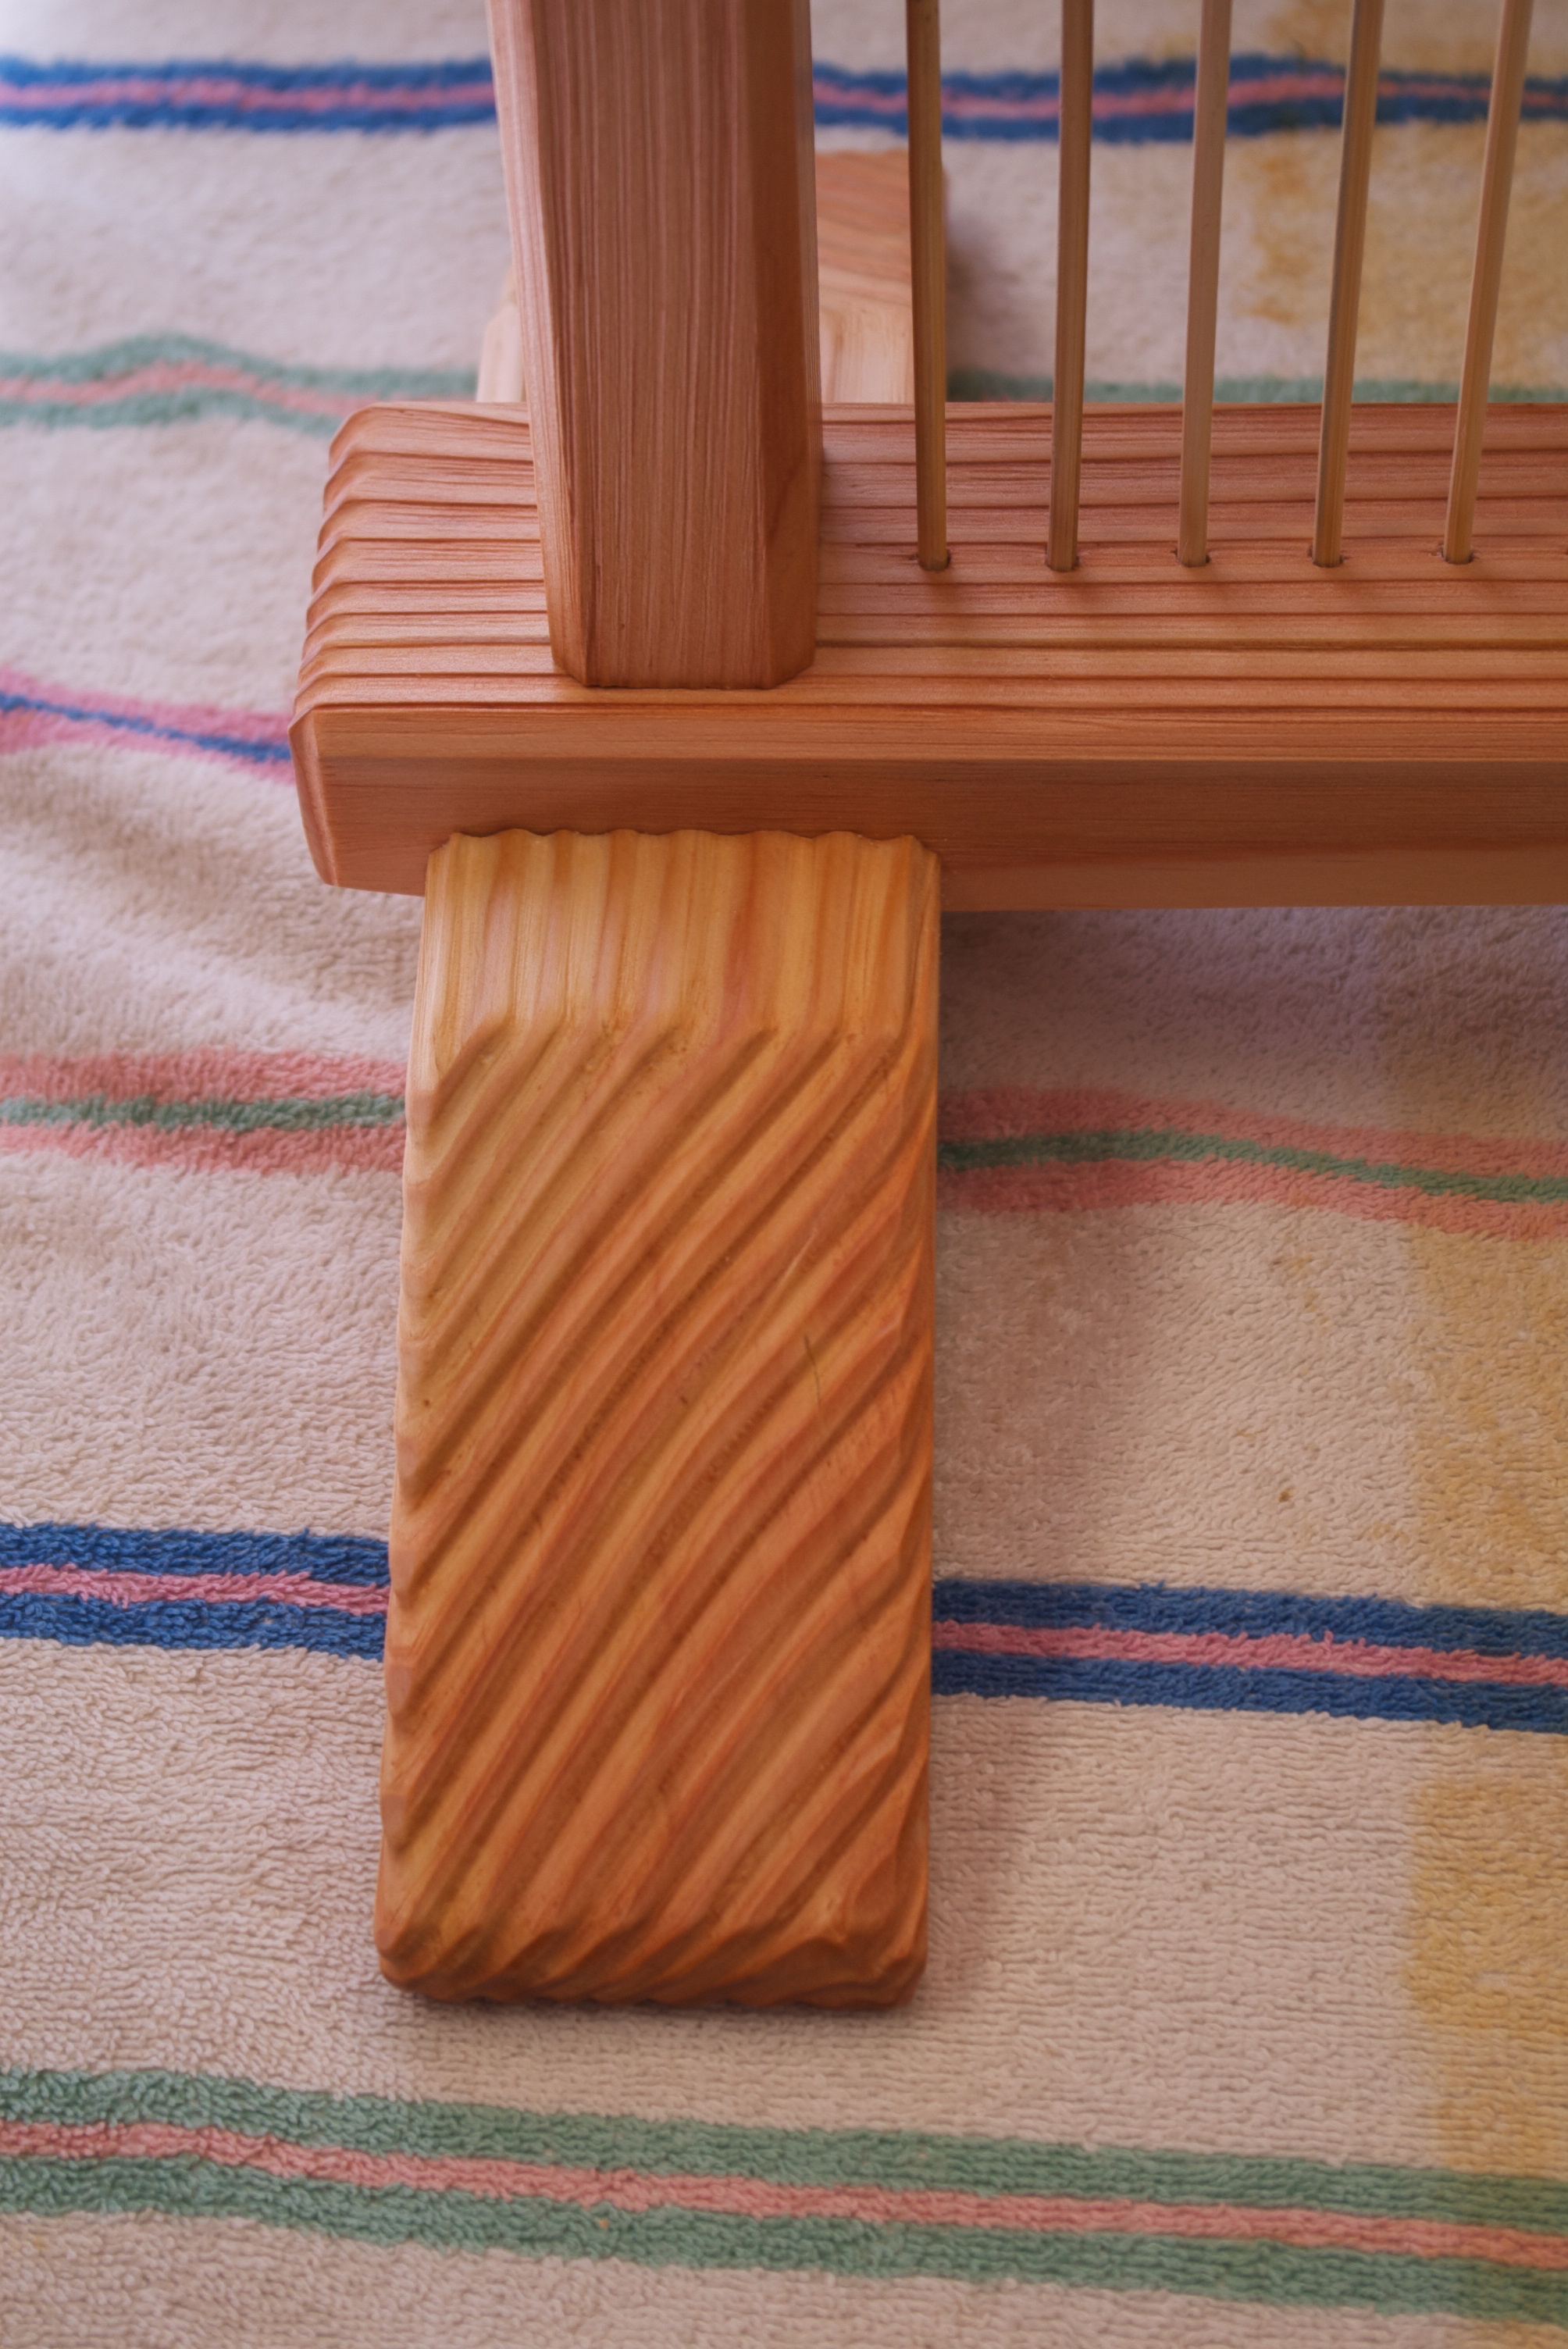
Finally the top rail was set into place and secured with wedges. The only fussy part was guiding all of the bamboo skewers into place as the assembly pulled up tight.
All that remained was to cut the pins and wedges flush, dress them up a bit and wipe them down with a little Tried & True.

I had hinted at one last decorative element in a previous post. Knot tying is another of my interests and I try to work a knot or two into all of my projects. Usually in the form of drawer pulls. Alas, no drawers on this project, but I still managed to utilize a little knot tying regardless. Drawing inspiration from Japanese bamboo fence construction, I added a few bamboo skewers oriented horizontally across the vertical skewers. I secured them in place with knots of course.


I had originally planned to add a minimal texture with the uzukuri, but I started having a lot fun with it and went very bold instead. All-in-all I’m very pleased with how this project turned out. Not too bad for construction grade lumber and bamboo skewers from the grocery store. IMHO
Fair warning, I need to work on my photography setup in the new shop. Plus, it was well below freezing when I took these.


Part 5 Greg Merritt

Pingback: Hillbilly Tsuitate Screen-Part 5 | GREG MERRITT – BY MY OWN HANDS
Hey, those horizontal pieces and the knots really pop. Nicely done!
Thanks Wesley. I’m happy with how the horizontals turned out. They changed the look quite a bit I think.
Wow, really interesting texturing. I must have missed what an uzukuri is. Nice effect. And great build.
Thanks Matt.
If you go back one post for a link to several other posts on it or do a search on my blog. Essentially different grades of “brushes” for abrading away the softer wood. Like I said above, I went very bold with it on this project, but it can also be done with a subtle effect.
Very good find on the panel board and great overall effect. Bamboo pins is a nice finishing touch. I have to admit though that I liked the original design of the feet (as on the drawing) much better. The sloped ending on the ones you have now don’t seem to resonate with the rest of the piece, at least for me.
Have fun and keep building!
I went back and forth on the foot detail. I’m happy with my choice though. I admit that I’m still a little curious as to how it would look with the original design in my drawing. I might have to build another one. 🙂
Very good idea, those horizontal skewers.
Sylvain
Thanks Sylvain.
Beautiful design and build.
Thank you Denise.
This is seriously cool, Greg. Well done.
Thanks Kinderhook.
That’s very impressive work Greg , both from a design and construction standpoint.
Thank you Randy.
Fantastic. And if I didn’t comment yet – you have a fantastic blog! It’s always great to to hear you sharing the creative process from plan to execution. Oh, and I love the humble pine.
Thank you Quercus! I appreciate your kind words.
Nice work, Greg. The bold texturing really works with this piece. I bet it feels amazing.
Thanks Brian. I does feel amazing. One added benefit to the bold texture is that as the light changes throughout the day, so does the look of the piece.
Looks great Greg! Thanks for sharing, I have really been enjoying following along on these projects.
Thank you Schuyler. I’ts good to know that you are enjoying what I’m putting on here.