
 I wasn’t completely satisfied with the joinery at the rear of my first drawer. I spent most of Friday evening trying to come up with a better layout. I also wanted to make assembling the drawer easier. The pegging system caused issues with the clamping. With the first drawer I had to wait for the glue to set then remove the clamps so that I could add the pegs. I wanted the pegs to eliminate the need for clamps. So this first setup was the wrong way around.
I decided that a finger joint would be the best joint for attaching the rear of the drawer. This would allow me to install the sides to the front of the drawer in my vise as well as add the pegs. The first side will clear the apron of the bench which will allow my to install the second side in the vise as well. Once the sides are attached to the front, it’s a simple matter of installing the back since the finger joints will simply push on from the rear. Back into the vise and install (3) pegs per corner, (2) in one direction and (1) in the opposite direction. After all of that, I slide the bottom into place. Gluing the bottom into the groove of the front of the drawer and pegging it to the rear of the drawer.
 This setup worked really well for me. I had intended to take photos of the whole process but was too caught up in the assembly and forgot on both drawer no.2 and no.3. I did manage to snap a photo before I cut the pegs flush on the bottom.
I also used pegs made from bamboo skewers. (100) for a $1.00 at Wal-Mart. 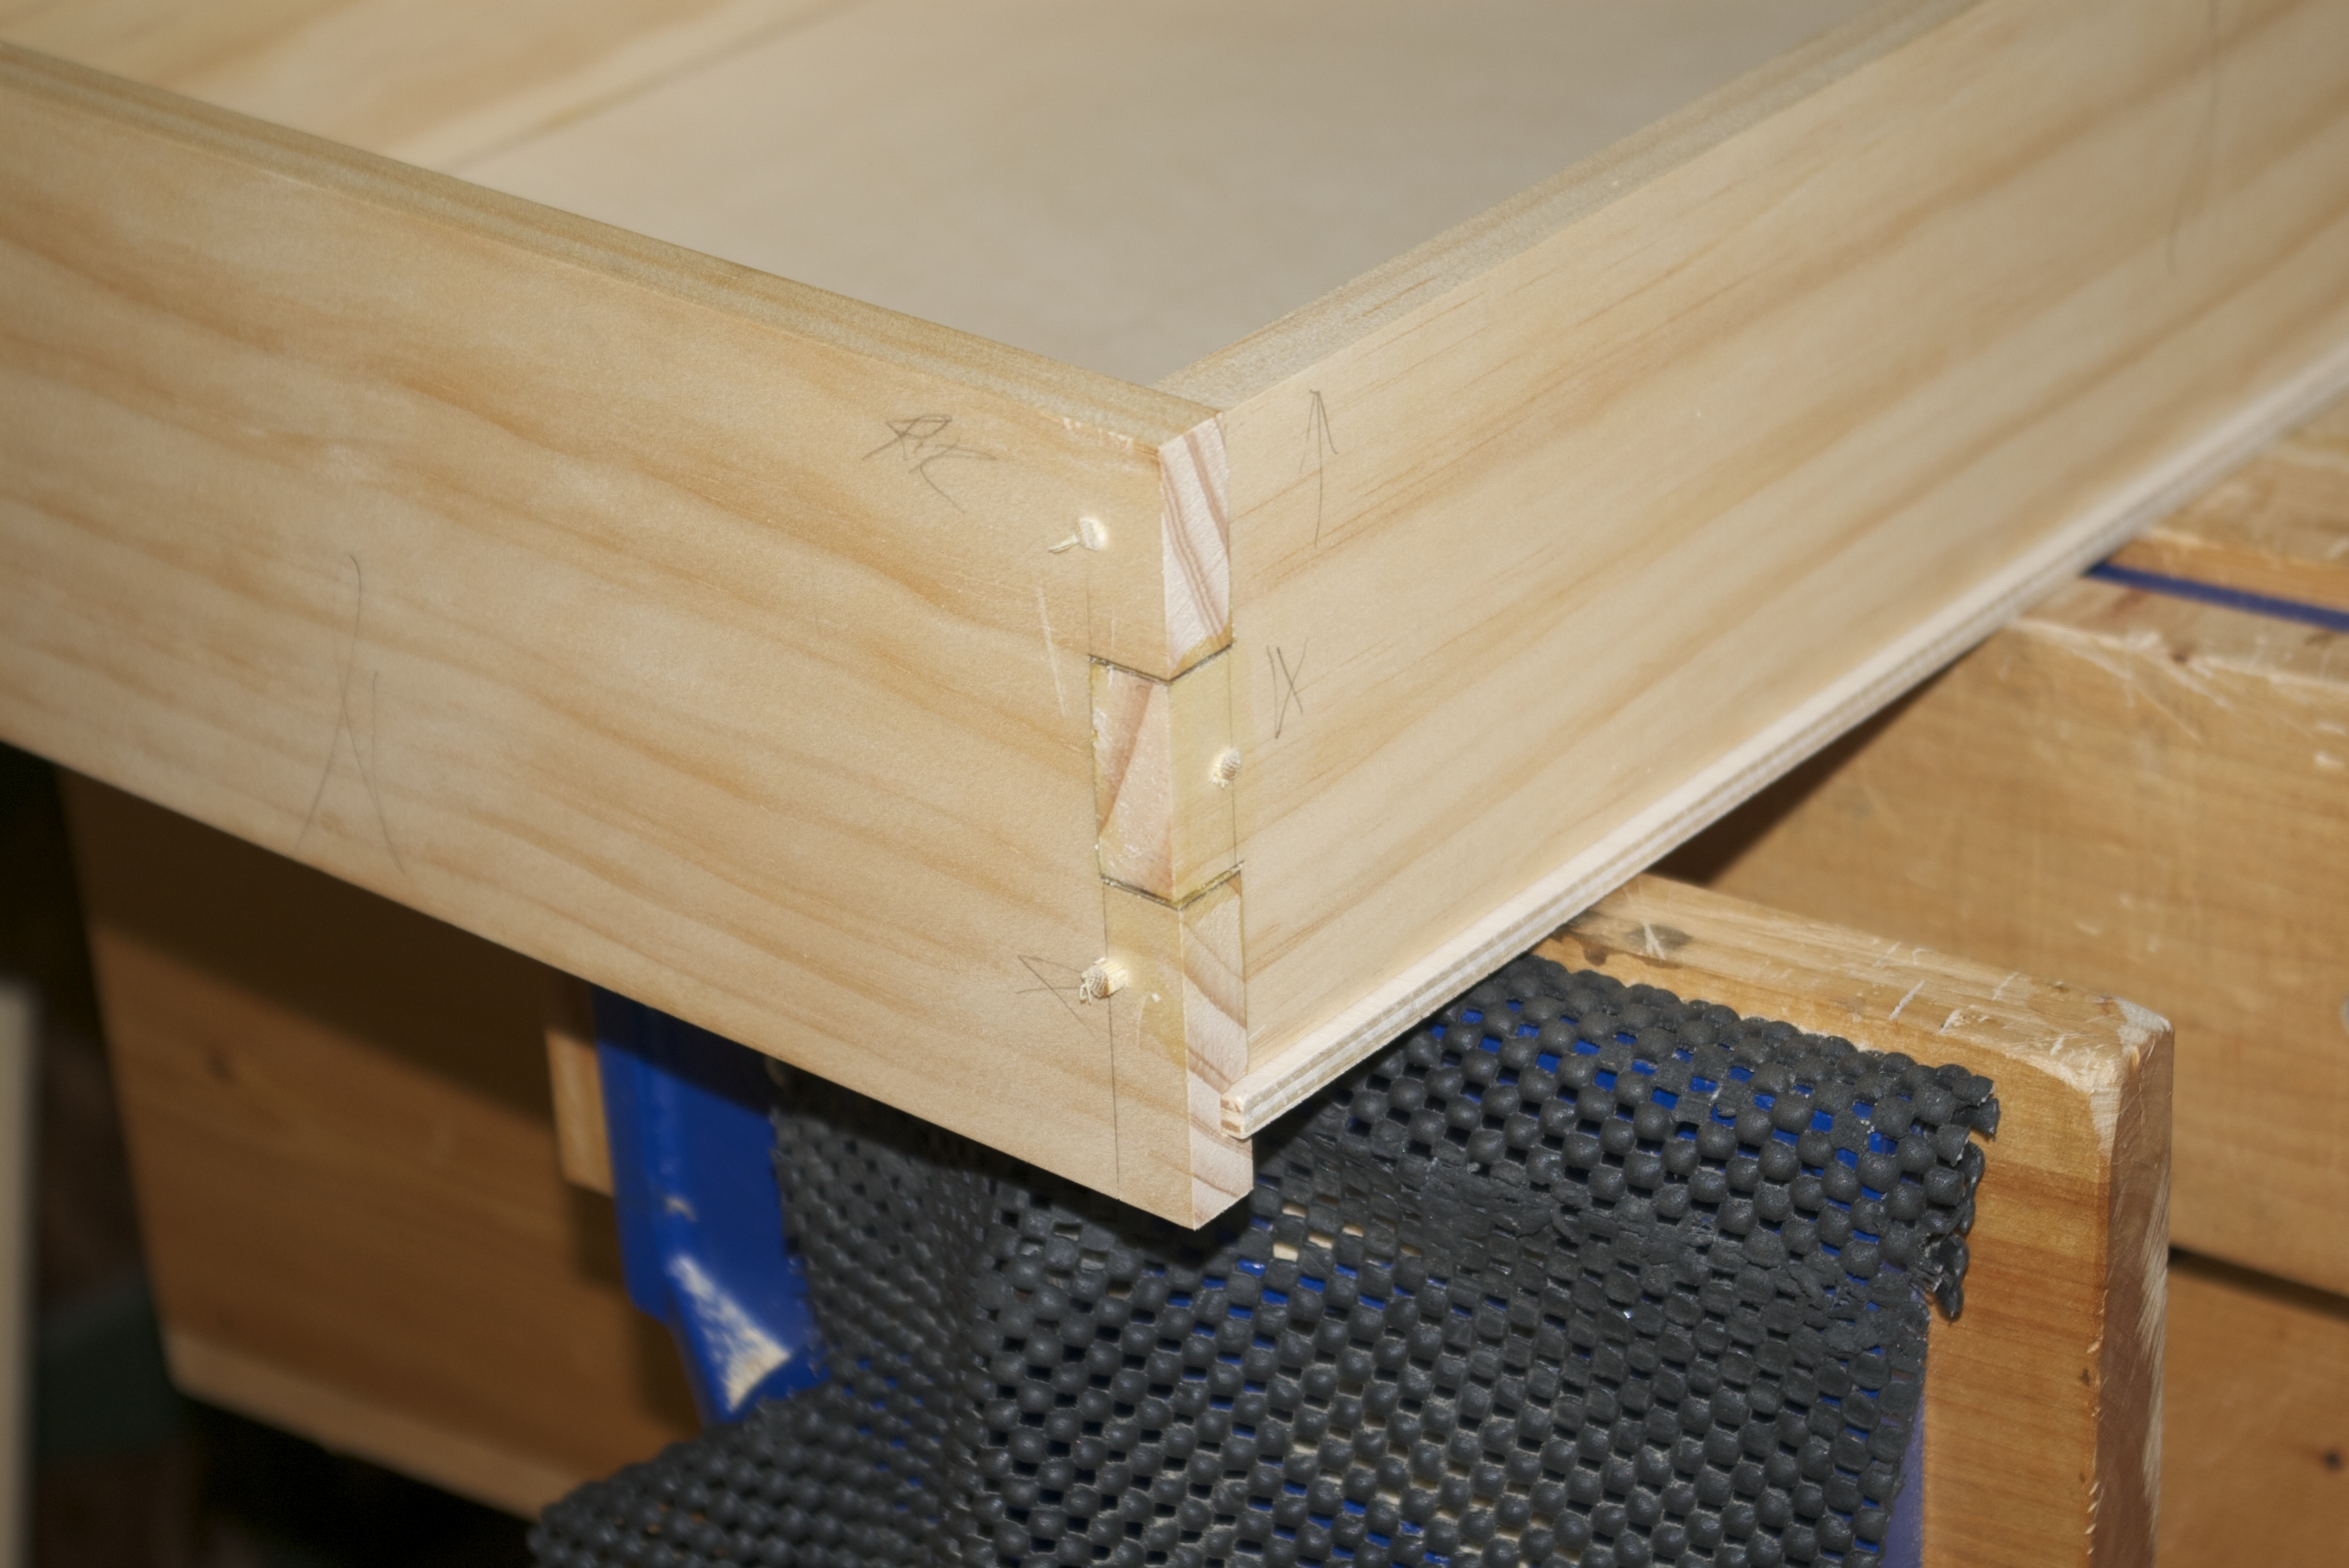 These worked great. Mine was just over an 1/8″, so I drilled a slightly undersized hole and installed them with no glue. Since I’m working in pine, I used the compression factor of pine to my advantage. I did a test run with the bamboo pegs and could not remove it from my test piece. They hold really well. The trick to installing them is to tap them lightly. If you try to just whack them in, you’ll split the wood.
  Light taps gives the wood time to compress. Once the peg is in, it’s not coming out. One thing to note about these pegs. The traditional ones used by Japanese craftsman are actually wood. If you live in Europe or Australia you can mail order them by the gross. Technically I could too, but the shipping is way too painful.
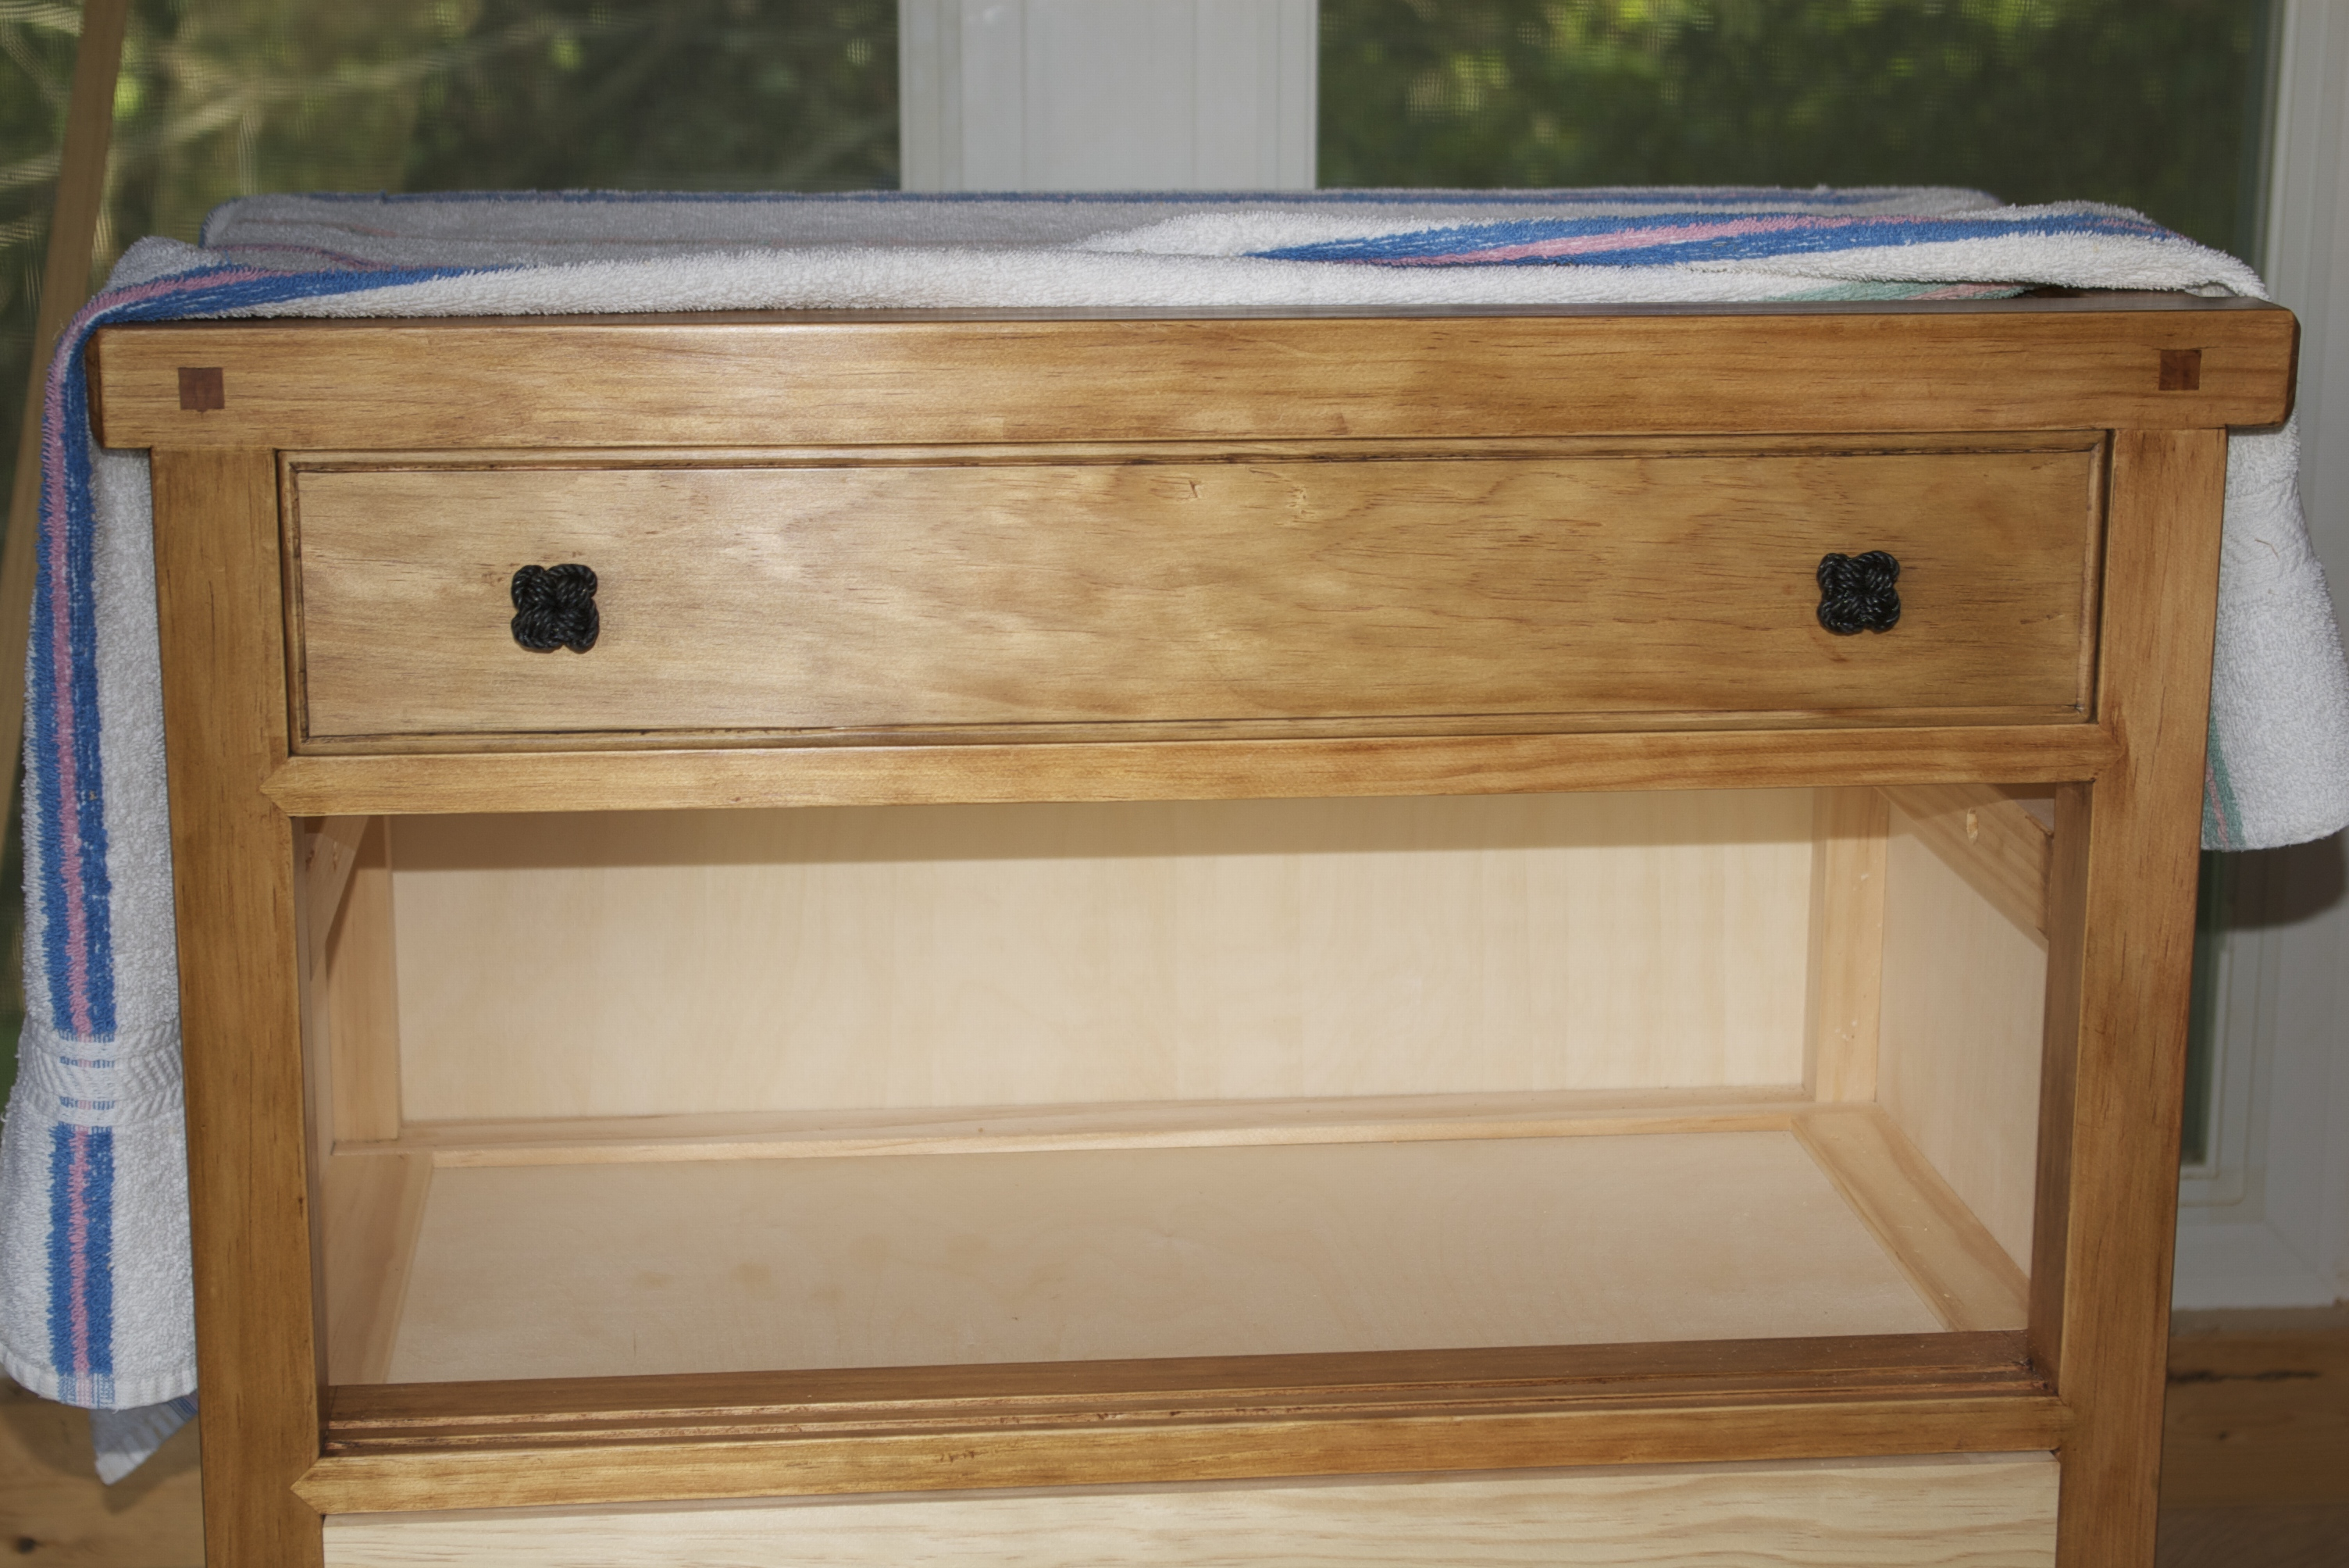 So this weekend I was able to construct the two remaining drawers, one on Saturday and one today. Bringing me to a career high of (9) drawers, woo-hoo. I was also able to fit drawer no.2 to its opening. Once that was done, I couldn’t resist adding a bead detail to drawer no.1, applying the finish to it and installing the pulls. The pulls I made from tarred nylon twine. They are a (4) strand star knot that gives me a square shape to eco the exposed square tenons on the front of the tansu.
Hopefully I’ll be able to fit drawer no.3 tomorrow after work. Fitting drawers is a slow process for me. I’m far to worried about making them too loose. But I’m getting better at it.
Greg Merritt

Nice progress sir, love the way you tied the knots…….. (Couldn’t resist…) into the square corner detail.That is awesome.
Thanks Brian. Sometimes my wealth of useless information actually does prove to be useful. 😉
Greg
Looking great Greg,
based on how much you get done I think you must have found that you do not need to sleep.
The knot handles suit it so well
Thanks Dave.
I’ve been lucky the past few week and have been able to put in an hour after work almost every evening. Plus several hours on the weekends.
I’m pretty happy with the way the knotted pulls turned out as well. I work on those in the evenings before going to bed. See I do sleep. 🙂
Greg