
 The legs and the underside of the top received a couple of coats of Tried & True Original oil finish. Once that had dried it was time to tackle the upholstery. Note that I left all of my layout lines intact. They may prove useful, or at least interesting, to someone in the future. In the short-term, I can flip the footstool over bore anyone who will listen as to how I made it. Kinda’ like what I do here on this blog. LOL
I have no training and limited experience with upholstery. My training consists of watching a few videos (P. Sellers, YouTube) and reading a few articles. My experience is two recently completed projects (Headboard, Cedar Chest). Those came out pretty well, but the whole process is still very much trial and error for me. As you will soon see.
I began by making and cutting the foam cushion material.

Next I wrapped the top with batting. I know that I will be resting my foot against the edge of this stool part of the time. So I gave the edges of the top a heavy radius. The addition of a batting layer will increase the comfort as well as prolong the life of the cover material.

Then I cut out a piece of material for the cover.
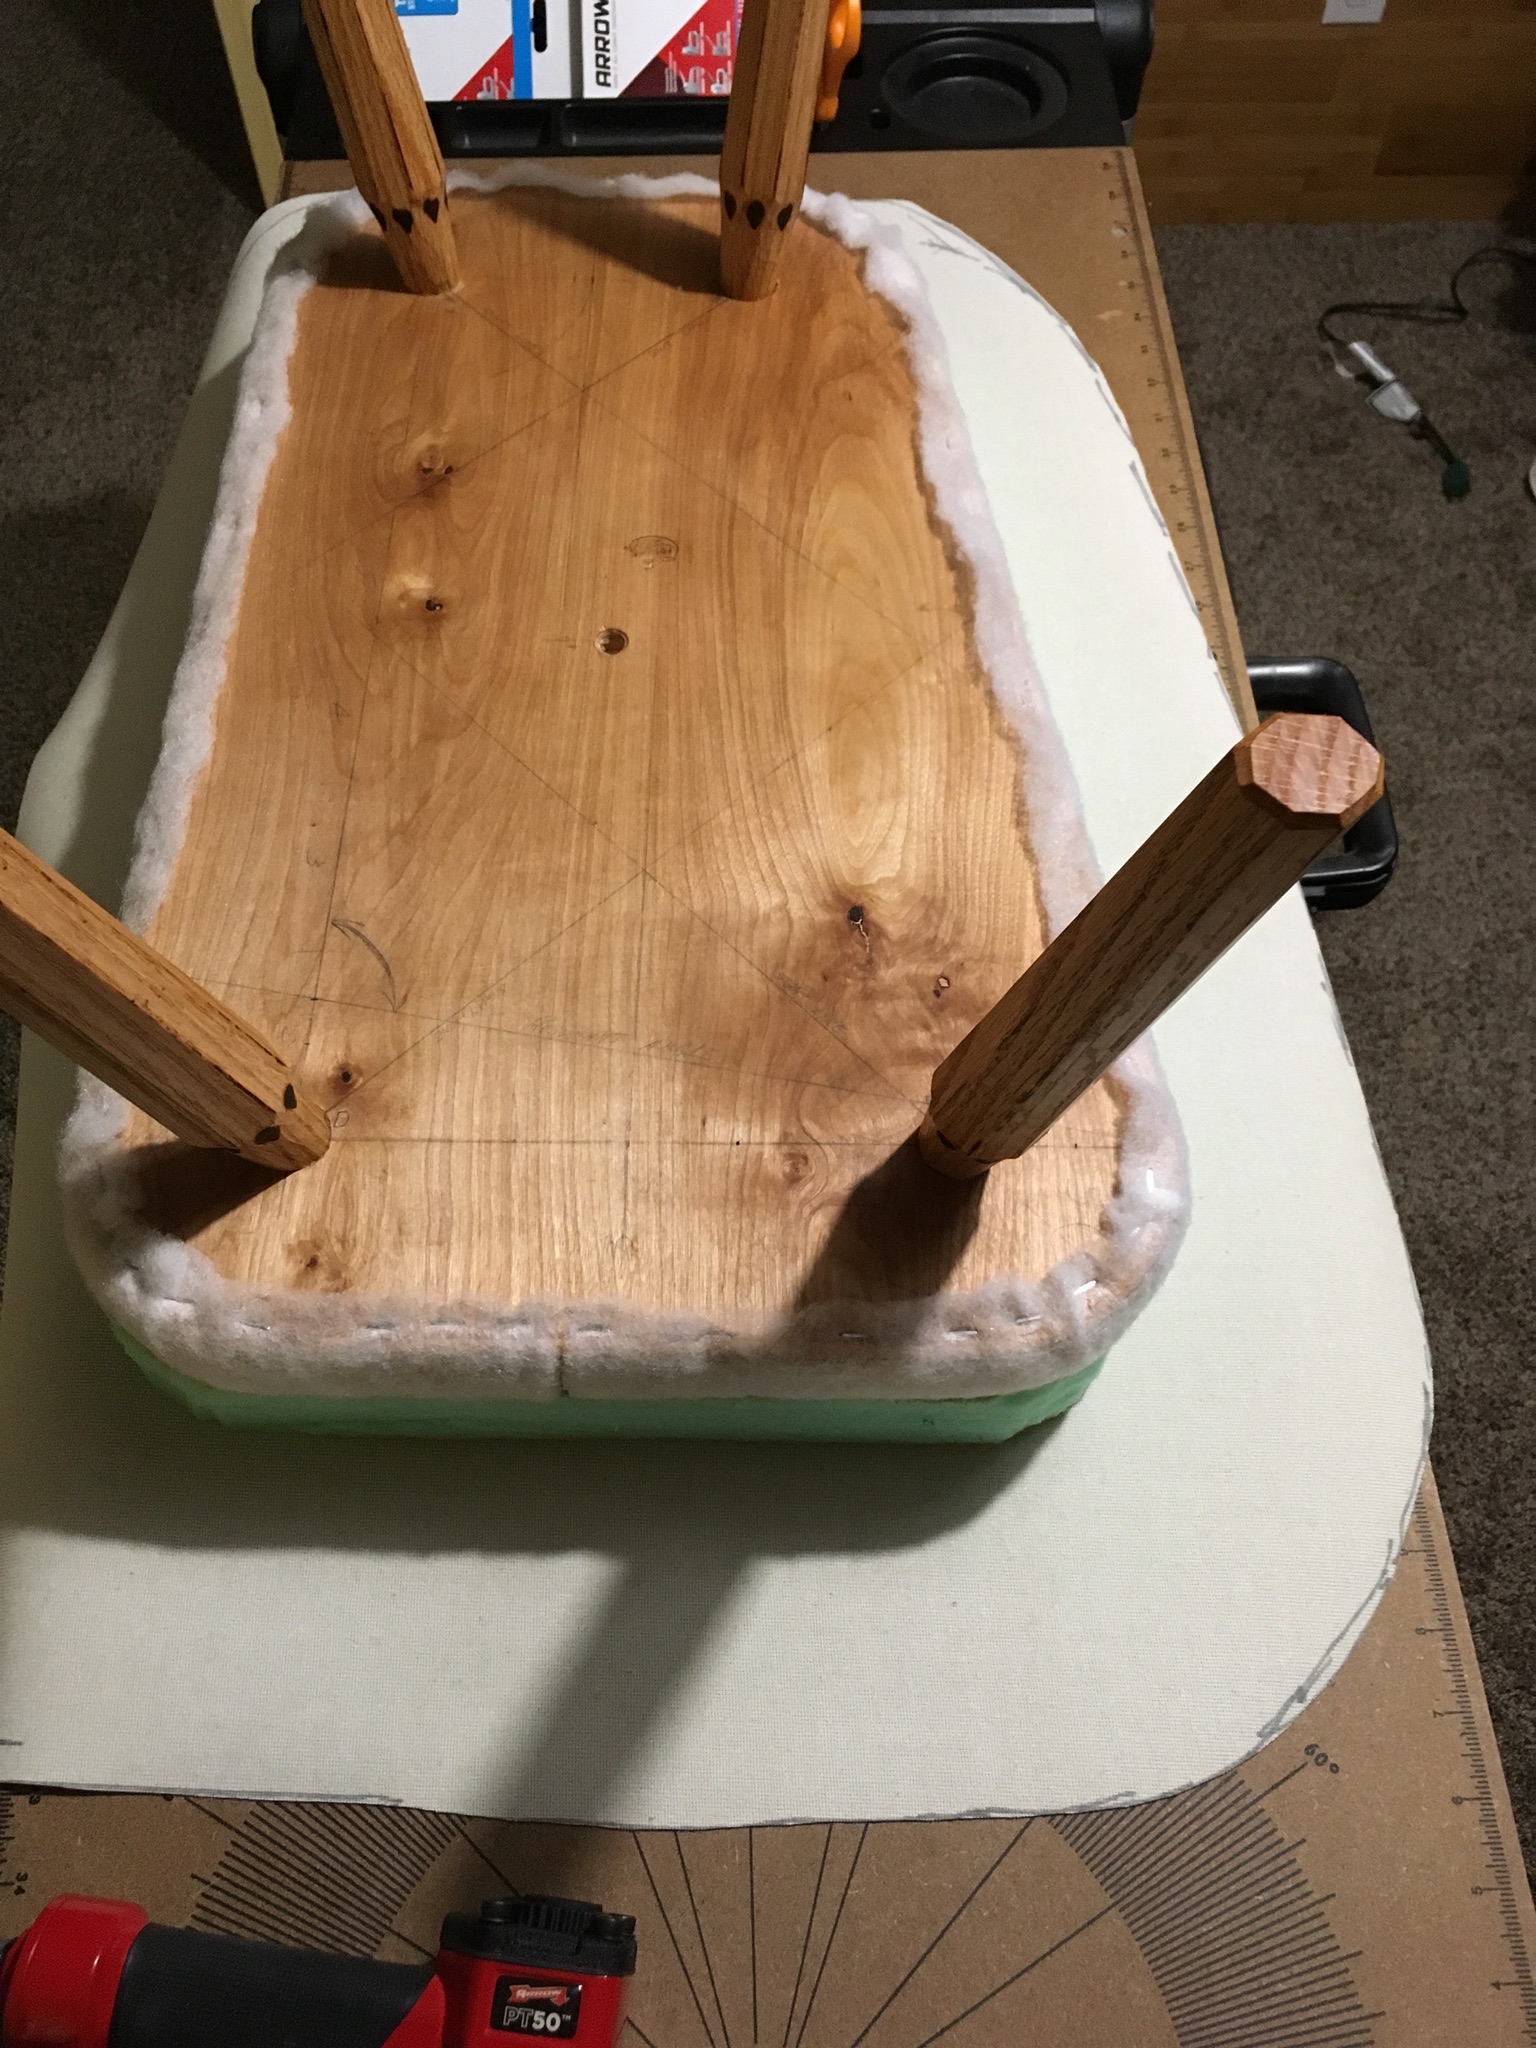
When wrapping an item in this way, the corners are the hard part. Lots of material to stretch fold and tuck while still trying to make it look nice. My previous two projects had nice 90deg corners and they were tough enough to deal with. By creating radius corners on this footstool I made the task even more difficult.
While we are looking at the bottom I should point out that this is the first project upon which I made use of my logo stamp. I also purchased a cheap set of number stamps so that I can add the date as well.

Back to upholstery.
So after a flurry of staple gun and curse words, I ended up with this…


Yep, I thought the same thing…
“Looks like crap!“
So I spent the next two hours dismantling what I had just completed. Then I went to bed. A little dejected, but hopeful for round two.
Yesterday at lunch I did a little more searching and eventually stumbled upon videos demonstrating the process of recovering automotive door panels. Door panels are odd-shaped and generally have large radius corners, much like my footstool. Turns out the “trick” is to start at the center of the corners. Then stretch, pull, fold and tuck every inch of the way.
So after another flurry of staple gun and curse words, I ended up with this…

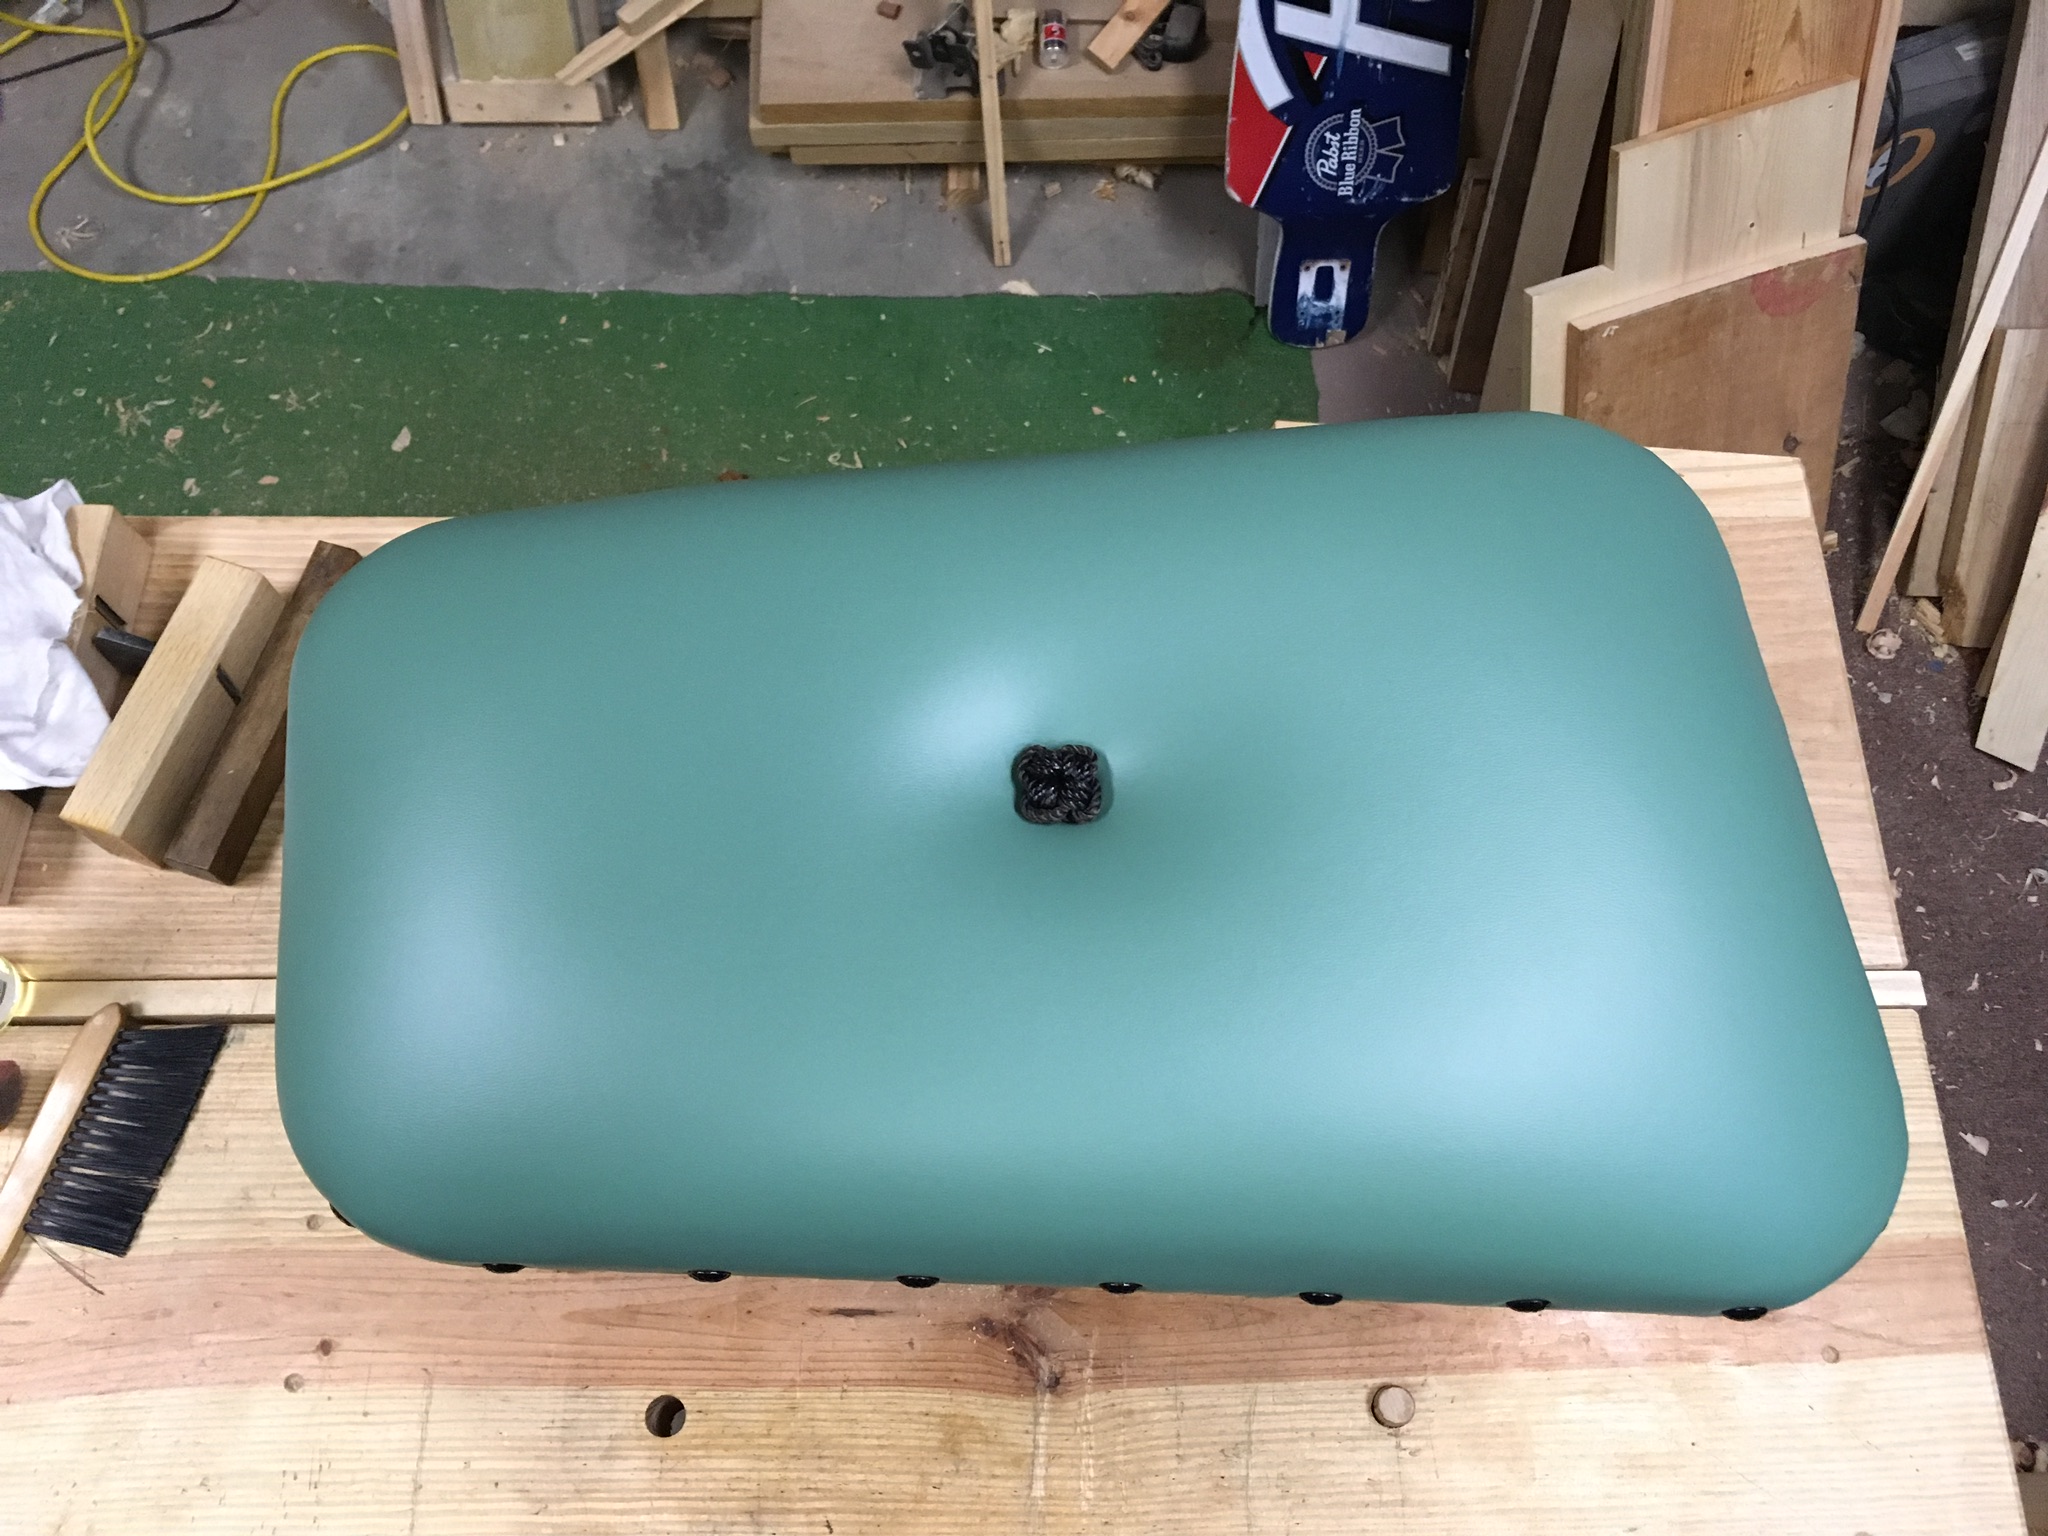
Much, much better. YMMV
In Part 1 of this series, I yammered on about how I make an effort to include similar details on all of my pieces so that they, in theory, look like a matching collection. So here are my efforts to that end on this footstool.
The legs are oak. Just like all of my other staked pieces.
I used the wood burner to burn the faceted edges of the octagonal legs and created a leaf pattern around the top of the leg. These are details that I have added to every leg on my staked furniture pieces.

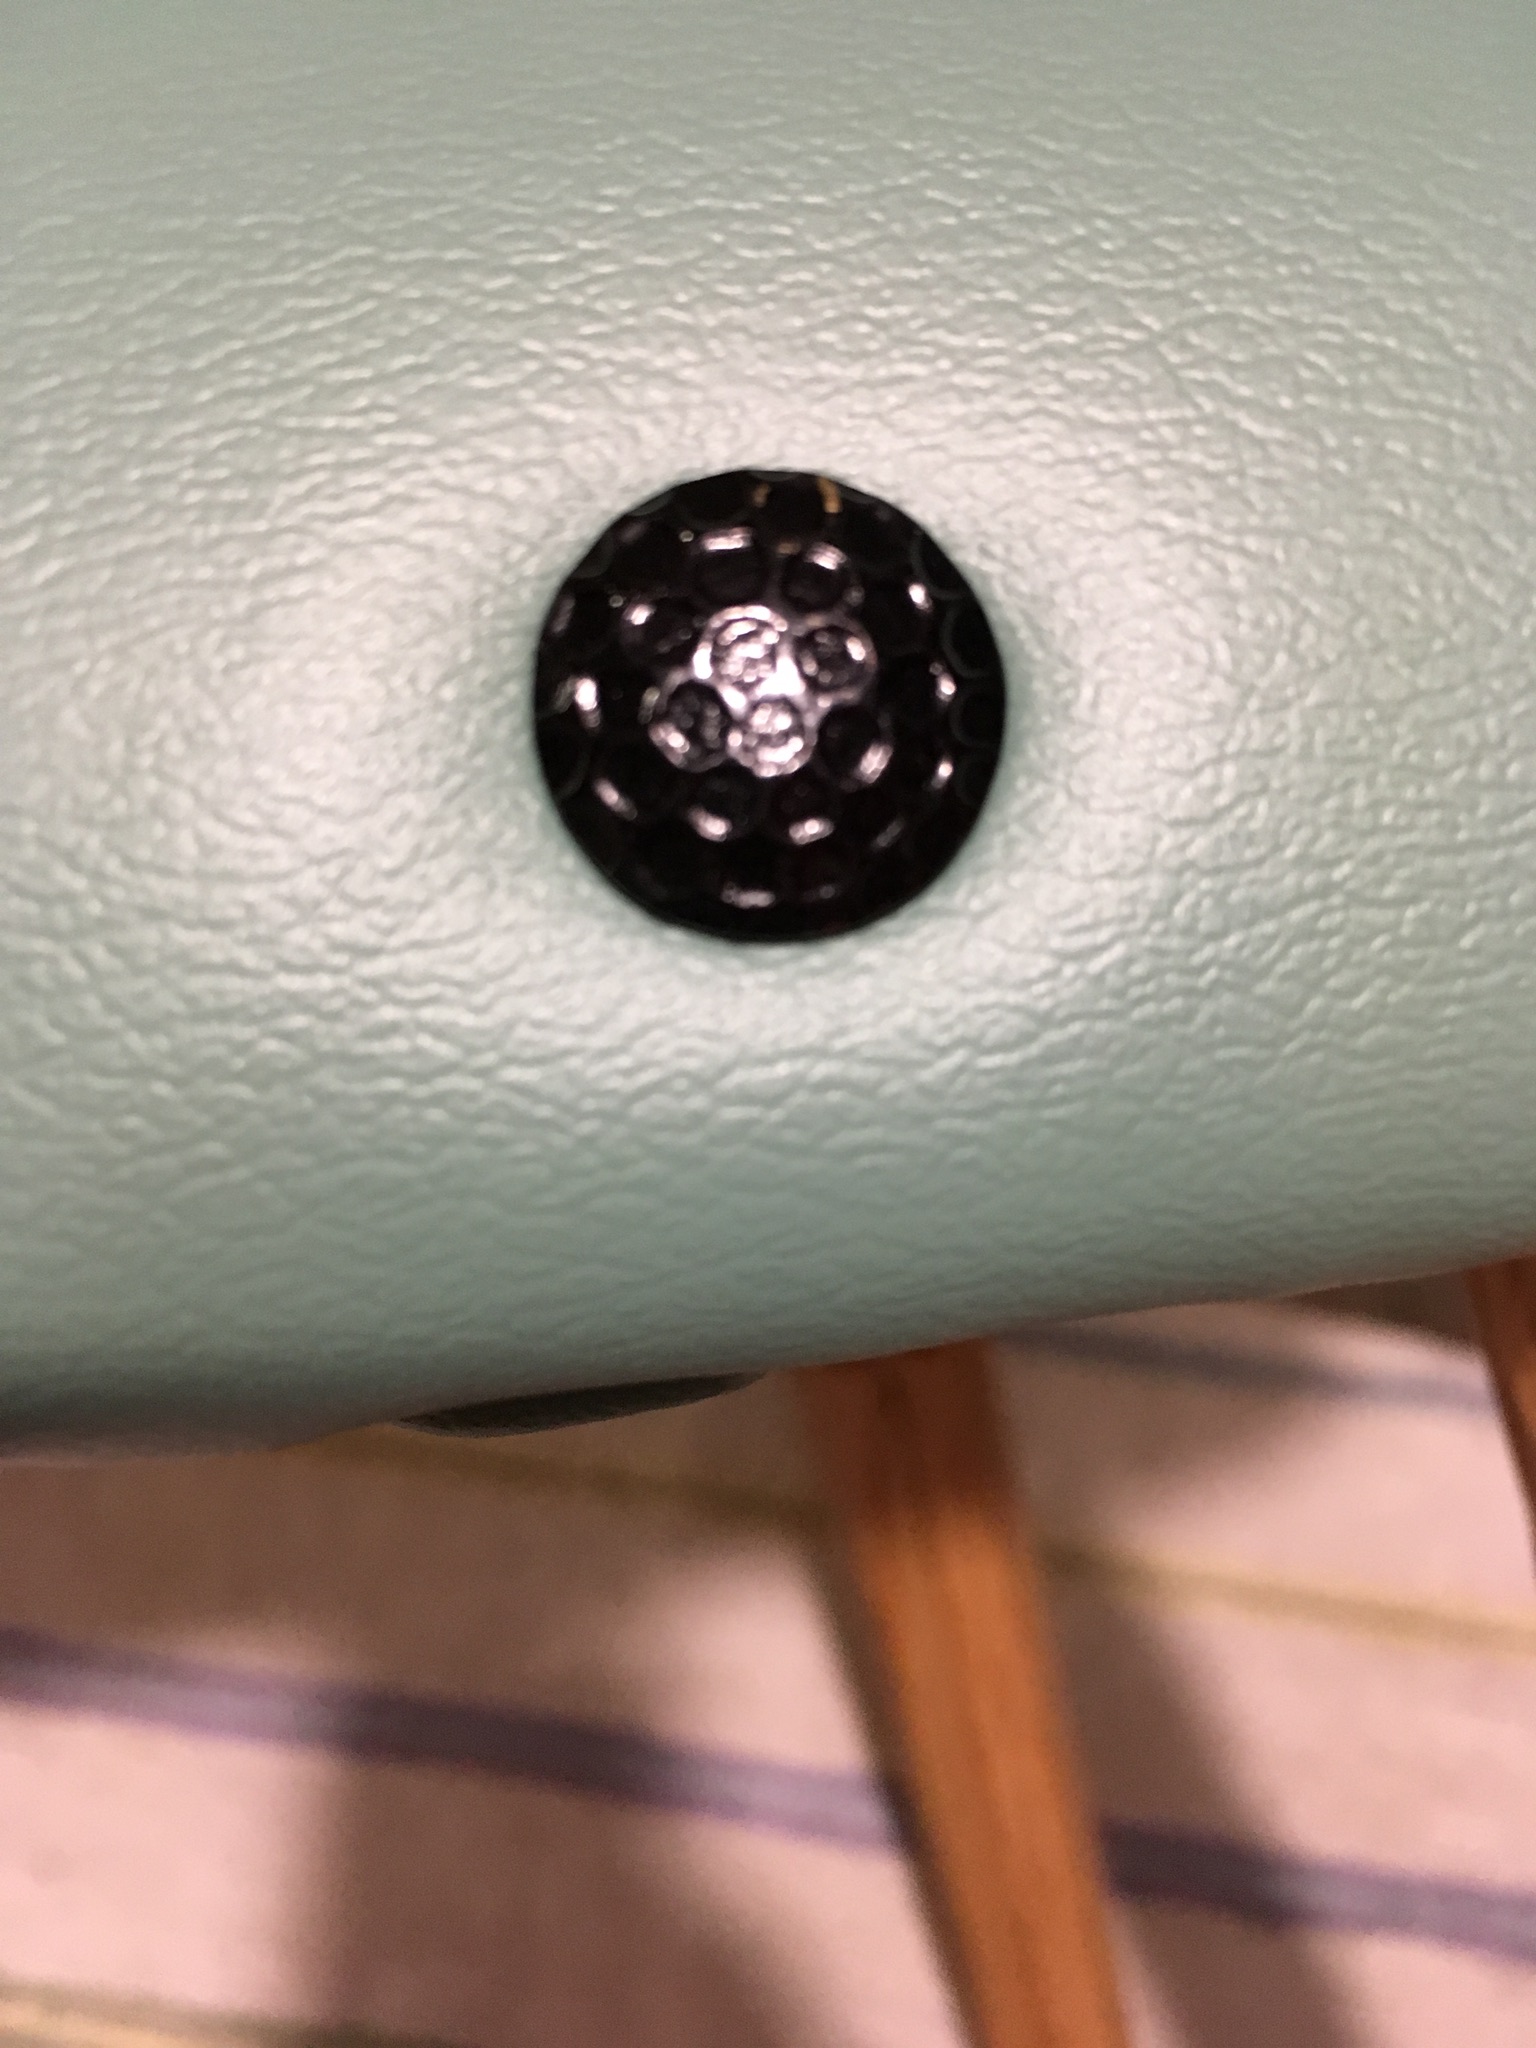
I also tied a four-strand star knot to use as a tufting button. The same detail was implemented on my other two upholstery projects.

Finally, I applied decorative nails around the perimeter of the stool. This is a new detail, but is utilized to mimic the dark perimeter band that I typically create with the wood burner.
This was a fun little project. Using the staked method I was able to quickly create a functional, durable and, IMHO, attractive piece of furniture. Now I can relax a little and put my feet up.
Part 2 Greg Merritt

Pingback: Asymmetric Footstool-Part 2 | HILLBILLY DAIKU
Wow you did a marvelous job Greg, looks really good. Now you’re ready to upholster a 57 chev. Well done old mate
Thanks Salko! LOL…the color reminds me a 57 Chevy.
The second run at the upholstery looks great. I’m very impressed.
Thanks! Don’t be too impressed…its mostly a combination of piss-poor planning and dumb luck with a little bit of stubbornness mixed in.
Great job, especially on the upholstery. I would not have been able to do that no matter how many cussing rants I did.
Thanks Jeff. I have no doubt that you could do this. If I can do it, anyone can. You just have to be willing to screw it up once or twice. LOL
“stretch, pull, fold and tuck” – sounds like a procedure older women in L.A. go through every few years. Nice job on the footstool. I like the second run of upholstering much better, too. Much cleaner with no visible pleats. Expected to see a picture of you enjoying the fruit of your labor!
LOL…Thanks…I hate to have my photo taken. I am making use of ithe footstool though. With I had made it long before now.
It turned out beautiful. I especially like the knot on top.
This project is the perfect use for plywood. I never would have thought to use it with staked construction.
Cheers!
Thanks Brian…I think plywood has its uses. I know that some turn their noses up at it though. The staked method worked great in plywood. I hammered these legs into place without fear of splitting the top. The laminations of the ply seem to grab onto the leg with a death grip as well. Very solid.
What a Difference between the first attempt and the final one!
Congratulation and thank you for the tip.
Sylvain
Thanks…I’m amazed that taking a slightly different approach resulted in such a dramatic difference in the final result.
IMHO that looks great, but we need another post reviewing it like the “smelly feet” perspective – of course!!!
LOL…thanks Antonio. I might break down and have management take a photo of me with my feet up. Maybe….but don’t hold your breath. 😉
Looks like you have the leg angles down. I’m finding that is trickier than it looks to pull off. The upholstery turned out good in the end!
Getting the angles correct for the legs is getting a little easier. I set the reamer for a very shallow cut. Then when I’m close to size I begin checking against my dowel. One rotation of the reamer can make a dramatic change. So one rotation, check, adjust and repeat. I found that by doing it this way I can get the final fit very close, if not exact.
It turned out very nice.
Thank you Brian.
Pingback: Equilateral Footstool-Part 1 | HILLBILLY DAIKU
Pingback: Tapered Octagonal Legs with the OCTA-LEG-PRO | HILLBILLY DAIKU
Pingback: 3-Ply Moravian Chair-Part 4-Complete | HILLBILLY DAIKU