
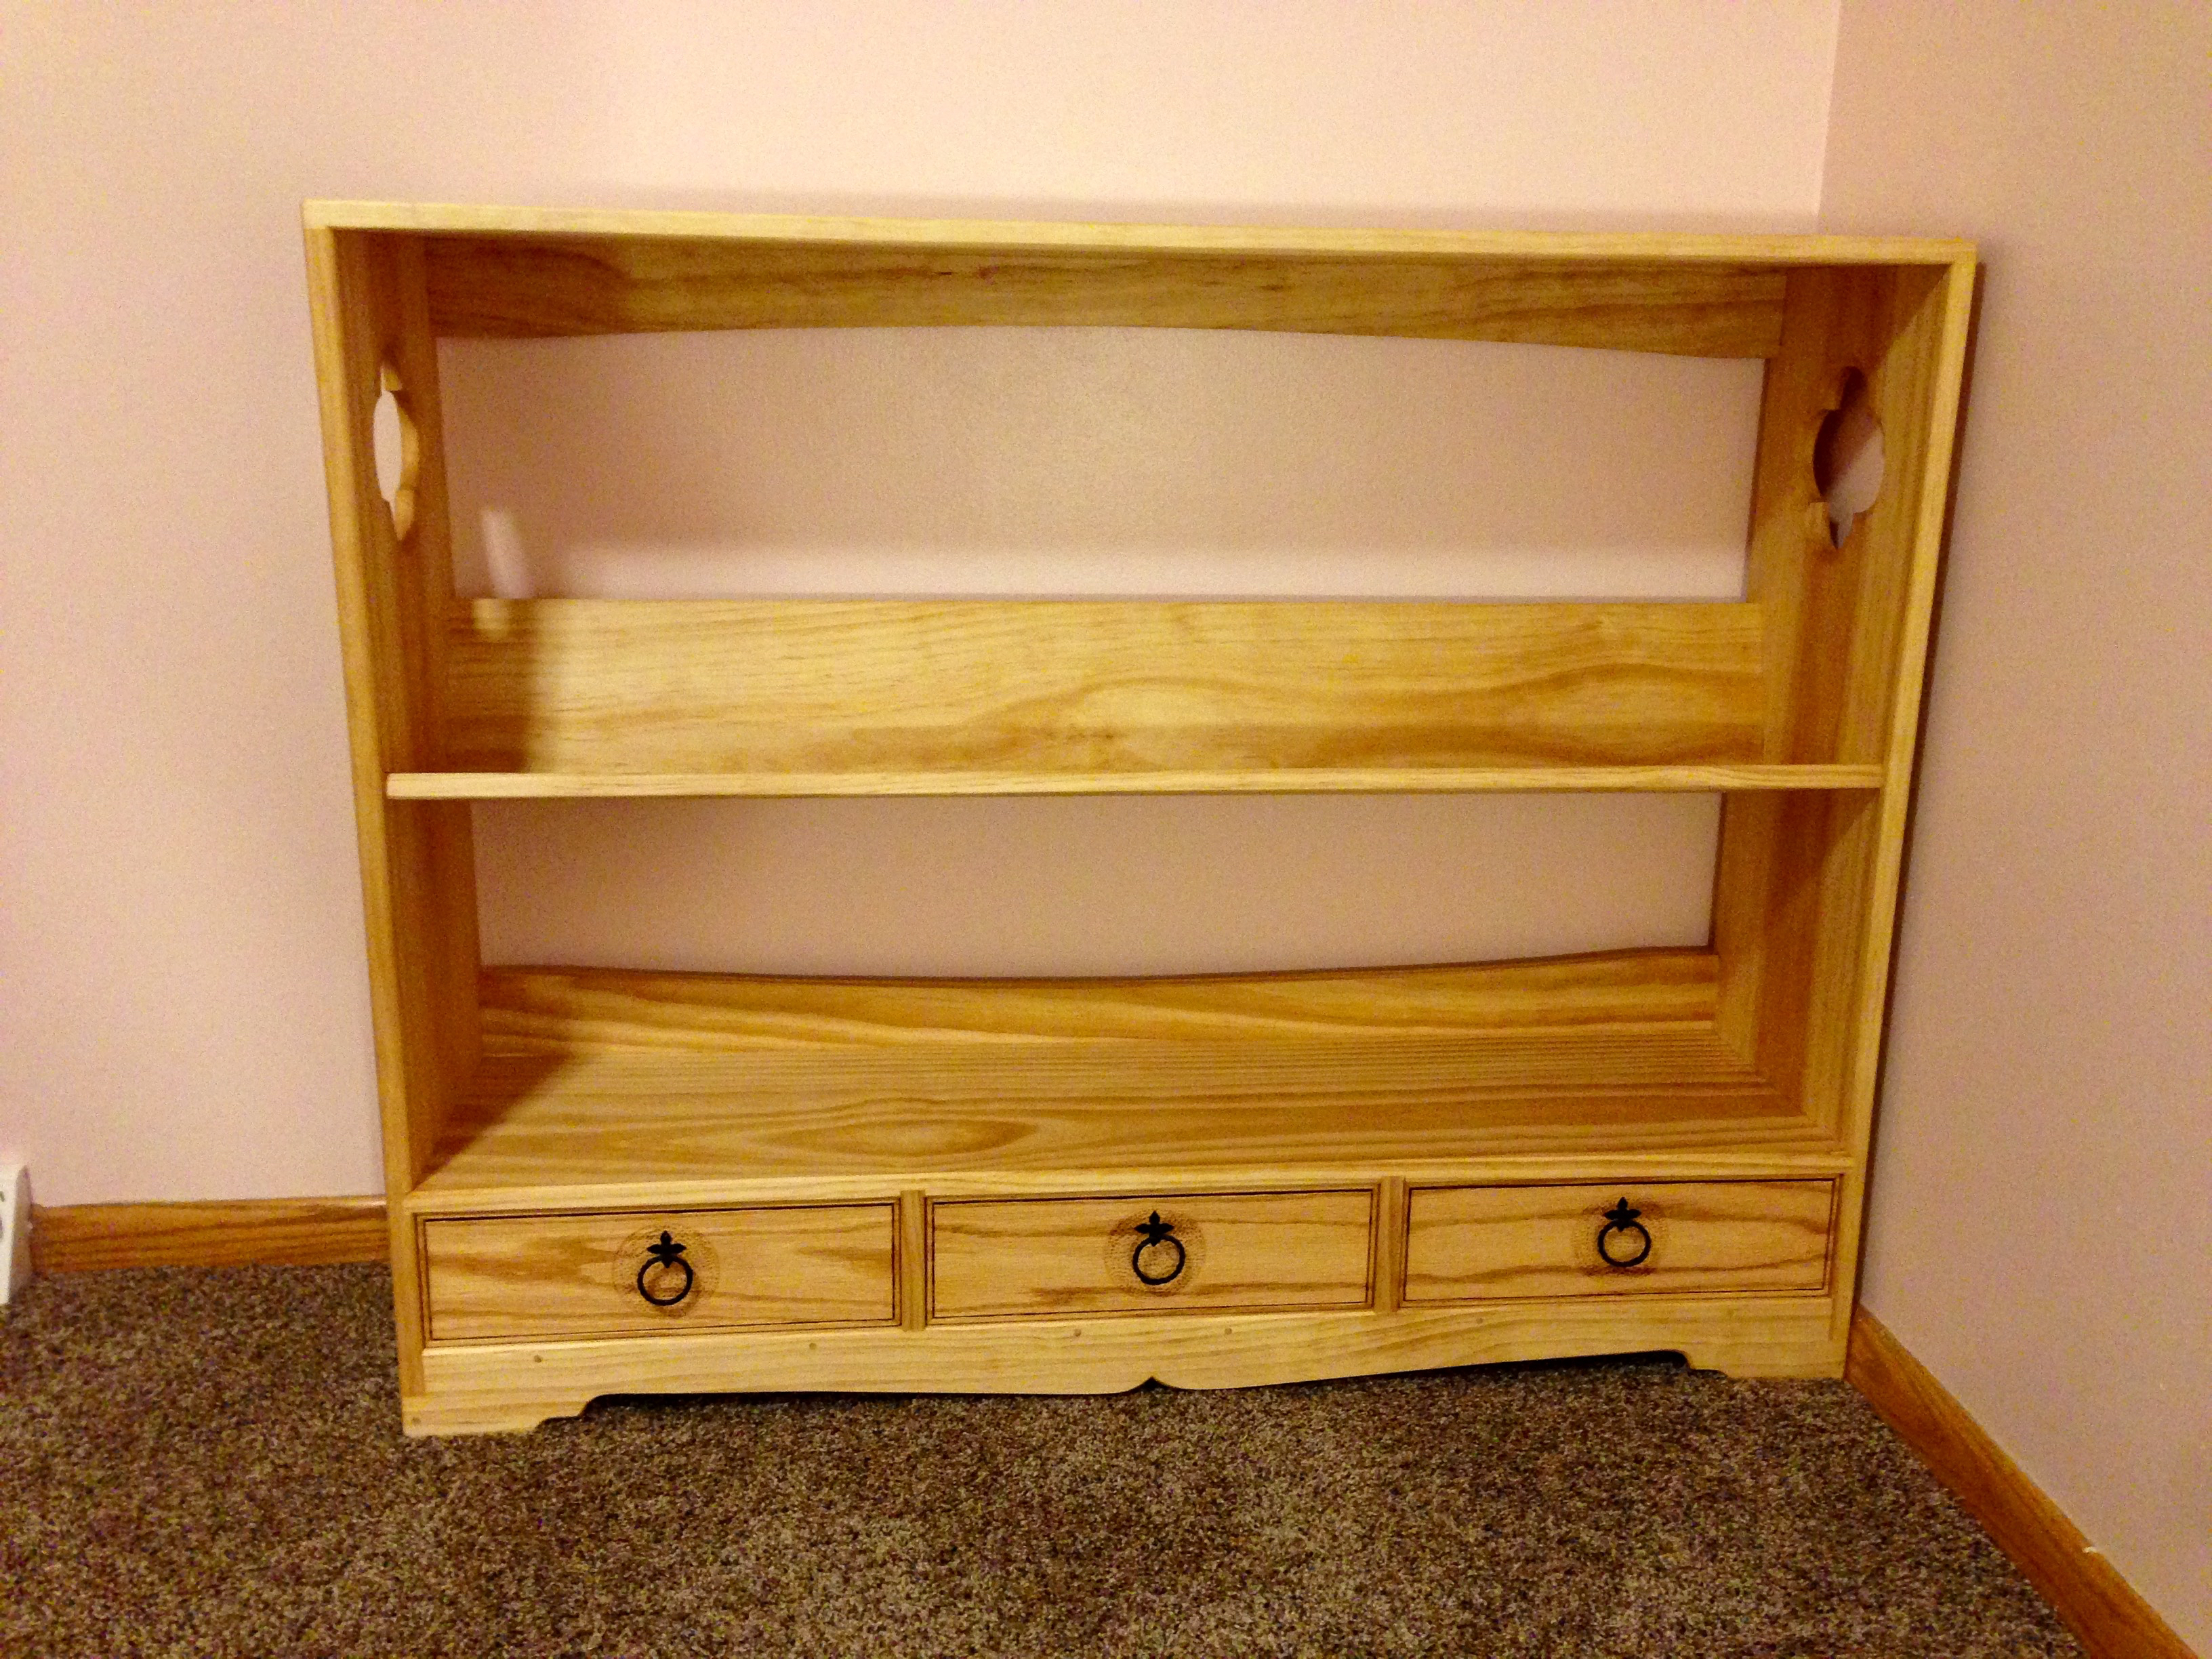
 After two coats of my “pine” enhancer concoction, two coats of T&T Original and a final coat of paste wax I’m calling the bookcase done. All-in-all I’m pretty happy with the end result. My finish experiment went really well and I know that I’ll be using the tinted linseed oil for future projects.
I worked in my standard details while applying the final touches to the build. I like to add a bead around the perimeter of my drawers. I think it looks good, plus it adds a bit of durability to the edges. Any dents and dings that do happen won’t show up nearly as much on a bead as they will on a hard corner. I also like to set this bead detail off by running a wood burning tool in the trough created by the bead. This makes for a nice bit of contrast. Essentially, this is just a common man’s method of creating the look of a traditional applied cock bead.
The drawer pulls are again my standard fare. Hand laid grommets from tarred nylon twine and attached to the drawer with a lanyard knot. To add a bit of “fancy”, I used a pair of dividers to scratch in a circle centered around the pull. I then used a simple stamping tool made from a piece of scrap steel to fill the circle with texture. To make the “floral” detail at the top of the pull, I simply pressed the tip of the wood burning tool flat to the wood.

The photos are little rugged. With the bench build in full swing I have no room in the shop for taking photos. So I had to bring this thing into the house for final dog and pony pics.


Part 9 Greg Merritt

Pingback: Bookcase-Progress 9 | GREG MERRITT – BY MY OWN HANDS
Greg, this piece looks really nice. Congratulations on the build. The detail on the drawers really adds some visual interest – I like that a lot.
You answered a question that I’ve been thinking about for some time. And that is “When rounding over a vertical member and a horizontal member that intersect (such as on your bookcase), how do you deal with the intersection?” It looks like you’ve used a technique that Paul Sellers used on his walking cane to get the bottom of the handle to “flow” into the shaft. It looks good. Are you happy with that aspect?
Thanks Matt! That I do that round-over/bevel detail on all of my pieces. Including the inside lip of the drawers. Sharp corners and pine do not go together. I like it and its one of the more meditative tasks in my projects. I typically do all of the inner edges of cases and drawers with a chisel. Takes a good bit of focus, but very relaxing!
Looks fantastic Greg! Thanks for taking the time to share. Hope the bench is going well.
Schuyler
Thank you! The bench should be up and running by the end of this weekend. 🙂
If you keep this up you are going to make pine furniture popular again. Looks great!
LOL…thanks Alex! Not sure my stuff is capable of that. My hope is that someone will be inspired to do much better than I.
Fantastic! The little details transform this piece from a simple bookcase to a stunning centerpiece of conversation! You’ve given me some ideas…
Thanks so much Brian. Glad to hear that I have set you to thinking. All of the details are simple to create and require minimal tools.
That was a really nice build. It’s almost a combination of shaker, arts and craft, and asian styles. Thanks for taking us along!
I like the tinted linseed oil finish. It gives the look of slightly aged pine. One of these days, I want to try out nitric acid as a way of aging pine. Figured I would mention it for consideration.
Thanks Jamie. You pretty much summed up all of my insporation for this piece.
I’ve read about the nitric acid technique but have never tried it. Goes against my non-toxic policy. But thats just my hangup though.
Really nice piece of furniture.
The rounding of the board (with the attention to the intersections), the cove around the holes and at the foot, the drawer beading, etc.. it all makes it a step above ordinary work.
Sylvain
Thank you Sylvain. Like I said above, the details that I had are really simple to create and are accessible to everyone. With a little imagination, the possibilities are limitless.
Everything looks awesome! I can’t understand why pine gets such a bum rap sometimes. As your pieces showcases, pine can look great when properly highlighted. The open back concept is interesting. For some reason, I thought you were going to panel it-which probably would have looked nice-but it would also take away from the “lightness” of the piece.
Another commenter mentioned rounding over vertical and horizontal intersections, could you elaborate on that (when you get a chance) Thanks.
Bill
Thanks Bill! I think pine gets a a bad image, in part, due to to the “craft” fair furniture craze. Poorly made stuff, put together with a nail gun and slathered with stain.
Yep, always was going to be an open back. The only raised panel is behind the drawers. The open back is why I was so careful to ensure that the assembly would have the required strength to reist wracking.
I’m working on a followup post that goes over that detail and a couple others. That comment started me thinking. There are a few things that I do without giving them much thought, but may be useful to point out to others. I’ll have that post up soon.
Looks fantastic, Greg.
Thanks very much Derek.
Very nice finishing touches. The pulls are perfect for the piece.
Wow you are really great with those finishing touches. Nice job. I aspire to do as well as this
Thanks Randall, I really appreciate it! …but please set your sights higher than what I’m doing. 😉
Pingback: Tenugui Hanger Revisit | BY MY OWN HANDS